
ARC Raiders: How to Complete the Forgotten Relics Event – Full Merit Farm Guide
I was crouched in a Buried City maintenance corridor, two minutes left on the evac timer, when I realized my backpack held the wrong kind of broken. I had spent fifteen minutes fighting through a scavenger nest to pull a dusty metal cylinder out of a locked cache, but the purple highlight wasn’t the Forgotten Relic icon I needed-it was just high-tier scrap. Outside, an Arc patrol was sweeping the street I’d planned to use, and the real relic I had passed three rooms back was now sitting in someone else’s pack. That extraction taught me the hardest lesson of this event: Forgotten Relics isn’t about luck or aim. It’s about knowing exactly what you’re hunting, where the spawns live, and how to turn those trinkets into Merits before the July 27 deadline erases the whole operation.
What the Forgotten Relics Event Actually Demands
Embark Studios built this limited-time event, running June 16 through July 27, as a stress test on your efficiency across PC, Steam, PlayStation 5, Xbox Series, and the Epic Games Store. There are two parallel systems running. First, the Forgotten Relics reward track: twenty-one steps requiring a total of 3,150 Merits, handing out the Saltwalker outfit, an augment, a blueprint, and 100 Raider Tokens along the way. Second, the Converging Paths project: a six-stage chain gating extra rewards behind specific objectives. Merits feed the track; objectives clear the project. Ignore either one and you leave loot on the table.
Merits come from two sources: match XP earned through looting, combat, and survival time, and the lump-sum conversion you get by extracting with special event trinkets and donating them back on Speranza. The fastest way to finish is not to treat standard raids as random deathmatches. You need a loop. Enter with a purpose, execute, extract, donate, check progress, and queue again. Anything else is just burning daylight against a forty-two-day clock.
Step 1: Farm Merits Through Match XP First
Every action inside a raid drips XP into your Merit pool, and consistency beats heroics. Looting containers, eliminating enemy AI patrols, killing hostile players, and surviving until the final extraction window all feed the same bar. The players who finish the full track fastest are the ones who stopped chasing highlight-reel plays and started treating every raid like a farming simulator with gunfire.
The most efficient loop looks like this: drop into a map with high container density, clear two to three major loot zones while tagging every bot you see, then extract with the survival time bonus intact. A run that ends at the ten-minute mark with moderate looting and four or five AI kills generates significantly more Merits than a five-minute PvP death where you bag one player and lose everything. If you are extracting with zero relics, you are still making progress, but only if you survive. Dropping hot, dying in ninety seconds, and requeuing is the fastest way to time-gate yourself out of the Saltwalker outfit.
Since Patch 1.33.0 launched alongside the event, you also need to pack your own kit. Certain map conditions now disable Free Loadouts, meaning you can no longer count on spawning with baseline armor and a rifle. Show up with at least mid-tier protection, a reliable primary weapon, and a backpack large enough to hold regular loot alongside any relics you find. The event rewards preparation, not improvisation.
Step 2: Hunt the Nine Forgotten Relics
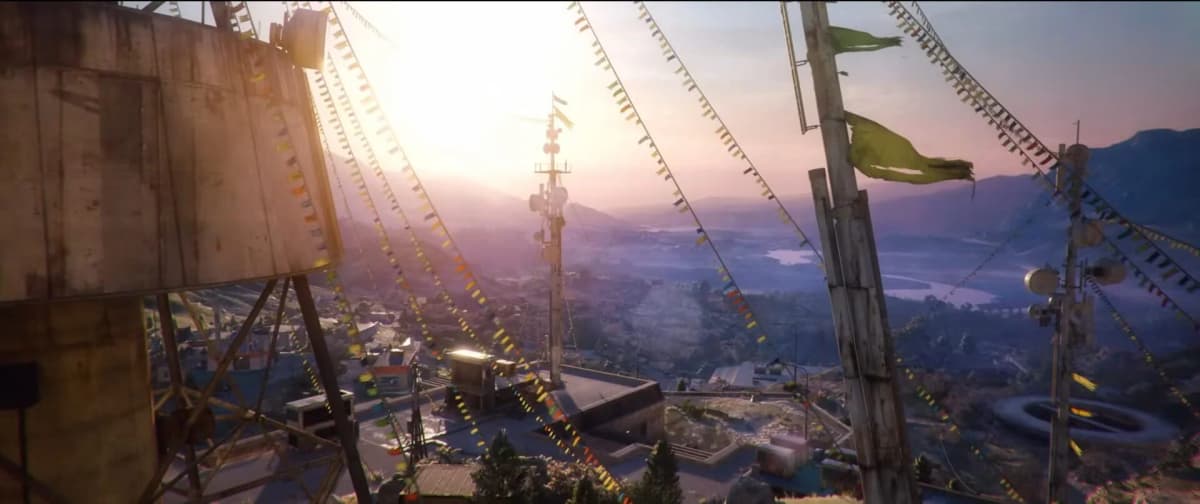
The nine special trinkets are the rocket fuel for your Merit total. They appear as distinct event-tier items with unique purple highlighting, and they occupy specific inventory slots separate from standard scrap. Finding them is the difference between crawling toward the 3,150 finish line and sprinting. The relics are spread across Buried City, Riven Tides, and Dam Battlegrounds, concentrated in high-tier loot zones that already draw heavy player traffic.
In Buried City, your best odds sit in the central underground complexes and the upper administrative blocks. These areas are dense with locked caches and scavenger boss pockets, but they are also ambush magnets. Move methodically, check corners for campers waiting to loot your corpse, and have an exit route planned before you open any container. The verticality of Buried City is your friend if you know the stairwells; use them to break line of sight from squads holding the main corridors.
Riven Tides spreads its high-value spawns through the flooded understructures and the shipping yards. Water slows your movement and muffles audio cues, which means you hear threats later and escape slower. Hit the shipping containers in sequence, check the submerged office blocks for locked safes, and do not linger on the open docks. Snipers love the crane sightlines, and the cover is thinner than it looks. If the zone forces you into the flooded tunnels, bring a compact weapon; long rifles corner poorly in those tight spaces.
Dam Battlegrounds compresses the action vertically. The maintenance tunnels run beneath the main kill zones and hide some of the best cache spawns, but they are death traps if another squad enters from the opposite end. The control tower levels offer relic spawns with a view, yet climbing announces your position to half the map. My preference is to sweep the lower turbine rooms first, extract upward only if the audio is clear, and abandon the tower entirely if I hear more than one set of footsteps above me.
Night Raid variants of all three maps deserve dedicated runs. The loot tables skew toward higher-value items after dark, and while the visibility penalty slows clearance speed, the concentration of relic spawns in high-tier zones feels noticeably better. Run a suppressed weapon and avoid flashlight beams that paint you as a target. Let other players draw the patrols while you loot in the margins, then extract early. One relic extracted safely in five minutes beats three hours of lost gear.
Step 3: Master the Speranza Donation Workflow
Extracting with relics only gets you halfway. You must donate them on Speranza to convert them into event Merits. The donation point is the display stand tied to the Converging Paths project, and botching this workflow is the most common progress killer I see from other raiders.
- Extract and head directly to the donation stand before selling, scrapping, or stashing anything else.
- Donate every Forgotten Relic in your inventory. Regular scrap and standard trinkets do not contribute to the event.
- Open the Events page and confirm your Merit total incremented. The UI auto-converts eligible donations, but the visual feedback can lag, so verify the number before requeuing.
- While in the hub, tab over to Converging Paths and check whether your donation unlocked the next stage. Several steps gate explicitly behind the display stand, and you cannot advance until the hand-in registers.
Do not hoard relics in your personal stash for a bulk donation. The conversion is immediate and per-item, so there is no mathematical benefit to waiting. More importantly, hoarding blocks Converging Paths progress. I have watched players run ten straight raids, fill a stash tab with trinkets, and then realize they spent those ten runs locked at stage two because they never checked the project tab. Bank relics into the event track the moment you return to Speranza.
Step 4: Clear Converging Paths in Order
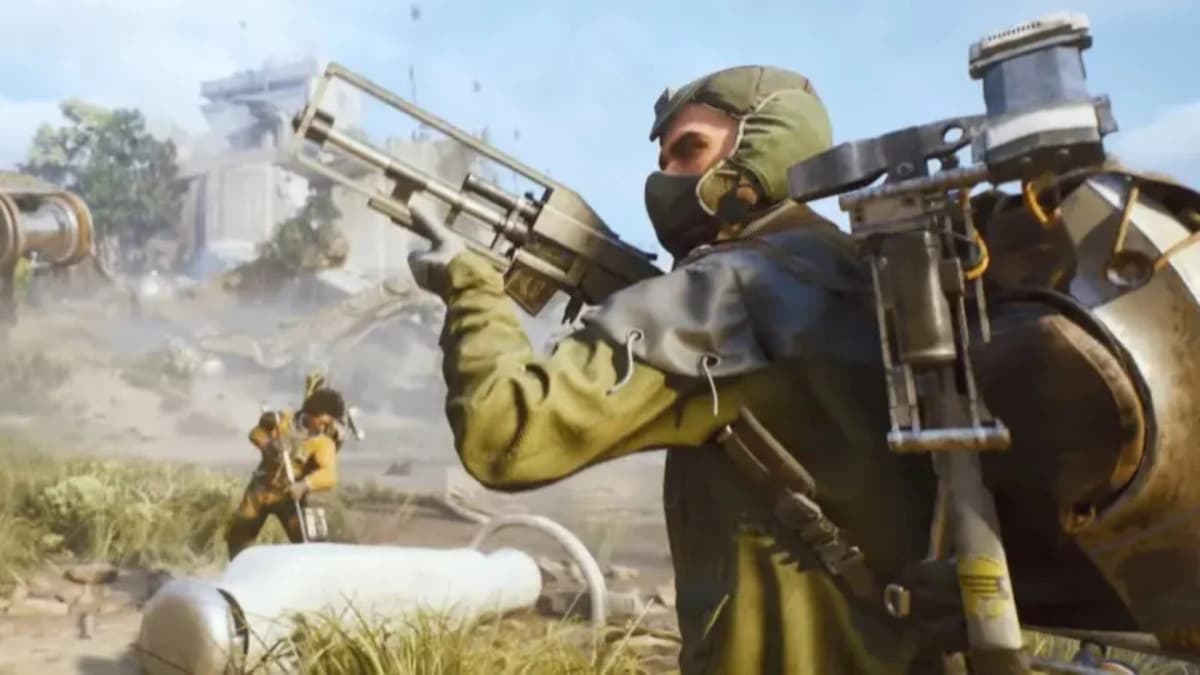
Converging Paths is a six-stage project running parallel to the main reward track. Think of it as your structured to-do list rather than a side quest. The stages rotate through three requirement families: donating relics to the display stand, dealing damage to Arc enemies, and securing kills with mines or traps.
For the Arc damage requirements, load into Dam Battlegrounds or Buried City where Arc patrol routes are most predictable. Do not attempt to solo a patrol unless you are carrying armor-piercing rounds or explosives. The smarter play is to third-party: let the Arc units engage another squad or the local scavengers, then dump damage into the heavy targets from an off-angle. Damage tags count even if you do not secure the kill, so tag the Arc elites and reposition. If the fight turns against you, disengage. Your progress is already banked.
For the mine and trap stages, equip cheap deployables and bait AI patrols into chokepoints. Bots path predictably through interior doorways and stairwells. A single tripwire or explosive mine placed at the base of a ladder can clear your requirement across multiple matches without altering your normal loot route. If you are running with a squad, stack traps in the same hallway and coordinate detonation timing so everyone gets credit. Just communicate before placing anything; friendly fire from poorly spaced explosives will cost you more in medical supplies than the stage reward returns.
FinalBoss // Gear
Level up your setup
01Top-rated gaming headsetson Amazon→02High-refresh gaming monitorson Amazon→03Gaming chairson Amazon→04Discounted game keyson Kinguin→
Affiliate links · As an Amazon Associate, FinalBoss earns from qualifying purchases.
Want to Level Up Your Gaming?
Get access to exclusive strategies, hidden tips, and pro-level insights that we don't share publicly.
Ultimate Guide Strategy Guide + Weekly Pro Tips
Step 5: Track Your Progress Cleanly
The Events page is your only reliable source of truth, but the UI splits attention in a way that confuses players. The Forgotten Relics track displays as a linear Merit bar, while Converging Paths hides inside its own project tab. Finishing a step on one does not auto-advance the other, and the game does not flash a central notification when Converging Paths unlocks a new stage.
My routine after every third raid: return to Speranza, donate any relics, open the Events tab to check the Merit bar, then tab to Converging Paths to confirm whether the latest donation or match objective triggered the next step. This takes thirty seconds and prevents the nightmare scenario of running five straight relic hunts only to realize you already had enough donations banked and should have been chasing Arc damage in Dam Battlegrounds instead. The event window is too short to waste raids on objectives you have already completed.
The Math and the Deadline
Three thousand one hundred fifty Merits across forty-two days averages to exactly seventy-five Merits per day. That sounds relaxed until you factor in extraction failures, contested relic zones, and days when you cannot play. I recommend pacing for one hundred Merits daily, which gives you a buffer against bad luck.
A solid Buried City run with one relic extraction, moderate looting, and survival to the final extract window generates roughly sixty to ninety Merits depending on your combat activity. Two runs per day keeps you ahead of schedule. Three runs, alternating between pure relic hunts and standard XP farm raids, finishes the entire twenty-one-step track with a week or more to spare. The Saltwalker outfit, the augment, the blueprint, and the 100 Raider Tokens waiting at the end are worth the discipline, especially since Raider Tokens retain value beyond the event window while the cosmetics do not come back.
Efficiency Rules and Common Mistakes
Since the event went live, the same errors keep showing up in squad chat and on death screens. Avoid them and you save yourself days of grinding.
- Extracting with one relic and evacuating immediately: If your backpack has space and the timer allows, loop for a second trinket. The evac window is your only hard limit; use the full clock.
- Ignoring standard match XP: Even a raid with zero relics generates Merits through looting and survival. A clean six-minute run is never wasted time.
- Dying with relics in your pack: The sunk-cost fallacy kills more players than bullets. If you have two trinkets and a full squad is pushing your extract, take the long rotation. Those items represent gated progress you cannot buy back.
- Confusing the donation stand with the vendor: Selling relics for standard currency destroys event progress. Donate first, sell scrap second.
- Running blind on Converging Paths: Always check which stage is active. Bringing mines into a raid when the current stage demands Arc damage is poor preparation, and poor preparation costs Merits.
Advanced Tactics for Solo and Squad Runs
Solo players should prioritize stealth and evasion over clearance speed. The relic spawns do not care whether you killed every bot in the building; they only care that you touched the container and reached the evac point. Suppressed submachine guns and lightweight armor let you rotate quickly without broadcasting your position. Avoid the central PvP magnets unless the relic route forces you through them, and extract the moment you secure a trinket. Greed is the solo player’s biggest enemy in this event.
Squads should run division of labor. Designate one player as the dedicated relic carrier while the others cover angles and bait patrols. If the carrier drops, a teammate can grab the trinket and continue the extract without resetting the raid. Squads also clear trap stages faster by stacking deployables in shared chokepoints, though you must coordinate placement to avoid friendly fire. In Buried City, send one player high to watch for extract campers while the other two sweep the cache room; in Riven Tides, maintain acoustic contact because the water makes visual cohesion easy to lose.
Cross-platform squads on PC and console should note that audio mixing differs slightly between systems. Callouts matter more in this event than in standard raids because the relic hunt forces you into the same high-traffic buildings repeatedly. Predictable routes breed predictable ambushes, so vary your approach angle every other raid.