Arc Raiders’ PvP Build That Finally Worked for Me (Weapons, Armor, Strategy)
How I Finally Stopped Losing Gunfights in Arc Raiders PvP
After sinking roughly 40 hours into Season 2 PvP and burning through every “meta” idea I saw, I kept running into the same wall: I’d win the first few shots, then lose trades because my shield broke, my rolls whiffed, or I simply ran out of stamina mid-fight. The breakthrough came when I committed to one focused setup – the Combat Build built around Bettina AR + Stitcher SMG, a Medium Shield, and a Combat Mk.3 aggressive augment, with my entire skill tree tuned for mobility and shield uptime.
This guide is exactly how I run that build now: weapons, armor, skill path, platform settings, and the fight flow that took me from coin-flip duels to winning around 70-80% of my 1v1s. If you’re tired of being out-traded or stuck in slow heavy builds, this is the arc that finally worked for me.
Prerequisites & Farming: What You Need Before the Build Feels Good
One of my early mistakes was trying to “test” this build half-finished. It feels mediocre until a few core pieces are in place. Here’s what you realistically need before expecting it to carry in PvP:
- Raider Level: 25+ (you want most of the mobility and combat nodes unlocked).
- Expedition Progress: Expedition 2 cleared to craft Combat Mk.3.
- Credits / Loot: About 60,000 credits (or the loot equivalent of 3-5 high-risk raids).
- Key Gear: Bettina AR, Stitcher SMG, Medium Shield, Combat Mk.3 Aggressive augment.
Solo, this took me roughly 4–6 hours of focused farming; in a decent squad that knows how to split loot, around 2 hours. Don’t make my mistake of buying sidegrades along the way – save aggressively until you can lock in the core pieces above.
Weapons: Bettina AR + Stitcher SMG (The Core of the Build)
I tested snipers, shotguns, and full-SMG builds, but nothing matched the consistency of Bettina + Stitcher once I leaned into their roles. Think of Bettina as your fight opener and mid-range bully, and Stitcher as your clean-up and close-quarters panic button.
Bettina Assault Rifle – Your Main Workhorse
Bettina’s high rate of fire and controllable recoil make it ideal for the 15–40m sweet spot where most PvP fights actually happen. With a stability mod and an extended mag, it becomes a laser that lets you shred shields quickly without overexposing.
- Priority mods: Stability > Extended Magazine > Damage vs. shields.
- Use case: Opening volleys, peeking from behind cover, pressuring enemies crossing open lanes.
- Key habit: Fire in controlled 6–8 round bursts at mid-range instead of full-auto spraying; this keeps recoil predictable and headshots consistent.
The big change in my win rate came when I stopped hip-firing Bettina and treated it like a precision AR: ADS for Bettina, hip-fire only for Stitcher. That one discipline shift alone dramatically tightened my TTK.
Stitcher SMG – Close-Range Deletion Tool
Stitcher is your answer to anyone who manages to close the gap. Its high RPM and forgiving hip-fire spread mean that if someone is inside 10m and you get the first 5–7 bullets on target, they usually don’t walk away.
- Priority mods: Stability, suppressor (if available), and anything that improves swap speed.
- Use case: Pushing wounded targets, defending tight angles, and surviving when someone floods your cover.
- Key habit: Practice pre-swapping to Stitcher when you intentionally push a corner – don’t wait until you see an enemy to swap.
The combo that finally felt “right” for me was: open with Bettina, break shield and chunk HP, then as soon as I start closing distance or the enemy does, I swap to Stitcher and commit to the push. Trying to finish with Bettina in tight spaces was how I lost most of my early duels.
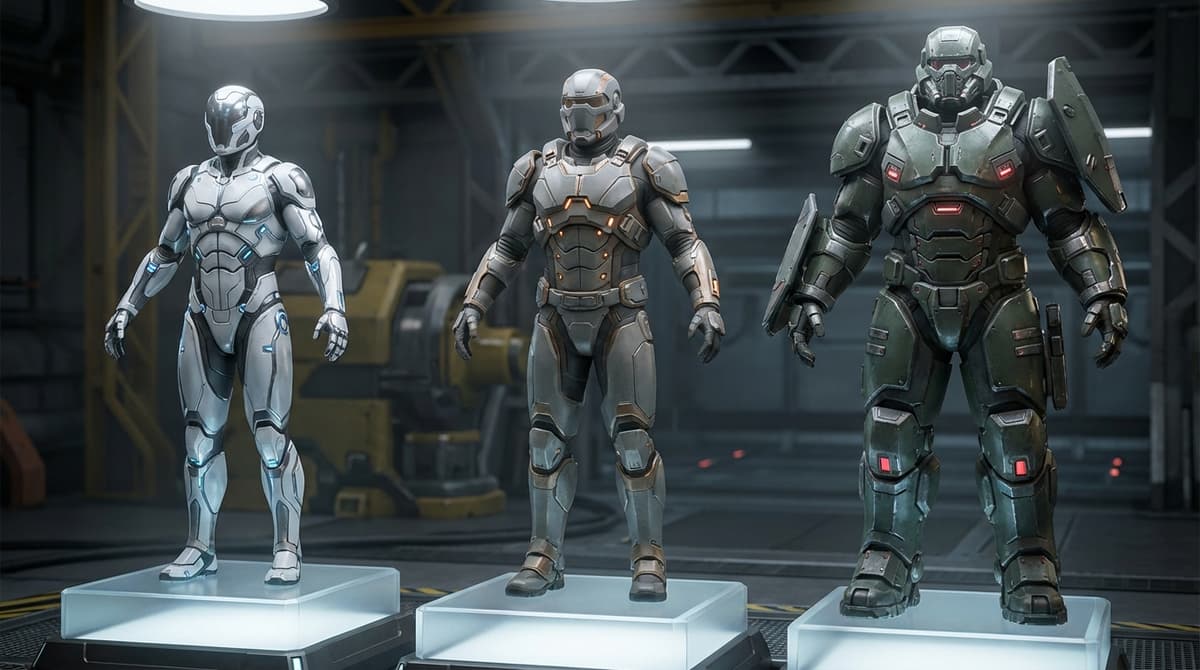
Armor, Shield, and Augment: Staying Alive Without Feeling Slow
Season 2’s balance changes really swing things toward mobility + medium shields. I stubbornly stuck with heavy shields at first because “more HP must be better,” but the movement penalty lost me more fights than the extra health ever saved.
Combat Mk.3 Aggressive – The Backbone of the Build
Once I crafted Combat Mk.3 Aggressive, the entire build clicked. The extra shield strength, more grenade capacity, and passive sustain mean you can outlast people in drawn-out fights instead of relying on a single perfect peek.
- Boosted shield value for longer trades.
- Extra grenade slots so you’re never entering a key fight “dry.”
- Enough inventory space to carry ammo, heals, and a couple of emergency items without overloading.
It’s expensive, and losing it in a bad raid hurts, but after a few nights of playing with Mk.3 I honestly couldn’t go back to lower-tier augments for serious PvP.
🎮 Get This Game at the Best Price
Compare prices instantly and save up to 80% on Steam keys with Kinguin — trusted by 15+ million gamers worldwide.
*Affiliate link — supports our independent coverage at no extra cost to you
Medium Shield – The Sweet Spot
The Medium Shield is the unsung hero of this setup. The HP is enough to take a couple of mistakes, but the key is the recharge speed and lower movement penalty. With the right skills (more on that next), it feels like your shield is always almost back up by the time you re-peek.
- Use it for short, controlled peeks; never stand out in the open trading.
- Pair it with a shield recharger in your quick slot – that one consumable has saved more fights for me than any grenade.
- Keep your carry weight under ~25 kg; if you notice your rolls getting sluggish, drop loot before you commit to a big engagement.
Don’t make my mistake of hoarding every purple you see mid-raid. If your backpack is heavy, your rolls slow down and the whole point of this build – fast repositions and chain rolls – falls apart.
FinalBoss // Gear
Level up your setup
01Top-rated gaming headsetson Amazon→02High-refresh gaming monitorson Amazon→03Gaming chairson Amazon→04Discounted game keyson Kinguin→Affiliate links · As an Amazon Associate, FinalBoss earns from qualifying purchases.
Skill Tree: Build for Movement First, Tankiness Second
The skill tree is where I see most people (including past me) sabotage this build. The temptation is to grab every damage and armor node first. The reality: mobility and stamina win you way more fights than 5–10% extra damage.
- Core Mobility: Rush the nodes that buff stamina pool and stamina recovery. Once I maxed these, I could roll, sprint, and re-peek without feeling “gassed” after one push.
- Roll Upgrades: Take anything that extends i-frames on rolls or reduces their cooldown. With these maxed, you can chain 3–4 rolls to cross open ground or dodge entire bursts.
- Shield Synergy: Grab nodes that improve shield regen or reduce movement penalties while shielded. These are what turn Medium Shield into a constantly refreshing buffer instead of a one-time health bar.
The order that worked best for me: movement nodes > roll nodes > shield efficiency > general survivability. Whenever I respecced into “more armor” at the cost of stamina, my deaths skyrocketed because I simply couldn’t disengage or chase properly.
Want to Level Up Your Gaming?
Get access to exclusive strategies, hidden tips, and pro-level insights that we don't share publicly.
Ultimate Guide Strategy Guide + Weekly Pro Tips
How to Actually Fight With This Build (Step-by-Step)
Here’s how a typical successful engagement plays out for me now. The individual pieces of the build only shine when you chain them in the right order.
1. Approach and First Contact
As I close in, I’m already thinking about my exit route – a corner, a ledge, or a zipline I can roll back to. I approach with Bettina out, ADS ready. My goal in the first 2–3 seconds of contact is simple: break their shield and tag some HP, not secure the kill instantly.
- Use short peeks with Bettina – 6–8 bullets, then pull back.
- If they’re holding an angle, pre-fire as you swing, instead of waiting to see them first.
- Keep an ear on your own stamina; if it’s low after a sprint, wait a second before you hard-commit.
2. Commit or Reset
Once shields are cracked on either side, most fights are decided by who manages their reset better. This is where Medium Shield + Mk.3 + mobility skills do the heavy lifting.
- If their shield breaks first: I swap to Stitcher, throw a grenade to cut off their retreat, and push while rolls are off cooldown.
- If my shield breaks first: I instantly roll back behind cover, pop a shield recharger, and do not peek again until the bar is visibly back.
- Never re-peek from the exact same spot. Use your rolls to change elevation or switch sides of a doorway.
3. Finishing the Fight
The last 5 seconds are where greed usually kills you. The rule I forced myself to follow: once you’ve committed with Stitcher, finish the push or bail completely – no half-measures.
- Push with Stitcher hip-fire, aiming center-mass and letting recoil climb toward head level.
- If they roll away and you lose visual, don’t chase blindly – fall back, reload, and let your shield recharge instead of running into a crossfire.
- In squads, call your target and focus-fire; this build excels at melting one player fast so you turn 3v3 into 3v2.
Once I started respecting my own cooldowns and shield instead of ego-chasing low HP enemies, my survival rate between raids went up dramatically.
Platform Settings & a Simple Practice Routine
This build leans heavily on smooth camera control and responsive rolls, so a few settings tweaks helped a lot:
- PS5 / Xbox Series: Enable 120 Hz and VRR if your display supports it. In-game, lower motion blur and depth of field so targets stay crisp during rolls.
- PC: Prioritize a stable high FPS over ultra visuals. I dropped some shadows and post-processing to keep fights above 144 FPS. Set FOV around 100 so you can track flanks without losing target clarity.
- Sensitivity: I settled around medium hip-fire sens with lower ADS sens so Bettina feels steady at range.
To lock in the muscle memory, I run a simple 30-minute routine before serious PvP sessions: 10 minutes of pure movement (roll chains, ziplines, cover swaps), 10 minutes of Bettina-only tracking at mid-range, then 10 minutes of forced-close fights using only Stitcher. After about a week of doing this, the build stopped feeling “clunky” and started feeling natural.
Closing Thoughts: Why This Build Is Worth Sticking With
This Combat Bettina + Stitcher setup isn’t a magic win button, but it finally gave me a coherent gameplan: open with Bettina, abuse Medium Shield regen, reposition with roll chains, and finish with Stitcher. The first few sessions will feel awkward if you’re coming from heavy, tanky builds, but once the mobility and shield rhythm click, you’ll notice you’re surviving more raids, winning more 1v1s, and actually dictating fights instead of reacting to them. If I could turn my endless 50/50 duels into consistent wins with this loadout, you can absolutely do the same.