
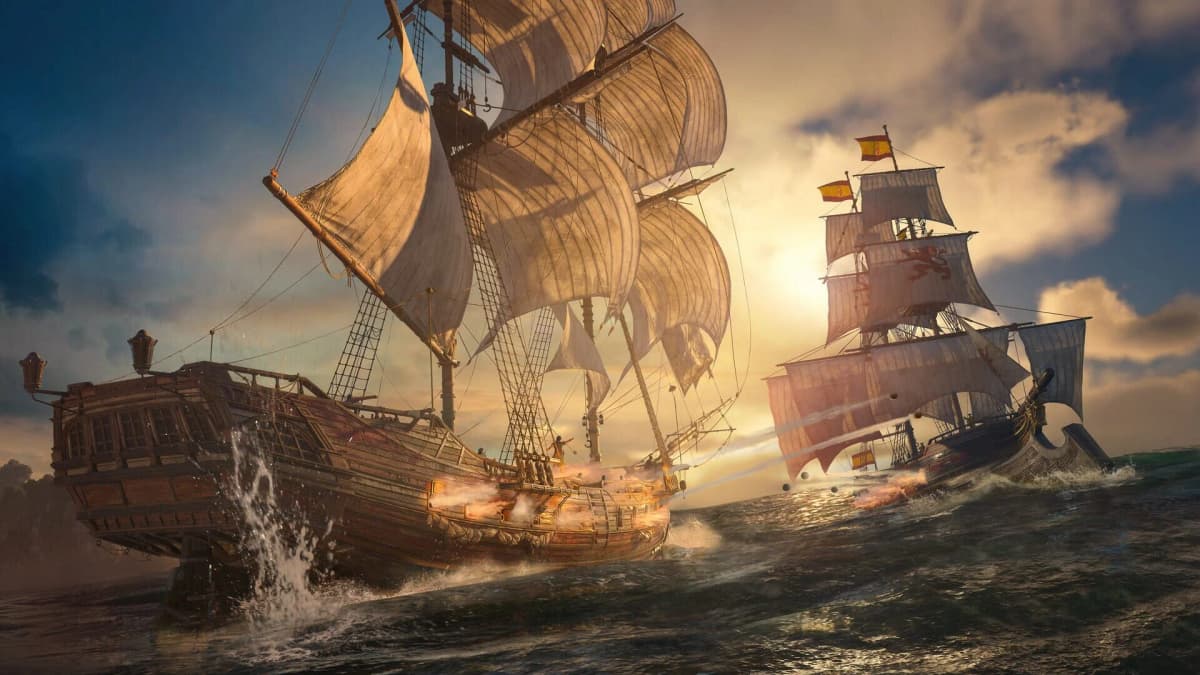
Naval Convoys turn Edward Kenway’s usual ship combat into an endurance fight: escorts punish careless approaches, the flagship demands controlled damage, and an early boarding attempt can leave the Jackdaw trapped under concentrated fire. The reliable answer is to prepare the Jackdaw before leaving Great Inagua, disable escorts at mortar range, immobilize any survivor with chain shots, then cripple and board the flagship instead of sinking it.
Do not start a convoy encounter under the minimum upgrade line. Level 2 Armor is the survival floor for absorbing escort fire, Level 2 Side Guns give the Jackdaw enough broadside pressure to finish isolated targets, and an upgraded Mortar is the tool that keeps the formation from collapsing onto you. Bring special ammunition with a purpose: 15 or more Chain Shots for escort masts and 20-30 Heavy Cannonballs for the flagship.
Table of Contents (9)
Naval Convoy Preparation Checklist
Set the Jackdaw up before you hunt the convoy. This is less about maximizing every upgrade than covering the exact moments where a convoy can overwhelm a ship that is otherwise capable in a one-on-one fight.
- Armor: Upgrade to Level 2 before committing. Escort broadsides add up quickly when two ships have an angle on you.
- Side Guns: Use Level 2 as the minimum. Higher levels improve damage per salvo, which shortens the time each escort stays dangerous.
- Mortar: Bring an upgraded Mortar. Its role is to damage and disrupt escorts before they reach broadside range.
- Chain Shots: Carry at least 15. These are for snapping masts and removing an escort’s ability to keep pace.
- Heavy Cannonballs: Carry 20-30. Reserve them for crippling the convoy flagship without accidentally sinking the ship you need to board.
- Fire Barrels: Keep them available for a pursuing escort that has committed to your stern.
The important distinction is ammunition discipline. Chain Shots solve movement, Mortar fire solves distance, broadside salvos solve an exposed escort, and Heavy Cannonballs solve the flagship’s durability. Spending all of one type early forces you into a longer and messier fight later.
Why Convoys Need a Different Combat Plan
Red Bull, El Impoluto, and La Dama Negra reward tight control in high-pressure naval battles, but a convoy adds a target-priority problem. The flagship is the prize; the escorts are the reason rushing it goes wrong. If you chase the biggest hull first, the smaller ships gain time to surround the Jackdaw, keep their guns trained on your sides, and punish every slow turn.
Handle the convoy as three separate phases: create distance, neutralize escorts, and board the flagship. Keeping those jobs separate is what makes the encounter repeatable. You are deciding which ship can damage you next, rather than trying to out-damage the entire formation at once.
Phase 1: Open at Mortar Range and Break the Escort Formation
Start by keeping the convoy at a range where the upgraded Mortar can work before the escorts reach their preferred broadside distance. Aim your first shots at the escort that is most likely to close the gap first. A damaged escort cannot pressure the Jackdaw as effectively, and forcing it to react creates space between it and the flagship.
Do not use the Mortar as a last-second answer after both escorts are already beside you. Its best value comes from stopping the formation from becoming a tight cluster around the Jackdaw. A convoy is much easier once one escort has fallen behind or has been forced into a damaged state while you continue moving.
Keep your route broad rather than circling tightly around the flagship. A wide approach preserves room to turn and keeps you from presenting the Jackdaw’s side to multiple ships at the same time. The goal is to make one escort chase while the other is too far away to contribute meaningful fire.
Phase 2: Chain the Closest Escort, Then Finish It with Broadsides
Once an escort begins closing, use Chain Shots to target its mast. An immobilized escort is the safest escort: it cannot stay on your flank, cannot quickly recover a firing angle, and cannot follow the flagship’s movement while you reset the fight. This is why carrying 15 or more Chain Shots matters. You need enough to control more than one threat if the first disable does not fully separate the convoy.
After the mast is damaged, turn the Jackdaw into a clean broadside pass. Level 2 Side Guns are the minimum because the escort needs to leave the fight quickly once you have created that opening. Higher-level Side Guns make the plan more forgiving by reducing the number of passes needed, but the core rule stays the same: fire full broadsides at an escort only when you have isolated it from the rest of the formation.
Avoid splitting damage evenly across both escorts. Two half-damaged ships can still keep you under fire. One disabled or destroyed escort immediately reduces the convoy’s pressure and gives you safer room to reposition for the next target.
Use Fire Barrels Only When a Ship Is Directly Behind You
Fire Barrels are a defensive timing tool, not an opening attack. Drop them when an escort is committed to chasing directly behind the Jackdaw and you are about to turn away. That forces the pursuer through the danger zone or makes it give up the line, buying the space needed to re-establish Mortar range.
Dropping barrels while an escort is off your side wastes them. The immediate threat in that position is broadside fire, so keep sailing, turn to deny its angle, and use the next safe pass for your own guns.
Phase 3: Cripple the Flagship Without Sinking It
Move onto the flagship only when the escorts are destroyed, immobilized, or far enough away that they cannot punish a boarding attempt. This is the point to switch to Heavy Cannonballs. Their job is to force the flagship into a crippled state efficiently while preserving it for capture.
Keep the Heavy Cannonballs in reserve until this phase. Using them on escorts makes the flagship section slower and increases the chance that you are forced to rely on ordinary broadsides for too long. A convoy can still be won that way, but the clean route is to arrive at the flagship with enough heavy ammunition left to control its health carefully.
Watch the flagship’s condition after every heavy volley. Once it is crippled and ready to board, stop treating it as a target for damage. Extra shots are where successful convoy runs turn into lost rewards: the convoy prize comes from capture, so sinking the flagship defeats the purpose of the fight.
Boarding Windows and Morale Control
The boarding window begins after the flagship is crippled and escort pressure has been removed. Boarding while an active escort still has a clear firing line leaves the Jackdaw vulnerable during the most committed part of the encounter. If an escort survived your opening sequence, disable its mast first, create separation, and board only when it cannot immediately rejoin the fight.
Use the convoy’s morale reduction phase as confirmation that the fight has shifted from ship control to capture. The safest boarding attempt is the one where you have already done the hard work at sea: the flagship is crippled, its support ships are neutralized, and the Jackdaw is no longer absorbing repeated escort salvos while you finish the objective.
There is no benefit to forcing the boarding phase early. A few more seconds spent disabling the last escort are usually safer than trying to complete the capture while the remaining ship continues to threaten the Jackdaw.
Common Naval Convoy Mistakes
- Attacking the flagship first: This leaves both escorts free to close in and fire at the Jackdaw.
- Entering with weak armor: Level 2 Armor is the minimum protection needed to survive sustained escort pressure.
- Saving the Mortar for close range: Use it early to stop escorts from reaching that range in the first place.
- Using Chain Shots as ordinary damage: Their priority is removing escort mobility by targeting masts.
- Spending Heavy Cannonballs on escorts: Keep 20-30 rounds available for the flagship’s cripple phase.
- Boarding while escorts remain active: Neutralize or separate them first so the Jackdaw is not exposed during capture.
- Over-firing on a crippled flagship: Stop once the boarding state is available; the objective is capture, not destruction.
The Repeatable Convoy Route
Leave Great Inagua with Level 2 Armor, Level 2 Side Guns, an upgraded Mortar, 15-plus Chain Shots, and 20–30 Heavy Cannonballs. At the convoy, maintain range and Mortar the first escort that threatens to close. Chain its mast, finish it with broadsides, and use Fire Barrels only against a committed stern pursuit. Repeat the process on the remaining escort, then use Heavy Cannonballs to cripple the flagship and board it before excess damage sinks the prize.
With that order in place, Naval Convoys become a controlled Jackdaw encounter: distance first, escorts second, flagship last, boarding only after the sea around Edward Kenway is secure.
FinalBoss // Gear
Level up your setup
01Top-rated gaming headsetson Amazon→02High-refresh gaming monitorson Amazon→03Gaming chairson Amazon→04Discounted game keyson Kinguin→Affiliate links · As an Amazon Associate, FinalBoss earns from qualifying purchases.
Want to Level Up Your Gaming?
Get access to exclusive strategies, hidden tips, and pro-level insights that we don't share publicly.
Ultimate Guide Strategy Guide + Weekly Pro Tips