
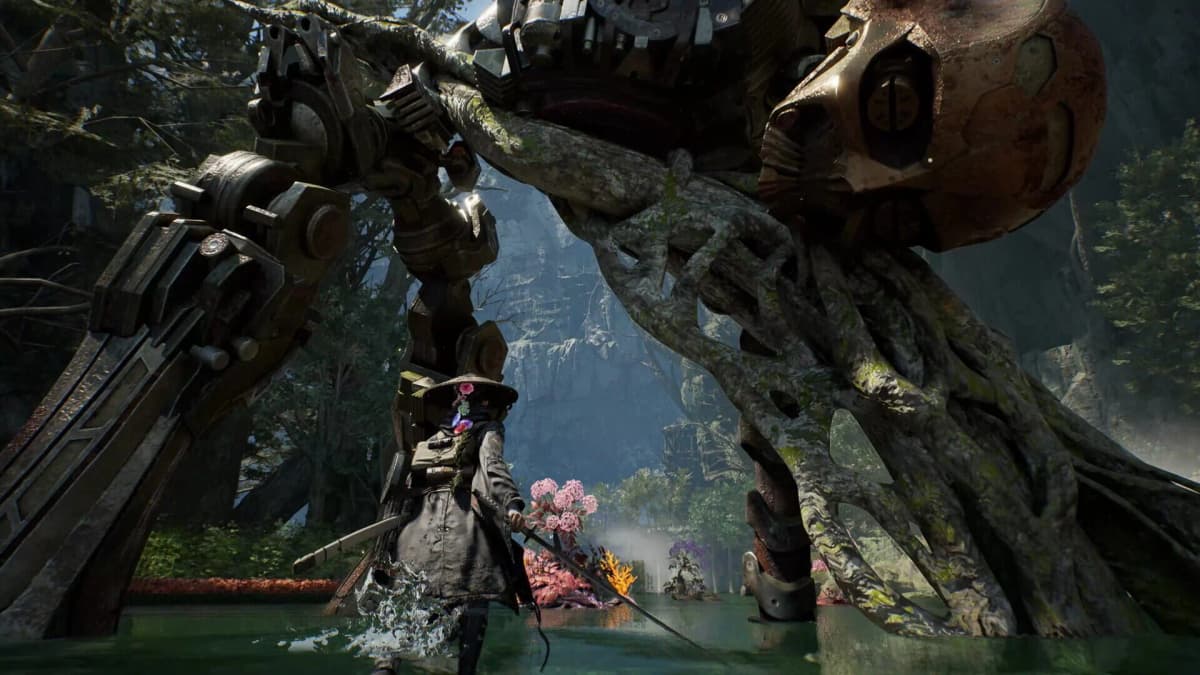
Treat Chapters 3-5 as one continuous route: follow the newest story objective, activate every shrine or camp as soon as you reach it, and leave locked branches alone until the story gives you the matching access. The combat check across this stretch is equally consistent: build FP with clean deflects, then spend it during a safe opening with the damage type the Nushi is weak to.
The time loss comes from trying to fully clear each zone before its story barriers open. Chapter 3 is The Vessel, Chapter 4 is Stems, and Chapter 5 is Branching Paths. Each chapter adds a route gate or boss sequence that is easier when you arrive with a recent return point, upgraded gear, cooked supplies, and a flexible elemental loadout.
Table of Contents (13)
Chapters 3-5 Route Snapshot
| Chapter | Main route | Key progression point | Boss focus |
|---|---|---|---|
| Chapter 3: The Vessel | Terraces at the Great Wall, signal hunt, repeated story encounters | Secure the first shrine, finish the mandatory Malefact sequence, then revisit newly opened gates | Shidou & Nue; Poison weakness and split-threat pressure |
| Chapter 4: Stems | Pilgrim’s Zone, cave route, Belfry | Defeat Taurus twice, then solve the flame-bell sequence in the correct order | Nushi Taurus; use the fight to maintain the deflect-to-FP rhythm |
| Chapter 5: Branching Paths | Cleanse Walker to Matsukawa Zone, colony detour, elevator route | Find new shrines, collect route loot such as Hazebringer, and keep a second damage type ready | Rangifer Anomaly; antler timing and a possible weakness change matter |
The Shrine, Gate, and Return-Point Rules
Use the same route discipline in all three chapters. A shrine or camp is more valuable than a side-room chest when you enter a new zone, because it gives you a reliable return point for upgrades, cooking, conversations, and the next story objective. Activate it before taking a branch that does not clearly advance the marker.
- At the Cleanse Walker or hub, select the newest main objective before departing.
- Follow the primary marker until the game presents a traversal, combat, or key-item gate.
- Activate the first shrine or camp you encounter in the new area.
- Take side paths only when they are immediately reachable with your current abilities.
- Make a mental note of colored gates, locked doors, high ledges, and blocked rooms instead of trying to force access.
- After the objective changes, return through the region and collect the branches that have genuinely opened.
- Before committing to the next chapter route, return for equipment upgrades, cooking, conversations, and a refreshed objective.
Do not clear every branch before the mandatory boss chain. The Chapter 3-5 route is built around story-triggered access. A door that looks close enough to reach can still be a dead end until the correct key item or traversal route becomes available.
Chapter 3: The Vessel Walkthrough
Chapter 3 begins the more demanding route structure. Move toward the new area objective, activate the first shrine or camp, and continue through the Terraces at the Great Wall rather than spending time on locked side paths. The chapter moves through a signal hunt and a repeated story-fight sequence before the Great Wall section fully advances.
Clear the Malefact sequence before exploring
The early Chapter 3 sequence involves a first encounter with the story Malefact, a chase, a second fight where damage carries over, and a later Great Wall battle that adds a lightning attack pattern. Play the first encounter with the later fights in mind. Taking avoidable damage early makes the carryover sequence much harder than it needs to be.
- Use the first encounter to learn the boss’s committed strings and deflect timing.
- Do not spend healing carelessly before the chase and follow-up confrontation.
- When the later fight adds lightning pressure, wait for a committed attack rather than attacking through the new visual effects.
- Open every shrine or camp on the mandatory route so a failed attempt does not turn into a long run back.
Shidou & Nue: Poison weakness and FP discipline
Shidou & Nue is the Chapter 3 Nushi check, listed at Level 20 with a Poison weakness. Aim to reach the encounter around that level, bring the strongest Poison-leaning option your current build supports, and treat the fight as a spacing test rather than a race to delete one enemy.

The duo pressure is dangerous because one target can interrupt the punish window created by the other. Keep both threats on screen as much as possible, stay at a range where you can identify the next committed attack, and use successful deflects to fill FP. Spend that FP only after a long string, a shared recovery, or another clear opening where neither target can immediately clip you.
- Use Poison damage: the listed weakness provides the best route to shortening the encounter.
- Deflect first: the FP gained from defense is the foundation of your stronger punishments.
- Hold FP for clean windows: low-probability aggression is especially costly against two active threats.
- Respect poison pressure: keep enough survivability and recovery resources for a longer attempt.
The common failure pattern is overcommitting to one target, getting hit by the second, then spending FP in panic. Reset your spacing after each punish. Consistent deflects and Poison bursts win this fight more reliably than constant melee trades.
What to collect before leaving Chapter 3
Take loot that sits directly on the mandatory route, including useful manuals or purchases you can make without detouring into a locked loop. Leave inaccessible gates for later. Once the story objective changes and the relevant route opens, return to collect the branches you recorded on the way through.
Chapter 4: Stems Walkthrough
Chapter 4 shifts into the Pilgrim’s Zone and uses route gates more aggressively. Leave from the hub with the current objective selected, then progress forward through the zone. The first bell sequence brings several golems into the area. You do not need to wipe out every enemy: defeat a couple of golems to move the event forward instead of turning the encounter into an unnecessary full clear.
Defeat Nushi Taurus twice
Taurus is fought twice during the Chapter 4 route, so preserve the lessons from the first battle. The best carryover from Chapter 3 is the same combat loop: defend cleanly, use deflects to generate FP, identify the active weakness read, and cash in your FP when Taurus has committed to an attack. The second encounter punishes players who rely on unfocused damage instead of learning a repeatable response.
- Enter both Taurus fights with your healing and offensive resources stocked.
- Let a committed attack create the punish; do not force hits during an uncertain animation.
- Use the encounter to keep your deflect timing sharp for the longer Chapter 5 boss route.
- Return to the hub after the chapter objective changes to upgrade and cook before moving on.
Reach the Belfry and ring the bell
After the Taurus route, navigate through the cave to reach the Belfry. The bell puzzle requires lighting the flames in a fixed order: Sun, Earth, then Moon. Handle the sequence exactly in that order before attempting to progress. The Chapter ends with the story scene involving Violet and the Beast, which also marks a useful point to reset at the hub and prepare for Matsukawa.

Use Chapter 4 to Prepare for Chapter 5
Chapter 4 is the cleanest resupply point before the Rangifer wall. Spend the return trip on upgrades, cooking, conversations, and a flexible combat kit. Chapter 5 can ask for different damage responses later in its boss route, so arriving with only one elemental option limits your ability to adapt.
- Upgrade the weapon or tools that support your strongest reliable punish.
- Cook and restock before leaving the Cleanse Walker.
- Keep a Poison option if it remains useful to your build, but carry a second damage type as well.
- Confirm the newest objective before heading to Matsukawa Zone.
Chapter 5: Branching Paths Walkthrough
Chapter 5 begins at the Cleanse Walker and sends Emma and Koo toward the Matsukawa Zone. Follow the main route first, activate shrines as they appear, and take the colony detour only when it is available on your current path. The zone contains useful loot and multiple elevator segments, so a shrine activation before committing to a vertical route saves a great deal of repeat travel.
Take the colony detour for Hazebringer
The Matsukawa route includes a detour into a colony with shrines and loot, including the Acid blade Hazebringer. Pick it up when the route opens naturally rather than abandoning the main objective to search every blocked passage. Hazebringer also gives you another damage-type option for a chapter where flexibility matters.
Use the elevators as route markers. Clear the immediate area, take obvious loot on the active floor, then continue upward or downward with the objective rather than repeatedly backtracking through every elevator stop. Revisit only after an objective update opens a previously blocked path.
Rangifer Anomaly: learn the antler sweep
Rangifer Anomaly is the Chapter 5 Nushi wall. The key pattern to master is the antler sweep, because missing its timing cuts off the deflects that feed your FP economy. Prioritize recognizing that sweep over squeezing in an extra basic attack. Once you can answer it consistently, the rest of the fight becomes far more manageable.
- Build FP from the antler sweep: a clean deflect creates the resources needed for meaningful offense.
- Spend after commitment: wait for the end of a completed pattern before using FP-based damage.
- Carry two damage types: a later Rangifer encounter can change its weakness, so a single-element loadout can leave you poorly matched.
- Keep the camera disciplined: Rangifer’s broad attacks are easier to read when you maintain stable spacing instead of circling too tightly.
- Use shrines before the boss route: Matsukawa’s elevators and side paths make an unchecked runback needlessly long.
Rangifer rewards the same habit that Chapter 3 starts teaching: defend with purpose, fill FP, and convert that resource only when the boss has truly stopped attacking. If the fight keeps collapsing late, the usual fix is to reduce low-value aggression and save FP for the antler-sweep punish cycle.
FinalBoss // Gear
Level up your setup
01Top-rated gaming headsetson Amazon→02High-refresh gaming monitorson Amazon→03Gaming chairson Amazon→04Discounted game keyson Kinguin→Affiliate links · As an Amazon Associate, FinalBoss earns from qualifying purchases.
Want to Level Up Your Gaming?
Get access to exclusive strategies, hidden tips, and pro-level insights that we don't share publicly.
Ultimate Guide Strategy Guide + Weekly Pro Tips