Why This UV-Green Glow Will Change Your PC Builds
Why a UV-Green Glow Changed My PC Builds Forever
After more than a dozen rigs—from cramped micro-ATX starters that felt like puzzle boxes to full-blown RGB extravaganzas—I was convinced I’d mastered every cable route and lighting trick. Then I spotted Tvorp’s “Green Machine.” That soft UV-green glow dancing over straight-as-an-arrow cables made my organized chaos look like kindergarten art. Within days, I tore down my perfectly fine build and started from zero. This isn’t just about color; it’s a philosophy shift in planning, precision, and restraint.
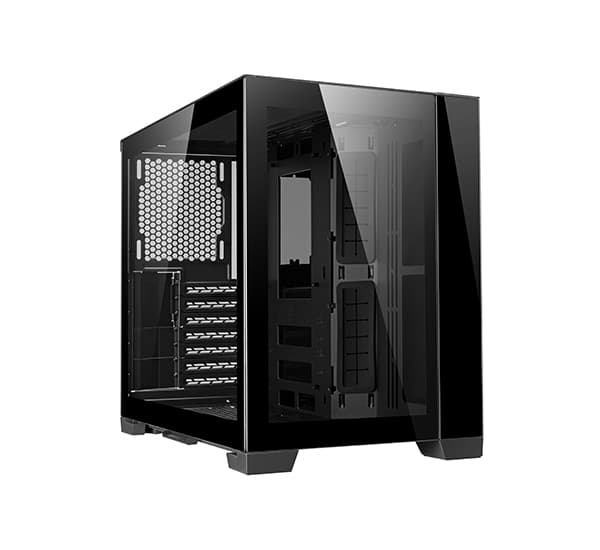
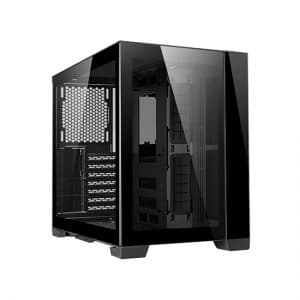
1. Choose the Perfect Case
I once squeezed a high-end GPU and two radiators into a tight micro-ATX tower, only to watch temperatures spike and my patience evaporate. The turning point came when I upgraded to a dual-chamber design with an open layout: suddenly, cables had room to breathe, airflow improved, and installation felt like a breeze.
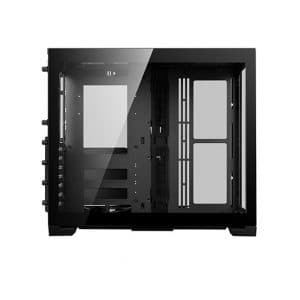
- Rear cable channels: Look for hidden compartments or Velcro straps behind the motherboard tray. They turn spaghetti into neatly tucked bundles.
- Radiator clearance: Measure every millimeter. My custom loop nearly stalled because the 240 mm radiator collided with the top panel—an expensive oversight.
- PSU and motherboard alignment: Decide early. Placing your power supply upside-down or sideways can save inches of cable slack and reduce clutter.
Pro tip: sketch your component layout on paper or use a case configurator tool online. It’ll prevent surprises when parts arrive.
2. Master Lighting with Subtlety
I used to chase kaleidoscopic patterns—rainbow fans, color-cycling strips, the works. It looked cool for a week, then felt overwhelming. The Green Machine taught me that less truly is more: one accent color, balanced brightness, and strategic placement make everything pop without blinding your desk.
- Single accent hue: Commit to one LED channel for coolant or strips. UV-green works magic with clear tubing, but the same principle applies to any color.
- Hidden backlighting: Tuck extra RGB strips behind the reservoir or PSU cover. The glow creeps out gently rather than screaming for attention.
- Software control: Use lighting suites (like iCUE or Mystic Light) to sync all zones. Dimming a few percent can cut eye strain and highlight your tubing.
Personal note: I test my light setup in both daylight and at night. What looks balanced in a dim room can wash out under bright LEDs.
3. Pre-Route Cables Like a Pro
If cable routing was my mortal enemy, pre-routing became my secret weapon. By running all power and data lines behind the motherboard tray before dropping in the mainboard, I exposed only the custom-sleeved gems I wanted everyone to see.
- Plan the path: Sketch cable routes or use thin string to mock up each run. That way, you avoid last-minute tugging and zip-tie frustration.
- Highlight key lines: 24-pin, GPU power, and front-panel connectors deserve combs and custom sleeving. Tuck the rest behind a PSU shroud or in rear channels.
- Use adhesive tie points and Velcro straps: They’re easier to adjust than zip-ties and won’t damage insulation if you need to tweak later.
A small detail like grouping wires by function (power vs. data) not only looks neat but also makes troubleshooting far quicker down the line.
FinalBoss // Gear
Level up your setup
01Graphics cardson Amazon→02Gaming laptopson Amazon→03High-refresh gaming monitorson Amazon→04Discounted game keyson Kinguin→Affiliate links · As an Amazon Associate, FinalBoss earns from qualifying purchases.
4. Water Cooling: Plan Before You Bend
Hard tubing can look like art when done right, but one misplaced bend and it’s a jagged disaster. My rule: mock up your loop path with flexible tubing or string first, then translate those measurements to hard-line cuts.
- Dry fit with string: Lay out your entire loop path, mark bend points, then measure twice before heating and bending PETG or acrylic tubes.
- Combine hard and soft lines: Use rigid tubing for straight runs and soft tubing for tight corners. It balances looks with ease of installation.
- Flush and leak-test: Circulate distilled water through the loop for at least an hour before adding coolant. Nothing kills the vibe faster than a late-night drip.
- Conceal a UV strip: Place a small UV LED behind the reservoir or under the motherboard tray. It gives coolant that signature glow without overlighting the whole interior.
Maintenance reminder: flush, refill, and replace O-rings every 6–12 months. It keeps your loop sparkling and prevents microbe buildup.
Want to Level Up Your Gaming?
Get access to exclusive strategies, hidden tips, and pro-level insights that we don't share publicly.
Ultimate Guide Strategy Guide + Weekly Pro Tips
5. Balance Your Performance Parts
Pushing your GPU and CPU to the limit is satisfying—until your fans sound like jet engines and radiators hit their flow limits. I learned to tune every element for smooth harmony rather than maximum extremes.
- Quality fans: Invest in PWM-controlled blades with high static pressure. They move air quietly and respond to temperature changes.
- Radiator sizing: A 360 mm radiator feels luxurious but only if your case supports full-length mounting with clearance. Plan first, buy second.
- VRM and RAM cooling: Small directed fans or heatsinks over VRMs and high-speed RAM can shave off a few degrees under load.
If you’re new to loops, start with just a CPU block. Once you’ve nailed coolant flow and temperatures there, add a GPU block in your next iteration.
6. Maintenance & Pro-Level Finishing Touches
Your build’s showroom look lasts only as long as you upkeep it. After a surprise dust-induced shutdown, I adopted these fail-safes:
- Custom dust filters: Magnetic or slide-in filters on every intake. Clean them monthly with compressed air or a soft brush.
- Drip trays and towels: Place a small tray under filling ports and have lint-free cloths on hand for quick spill control.
- Spare parts kit: Keep extra fittings, tubing, O-rings, and screwdrivers in a small toolbox. Late-night tweaks shouldn’t turn into scavenger hunts.
For the ultimate finish, consider full custom sleeving on visible wires and dedicate time to fine-tuning your fan curves. Near-silent operation is the last piece of the puzzle.
Conclusion: The Power of Restraint
My weeklong obsession with the Green Machine taught me that the magic isn’t in adding more—it’s in choosing the right components, routing every line with intention, and letting a single, well-placed UV-green glow take center stage. If I could text my rookie self one tip, it’d be: plan thoroughly, conceal ruthlessly, and light sparingly. That way, your next build won’t just run cool—it’ll command attention.