
Chaos Zero Nightmare: Best Team Build Frameworks for Nightmare Runs
For most Chaos Zero Nightmare Nightmare runs, the best team is not “three strong units.” It is one clear damage engine, one support that feeds that engine, and one slot that fixes consistency through AP recovery, card draw, shields, or healing. Pick the carry first, then build the deck around how that carry turns cards into damage.
The short version
- Default frame: 1 core DPS + 1 enabler that feeds the carry’s card mechanic + 1 sustain/flex slot.
- Farming frame: 2 attackers + 1 AP/draw support when content is easy or your carry self-sustains.
- Boss frame: burst carry + setup enabler + a shield/heal unit so you survive to the burst turn.
- Combat runs on cards and Action Points (AP). Every card costs AP; a team that bricks its hand or runs out of AP loses to one that plays cleanly every turn.
- Match the enabler to the engine: a Bullet carry like Diana wants AP and bullet generation; a Mark burst carry wants draw and amp; an Exhaust carry wants generators.
Build around the card engine, not the role label
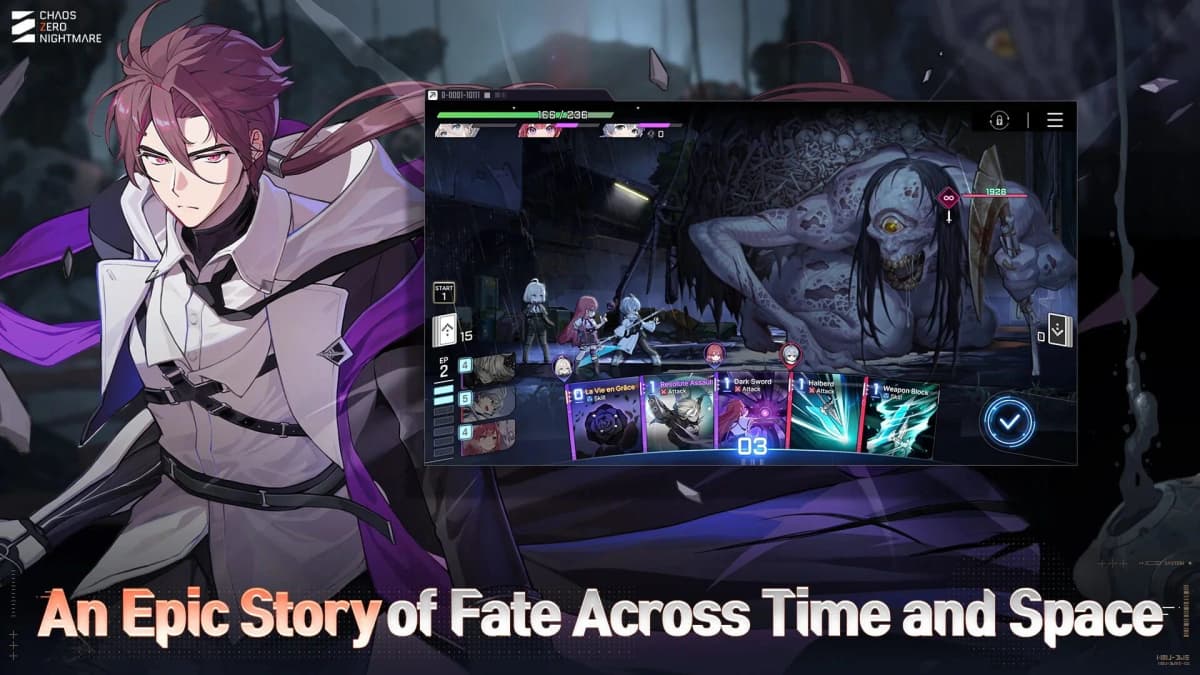
Combat in Chaos Zero Nightmare is a card-and-deck system: you spend Action Points (AP) to play cards each turn, and some cards cost zero AP. So the first question for any team is not “who is strong” but what mechanic converts this carry’s cards into damage? The good teams are built around one recognizable engine — zero-cost spam, Bullet stacks, Exhaust or Curse payoffs, Marks for burst, or follow-up triggers — and the supports exist to make that engine fire more often and fail less.
A lot of teams feel weak because the player stops at “this is my attacker” and never finishes the thought. The full version is “this carry only becomes broken once bullet generation and AP recovery are both online,” or “this carry needs Mark stacked before the burst turn.” That second layer is where team-building actually starts. If you are still settling your roster, see our reroll guide for the early carries worth chasing.
Bullet stacks (Diana, Renoa, Lucas)
Bullet is a real card tag: Bullet cards accumulate in your deck and are then consumed — exhausted or discarded — to cash out scaling damage rather than ticking a single numeric meter. Diana (5★) is the main Bullet generator and finisher; she “has access to powerful bullets that you can collect and use to deal massive damage.” Pair her with Renoa (5★), who feeds more bullets to the party and brings the Quietus keyword that stops your deck from clogging with spent Bullet cards. Lucas (4★) boosts bullet damage, draws passively, and fires fixed-damage attacks after exhausting Bullet cards.
The third slot is usually Nia (4★), who supplies healing, draw, discard, and minor damage buffs — the discard especially helps recycle bullets. If a Bullet team feels inconsistent, the problem is almost never raw damage; it is AP economy or turn order collapsing before stacks pay off. Fix the resource flow before you add attack.
Marks for burst
Mark is a combat keyword built for deleting one target. While you hold Mark, using an Attack Card grants 100% Extra Attack and Tenacity Damage at 0 cost and reduces Mark by 1 — so a stack of Mark turns into a string of free, amplified hits. Cards such as Quickdraw, Sniper’s Domain, Tracer, Target Spotted, and High-Power Scope apply or spend it.
Build this shell to compress the burst turn: pair the Mark carry with draw, damage amp, or morale support so the kill window arrives before enemy pressure does. It is excellent for bosses and elites where one dangerous target solves the fight, and weak against wide waves — if you face crowds, give the flex slot an AoE answer.
Exhaust and Curse payoffs
When a card has Exhaust, it leaves play to the Exhaust pile and only returns next fight; numbered Exhaust (e.g. Exhaust 2) sends the card to discard so you can replay it that combat until the count runs out. Curse cards are negative cards enemies and events shove into your deck. Both archetypes win by aligning a setup package with a payoff: do not bring an exhaust or curse-payoff finisher without reliable ways to create the state it needs.
This is the easiest shell to misbuild because the payoff cards look amazing in isolation — and fall flat when the enabling package is too thin. If your big turns never happen, add more setup and cycling, not more finishers.
Zero-cost spam
Some cards cost zero AP, and a zero-cost carry wins by chaining those actions without burning AP. Prioritize draw, cost reduction, and hand refills so the carry sees more playable cards each turn; the third slot can be sustain in dangerous content or a second attacker when stages are light. The common mistake is bolting on a slow, high-cost utility unit that clogs the hand and stalls the chain. If your carry wins by volume, keep the deck cheap.
Follow-up triggers
Follow-up carries fire secondary attacks when allies act, so they scale through team interaction rather than raw stats. Pick allies that cause extra attacks, raise morale, or create more trigger windows instead of generic stat buffers — a trigger enabler multiplies the carry’s identity, while a flat buffer just flattens it. These teams feel incredible when synchronized and useless when the extra attacks are rare, so build for trigger frequency first.
When the third slot should be sustain instead of damage
In harder bosses and long roguelike-style runs, defensive layers are part of your damage plan. A shield, heal, or counter effect buys your carry more turns to do its job, and Nightmare difficulty punishes dead turns far more than slightly lower damage numbers. If enemy pressure is high, survivability is not optional glue — it is what lets the engine function at all.
- Take sustain when fights are long, chip damage is constant, or bosses punish setup turns.
- Take a second attacker when your carry already self-sustains or the stage is easy enough to race.
- Take AP/card support when runs keep failing from bad hands, AP drought, or slow setup.
FinalBoss // Gear
Level up your setup
01Mobile gaming controllerson Amazon→02Top-rated gaming headsetson Amazon→038BitDo controllerson Amazon→Affiliate links · As an Amazon Associate, FinalBoss earns from qualifying purchases.
Want to Level Up Your Gaming?
Get access to exclusive strategies, hidden tips, and pro-level insights that we don't share publicly.
Ultimate Guide Strategy Guide + Weekly Pro Tips
Three team shells that work for most rosters
1. Safe progression shell
Carry + engine support + sustain. The best default while you are learning matchups or pushing stages where one bad draw spirals. A Bullet build of Diana + Renoa + Nia is a clean template: Diana carries, Renoa feeds bullets and keeps the deck lean with Quietus, Nia heals and draws. Slower than full offense, but every slot has a job.
2. Fast farm shell
Main attacker + sub-attacker + AP/card support. Use this when you are not dying and just want faster clears. The support should lift both attackers indirectly through card quality, AP flow, or draw — not try to be a half-damage, half-defense compromise that does neither well.
3. Boss-kill shell
Burst single-target carry + setup enabler + shield/heal. The dependable answer for enemies that must die on schedule. Mark stacking, burst prep, or follow-up amplification go in slot two; defensive stabilization goes in slot three so you survive until the burst window opens. For deeper per-archetype shells, see our best teams by archetype guide, and for stage-by-stage picks, the early, mid, and late game teams guide.
Common mistakes
- Picking three good units with no shared engine. Synergy beats raw individual value.
- Overloading expensive cards. If your hand keeps stalling, the deck is too top-heavy for your AP.
- Generic support on a mechanic carry. A Bullet or Mark carry needs an enabler that feeds the tag, not flat stats.
- Ignoring defense in Nightmare content. Surviving one extra turn often out-damages a greedy sub-DPS slot.
- Fixing damage before fixing consistency. If you keep missing AP, draw, or setup windows, more attack will not solve it.
Practical takeaway
Change your team-building order: start with the carry, identify whether it runs on zero-cost chains, Bullets, Exhaust/Curse, Marks, or follow-up triggers, then pick supports that make that exact pattern happen more often. Decide the third slot — defense or extra offense — by the content you are clearing. DPS core first, engine support second, consistency slot third is more stable than any short-lived tier list, and it is how teams like Diana + Renoa + Nia stay strong in Chaos Zero Nightmare even as the meta shifts.