
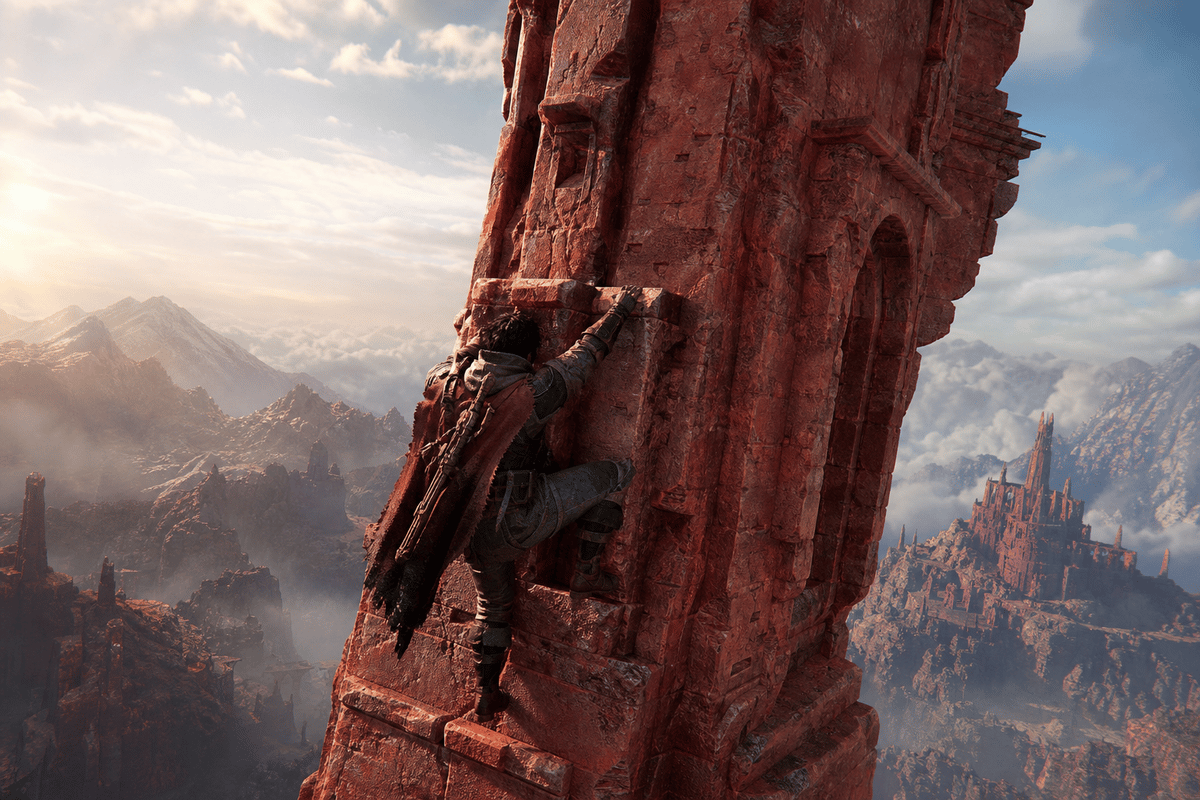
The Spire of Soaring is the Chapter 5 gate between Toward the Nest and the Crowcaller route in Crimson Desert. Its sealed front makes the location look inaccessible, but the intended path starts below the tower: enter the lower tunnel, use the wind lift, restore its Axiom Force circuits, power the skybridge, and rotate the final bridge mechanism. With the route memorized, the full sequence takes around 10-20 minutes.
Table of Contents (15)
Spire of Soaring Requirements Before You Start
Reach the spire while progressing through Chapter 5’s Toward the Nest main quest. The tower’s upper sections rely on movement and puzzle powers acquired through story progress, so arriving early leaves you without the tools needed to finish the climb.
- Main quest: Chapter 5, during or after the route toward Crowcaller in Toward the Nest.
- Traversal: Glide or flight access for the wind lift and exterior gaps.
- Puzzle tool: Axiom Force for rotating and reconnecting energy mechanisms.
- Movement boost: Force Palm for the upper traversal section and the final pressure plate.
- Recommended: Axiom Force level 2 makes the larger upper-level launch and wall-pull movement much more forgiving.
Important: Do not spend time circling the sealed front entrance. The tower is designed around a hidden approach from its lower side, and the locked façade never becomes the route forward during this objective.
Find the Hidden Tunnel Entrance in Northern Demeniss
Travel to northern Demeniss near the Denn River, north of Windmere Manor and Whitehill Mill. Stand facing the Spire of Soaring, then move down toward the lower right-hand side of the structure, along its eastern cliff-facing edge. Look for a mine-like tunnel or cave entrance beneath the tower rather than a door built into the outer wall.
The tunnel leads into the spire’s lower machinery chamber. This is the key piece of navigation the objective does not explain clearly: the climb begins underground, then emerges through the tower’s internal wind system.
Why the Front Entrance Wastes Time
The front of the Spire of Soaring reads like a standard dungeon entrance, but it remains blocked. Searching for a switch around the main door, climbing the exterior wall, or trying to force a route from the upper ledges leads away from the puzzle chain. Once you spot the tunnel, treat the tower as a vertical interior challenge rather than an exterior climbing landmark.
Ride the Wind Lift to the First Puzzle Floor
Inside the lower chamber, head toward the large fan and wind-shaft assembly. The lift is powered by a rising air current. Stand on the active airflow, jump, then deploy your glide to carry Kliff upward into the tower.
If the fan is inactive, interact with a glowing sphere or battery mounted on the assembly. Remove it and place it back into its slot to reset the device, then return to the airflow. This refreshes the wind lift when the mechanism fails to start correctly.
Keep the ascent controlled. The wind current is meant to carry a glide upward, so rapid directional inputs can make the climb less stable. Let the vertical airflow create the height, then make only small adjustments to land on the upper platform.
At the top of this first ascent, activate the available Abyss Nexus checkpoint before touching the nearby puzzle device. Falling during later traversal is far less costly once the checkpoint is active.
Restore the First Axiom Force Circuit
The first interior mechanism teaches the spire’s core rule: power must travel continuously from its source to its receiver. Use Axiom Force on the device to rotate its circular sections and connect the visible energy lines.
- Find the disconnected energy line or socket on the mechanism.
- Use Axiom Force on the outer edge of the rotating device.
- Turn the rings until every visible line segment meets cleanly.
- Confirm that the current reaches the receiving side before leaving the platform.
The easy mistake here is rotating the ring that already looks closest to the destination. Follow the actual line traces instead. A ring can look aligned from one angle while leaving a small break in the circuit on the far side. The puzzle is solved only when the power path has no gaps.
Cross the Midair Boost Section
Restoring the first circuit opens the route into the spire’s central vertical section. This is where the tower shifts from a straightforward rotation puzzle into a movement test, combining air currents, wall pulls, launch points, Force Palm boosts, and gliding.
Use the available lift or ledge to gain your initial height, then line up with the central platform before committing your remaining movement tools. Axiom Force wall pulls and the double-jump catapult provide the more controlled route; Force Palm boosts can supply the last bit of elevation before gliding across the gap.
Save your height boosts until you are level with the destination. Spending Force Palm or a catapult jump at the start of the gap produces distance without enough elevation, leaving you below the platform lip. Build height first, face the landing point, then use the boost as a finishing correction.
Safer Route for Players Missing the Glide Timing
The direct glide is faster when your approach is clean, but the wall-pull route gives you more opportunities to correct your position. Use Axiom Force to pull toward the available surfaces, chain the double-jump catapult, and glide only once the central platform is directly ahead. This takes a little longer but reduces the chance of dropping back to the checkpoint.
Repair Both Broken Connections and Activate the Plate
On the next tower level, search for the two remaining broken energy connections. Each must be realigned with Axiom Force before the central activation system can power up. Check the surrounding structures rather than focusing only on the largest central device; the missing links sit along the path that feeds into it.
- Locate each disconnected node or broken line.
- Use Axiom Force to rotate or reposition the segment until the energy path reconnects.
- Trace the completed current back toward the central control surface.
- Wait for the large pressure plate to become active.
Once both links are live, stand near the newly powered pressure plate and hit it with Force Palm. The plate is a ranged physical trigger, so standing on it alone does not complete the activation. Force Palm powers the skybridge and can also grant an Abyss Artifact pickup at this stage.
If the pressure plate does nothing, one energy connection is still incomplete. Return to the circuit path and inspect every line for a break. The first repaired node can make the machinery look active while the second missing link still prevents the final trigger from receiving power.
Power the Skybridge and Reach Crowcaller
With the pressure plate activated, head out to the newly powered skybridge. The bridge is only partially useful at first: interact with its control device or stone pillar using Axiom Force, then rotate the internal circular mechanism until the bridge aligns with the route ahead.
Watch the bridge’s physical direction rather than rotating blindly. The correct position creates a continuous walkway toward Crowcaller. Once it locks into place, cross immediately and keep your glide ready for the exterior path beyond the spire.
Spire of Soaring Troubleshooting
The entrance is still blocked
You are likely searching the tower façade. Return to the base and follow the lower eastern or cliff-side terrain until you find the tunnel beneath the structure.
The wind lift does not activate
Inspect the fan assembly for its glowing battery or sphere. Removing and reinserting it resets the lift. Afterward, jump into the air current and glide instead of attempting to climb the shaft normally.
The circuit looks correct but has no power
Rotate the outer rings again and follow the visible energy line from start to finish. One small gap, especially at a ring edge, stops the entire device from registering as complete.
You keep falling short of the central platform
Delay the Force Palm boost or catapult jump until you have climbed to the platform’s height. The boost is strongest as a final adjustment after your glide path is aligned, rather than as an opening move from below.
The skybridge has power but points the wrong way
Return to the bridge control mechanism and use Axiom Force on its rotating disc. Keep turning it until the bridge forms a direct line toward the Crowcaller path.
FinalBoss // Gear
Level up your setup
01Top-rated gaming headsetson Amazon→02High-refresh gaming monitorson Amazon→03Gaming chairson Amazon→04Discounted game keyson Kinguin→
Affiliate links · As an Amazon Associate, FinalBoss earns from qualifying purchases.
Want to Level Up Your Gaming?
Get access to exclusive strategies, hidden tips, and pro-level insights that we don't share publicly.
Ultimate Guide Strategy Guide + Weekly Pro Tips