Crimson Desert: How to Upgrade Your Camp – Dispatch & Farm Guide
Why Your Camp Matters (And Why It’s So Confusing)
After about 15 hours in Crimson Desert, my camp looked like a sad cluster of tents and confused Greymanes. I kept seeing “upgrade camp” objectives, but I had no idea what actually triggered upgrades, how dispatch rewards worked, or why my farm was giving me almost nothing. The breakthrough came when I stopped treating each system (dispatch, farm, ranch, vendors, donations) as separate features and started running them as one connected loop.
This guide walks through the exact workflow I use now to turn the camp into a reliable resource engine: how to trigger camp upgrades via Grounds of the Sunrise quests and commissions, how to set up efficient dispatch missions, how to use the supply box storage, and how to plug the farm and ranch into the whole system so you’re never starved for food, trade goods, or crafting materials.
Step 1 – Unlock & Push Grounds of the Sunrise Quests First
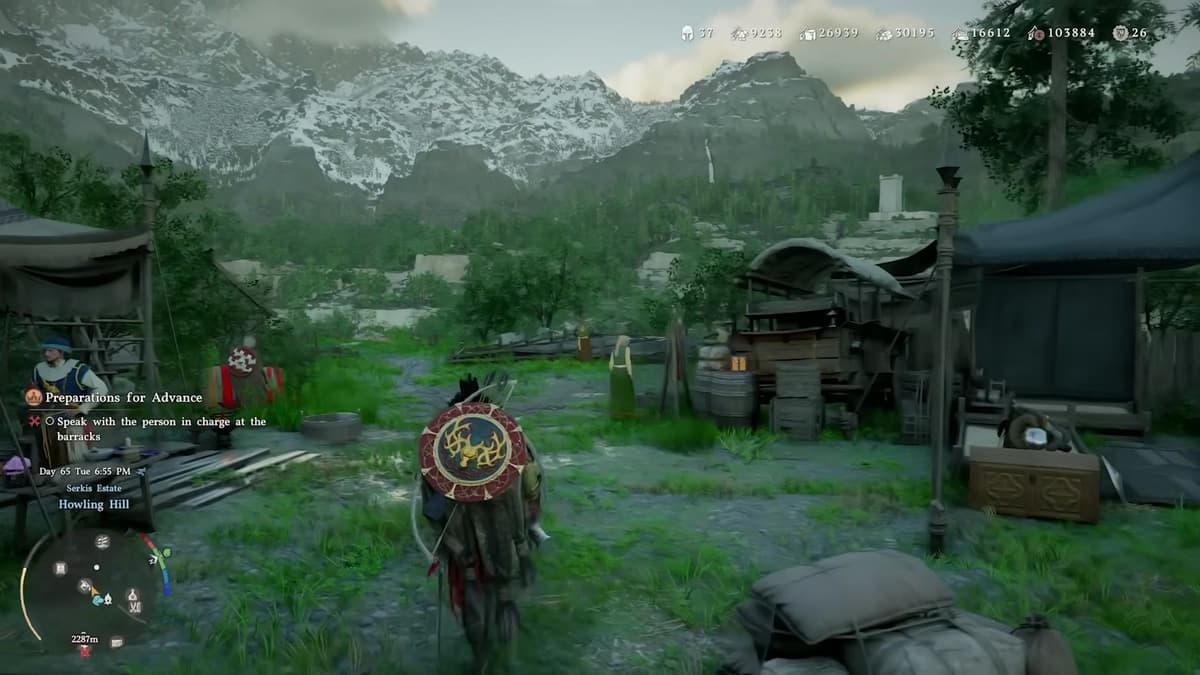
Your camp really opens up once the Grounds of the Sunrise faction line gets going. This usually happens around chapter 3-4, after the main quests push you into the Greymane story and you settle at Howling Hill.
What finally clicked for me was realizing: most camp expansion is tied to Grounds of the Sunrise quests and Greymane commissions, not just random grinding.
Here’s what to do:
- Open
Menu → Journal → Faction Quests → Greymane. - Look for the Grounds of the Sunrise questline (you’ll also see Greymane Commissions tracked right next to it).
- Prioritize any quest with a tiny camp icon in its name or description – those are direct camp upgrades or new facilities.
- Talk to Marius whenever new Greymanes arrive – his quests unlock new people and vendors inside camp.
These quests are usually short and very worth it – they unlock new tents, vendors, and facilities like the smithy, farm, ranch, and even your house. If your camp progression feels “stuck,” 9 times out of 10 it’s because you’ve ignored a Sunrise quest or a Greymane commission in your journal.
Reading Camp Upgrade Requirements
Here’s the part the game never spells out: you don’t upgrade the camp by talking to a single NPC. Each camp level is its own Camp Expansion mission, and you start it from the map. Open the Map, switch the icon filter to Factions, hover over the Greymane camp icon on Howling Hill, and press Inspect (Y / Triangle / double-click on PC). From there, open the Missions tab to see the next expansion and exactly what it costs.
The requirements scale hard as you climb, and the pattern is always recruits + raw materials + food + Camp Funds:
- Level 1 → 2 is cheap on purpose: roughly 2 recruits, ~100 Food and ~250 Silver. This is the upgrade that actually unlocks dispatch missions and extra recruit slots, so rush it.
- Level 2 → 3 is the first real jump: about 60 Stone, 60 Lumber, 400 Food, and 1,600 Camp Funds (Copper), plus 4 recruits. Crucially, this is the expansion that unlocks the Farm and Ranch.
- Later expansions balloon fast – the fourth expansion alone wants ~10 recruits and thousands of each material on top of 100,000 Camp Funds.

My rule of thumb became: whenever a new Expansion mission appears, I treat it as top priority and feed the camp stash until it completes. Each expansion not only adds space and structures, it also raises Greymane skill caps and unlocks better dispatch missions.
Step 2 – Use the Provisions Manager for Smart Donations & Trade
Carl, the Provisions Manager, is the quiet MVP of camp progression. He isn’t where you start an expansion (that’s the map), but he’s the bridge between your personal backpack, the camp stash that funds upgrades, and your trade money.
You’ll usually find him near the central tents or supply area.
Topping Up the Camp Stash
Expansion missions pull materials straight from your camp stash, so your job is keeping that stash full. You can:
- Let dispatch missions bring everything in passively, or
- Open Carl’s menu and hand over materials directly from your own inventory.
What worked best for me was a hybrid:
- Use dispatch missions to bring in bulk stone, lumber, and generic food.
- Top up the last missing amounts via Carl when I’m 5–10 units short.
This keeps you from over-farming in the open world just to push a single upgrade.
Packaging Goods and Understanding Money Types
Carl also lets you turn raw materials into packaged trade goods. This is where a lot of players (me included) get confused, because the game uses two important currencies:
- Silver – your personal money for merchants, crafting, Cliff, etc.
- Camp Funds (Copper) – used for camp upgrades and internal camp dealings.
Here’s the key distinction I wish I’d known earlier:
- Unpackaged trade goods (like raw silk from dispatch) can be sold to black market traders for real silver.
- Packaged goods made at Carl can be sold to normal traders for Camp Funds.
My workflow:
- Sell most unpackaged goods at black markets for silver.
- Only package goods specifically when I need more Camp Funds for upgrades.
- Avoid packaging high-value materials I still need for crafting (like rare hides or ores).
Carl can also recover lost story/boss items if something goes wrong. If a quest-critical item ever vanishes, check his Recover Items menu before panicking.
Step 3 – Build a Constant Dispatch Loop with Ross
Ross, the Dispatch Coordinator, is where your camp goes from “cute base” to “industrial-grade resource farm”. My biggest mistake was only using dispatch occasionally. Once I started running missions constantly, my resource problems disappeared. Handy tip: you don’t even have to walk to Ross – you can open the same dispatch board by inspecting the camp (or any controlled location) on the map and opening its Missions tab.
How Dispatch Missions Work
Interact with Ross (or inspect a location on the map) to open the dispatch board. You’ll see missions grouped by type:
- Food missions – meat, grain, general provisions.
- Trade missions – silk, dyes, specialty items.
- Base resources – stone, lumber, ores.
- Construction/Expansion missions – these actually construct things like the ranch or new tents.
Each mission shows:
- A required party size (e.g. 2–4 members).
- A task time measured in in-game hours, and a required-currency/resource cost to launch it.
- A reward preview that lands in your camp stash when the timer runs out.
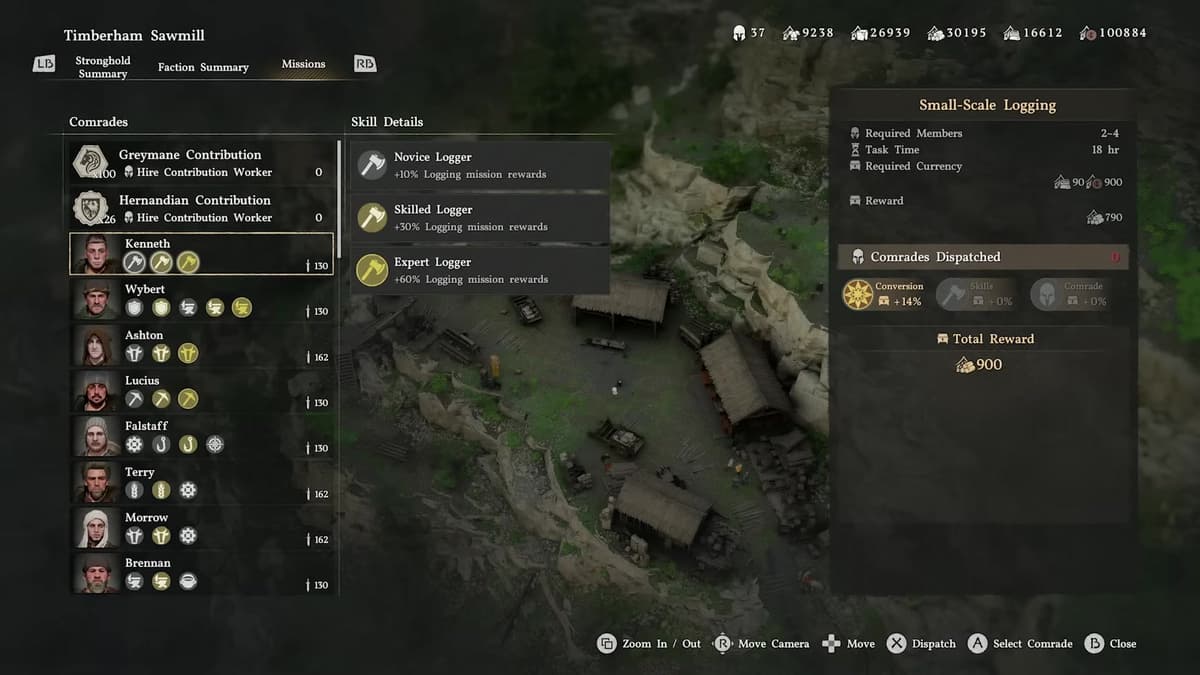
When assigning Greymanes, two separate bonuses matter:
- Skill match – put a comrade whose skill matches the mission on it. The skill tier is what counts: a Novice gives +10%, a Skilled comrade +30%, and an Expert +60% to that mission type.
- Full party – filling every slot adds a separate +40% Comrade bonus, so always max out the party if you can.
- Use the Manage Comrades screen to check who’s good at what (logging, mining, crafting, combat, trade, etc.).
The dispatch screen breaks your total reward into three multipliers – Conversion, Skills, and Comrade – so you can see exactly where your bonus is coming from. One thing worth knowing: dispatching comrades does not give them EXP; their skill caps rise with camp progress, not from being sent out.
Mission Priority (What to Run First)
Here’s the priority order that gave me the smoothest progression:
- #1 – Construction/Expansion missions
Anything that builds (ranch, farm upgrades, new facilities). Keep these running until they’re done. - #2 – Money missions
Missions that return trade goods and coin. Use these to fund both church donations and camp upgrades. - #3 – Food missions
Especially early on, to cover camp needs and stockpile for Cliff’s recipes and ranch feeding. - #4 – Base resource missions
Stone and lumber when you’re pushing a major camp level.
The huge advantage: most missions can be re-run on a loop as long as you have the required input resources. Once I unlocked a good silver-yield mission, I left it cycling while I went off to do main story.
Boosting Dispatch with Church Donations
One detail the game barely explains: you can permanently boost dispatch payouts by donating at a region’s church. Interact with the donation box inside a church and donate Camp Funds – this builds a buff called Conversion, which multiplies the rewards of dispatch missions in that region.
- Roughly every 10,000 Camp Funds donated nets about a 10–15% bump to your Conversion rate.
- It stacks all the way up to a +200% hard cap – effectively doubling dispatch rewards in that region.
- It is region-specific: the buff only applies to missions inside that region, so donate at a church in each region whose missions you farm heavily.
My pattern:
- Farm a bit of money using dispatch or black market trades.
- Dump a solid chunk into the donation box at a church in the region.
- Then focus dispatch missions in that region for a while to ride the higher Conversion multiplier.
This snowballs surprisingly quickly if you keep Ross busy.
Step 4 – Use the Supply Box as Your New Storage Hub
The Supply Box is where almost all your indirect loot ends up:
- Rewards from dispatch missions.
- Loot from auto-resolved or blocked missions.
- Items from bodies that despawned before you looted them.
After a recent update, the Supply Box also gained a crucial feature: personal item storage. This effectively turns it into your camp chest.
🎮 Get This Game at the Best Price
Compare prices instantly and save up to 80% on Steam keys with Kinguin — trusted by 15+ million gamers worldwide.
*Affiliate link — supports our independent coverage at no extra cost to you
How I use it now:
- Store excess crafting mats (ore, hides, bones) I don’t need immediately.
- Dump old weapons/armor I’m not ready to sell but don’t want in my main inventory.
- Keep a small stash of upgrade materials near the smithy so I can refine gear without town trips.
Make a habit of checking the box every time you return to camp. I was shocked how often it was overflowing with trade items and food I didn’t even realize I’d earned.
FinalBoss // Gear
Level up your setup
01Top-rated gaming headsetson Amazon→02High-refresh gaming monitorson Amazon→03Gaming chairson Amazon→04Discounted game keyson Kinguin→
Affiliate links · As an Amazon Associate, FinalBoss earns from qualifying purchases.
Want to Level Up Your Gaming?
Get access to exclusive strategies, hidden tips, and pro-level insights that we don't share publicly.
Ultimate Guide Strategy Guide + Weekly Pro Tips
Step 5 – Link Farm and Ranch into a Self-Sustaining Loop
The camp really comes alive once you unlock the farm and ranch, which both come online with the Level 2 → 3 camp expansion (Kamu runs the farm plot, Ben handles the ranch). I initially treated them as “bonus flavor,” but they’re actually a powerful way to stabilize food and material income.
Running the Farm
At the farm plot you can plant seeds to grow crops and trees:
- Get seeds by using fruit in your inventory (
Inspect → Extract Seed) or buying from town provision vendors. - To expand seed selection, raise trust with different town provisions merchants.
- Interact with the farm storage, grab seeds, and plant them in the designated plots.
Crops and trees grow over a few in-game days. Trees don’t last forever – once they’re fully grown and harvested, you’ll usually need to chop them down and replant.
What I focus on:
- Barley/Wheat – dual use: cooking and ranch animal feed.
- Any fruit/veg I commonly need for Cliff’s recipes.
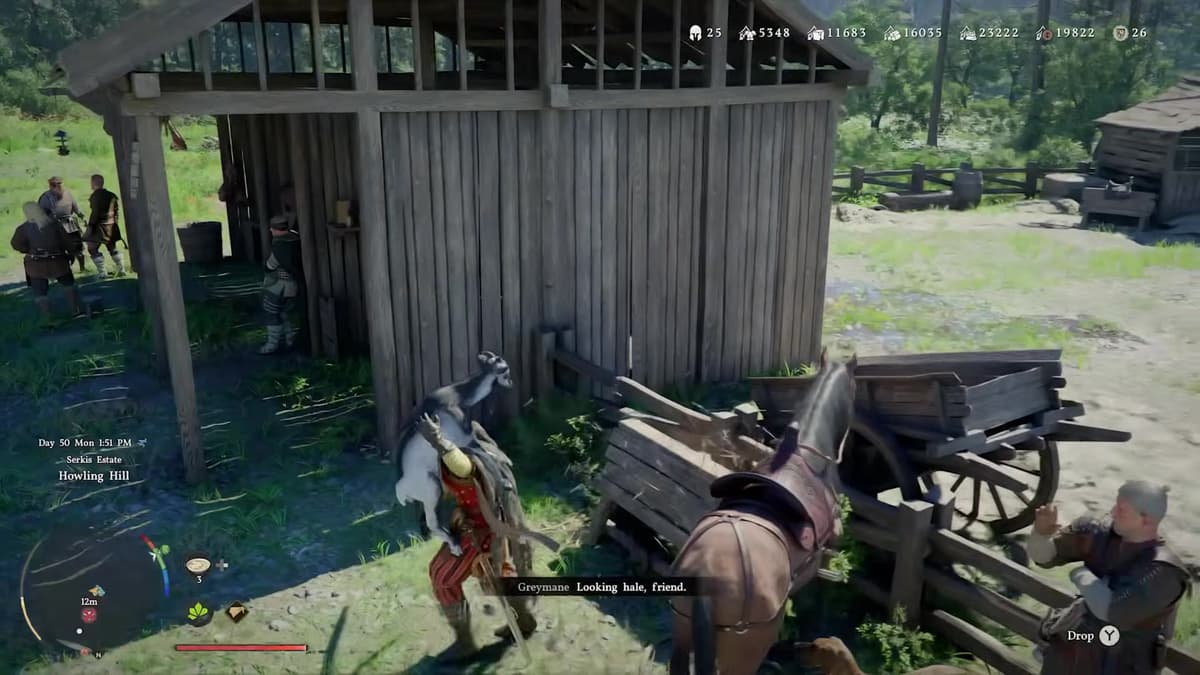
Building and Stocking the Ranch
The ranch is your passive animal product generator. To use it effectively:
- Find animals in the wild (chickens, goats, etc.).
- Carry them or transport them on horseback back to camp.
- Walk them into the ranch area to trigger a cutscene and register them.
Once registered and placed, animals gradually produce resources:
- Chickens – eggs, feathers.
- Goats – milk, horns.
- Other animals add their own meat/hide/bone variants.
All of these auto-deposit into your camp storage over time, which is incredibly convenient.
Feeding, Breeding, and Butchering
The ranch only works if animals are fed:
- Use the feed bin to deposit food (grains like barley/wheat work great).
- Important: once you put food into the bin, you cannot take it back out, so don’t dump your last rare ingredient.
- As long as there’s food, livestock quantity increases and production continues.
If you have multiple animals of the same type, they can eventually produce offspring, scaling up your production without you capturing more. It takes a while, but it’s worth the patience.
You can also send animals to be butchered to generate a burst of raw meat and materials. I only do this when I’ve got a surplus, since it cuts into long-term passive gains.
When the farm grows the feed and the ranch turns it into eggs, milk, meat, and materials, you suddenly don’t need to rely on random hunting or vendors for basic cooking and crafting ingredients.
Step 6 – Vendors, Smithy, Cooking, and Trade Agreements
As you push Grounds of the Sunrise quests and camp levels, more vendors move into camp. These are the key ones to prioritize.
Ronnie the Cook
Ronnie sells ready-made food and basic ingredients. The big tip here: whenever he has water, barley, and meat, I buy them out. Those three are the core of a simple clear soup-style recipe that heals a ton and is cheap to mass-produce for bosses and big fights.
Also, don’t forget you can often grab extra meat hanging right behind him – it’s your camp, so help yourself.
Smithy and Crafting Stations
After enough Grounds of the Sunrise progress, you’ll unlock a blacksmith and crafting station inside camp. This is where the earlier setup pays off:
- Dispatch and ranch provide ores, hides, bones, and Abyss materials.
- The supply box stores them right next to the smithy.
- You refine, upgrade, and craft gear without running back to a major city.
This is where your camp really becomes a functional mid-game hub rather than just a story location.
Expanding Vendors with Trade Agreements
City vendors matter too. When you build enough trust with them (usually up to 100), they sometimes sell a trade agreement item.
- Buy the agreement from the city vendor.
- Open your inventory and press the confirm button (e.g. X / A) on the item to actually activate it.
- Once activated, your camp vendors start selling items from that city’s stock.
I missed the “press to activate” step and wondered why nothing changed. Don’t repeat that mistake.
Brice and Wagon Logistics
When you unlock Brice and a wagon, you can load packaged goods and park the wagon near traders. This saves a ton of trips when you’re moving bulk trade goods.
I use Brice mainly when I’ve intentionally run a big dispatch cycle focused on trade goods and want to convert a whole stack of packaged items into Camp Funds in one run.
Step 7 – Fast Travel and House Quality-of-Life
Two final quality-of-life pieces round out the camp experience.
- Camp Fast Travel – There’s an Abyss-based fast travel point you can unlock near the back of camp. Story progress and a short puzzle chain in a quarry get you a transporter you can place near camp. Once it’s set up, you can warp back and forth far more easily.
- House on the Opposite Hill – With enough camp upgrades, a bridge appears to a house on the facing hill. Inside, you can rest and decorate, and with farm progression you unlock extra cosmetic options like hair dye stations.
These don’t directly affect resources, but they make the camp feel like a true base of operations you naturally want to return to.
A Simple Camp Routine That Keeps Everything Running
To tie everything together, here’s the camp loop I run every time I fast travel back. It takes about 5–10 real minutes and keeps my camp snowballing:
- 1. Empty the Supply Box
Grab all dispatch rewards, ranch outputs, and misc loot into your inventory. Move surplus straight into personal storage slots in the box. - 2. Check Camp Upgrades
Inspect the camp on the map and look at the current Expansion mission. If you’re close on materials, top up the stash via Carl. - 3. Set or Refresh Dispatch Missions with Ross
Ensure construction missions are running, then queue money and food missions on a loop. - 4. Harvest and Replant the Farm
Pick mature crops, extract seeds from any new fruits, and replant high-value staples like barley and wheat. - 5. Feed and Manage the Ranch
Check that the feed bin isn’t empty; add cheap grains from the farm. Collect any animal products and decide if you want to butcher surplus animals. - 6. Visit Vendors & Smithy
Buy Ronnie’s key ingredients, refine or upgrade gear at the smithy using stored materials, and sell off trade goods (unpackaged to black market, packaged via wagon when needed). - 7. Rest / Save at the House (Optional)
Use the house to rest, manage cosmetics, and reset your mental “loop” before heading back out.
Once I started doing this routine every time I came back to camp, I stopped worrying about food, basic mats, and even mid-tier upgrade materials. The camp simply kept spitting them out while I focused on main quests and exploration.