
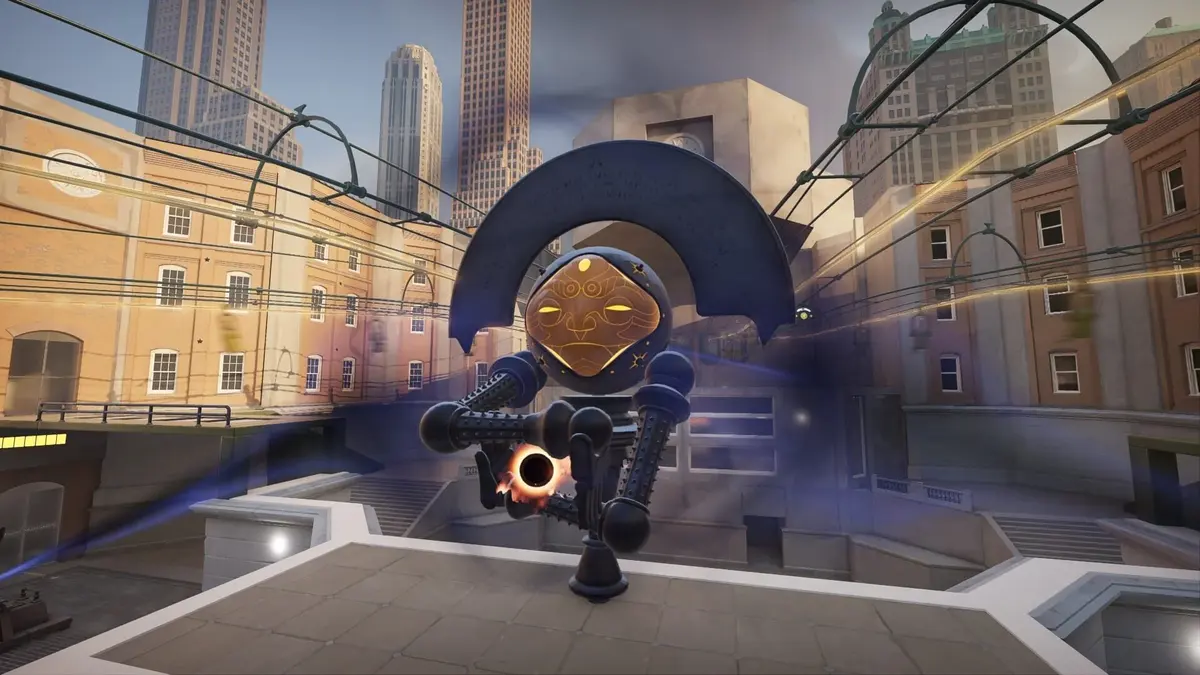
Deadlock’s community vote turned a year of Rat King jokes into a playable frontline Brawler on October 2, 2026. Arriving during the City Never Sleeps hero rollout, he brings a kit built around prolonged, close-range engagements. The useful starting point is to buy enough weapon pressure and durability to stay near a rat-covered target, then use his barrier when that target retaliates.
The main trap is committing before the enemy spends their movement. Ground and air dashes can remove attached rats, cutting short the repeated bites that make Rat King’s gun increasingly dangerous. Scrap Grenade helps force that movement; an upgraded Rat Swarm gives you another charge to punish it.
Table of Contents (7)
Rat Swarm creates the window for your weapon damage
Rat Swarm is the center of Rat King’s combat loop. It sends rodents forward up to 50 meters, attaching to enemies they pass. Up to five rats can latch onto one character, and each bites once per second, dealing Spirit Damage and applying a stacking 1% Bullet Resist reduction.
That split matters when choosing your damage investments. The rats contribute Spirit Damage, but their resistance debuff rewards follow-up gunfire from Rat King and weapon-focused teammates. In a committed trade, concentrating several rats on the enemy you can actually shoot produces a clearer payoff than lightly tagging enemies who can immediately leave.
Rat Swarm’s upgrades add a second charge, increase the swarm’s size, extend the debuff duration from four to eight seconds, and double each nibble’s effectiveness. Charge availability is particularly useful against mobile opponents: the first cast can force a dash, leaving another swarm available after they have used their escape.
A longer debuff duration does not protect attached rats from a dash. Against an opponent with movement available, hold the swarm until they commit or preserve a second charge. Spending both charges before their escape gives them an efficient answer to your main pressure tool.
Rat King’s rifle, Sovereign’s Decree, is rapid-fire with a 24-round magazine. It fires paired shots: one lands where you aim, while the other lands nearby. Damage falloff begins at 20 meters and reaches its limit at 50 meters. Although rats can travel 50 meters, your strongest personal follow-up comes much closer; a distant swarm hit is often better treated as pressure or an opening for an ally than permission to chase across open ground.
Scrap Grenade makes enemies move on your terms
Scrap Grenade bounces and explodes multiple times, dealing Bullet Damage and slowing enemies. Its value comes from occupying the route an opponent wants to use. Corridors, jungle entrances and corners give its repeated explosions more opportunities to interfere with movement than a throw into an open lane.
Use it to open a trade before exposing yourself to sustained fire. Placing the grenade along an enemy’s retreat can force them to move sideways, spend stamina or remain near the explosions. That creates a better moment for Rat Swarm and reduces the distance you must cover before firing effectively.
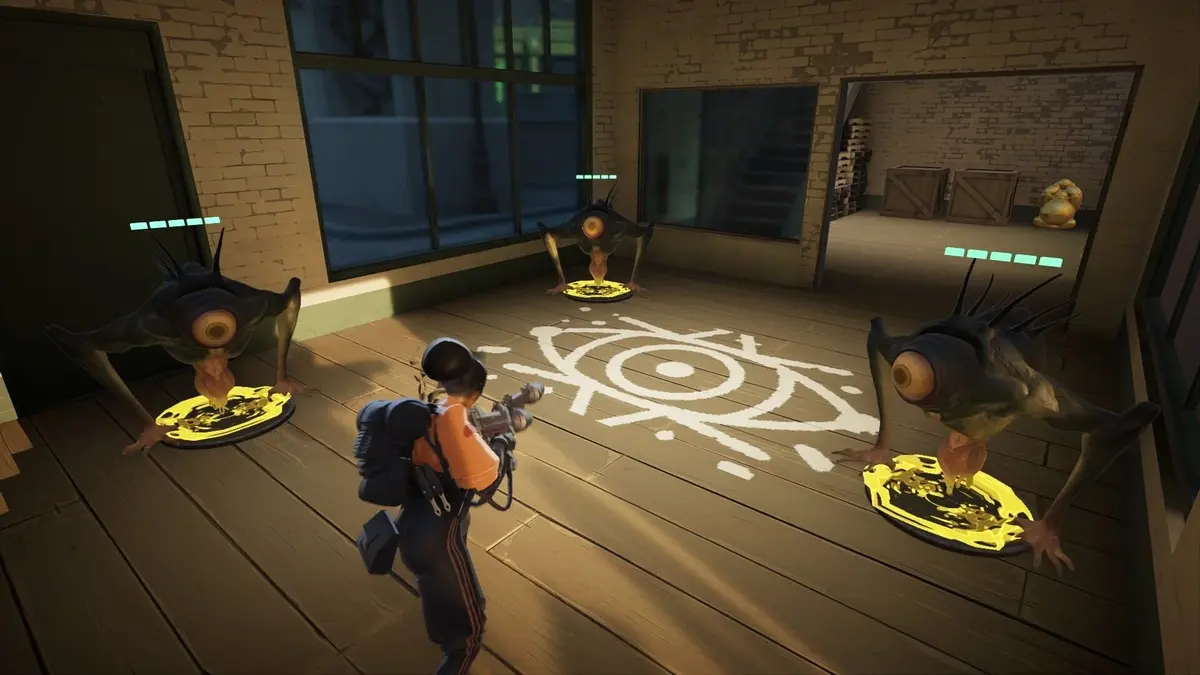
Players can melee the grenade to send it flying in a chosen direction, including opponents redirecting it away from themselves. An enemy already committed to shooting, pursuing an ally or moving through a narrow entrance has fewer convenient opportunities to deal with it. The same slow makes Scrap Grenade useful for peeling: put pressure on the pursuer’s route rather than chasing them away from the teammate you are protecting.
At maximum rank, Scrap Grenade gains more damage, a shorter cooldown and a larger final explosion. Those upgrades favor fights where opponents must keep contesting the same space. When enemies consistently dash out of your pressure instead, Rat Swarm’s additional charge addresses that problem more directly.
Royal Pestments should cover the counterattack
Royal Pestments supplies a barrier equal to 15% of maximum health for six seconds. Incoming bullet damage has a 15% chance to be returned to the attacker. Fully upgraded, the barrier lasts 10 seconds, scales to 25% of maximum health, raises the return chance to 30% and caps any single incoming damage instance at 250.
The strongest timing is around the enemy’s committed response. If the opponent is still backing away from your grenade, activating Pestments can spend valuable barrier time without absorbing much damage. Waiting until you have already taken the full retaliation loses the protection that would have let you maintain gunfire. Watch for the point where they turn, hold their firing position or commit their damaging abilities.
Maximum health has a direct interaction with this ability. Every additional 100 maximum health adds 15 barrier at base rank or 25 when fully upgraded, alongside the extra health itself. That makes health purchases especially useful when your role requires entering first and remaining exposed.
Rat King’s Bullet and Spirit Lifesteal operate at 75% effectiveness. Lifesteal can support a long trade, but buying heavily into it leaves you dependent on uninterrupted damage for reduced returns. Health, barrier timing and access to a target deserve attention before trying to sustain entirely through healing. His 800 base health also leaves poorly protected early entries punishable.
Rule, Rattania! has a support window before its slam
Rule, Rattania! opens with a charge. While it is active, allies within 24 meters gain movement speed, immunity to slows and 20% incoming damage reduction. That gives Rat King a way to advance with teammates, help them cross a contested entrance or support a retreat against slowing effects.
A second activation slams the flag into the ground, dealing 200 Bullet Damage, knocking enemies up and applying a 40% movement-speed slow. The impact also bursts a sewer pipe, releasing rats over the next 12 seconds to apply the Rat Swarm debuff nearby. The slam therefore creates continued pressure around its location after the initial crowd control.
Immediate reactivation suits an urgent interrupt or a target that must be stopped now. Otherwise, let the charge’s protection help allies reach useful positions before spending the slam. Enemies who have committed to an objective or already dashed have fewer ways to avoid the impact and the rats that follow.

The fully upgraded ultimate adds movement speed, eight seconds to both the charge and planted-banner durations, and expands the radius to 32 meters. Damage reduction rises to 35%, while slam damage increases to 350. For a frontline Rat King, those upgrades improve how much of the team he can protect and how long they can contest the area — not merely the initial hit.
Early purchases: secure the firing window first
Rat King benefits from an early offensive component paired with a purchase that solves his lane’s survival or movement problem. Which comes first depends on whether you can already reach enemies and remain in range. His kit gives clear reasons to prioritize the following stats without committing to a rigid item script.
- Weapon damage when your swarm converts into gunfire. Rat Swarm reduces Bullet Resist, and Scrap Grenade also deals Bullet Damage. Magazine or reload support becomes useful when your firing window regularly outlasts Sovereign’s Decree’s 24-round magazine.
- Maximum health when you must absorb retaliation. It increases both your health pool and Royal Pestments’ barrier. Against ranged harassment, early durability helps you preserve enough health to take a deliberate trade later.
- Movement or stamina when reaching the target is the problem. Closing into effective rifle range and retaining an escape can be more valuable than increasing damage you cannot safely deliver.
- Cooldown reduction for repeated contests. More frequent grenades, swarms and barriers support pressure around entrances and objectives. It becomes more valuable when fights repeatedly give you another opportunity to cast.
- Selective lifesteal once sustained damage is reliable. Both lifesteal types suffer the 75% effectiveness modifier. Invest for trades where you can keep dealing damage rather than using healing purchases to compensate for being forced out of range.
A Spirit-leaning approach can strengthen Rat Swarm’s damage, but it still benefits from weapon follow-up and sufficient durability. Scrap Grenade deals Bullet Damage, so Spirit investment should be justified by your rat pressure rather than an assumption that every ability scales through the same damage type.
Choose upgrades around the lane problem and your team role
Rat Swarm is the natural offensive investment when enemies remain available for follow-up shots. Royal Pestments deserves earlier attention when taking damage prevents you from participating, while the ultimate becomes more important when teammates need you to lead coordinated fights. These situations call for different priorities:
| Situation | Ability emphasis | Early purchase emphasis | What it solves |
|---|---|---|---|
| Weapon-pressure lane | Rat Swarm charges and stronger debuff pressure | Weapon damage alongside enough health to withstand the response | Converts repeated bites into sustained rifle damage |
| Heavy ranged harassment | Earlier Royal Pestments investment | Health and defensive stats before excessive lifesteal | Preserves health for contesting lane and taking a committed trade |
| Mobile opponent | Rat Swarm’s second charge; Scrap Grenade to pressure escape routes | Movement or stamina alongside weapon pressure | Lets you reapply rats after a dash and stay close enough to capitalize |
| Teamfight frontline | Royal Pestments and Rule, Rattania! | Maximum health, defensive stats and cooldown reduction | Supports entry, barrier uptime and longer objective contests |
Longer Rat Swarm debuff duration is most valuable when you or an ally can keep exploiting it. Against an enemy who repeatedly removes the rats and escapes, solve charge availability and movement access first. Likewise, a stronger barrier has limited offensive payoff if you spend its duration too far away to threaten anyone.
Turn lane pressure into a useful midgame entry
Before a coordinated fight, decide whether your ultimate is providing the approach, protecting an objective contest or delivering the stopping power. That decision determines where you need teammates: close enough to receive the charge’s benefits, and positioned to exploit the slam rather than still catching up after it lands.
Corridors and jungle entrances suit the whole kit. Scrap Grenade occupies the approach, Rat Swarm punishes enemies who remain, Royal Pestments covers their return fire, and the ultimate’s sewer rats keep pressure around the contested area. Fighting there also reduces the amount of open ground you must cross to reach useful rifle range.
Keep your early build focused on the missing part of that engagement. Buy weapon pressure when targets stay available, health when retaliation forces you out, and movement when you cannot close the gap. Save a swarm charge for dash escapes when possible, activate Pestments for the committed response, and use the ultimate where allies can benefit from its protection. That gives Rat King a dependable frontline purpose before chasing a higher-damage build.
FinalBoss // Gear
Level up your setup
01Top-rated gaming headsetson Amazon→02High-refresh gaming monitorson Amazon→03Gaming chairson Amazon→04Discounted game keyson Kinguin→Affiliate links · As an Amazon Associate, FinalBoss earns from qualifying purchases.
Want to Level Up Your Gaming?
Get access to exclusive strategies, hidden tips, and pro-level insights that we don't share publicly.
Ultimate Guide Strategy Guide + Weekly Pro Tips