Disciples: Domination – Chapter 3 Plains & Maw Walkthrough
Game intel
Disciples: Domination
Rule through the chaos! Fifteen years after Avyanna freed Nevendaar from the tyrannical grip of the gods, Disciples: Domination returns you to a realm hanging…
Chapter 3 Overview – Plains of Agthos & Maw of Ashes
After spending my first run circling the Maw of Ashes and missing key triggers, I realized Chapter 3 in Disciples: Domination is much smoother when treated as a clear sequence: reach the Tower of Jubilation, recruit Ejamar, break the obelisks, survive the Maw’s alternate realm, and then set up the Melding of Steel against Thur’gaal.
This guide walks through that exact order, focusing on puzzles, companion recruitment, obelisk objectives, and the choices that shape your position going into the war. It’s written from the PC (Steam) version.
What you’ll accomplish in this chapter
Step →Secure the Plains of Agthos and clear the Tower of Jubilation.Step →Solve the four-plate rune puzzle (for an optional chest).Step →Recruit Ejamar so you can open gateways and tackle the Maw.Step →Destroy the obelisks keeping the death cloud over the Maw of Ashes.Step →Navigate the Maw’s alternate realm, meet the Witness, and confront Freya’s image.Step →Free Illmeren and unlock Avyanna’s Cosmic Blast ultimate.Step →Make key war council choices that affect bonuses before the Melding of Steel.Step →Win the back-to-back battles against Thur’gaal.
Recommended prep
- Difficulty: Medium, with a hard spike during the Melding of Steel.
- Time estimate: Around 45-60 minutes if you explore lightly; longer if you chase every fight and treasure.
- Party tips: Keep a solid frontline with at least one dedicated healer and a couple of high-damage units. Carry several spare units for the war sequence at the end.
- Level guidance: Aim to be comfortably prepared before the level 25 range by the time you approach the Melding of Steel. The earlier sections are more forgiving.
Don’t make my early mistake of rushing the Thur’gaal fight under-leveled with no reserve troops; the back-to-back encounters will chew through a thin roster.
Step 1 – Plains of Agthos & Tower of Jubilation
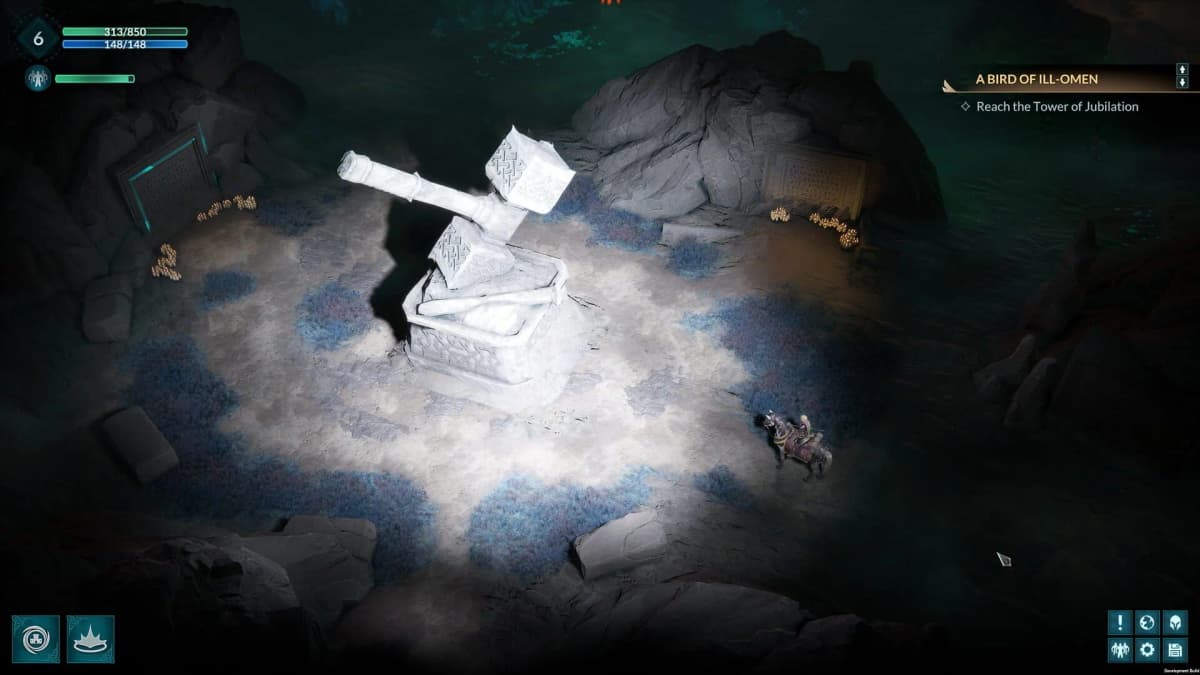
After Ormeriel’s death, Avyanna receives Illmeren’s letter and travels to the Plains of Agthos. Your first major goal is the Tower of Jubilation in the southwest of the map.
Step →Reach the Tower of Jubilation.Action →From your entry point in the Plains of Agthos, follow the main marker toward the southwest until you see the tower and its demon guards.Result →You trigger a confrontation with Legion demons acting under Thur’gaal’s orders.Step →Deal with the tower guards.Action →Talk to the demons at the entrance; they will attack. Win the battle to proceed inside.Result →The entrance opens and the tower interior becomes accessible.Step →Unlock the staircase to the upper floors.Action →Inside, move through the side hallway (left or right – they loop) to reach a lever on the far side. Pull it to unlock the gate blocking the main staircase.Result →The gate in front of the stairs opens. Return to the central hall and go up.Step →Explore the second floor and note the puzzle room.Action →On the second floor you’ll find a healing fountain. From there, head left to reach another set of stairs leading up and a four-plate rune puzzle (more on that below).Result →You unlock a convenient heal point and discover an optional puzzle area.
Four-plate rune puzzle solution (optional chest)
This small puzzle is easy to overthink. The four plates share the same rune and toggle one another when stepped on.
Step →Reset all plates so they are inactive.Step →Step on the second plate from the left first.Result →This toggles its state and affects the others.Step →Then step on the first plate on the left.Result →All four plates end up activated, opening the nearby gate and revealing a treasure chest.
You do not need this puzzle to continue the story; the stairs up to the third floor are right next to it. I like to grab the chest while I’m here, but you can skip it if you’re rushing.
Meet Sugdran and learn Illmeren’s fate
Step →Reach the third floor.Action →Take the stairs near the puzzle to the upper level.Result →You find a cell where Illmeren should be, but instead Sugdran is imprisoned.Step →Free Sugdran.Action →From the cell, go further left to find a lever. Pull it to open the cell and then speak with Sugdran.Result →Sugdran explains Illmeren was taken to the Maw of Ashes in the center of the region, setting your next main objective.
Step 2 – Find Ejamar in Elma’ar & Skyless Grove
When you approach the Maw of Ashes in the center of the Plains, you’re blocked by a deadly cloud. This confused me on my first run until I realized this step is gated behind Ejamar’s recruitment.
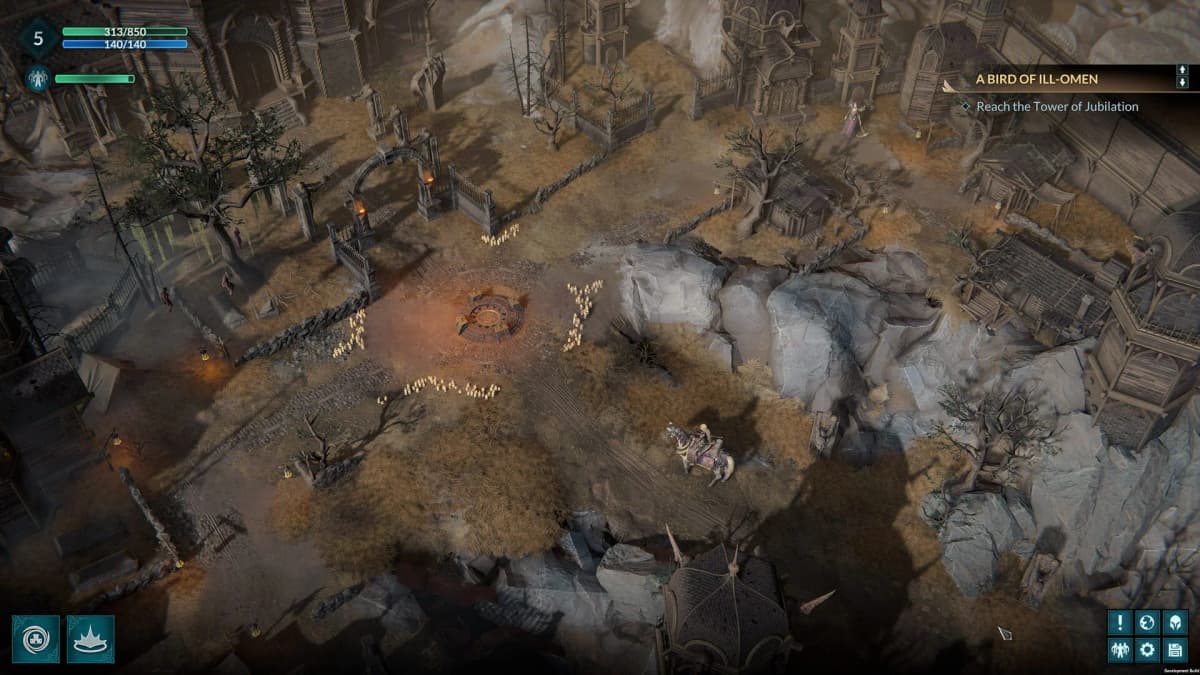
Step →Investigate the Maw of Ashes.Action →Move toward the central landmass connected by three bridges. A cloud of death prevents entry, and you meet Aldryn, an Undead who hints that Ejamar can help disperse it.Result →Your immediate goal shifts to finding Ejamar.Step →Travel to Elma’ar and the Skyless Grove.Action →Head to Elma’ar, where you’re greeted by Pyrmelan. He explains the Skyless Grove’s peace has been disturbed and prompts you to investigate.Result →You gain access to the Skyless Grove area.Step →Enter the Grove and approach the locked door.Action →Inside Skyless Grove, move to the right. You’ll come to a door that seems locked but opens as you approach.Result →You enter a chamber with two gateways and a note saying only one leads to Ejamar.
Choosing the correct gateway to Ejamar
Step →Optional: Take the left gateway for treasure.Action →The left portal sends you to a side room with some loot and a level 24 encounter. You can safely retreat from this fight if it looks risky.Result →Extra rewards with no permanent downside if you back out of the battle.Step →Take the right gateway to reach Ejamar.Action →Use the right portal to arrive in Ejamar’s chamber. He’s hostile at first and brings his forces against you.Result →Defeat Ejamar’s group to earn his respect and recruit him as a companion.
Once recruited, Ejamar warns Avyanna about Malekith, the Thrice-Woken, and gains the ability to open gateways in dungeons and the open world. With him in your party, you can finally resolve the Maw of Ashes cloud.
Step 3 – Destroy the Obelisks Around the Maw of Ashes
Back in the Plains of Agthos, return to the Maw with Ejamar present. He suggests that the death cloud is sustained by several obelisks placed around the Maw.
Step →Destroy the first obelisk.Action →From the western entrance to the Maw of Ashes, move a short distance south. You’ll find the first obelisk guarded by Undead enemies.Result →Defeat the Undead and interact with the obelisk to destroy it.Step →Check the marked location of the second obelisk.Action →Travel east from the first obelisk to the marked spot for the second one. You discover there is no obelisk actually present there.Result →The game nudges you onward; this missing obelisk is a story beat, not a bug.Step →Destroy the third obelisk.Action →Continue around the Maw’s perimeter to reach the third obelisk, again guarded by enemies. Clear them out and shatter the structure.Result →With the remaining obelisks destroyed, the death cloud over the Maw of Ashes disperses, allowing safe entry.
This is the point where I finally stopped running circles outside the Maw. Once the cloud is gone, head straight in.
🎮 Get This Game at the Best Price
Compare prices instantly and save up to 80% on Steam keys with Kinguin — trusted by 15+ million gamers worldwide.
*Affiliate link — supports our independent coverage at no extra cost to you
Step 4 – Enter the Maw & First Freya Encounter
With the cloud dispelled, the Maw of Ashes opens into a dungeon crawl and a series of important story confrontations.
Step →Enter the Maw of Ashes.Action →Cross one of the bridges into the central area now free of the death cloud.Result →You meet a group from the Mountain Clan, including Freya.Step →Survive Freya’s first attack.Action →Freya calls Avyanna the Endbringer and references the Witness before attacking your party. Win the battle.Result →Freya’s group retreats, opening the path deeper into the Maw.Step →Reach the broken bridge.Action →Follow the linear dungeon path until you reach the first healing fountain. From there, continue straight ahead until you arrive at a broken bridge that blocks progress.Result →Sugdran offers to repair the bridge, warning that strange things may happen.
As soon as Sugdran starts hammering, the game shifts gears into an alternate realm sequence that can be disorienting without a clear route.
FinalBoss // Gear
Level up your setup
01Top-rated gaming headsetson Amazon→02High-refresh gaming monitorson Amazon→03Gaming chairson Amazon→04Discounted game keyson Kinguin→Affiliate links · As an Amazon Associate, FinalBoss earns from qualifying purchases.
Step 5 – Alternate Realm: Portals, Witness & Freya’s Image
Step →Move forward to Galthiel and Ormeriel.Action →In the alternate world, advance along the path. You’ll encounter Galthiel and Ormeriel standing before a portal.Result →A battle begins; although they appear in the story, they do not personally participate in the fight.Step →Win the battle and use the portal behind them.Action →After the fight, interact with the portal they were guarding.Result →You are transported to the next platform.Step →Meet the Witness.Action →On the next platform, approach and talk to the Witness.Result →After the conversation, another portal opens to continue your path.Step →Confront Thur’gaal and Malekith.Action →Take the new portal to reach a platform where Thur’gaal and Malekith are speaking. Engage in the battle that follows.Result →Defeat their forces to unlock a portal leading to a platform with three portals.Step →Choose the correct portal to Freya’s throne room.Action →On the three-portal platform, take the middle portal.Result →You arrive in a throne room where you must fight an image of Freya.Step →Defeat Freya’s image and use the throne.Action →Win the battle, then interact with the throne itself.Result →You are returned to the Maw of Ashes in front of the now-repaired bridge, with Sugdran present.
This whole sequence is more straightforward than it looks: always move forward, take the only available portal until you see three, then pick the middle one. That’s the key detail that saves a lot of wandering.
Want to Level Up Your Gaming?
Get access to exclusive strategies, hidden tips, and pro-level insights that we don't share publicly.
Ultimate Guide Strategy Guide + Weekly Pro Tips
Step 6 – Free Illmeren & Unlock Cosmic Blast
Step →Cross the repaired bridge.Action →Back in the Maw, talk briefly to Sugdran, then head over the now-fixed bridge.Result →You encounter Freya again, this time holding Illmeren captive.Step →Defeat Freya and choose your response.Action →Win the battle against Freya. Afterward, she’s ready to die by your hand. You can choose harsher or more understanding dialogue; taking a more empathetic path, with Avyanna trying to explain that Freya believed she was doing the right thing, leads to an appearance by the Witness and preserves the storyline while still freeing Illmeren.Result →Illmeren survives and you gain more context via the Witness’s brief appearance.Step →Explore deeper and inspect the Gate of Thorgoc.Action →At Illmeren’s request, go deeper into the dungeon until you find the Gate of Thorgoc, which leads toward the Source but has its far end destroyed.Result →Examining the gate reveals it cannot be used right now.Step →Leave the Maw of Ashes.Action →Exit the dungeon back into the Plains.Result →Avyanna unlocks her Cosmic Blast Ultimate ability. Outside, an envoy sent by Thur’gaal appears to summon you to the coming Melding of Steel. After the encounter, Illmeren departs to seek out the spies who betrayed her.
Step 7 – War Council Choices Before the Melding of Steel
Before the war, return to your throne room in Yllian. You’ll answer several strategic questions that influence the bonuses you receive going into the Melding of Steel. The following choices provided a balanced set of benefits across factions in my run.
Step →Decide how to aid war-torn civilians.Action →When asked what to do for those suffering from the war, choose to send aid that doubles as a cover for intelligence gathering (spies hidden within emergency relief efforts).Result →You support civilians while strengthening your spy network.Step →Set your stance toward Undead under Malekith.Action →When discussing the gathered Undead, select the option that welcomes any Undead warriors who wish to oppose Malekith.Result →You position yourself as a rallying point for those Undead who seek Malekith’s downfall.Step →Address your contracts with the Legions.Action →Accept that the terms of your contracts will be honored, to maintain respect from the Legion forces.Result →You bolster your standing with the Legions by proving you keep your word.Step →Frame Avyanna’s legend to the Legions.Action →Choose the answer that reminds the Legions how the Liberator became the Liberator, emphasizing Avyanna’s strength and past victories.Result →You reinforce Avyanna’s mythos and authority, gaining a solid bonus spread for your forces.
These choices lean into Avyanna as a pragmatic but principled leader, which fits well with the mix of allies you’re juggling at this stage.
Step 8 – The Melding of Steel: Defeating Thur’gaal
The Melding of Steel is a demanding, multi-battle sequence against Thur’gaal’s forces. Under-preparing here is the fastest way to stall your progress in Chapter 3.
- Minimum level: Aim for at least level 25 on your key units.
- Roster: Bring several spare units; you can swap them in after the first fight if you suffer losses.
- Healing: Ensure you have reliable healing and sturdy frontliners to absorb sustained damage.
Battle 1 – Thur’gaal’s forces
Step →Initiate the Melding of Steel.Action →When ready, return to the Plains of Agthos and talk to Thur’gaal to start the conflict.Result →The first large battle begins against his assembled forces.Step →Survive the opening clash.Action →Focus on eliminating high-damage enemies first while keeping your healers protected behind tough units. Play conservatively; this is only the first fight.Result →Once you win, you’re allowed to edit your party before the second battle. Replace fallen or weakened units with spares.
Battle 2 – Thur’gaal himself
Step →Prepare for Thur’gaal’s arrival.Action →In the party management screen, bring your healthiest heavy hitters and any units that can quickly burst down single targets.Result →You’re set up to end the fight before Thur’gaal’s damage overwhelms your lines.Step →Focus-fire Thur’gaal.Action →In the second battle, Thur’gaal appears with relatively low HP but very strong attacks. Prioritize him: concentrate damage, use any debuffs or control tools you have, and keep healing up while you burn him down.Result →Defeating Thur’gaal ends the battle and the Melding of Steel sequence.Step →Decide Thur’gaal’s fate.Action →After the fight, Thur’gaal admits that Malekith will hunt him and asks Avyanna to end his misery. Choosing to free him of his burdens (killing him rather than letting him flee) provides narrative closure consistent with his request.Result →Thur’gaal dies on your terms, and the chapter moves toward its conclusion.
Once the dust settles, Thur’gaal tells Avyanna that she will end the world one day, adding another layer of tension to your role as Liberator.
Step 9 – Wrap-up & Next Destination
After the Melding of Steel, return to Yllian and speak with Melendrach. In the follow-up meeting with your companions, the group agrees that the next logical step is to seek Malekith directly in the land of the Undead to uncover what is truly happening.
At this point, Chapter 3 is effectively complete: you have rescued Illmeren, secured Ejamar’s allegiance, shattered the Maw’s obelisks, unlocked Avyanna’s Cosmic Blast, and survived your first full-scale war against Thur’gaal’s forces.
TL;DR – Chapter 3 Key Steps & Insights
Step →Clear the Tower of Jubilation: pull the side lever to open the main stairs, optionally solve the four-plate puzzle (second-from-left, then first-left) for a chest, and free Sugdran on the third floor.Step →Learn Illmeren is held in the Maw of Ashes and discover the death cloud blocking entry.Step →Visit Elma’ar and the Skyless Grove, test the left gateway for optional treasure (retreat from the level 24 fight if needed), then take the right gateway to defeat and recruit Ejamar.Step →Return with Ejamar and destroy the obelisks around the Maw (west-south first, then continue to the third). The missing second obelisk is intentional story setup.Step →Enter the Maw, defeat Freya’s group, follow the linear path to the broken bridge, and let Sugdran start repairs to trigger the alternate realm.Step →In the alternate realm, beat the battles at Galthiel/Ormeriel, speak with the Witness, defeat Thur’gaal and Malekith’s forces, then take the middle portal from the three-portal platform to reach Freya’s throne room and her image.Step →Defeat Freya’s image, interact with the throne, return to the repaired bridge, then cross it to face the real Freya and rescue Illmeren. Explore deeper to the Gate of Thorgoc and exit to gain Cosmic Blast.Step →Handle the war council in Yllian with pragmatic, alliance-friendly answers (relief-as-cover for spies, welcoming anti-Malekith Undead, honoring Legion contracts, emphasizing the Liberator’s legend).Step →For the Melding of Steel, be at least level 25, bring spare units, endure the first large battle, then reconfigure your party and focus-fire Thur’gaal in the second fight.Step →After choosing Thur’gaal’s fate, report back to Yllian and commit to traveling into the Undead lands to confront Malekith in the next chapter.
The breakthrough for me was treating Chapter 3 as a defined chain-Tower → Ejamar → Obelisks → Maw → Alternate Realm → Illmeren → War Council → Melding of Steel-rather than a loose set of objectives. Follow that order and the chapter flows cleanly, setting you up strongly for what comes next.