
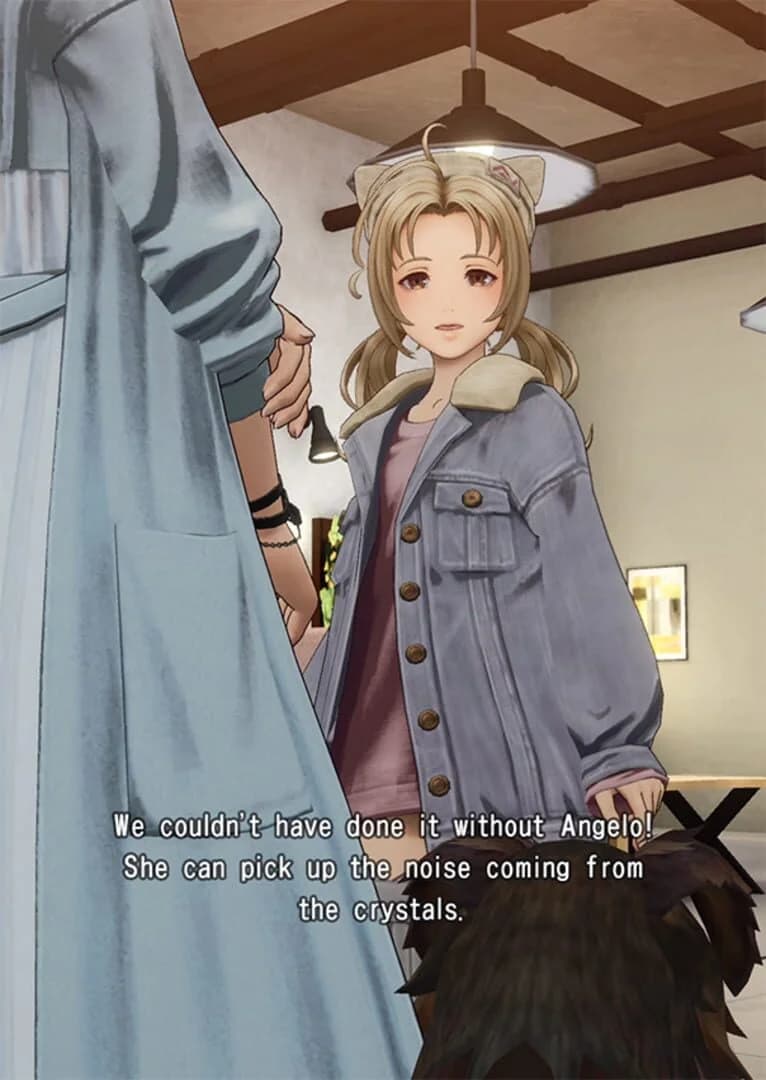
Released globally for iOS and Android on March 24, 2026, Dissidia Duellum Final Fantasy turns Bravery into the rhythm of every 3-vs-3 boss race. The fastest beginner path is simple: build Bravery through crystals and monster clears, reach the fixed 9,999 cap, activate Bravery Burst only when you can immediately pressure the boss, then rebuild from zero. Set up an account with at least two useful UR abilities, learn that loop in Challenges, and leave Ranked alone until the Burst input and crystal routes feel automatic.
The important historical difference within the Dissidia series is that Bravery here functions as a damage-phase charge rather than direct boss damage. A normal attack can look busy against the boss, yet its HP bar will not move until Bravery Burst is active. That one rule explains most rough early matches.
Table of Contents (18)
Understand the Boss Race Before Chasing Fights
Each match is a race between two teams of three. Both teams fight the same boss model, but each side has its own boss HP bar. Your Burst damage reduces only your team’s bar, and the first team to empty its track wins. That makes crystal control, safe Bravery farming, and well-timed boss damage more valuable than a random duel in the opening minute.
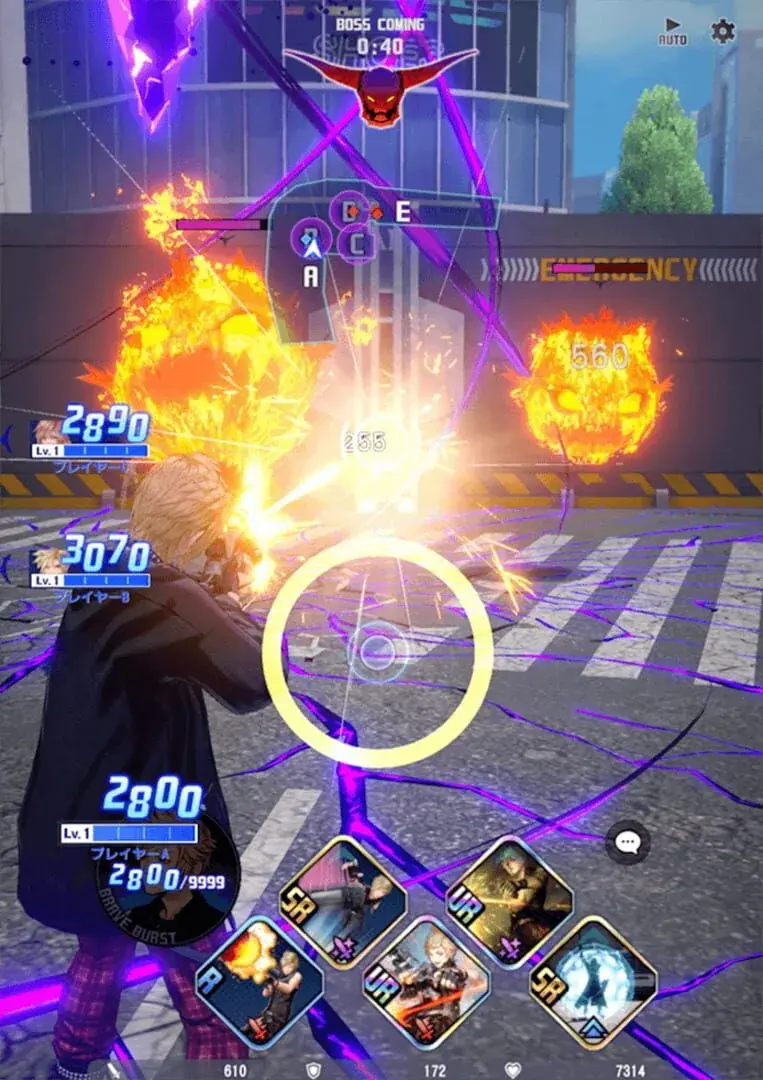
There are five floating crystals around an arena. Their activations create monster-clearing opportunities, and the team that contributes the most damage to the spawned monsters can purify the crystal for a large Bravery reward. Bravery also comes from defeating roaming monsters and rival players, although crystals and PvE clears are the safer foundation for a new account.
The opening-minute priority
- Move toward an active or soon-to-activate crystal rather than drifting away from objectives.
- Clear nearby monsters quickly to collect Bravery while remaining close enough to retreat from enemy pressure.
- Watch the Bravery gauge beside your character portrait instead of judging progress by how much visual damage you are dealing.
- Reach 9,999 before the first meaningful boss damage window whenever the map flow allows it.
- Only contest enemy players when the takedown is safe, the crystal is at stake, or the fight protects your own Bravery farmer.
Common trap: repeatedly hitting the boss before Burst. The boss’s normal-state barrier prevents those hits from reducing boss HP. Use that time for crystal routing, monster kills, positioning, debuffs, or getting into range for the next Burst instead.
The Bravery to 9,999 to Burst Loop
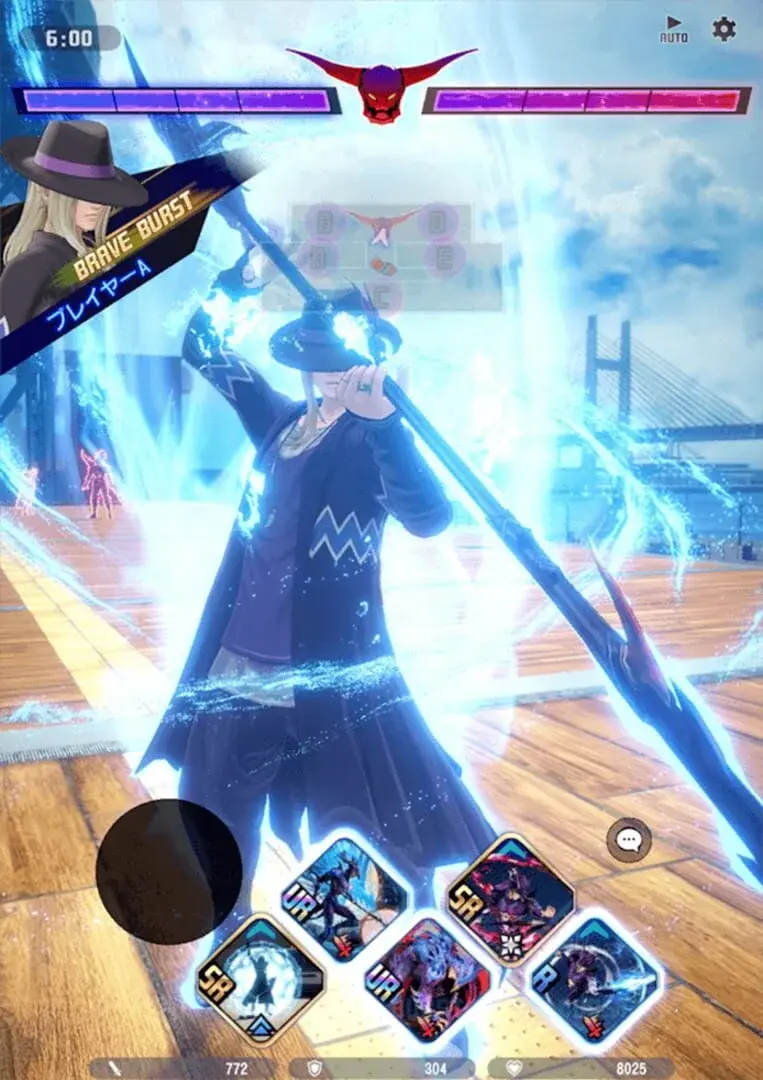
Every character follows the same broad two-phase economy. Phase one is Bravery acquisition. Phase two is Bravery Burst, the only state that breaks through the boss barrier and converts your attacks into real boss HP damage. Burst ends after its active abilities finish or when you use the designated finisher, and your Bravery then resets to 0.
- Farm Bravery through objectives. Focus on monster packs near crystals, crystal purification, and only the player fights you can win cleanly. Crystal rewards provide the biggest spikes, which is why route knowledge matters so much.
- Hit the 9,999 cap. At full Bravery, the portrait indicator changes and the Burst prompt becomes available. Bravery cannot build past 9,999, so your next decision is about timing rather than further farming.
- Set your boss position first. Move into a clear attack line and avoid activating beside a heavy boss area attack. Getting displaced, stunned, or forced to run wastes the most valuable part of Burst.
- Trigger Bravery Burst. Flick upward on the bottom-left character portrait when the prompt appears, or use the dedicated Burst button once it lights up.
- Chain abilities into the boss. Use your damage skills while the boss is in range. Keep the finisher for the end of a strong sequence, since using it immediately ends the Burst state and starts your rebuild.
The reset is the punishment for poor timing. A premature Burst, a Burst fired while facing the wrong way, or a Burst spent chasing an enemy player leaves you back at zero Bravery and far behind in the next crystal cycle. Treat 9,999 as a loaded damage phase, not an instant cast prompt.
When to activate Burst
For a first Burst, the cleanest pattern is to reach 9,999 through crystals and monster clears, hold it briefly while the boss appears or finishes a dangerous attack, then activate as the boss is reachable and your team can follow up. A coordinated Burst window creates an early HP lead because both teams are racing separate boss bars.
Delay the finisher when you still have safe, damaging abilities available. Burst remains active while those ability effects continue, giving you more boss damage than an immediate ender. Use the finisher when the boss is about to move away, a major attack is about to force a retreat, or your useful chain has already ended.
Targeting an opposing player during Burst can be powerful, especially if it secures a quick wipe and opens the boss for your team. It is a high-risk line for beginners because the boss race still decides the match. Spend early Bursts on boss HP unless removing that player directly protects a crystal or guarantees an uncontested damage window.
A simple drill for learning Burst timing
If you want the loop to click, practice it as a short sequence instead of a vague “play better” goal. In Challenges, build Bravery on weak enemies first, rotate through crystals until you cap at 9,999, then hold that full gauge for a clean boss opening instead of firing instantly. The lesson is not speed alone. It is speed plus patience.
Run that sequence until three things feel natural: you can notice the full-gauge prompt without staring at it, you can enter Burst with the boss already centered on screen, and you can finish a complete ability chain without panicking into an early finisher. That is the real beginner test in this game.
Use Controls That Support the Loop
Dissidia Duellum Final Fantasy uses landscape touchscreen controls. Move with the thumb pad, approach targets to trigger automatic regular attacks, and activate the abilities displayed at the bottom of the interface by swiping upward. Rapid taps inside the movement pad increase the speed and power of regular attacks, which helps when clearing monsters around a crystal.
Keep the boss centered before activating Burst. The game’s fast movement and large arenas make camera control a practical damage skill: a full Bravery gauge has little value if the boss falls off-screen or your first ability goes into empty ground. Use Challenges to practice turning the camera, moving into range, activating Burst, and landing a complete chain without needing to solve a live PvP situation at the same time.
Positioning matters just as much around crystals. Stay close enough to the active crystal and nearby enemies that you keep building Bravery, but not so deep that an enemy collapse traps you in place. Beginners often lose value by drifting too far during a chase, then arriving late to the next crystal cycle with no clean angle on either the monsters or the boss. A tighter route usually wins.
Three low-pressure drills worth repeating
- Crystal clear drill: rotate between active crystals and nearby monster packs without taking unnecessary duels. This teaches how to build Bravery quickly and safely.
- Camera check drill: before every Burst, pause for half a second and make sure the boss is on-screen and in range. That single habit removes a shocking number of wasted activations.
- Burst sync drill: if teammates are near the boss with full gauges or clear intent to engage, enter Burst with them instead of alone. Coordinated Burst windows hit harder than isolated ones.
Reroll Fast, Then Stop at a Useful Account
The initial draw window allows unlimited rerolls for the first ability and character draws until you accept the result and bind the account. Do this immediately after the opening tutorials and first gacha unlock, before committing progression resources to an account with mismatched abilities.
A practical stopping rule is two UR abilities that your intended main can use. Three UR abilities is an excellent result if it arrives quickly, but unlimited rerolls can become a time sink. A usable two-UR account lets you start learning crystals, Bravery timing, and boss positioning instead of repeatedly replaying the opening setup.
| Initial result | Recommended decision | Reason |
|---|---|---|
| Zero or one UR ability | Reroll | The account begins with too little flexibility for an ability-driven system. |
| Two UR abilities usable by your chosen character | Keep the account | This is the efficient baseline for beginning progression and learning the combat loop. |
| Three or more UR abilities with a coherent kit | Keep immediately | The extra early options help cover monster clearing, mobility, Burst damage, or survival. |
Check compatibility before accepting a roll. Ability draws can include skills shared by multiple characters, but some are restricted to specific heroes. A powerful UR ability that your main cannot equip does far less for a new account than a lower-complexity skill that fits the character you will actually play.
What a beginner reroll should prioritize
- Area damage: faster monster clears accelerate Bravery gain around crystals.
- Mobility: movement tools help reach active crystals, escape pressure, and stay on the boss during Burst.
- Burst-friendly damage: these abilities turn the 9,999 Bravery investment into a meaningful boss HP swing.
- Survival utility: barriers, self-healing, evasive tools, or defensive effects reduce the chance of dying with nearly full Bravery.
Start with one character and learn that kit before spreading resources across the roster. The opening selection includes Warrior of Light, Cloud Strife, Lightning, and Terra Branford, with classic and casual streetwear outfit choices. Pick the character whose movement and ability rhythm you can read cleanly, then build familiarity with that one HUD, range, and Burst chain.
Bartz offers a useful later comparison point for melee players: he is Wind-focused, and Goblin Punch charges forward into repeated attacks. That kind of direct engage pattern can clear close targets quickly, but it also demands careful positioning before Burst so the charge ends in boss range rather than beyond it.
Practice in Challenges Before Casual or Ranked
Challenges are the best place to build the habits that decide early matches. They can be played solo, award progression items such as Job Medals, and let you repeat crystal routes without immediately facing higher-powered opponents. The game remains online-only, but solo Challenges give you lower-pressure space to learn its systems.
| Mode | Best use | Beginner value |
|---|---|---|
| Tutorials and Help replays | Review the Bravery gauge, Burst activation, crystals, and role basics. | Use these whenever the HUD or input flow is unclear. |
| Challenges | Practice routes, camera control, boss telegraphs, and repeatable Burst chains. | Primary learning mode; solo play reduces pressure and earns Job Medals. |
| Casual Battles | Test your learned route against live players after basic consistency develops. | Use carefully; matchmaking can place you against accounts with higher power. |
| Ranked Battles | Apply team coordination, objective control, and Burst timing under competitive pressure. | Wait until the loop is reliable rather than entering to learn basic inputs. |
The Challenge routine that prepares you for Ranked
- Read the map’s five-crystal rhythm. Identify which crystal is active, where the nearby monsters are, and how you can rotate to the next objective without crossing an unsafe open area.
- Reach 9,999 without dying. This teaches the most important early-match discipline: gather value, retreat when pressured, and avoid turning a full gauge into a free enemy advantage.
- Hold full Bravery for a clean boss window. Practice waiting a moment instead of activating the instant the Burst prompt lights.
- Perform one complete Burst chain. Trigger Burst in range, use your reliable abilities, keep the finisher until the end, then retreat and begin the rebuild.
- Repeat with a second role. Learn at least one damage-focused or vanguard-style character for monster clearing and one support-oriented role for protecting crystal farmers and setting up Burst windows.
A reasonable readiness check is reaching 9,999 Bravery multiple times in a match, avoiding death before your first Burst, and consistently landing your Burst chain on the boss. Once those basics stop feeling random, Casual becomes useful for testing your route against real players. Ranked can wait until those same actions hold together under pressure.
Also make use of the Help tutorials more than once. The opening tutorial teaches the buttons, not the long-term rhythm, and later matches are harsher than that first onboarding pass suggests. Rewatching the Help screens after a few real games often clears up what felt messy the first time.
Fix the Mistakes That Cost Entire Damage Windows
Full Bravery, but no boss damage
Check the Burst prompt and activate it from the character portrait or lit button. At 9,999, you are ready for the damage state; you have not entered it automatically. Once Burst is active, move into boss range and use your damage chain before the state expires.
Burst ends before the strong part of the combo
The finisher ends Burst immediately. Hold it until your ongoing ability effects have produced their value, then use it when the boss is about to move or the safe attack window is closing. A shorter, reliable chain is better than an elaborate sequence that misses because of camera angle or boss movement.
You keep dying with 8,000 to 9,999 Bravery
Stop treating every enemy player as a mandatory fight. Route through crystals, clear monsters near teammates, watch boss telegraphs, and retreat before a dangerous area attack lands. Death near the cap is costly because it removes the Burst opportunity your entire opening route was building toward.
Your character feels weak despite a UR ability
Confirm that the ability is available to that hero and fits the job you need it to perform. A mobility skill or AoE tool can be more useful in the first week than a narrow damage option because it helps you reach crystals and build Bravery faster. The strongest-looking single ability does not replace a working route into Burst.
Half-Anniversary Draws Change the Reroll Calculation
The half-anniversary season begins after the August 25, 2026 maintenance and runs through September 28 at 8:59 PM PDT. From August 25 through September 14, players can perform one free 10 Ability Draw per day for 20 days. Limited-time abilities and character Styles are excluded from those free draws.
That event is a strong reason to finish the initial reroll process quickly rather than chase a perfect starting account indefinitely. Secure the two-UR baseline, bind the account, and use the daily free draws to widen your usable ability pool. The Web Shop also includes half-anniversary MogPay packs, a one-time 10 Draw Ticket offer, 500 free MogPay Points, and 200 free MogPay Points once per month during the season, but none of those replace learning the crystal-to-Burst cycle.
Live balance changes can alter individual abilities and roster priorities. The durable first-week investment remains the same: safe crystal pathing, fast Bravery generation, clean 9,999 activation, and controlled Burst chains. Those skills transfer across characters and remain useful even when a favored ability receives tuning.
Build the Habit, Then Enter Ranked
For the first week, judge progress by how often you complete the full loop rather than by your win rate: farm crystals and monsters, reach 9,999, wait for a safe boss window, Burst into a complete chain, and rebuild. Keep an account once it has two compatible UR abilities, use Challenges to remove input and camera mistakes, and enter Ranked only when dying before the first Burst has become the exception. In Dissidia Duellum Final Fantasy, that discipline creates more wins than chasing every fight on the map.
FinalBoss // Gear
Level up your setup
01Mobile gaming controllerson Amazon→02Top-rated gaming headsetson Amazon→038BitDo controllerson Amazon→
Affiliate links · As an Amazon Associate, FinalBoss earns from qualifying purchases.
Want to Level Up Your Gaming?
Get access to exclusive strategies, hidden tips, and pro-level insights that we don't share publicly.
Ultimate Guide Strategy Guide + Weekly Pro Tips