Everwind: How to Start Your First Flying Ship – Essential Early Tips
Why Your First Hours in Everwind Are So Rough
After spending my first 8-10 hours in Everwind wandering in circles, slowly sinking my ship with heavy blocks, and burning through all my fuel, I finally sat down and treated the early game like a checklist instead of a sandbox free-for-all. That’s when the game opened up.
This guide walks you through the exact early-game steps that made the biggest difference for me:
- Unlocking the Engineer Area Scan as your first skill
- Using the spyglass properly before flying anywhere
- Stripping the starter tower and island foundations for loot
- Building your ship mostly out of wood to keep it light
- Conserving fuel by idling the engine and planning trips
- Always carrying repair kits so tools and weapons don’t brick your run
Follow these in order and your first few sessions will be much smoother than mine were. Let’s go step by step.
Step 1 – Unlock Engineer Area Scan as Your First Skill
I tried dipping into all three skill trees at first “because RPG”, and it just slowed everything down. The breakthrough came when I beelined straight for Engineer → Area Scan on a new save.
Here’s what to do as soon as you get your first skill point:
- Open the skill menu when you level up.
- Go to the Engineer tree.
- Spend your first point on Area Scan.
Once it’s unlocked, you use it like this:
- Press left-click (with compass out) to cycle its mode until you see a blue-ish light.
- Hold right-click to fire off the scan.
The scan will highlight nearby points of interest, resources, and structures. On my first blind playthrough, I wasted so much time clearing empty islands or missing hidden entrances that were 20 meters away. With Area Scan, new islands go like this:
- Land → immediately scan.
- See what lights up – chests, dungeons, structures, ore clusters.
- Plan your path in seconds instead of wandering for 10–15 minutes.
Common mistakes to avoid:
- Forgetting to swap compass mode – if nothing’s lighting up, you’re probably in the wrong mode.
- Only scanning once – hit a scan when you land, and again after you move deeper into the island.
- Ignoring scan hits beneath you – a lot of loot hides in foundations and caves below the surface.
Once you get in the habit of scanning every new island, the game feels less like “guess where the fun is” and more like deliberate exploration.
Step 2 – Master the Spyglass Before You Fly Anywhere
The other early-game tool that completely changed how I played is the spyglass. I ignored it at first and just flew toward whatever looked cool. That burned a ton of fuel and time on already-cleared or low-value islands.
Here’s how to use the spyglass properly:
- Hold
Rto open the quick wheel. - Select the spyglass.
- Look toward a distant island and aim.
- Use its three zoom levels to get a closer look.
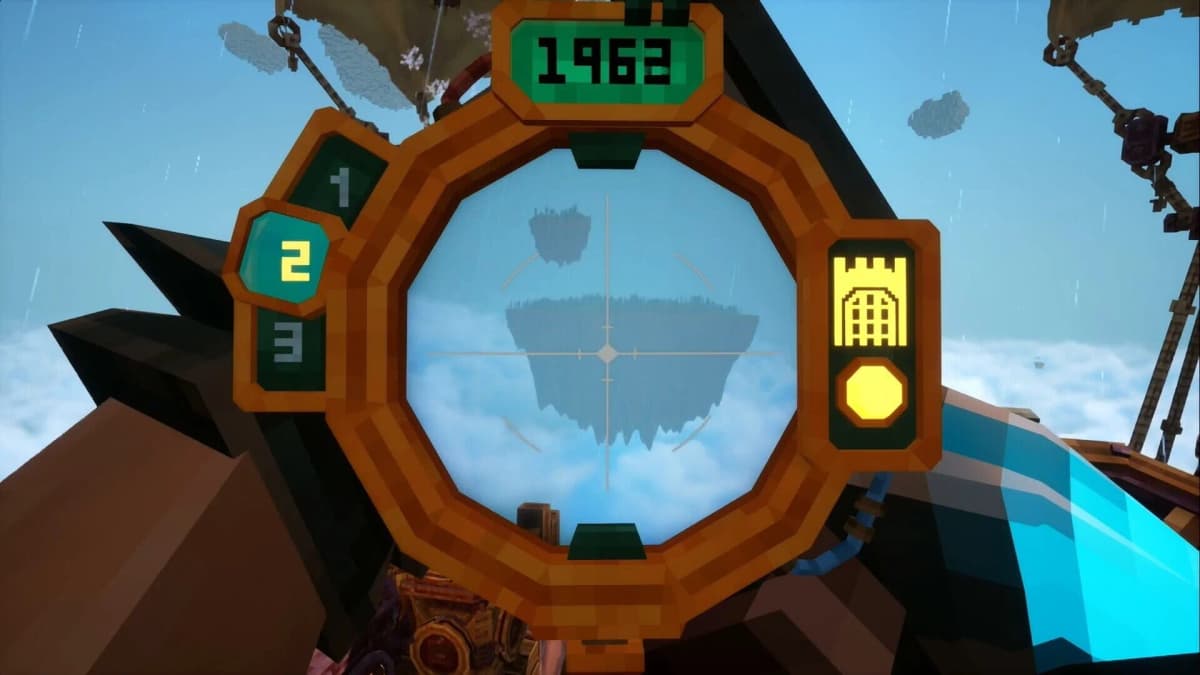
The key info the spyglass gives you:
- Whether you’ve already explored that island.
- Whether it has a point of interest – the right side of the spyglass lighting up yellow is your clue.
My current loop looks like this:
- Anchor near a cluster of islands.
- Do a 360° turn with the spyglass, mark which ones have POIs (yellow indicator).
- Prioritize those islands first, then backfill the boring ones if I need raw materials.
This single habit massively reduces wasted trips and lines up perfectly with Area Scan: spyglass to pick the island, then scan to zero in on loot once you land.
Step 3 – Strip the Starter Tower and Island Foundations
Don’t make my mistake of sprinting out of the spawn tower after grabbing the obvious chests. That starting area is basically a “tutorial loot piñata” if you’re thorough.
Here’s what I do now before I ever leave:
- Fully loot the tower interior – break anything that looks like it can be broken: crates, barrels, weak-looking walls.
- Find the hidden room in the tower:
- Either break the iron bars from inside, or
- Go outside, circle to the right, and smash the wooden barricade for an easier entrance.
- Once you’re done with the visible floors, check behind and under the structure for extra loot nodes.
Then, when you get to regular islands, don’t just clear the top surface and leave. The “outer ring” and foundations hide a lot:
- Walk the entire perimeter of the island from the outside.
- Mine obvious ore nodes under the lip of the island.
- Look for <strong洞 boarded="" cracks,="" entrances<="" openings,="" or="" strong=""> that lead to secret interiors.
More than once, I found a dungeon entrance on the underside of an island after completely missing it from the top. Pair this with Area Scan and you’ll leave way fewer resources behind.
🎮 Get This Game at the Best Price
Compare prices instantly and save up to 80% on Steam keys with Kinguin — trusted by 15+ million gamers worldwide.
*Affiliate link — supports our independent coverage at no extra cost to you
FinalBoss // Gear
Level up your setup
01Top-rated gaming headsetson Amazon→02High-refresh gaming monitorson Amazon→03Gaming chairson Amazon→04Discounted game keyson Kinguin→Affiliate links · As an Amazon Associate, FinalBoss earns from qualifying purchases.
Step 4 – Build Light with Wood and Smart Ship Layouts
My first ship looked awesome and handled like a brick. I spammed stone and heavy blocks because they felt “sturdy”, and suddenly my altitude and speed were terrible.

Early on, your ship’s weight limit is low. Treat it like a fragile airship, not a stone castle.
For the first few hours, follow these rules:
- Use wood for most structural pieces – it’s the lightest material you’ll reliably have.
- Build vertically more than horizontally – stack floors instead of spreading a giant flat deck.
- Only place core stations:
- Basic crafting (anvil, furnace, cooking pot when you get them).
- Storage chests.
- Bed/respawn if available.
- Delay decorative builds and big expansions until you’ve upgraded ship stats.
Whenever your ship starts feeling sluggish or won’t reach a slightly higher island you know should be in range, ask yourself:
- Did I add a bunch of heavy blocks lately?
- Can I swap stone or metal flooring for wood?
- Do I have redundant stations or chests I don’t really use?
Staying lightweight early helps you reach more islands with less fuel and less frustration, and you can always rebuild bigger once you upgrade your ship’s capacity.
Want to Level Up Your Gaming?
Get access to exclusive strategies, hidden tips, and pro-level insights that we don't share publicly.
Ultimate Guide Strategy Guide + Weekly Pro Tips
Step 5 – Save Fuel by Idling the Engine and Planning Flights
The first time I ran out of fuel mid-run, I realized how easy it is to accidentally burn your entire stash just by being careless. The engine doesn’t need to be on nearly as much as I assumed.
Fuel basics from my runs:
- When you put fuel in the engine, it shows a time limit for how long you can actively fly.
- Your ship can float without power once it’s already in a stable position.
To stretch your fuel:
- As soon as you reach an island and are safely parked, turn the engine off.
- When hovering between islands and not actively climbing or maneuvering, idle the engine and just float.
- Use the spyglass first before committing to a long trip, so you don’t waste fuel on already-cleared or low-value islands.
I’ve lost count of how many times I walked away from my PC, came back, and realized my engine had been humming along the whole time. Now I treat the engine toggle like a reflex – land, park, engine off before I even step off the deck.
Step 6 – Always Carry Repair Kits (and Use the Anvil When You Can)
Tool and weapon durability won’t punish you too hard on the starter islands, which is exactly why I got complacent. The first time I pushed into tougher floating islands, my tools snapped halfway through a big resource vein and my weapon broke mid-fight. Not fun.

The fix is simple: always craft a few repair kits before a big outing.
What’s worked well for me:
- Craft repair kits directly from your inventory before you leave the ship.
- Keep at least 2–3 kits on you when heading to a new or higher-level island.
- Use them mid-run instead of teleporting back just to fix one tool.
There’s an extra layer here that’s easy to miss: you get more value out of each kit when you repair via an anvil. The higher-tier the anvil, the better your repairs.
The way I handle it now:
- If an item is just dipping into yellow, I’ll wait and repair at the anvil back on the ship to stretch the kit further.
- If something is in the red and I’m deep in a dungeon or high up on a floating island, I’ll use a kit on the spot rather than risk it breaking mid-combat.
This lets you clear more content per trip and fully strip islands of resources without constant backtracking.
Putting It All Together for a Smooth Early Game
Once I started treating these as my non-negotiable early-game habits, Everwind stopped feeling like a slog and started feeling like a proper adventure sandbox:
- Engineer Area Scan to instantly read new islands.
- Spyglass scouting so every flight has a purpose.
- Thorough looting of the starter tower and island foundations for an early material boost.
- Lightweight wood builds so your ship actually flies well.
- Fuel discipline by idling the engine whenever you don’t need thrust.
- Repair kits + anvil so durability never hard-stops your progress.
If you run your first few sessions with this checklist in mind, your ship will grow faster, you’ll hit higher islands sooner, and you’ll spend way more time exploring and fighting than babysitting broken tools or a fuel-starved engine. I had to learn most of this the hard way; you don’t have to.