Fatal Frame II Remake – Complete Walkthrough Hub
Why These Early Chapters Matter (And Why I Stalled Here)
After spending my first 5-6 hours getting turned around between the Osaka and Kurosawa Houses, I realized the remake’s new camera, Willpower system, and altered layouts quietly punish old habits from the PS2 version. I kept wasting film, missing Fatal Frames, and backtracking through Minakami Village because I’d skipped key rooms and Prayer Beads.
This guide walks you through the early stretch of Fatal Frame II: Crimson Butterfly Remake-from entering Minakami Village, through the Osaka and Kurosawa Houses, and up to the Village Storehouse and Kiryu House leads. I’ll focus on:
- Locking in the new Camera Obscura mechanics (Viewfinder, Fatal Frames, Willpower)
- A clean exploration route that hits important rooms and upgrades
- How to handle key early ghost fights without burning through strong film
- What to do when you’re lost or Mayu suddenly disappears
No story spoilers beyond these early chapters-just enough detail to keep you moving and avoid the “wandering in circles” syndrome that hit me hard my first run.
Core Mechanics You Need to Master Right Away
The breakthrough for me was accepting that this is not just a prettier version of the original. The remake’s third-person camera and new combat systems change how you should approach every encounter.
Camera Obscura Basics (Viewfinder & Fatal Frames)
On controller, hold the left trigger (L2 or equivalent) to raise the Camera Obscura and enter Viewfinder Mode, then aim with the right stick and shoot with the right trigger (R2).
- Center the core: Most ghosts have a faint “core” around the head or chest. Keep that in the center circle of your viewfinder to build damage.
- Charge your shot: Wait for the shot gauge to charge; it’s tempting to spam, but holding for a moment does far more damage per film.
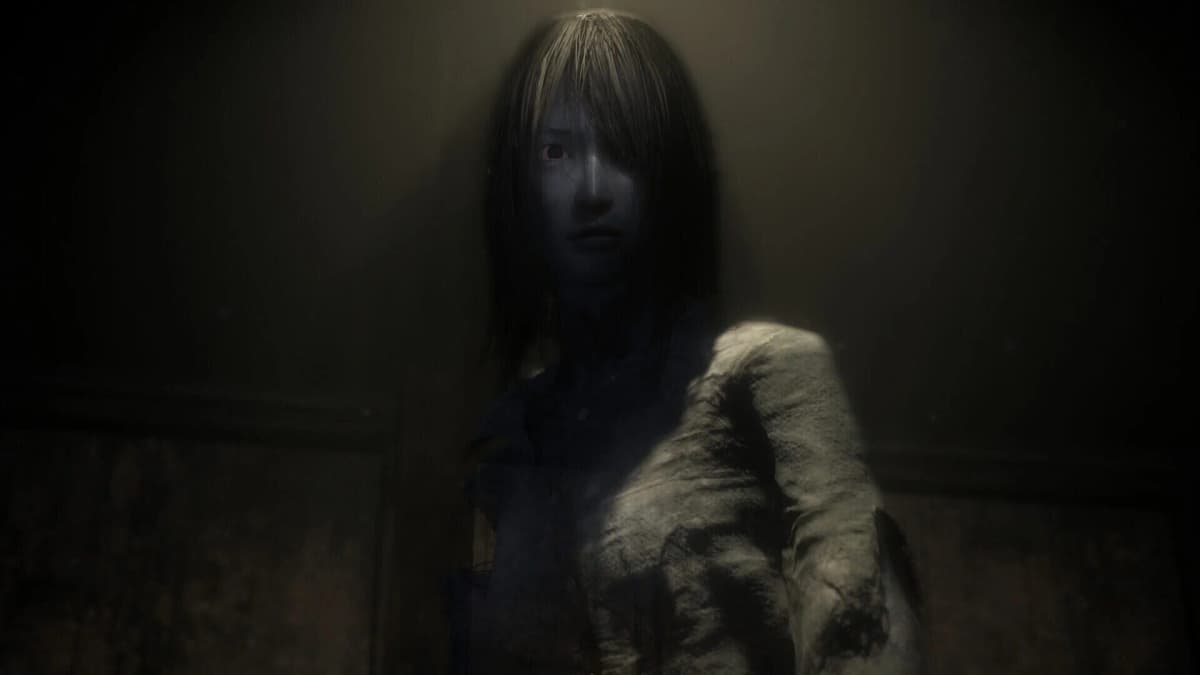
- Fatal Frame (Zero Shot): Just before a ghost attacks, the frame glows and sound cues spike. Shoot right then for a massive hit and a stun window.
- Chain shots: After a Fatal Frame, you often get a short “Fatal Time” window where consecutive shots deal bonus damage-this is when to spend better film if needed.
Don’t make my early mistake of panic-shooting with low charge. It feels safer, but you’ll chew through film and leave ghosts half-dead and enraged.
Willpower Gauge, Enrage, and Film Types
The remake adds a Willpower gauge under Mio’s health. Taking hits and getting grabbed whittles it down; low Willpower means you stagger more and your window for Fatal Frames feels tighter.
- Play patiently early: In the Osaka and Kurosawa Houses, your camera is still weak. Back away, circle furniture, and wait for clean Fatal Frames instead of trading hits.
- Standard film vs strong film: Treat your basic film (usually Type-14) as your default. Save higher-grade film for tougher encounters and mini-boss spirits.
- Enraged spirits: If fights drag on, some ghosts glow and become tougher, even regaining HP. This is the game telling you: stop nibbling, wait for big shots.
Prayer Beads and Crimson Butterfly Lanterns
Prayer Beads are your permanent upgrade currency. In these early locations you’ll already find enough to noticeably buff the Camera Obscura.
- Prioritize power and charge speed: Early on, I always put beads into damage and shot charge. Faster, stronger shots make every fight safer and shorter.
- Check every side room: If a corridor continues straight and there’s a door to the side, clear that room before progressing. Many of my first beads came from “optional” bedrooms and storage rooms.
- Save often: Crimson Butterfly lanterns are your checkpoints. Any time you finish a notable encounter or solve a puzzle, backtrack a little to save—it’s worth the minute of walking.
Prologue & Entering Minakami Village
You start by following Mayu into the forest. This area is mostly linear but teaches you two habits that will matter later:
- Watch Mayu’s behavior: When she slows down or comments, there’s usually a clue, item, or viewpoint nearby. I missed my first hidden item by sprinting ahead.
- Get used to the map: Open your map frequently as soon as the village appears. The remake’s over-the-shoulder view makes rooms feel larger, but the blueprint-style map still reflects the classic layout.
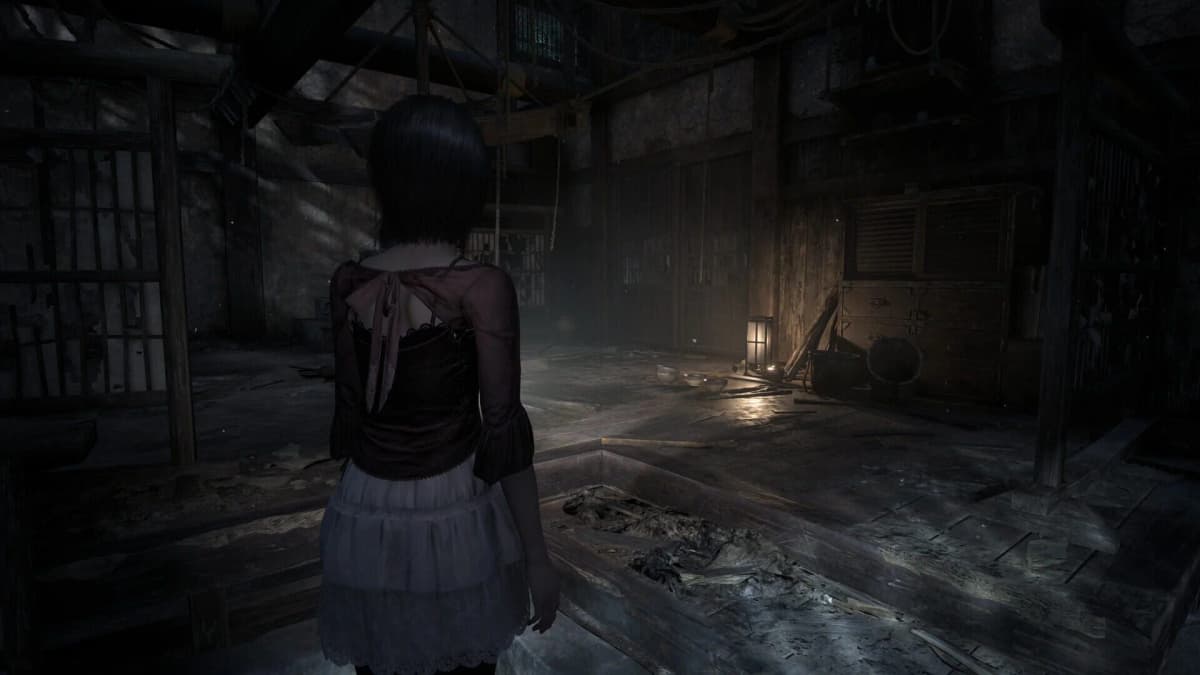
Once you reach the ruined gate and torch-lit entrance to Minakami Village, you’re in the real sandbox. Head towards the most lit path to reach the first major building: the Osaka House.
Osaka House Walkthrough – Getting the Camera Obscura
The Osaka House is your tutorial dungeon. My first time through, I rushed the main corridor and missed upgrades. Here’s a cleaner, efficient loop.
1. Ground Floor Sweep Before the Camera Room
When you enter, you’ll see a central hallway with side rooms branching off.
- Check both side rooms on the way in: Look for drawers, cupboards, and low shelves. The remake loves to tuck film and a few early Prayer Beads in these “nothing” rooms.
- Use the flashlight deliberately: Slowly pan around rather than sprinting; interact prompts can be easy to miss near the floor.
Only once you’ve cleared the visible ground floor rooms should you push deeper toward the room where Mayu drifts off and the Camera Obscura cutscene triggers.
2. First Spirit Fight – Learn to Backpedal, Not Spin
Right after you get the Camera, the game throws you into your first proper combat encounter. What finally worked for me:
- Lock into Viewfinder early: As soon as the ghost appears, raise the Camera and keep it raised. Dropping in and out makes you lose track of teleporting movements.
- Backpedal in straight lines: Use the left stick to move straight backward or diagonally; avoid frantic circles, since the third-person camera can disorient you near walls.
- Wait for the lunge: The ghost will close in and “pause” right before attacking. That hesitation is your Fatal Frame window—shoot when the frame flashes, then fire again during the follow-up stun if safe.
After the fight, immediately check the room again. The remake frequently spawns new items after events—film or a Prayer Bead may appear where there was nothing seconds before.
3. Unlocking the Way Out of Osaka House
Your short-term goal now is to reunite with Mayu and unlock the exit deeper into the village.
3. Unlocking the Way Out of Osaka House
Your short-term goal now is to reunite with Mayu and unlock the exit deeper into the village.
🎮 Get This Game at the Best Price
Compare prices instantly and save up to 80% on Steam keys with Kinguin — trusted by 15+ million gamers worldwide.
*Affiliate link — supports our independent coverage at no extra cost to you
- Follow new objective markers carefully: After each cutscene, open the map and note which door is now highlighted or accessible.
- Look for simple environmental puzzles: Expect classic Fatal Frame logic—sliding screens that hide doors, small keys on altars, family notes hinting which room to check next.
- When in doubt, re-sweep the main corridor: More than once I found the new key item had been quietly placed in a room I’d already searched.
Once you’ve collected the necessary key and viewed the main family lore notes, you’ll unlock the rear exit of the Osaka House, leading you back out into Minakami Village and toward the Kurosawa House area.
FinalBoss // Gear
Level up your setup
01Retro consoleson Amazon→028BitDo controllerson Amazon→03Capture cards (Elgato & more)on Amazon→04Discounted game keyson Kinguin→Affiliate links · As an Amazon Associate, FinalBoss earns from qualifying purchases.
From Osaka to Kurosawa House & the Heavenly Bridge
Exiting Osaka House, you’ll have a bit more freedom to roam. This is where I wasted a ton of time wandering before realizing the game quietly funnels you toward the Heavenly Bridge and the larger Kurosawa estate.
- Stick to lit paths first: Follow the lantern-lit streets to reach the bridge and the Kurosawa gate. Darker side alleys usually hide items, but hit them after you’ve unlocked your main route.
- Grab every Crimson Butterfly lantern: You’ll see these before and after key transitions like Heavenly Bridge. Always save; some of the next ghosts hit much harder.
- Expect more random encounters: As you cross open areas, weaker roaming spirits can spawn. Treat these as practice for lining up safer Fatal Frames.
Once you reach the Kurosawa House entrance, you’re stepping into the real heart of the early game.
Want to Level Up Your Gaming?
Get access to exclusive strategies, hidden tips, and pro-level insights that we don't share publicly.
Ultimate Editor's Pick Strategy Guide + Weekly Pro Tips
Kurosawa House – Efficient Route Through the Mansion
The Kurosawa House is bigger and more twisted than Osaka. The mistake I made was diving deep into one wing without fully clearing the opposite side, which forced multiple long backtracks.
1. Establish Your Hub: Central Hall & Save Point
When you first enter, you’ll usually pass through a main hall or foyer that connects to multiple corridors and staircases.
- Identify the nearest Crimson Butterfly lantern: This hall or a nearby side room often holds a save point—treat it as your “base” you always loop back to.
- Check the obvious doors first: Many locked doors are here to show you what you’ll unlock later. Try each once, then move on; don’t obsess.
2. Clear One Wing at a Time (And Watch for Prayer Beads)
I recommend fully exploring one accessible wing—say, the left corridor and its upstairs rooms—before committing to the other. In practice:
- Follow one corridor until you hit a locked door or clear dead end.
- Search each room thoroughly for notes, keys, and especially sparkles on tatami mats or in corners—these often hide Prayer Beads.
- After any major ghost encounter or story cutscene, walk back through the last few rooms. New spirits can appear, and previously empty shelves can now hold items.
This pattern sounds slow, but it actually saves time. Kurosawa House loves “doubling back” on itself with new triggers, and you’ll avoid aimless wandering if you deliberately clear sections.
3. Handling Tight-Corridor Ghost Fights
Corridors and stairwells in Kurosawa are where the new third-person camera can work against you. What helped me survive without burning rare film:
- Start fights in larger rooms: If you see a ghost spawn as you’re entering a hallway, backtrack into the room you came from. More space = easier dodges and Fatal Frame timings.
- Use corners as soft cover: Peek out with the camera raised, then step back after a shot. Many spirits telegraph their lunges enough that you can sidestep around door frames.
- Don’t be afraid to disengage: If you’re getting overwhelmed, run through a doorway and reset your positioning rather than tanking hits.
By the time you’ve collected the main keys and story items in Kurosawa House, you’ll unlock paths that point you toward Kiryu House and eventually the Village Storehouse.
Kiryu House & Village Storehouse – Setting Up the Next Chapters
The early visits to Kiryu House and the Village Storehouse are more about setting up future chapters than fully clearing these locations, but there are still important things to grab.
Kiryu House: Follow the Story, Then Double Back
When you first reach Kiryu House, you’ll mostly be funneled along a specific route by locked doors and scripted scenes.
- Prioritize main objectives first: Follow Mayu and the new markers until the game clearly gives you breathing room.
- Once the tension drops, explore: After the immediate story beat, walk back through every room you just used. Several of my mid-early Prayer Beads came from revisiting Kiryu’s early halls.
- Listen for audio cues: Whispers and sudden creaks often mark rooms with hidden items or ghost encounters that drop resources.
Village Storehouse: Treat It Like a Mini-Dungeon
The Village Storehouse is smaller, but it tends to house tougher spirits and important items.
- Enter with full resources: Save at the nearest lantern and make sure you have a healthy stock of basic film and healing items.
- Expect at least one serious encounter: Don’t blow your strongest film on the first ghost—there’s usually a nastier one deeper inside.
- Scan vertical spaces: In my run, several key interactables were placed high on shelves or above eye-line; tilt the camera up as you sweep.
Once you’ve cleared the Storehouse’s main objective, you’ll have everything you need to roll confidently into the mid-game chapters.
Common Early-Game Mistakes (I Made All of These)
- Rushing past “empty” rooms: Early Prayer Beads and better film are almost always in side rooms. If a door isn’t locked, assume it’s worth checking.
- Using strong film on tutorial ghosts: Stick to basic film until the game clearly frames an encounter as more serious (unique name, distinct intro, or multi-phase behavior).
- Ignoring Willpower: Even if your HP looks fine, repeated grabs can tank your Willpower and make later fights way harder. Play cautiously when you’ve taken a few hits in a row.
- Not saving after puzzles: I lost a full Osaka House loop to one bad fight because I’d skipped a lantern 30 seconds earlier. If you see butterflies, you save.
What to Expect After the Village Storehouse
Once you’re past the Storehouse setup and have thoroughly searched Osaka, Kurosawa, and the first portions of Kiryu House, you should have:
- A Camera Obscura with at least a couple of key upgrades (power and charge speed)
- Comfort with Fatal Frame timing and fighting in cramped corridors
- A mental map of the main village paths & where each house connects
- Enough film and healing items to handle the difficulty spike in later chapters
From here, the game starts leaning harder on multi-ghost encounters and more involved puzzles, but if you’ve built good habits in these early chapters, the rest of Minakami Village feels challenging instead of overwhelming. If I could get from fumbling every shot in Osaka House to comfortably chaining Fatal Frames by Kurosawa’s upper floors, you absolutely can too.