Goblin Vyke: The Thief Tycoon – Part 1 Walkthrough Guide
Part 1 in Goblin Vyke: The Thief Tycoon is less about improvisation and more about reading the game’s rules correctly. The opening loop combines shop management, stealth, and a light metroidvania structure, but the clean route is stable: keep the Mask of Greed, finish the first shop sequence, prepare for Lucius Goldleaf’s 250 gold mortgage demand, then use the opening Spire run to gather saleable loot without forcing direct combat. If you treat the dungeon like an action brawler, progress slows immediately. If you treat it like a trap-routing exercise, Part 1 becomes much more consistent.
Part 1 route at a glance
This walkthrough stays tight to the Part 1 objective path. The exact item count may vary slightly depending on version and drop luck, but the progression route does not.
- Accept and use the
Mask of Greed; Part 1 progression assumes the theft toolkit is active. - Run the first day of shop business and bargain for quick profit rather than perfect profit.
- Pay Lucius Goldleaf when he arrives for the 250 gold mortgage collection.
- Enter The Spire Buried Underground and watch for the first trap before looting the fallen adventurer.
- Steal the key from the sleeping skeleton and use it on the
right door. - Track skeleton patrols with
Observe, hide in grass, and use environmental traps instead of trying to duel enemies. - Go to the far left to pull the lever that raises the chain-linked floating platform.
- Collect early insects, including coinbeetles and other golden bugs, because they work both as utility items and sale inventory.
- Push onward to unlock the Cathedral path and, if your session continues that far, prepare for the bell-based progression step.
Opening shop sequence and the 250 gold mortgage
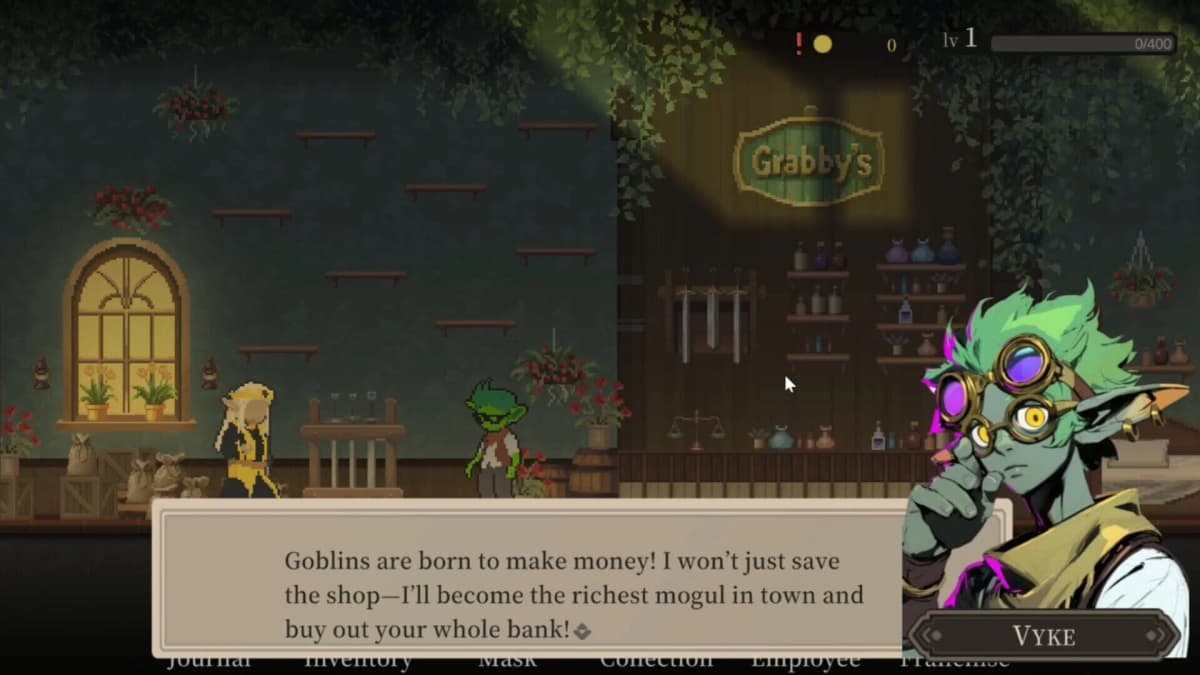
The first daytime segment exists to establish the game’s economic pressure. Vyke inherits a failing shop, and the debt is not background flavor. Lucius Goldleaf’s visit is the first hard check on whether you understand the relationship between bargaining and dungeon looting. Do not overread the opening customers as a long-form economy puzzle. In Part 1, the shop is serving a simpler purpose: it teaches you how to convert stolen goods into survival cash.
When customers arrive, prioritize closing sales over chasing the theoretical maximum on every single item. Bargaining is still worth doing, because early gold matters, but the best Part 1 habit is controlled aggression. Push prices enough to improve your margin, then close the deal while demand is still live. The opening does not reward stubborn haggling if it causes you to miss steady income before the mortgage collection arrives.
Once Lucius appears and demands 250 gold coins, pay him and move on. That payment is the gate that stabilizes the early route. If you are slightly short, sell lower-priority stock rather than hoarding for a later, cleaner market. In practical terms, Part 1 is a cash-flow tutorial disguised as a character moment. The correct benchmark is not “best possible storefront value”; it is “enough liquidity to clear the mortgage and fund the dungeon loop.”
How to approach early bargaining
- Use higher asks on unusual dungeon loot, because scarcity supports stronger margins.
- Accept smaller gains on common goods if you need the gold immediately for the mortgage.
- Do not sit on distraction items blindly; keep at least one useful bug, then sell surplus.
- If you must choose between inventory purity and immediate cash, immediate cash is more useful in Part 1.
The Mask of Greed and the game’s actual combat rule
The Mask of Greed is not a decorative narrative choice. It underpins the stealth loop that Part 1 is built around. If the game presents a decision around taking or using it, the intended route assumes you keep it. Some early walkthrough coverage notes that refusing the setup choice can prematurely derail progression, so the safe interpretation is simple: do not fight the game’s tutorial premise.
Just as important, the game does not want you winning by force. Skeletons and other early threats are not there to be traded with hit-for-hit. The practical rule is that traps are your offense, concealment is your defense, and movement timing is your recovery tool. If an enemy notices you, the clean response is to break line of sight, use bushes or grass, and reset the room rather than forcing a scramble in open ground.
That matters because the early enemy attacks and grabs are fast. If your version of Part 1 feels harsher than older footage suggests, assume the timing window is the real lesson. Use your dodge or grapple movement early. Late reactions tend to fail, especially in narrow rooms where a missed steal turns into a short chase.
The Spire Buried Underground: clean route through the early rooms
Descend the ladders and stop before the corpse
After the shop sequence, the first serious dungeon work begins in The Spire Buried Underground. The opening trap is placed to catch impatient looting. You descend the ladders, see the defeated adventurer’s body, and the obvious instinct is to walk straight in and strip the corpse. Do not do that. There is a trap before the body. Slow down, read the floor, and approach as if the corpse itself is the lure. Once the trap is accounted for, loot the body normally.
This is the game’s first blunt statement that greed without observation is punished. Among recent indie games with stealth systems, Goblin Vyke is unusually direct here: the lesson is delivered before the first room has really started.
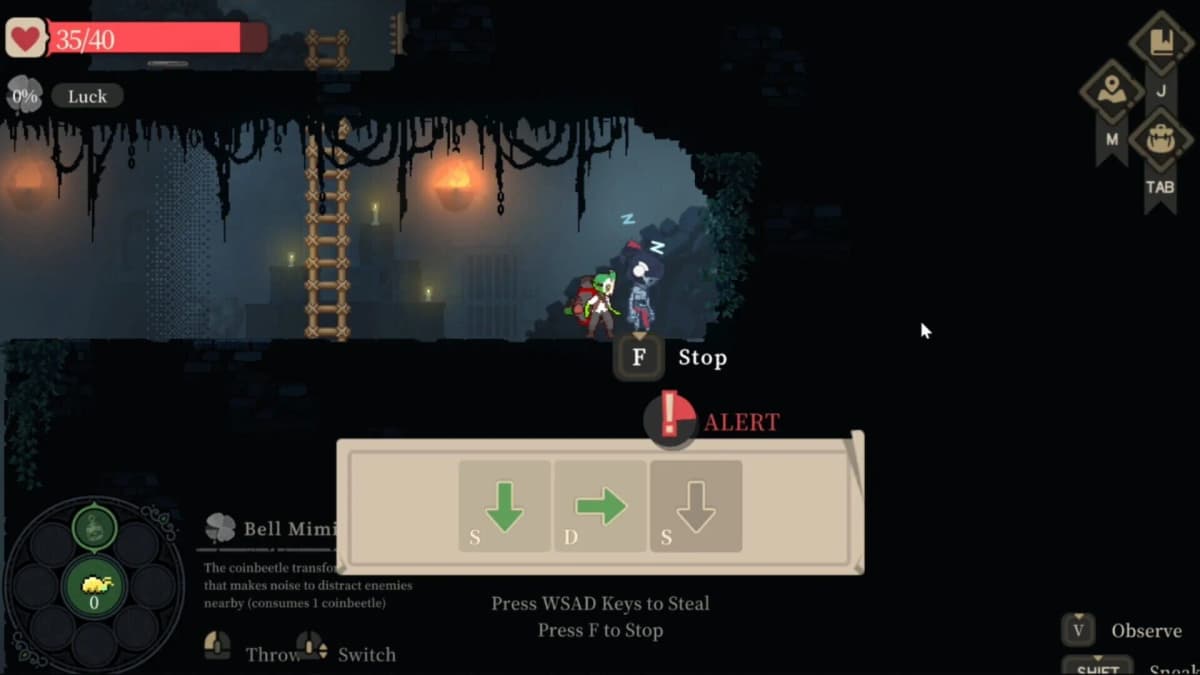
Steal the key from the sleeping skeleton
The next reliable progression step is the sleeping skeleton. It holds the key you need. Move slowly, take the key, and use it to open the right door. If the skeleton wakes or a patrol starts to converge, do not improvise in the middle of the room. Retreat into nearby bushes or cover, let the alert decay, and try again. Part 1 rewards patience more than speed in these short theft windows.
This is also where players often overcommit to “one more steal.” Once you have the key, the route is already solved. Extra greed in the same room only makes sense if you have a clear exit path and know where the nearest cover is.
Use Observe mode before entering patrol rooms
When patrolling skeletons start defining the room layout, open Observe and learn the path before touching anything. This is the cleanest way to control Part 1 difficulty. The game does not hide the fact that patrol timing matters; it expects you to make a plan from it.
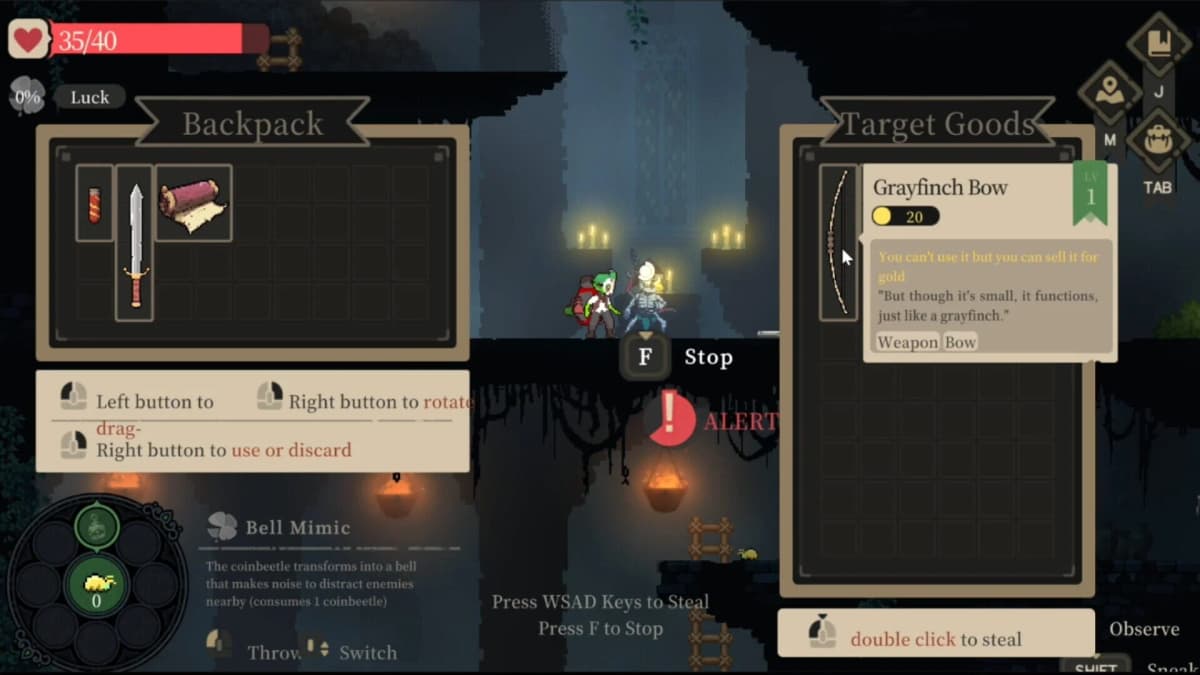
The safest theft order is usually to remove non-weapons first. Loose valuables, bugs, and side loot can often be taken without triggering the sharpest response. Weapons are higher-risk because armed enemies become more dangerous in the small spaces the Spire likes to use. If a skeleton is carrying something important, wait for the turn in its route or use a distraction item to separate it from the centerline.
You also cannot rely on killing enemies directly. Instead, route them into traps. Left-side spike or arrow setups are especially valuable early because they let you resolve a patrol without spending resources. Grass patches function as reset zones, not permanent safety. Enter them to disappear, then leave with a purpose. Hiding in grass and staying there too long just means you are surrendering tempo while patrols re-form.
- Watch one full patrol cycle before stealing.
- Take loose valuables before high-risk equipment.
- Use cover immediately after a failed steal attempt.
- Lure enemies onto environmental traps whenever the room allows it.
- Do not stay in open corridors after an alert; recovery happens from concealment.
FinalBoss // Gear
Level up your setup
01Top-rated gaming headsetson Amazon→02High-refresh gaming monitorson Amazon→03Gaming chairson Amazon→04Discounted game keyson Kinguin→Affiliate links · As an Amazon Associate, FinalBoss earns from qualifying purchases.
Want to Level Up Your Gaming?
Get access to exclusive strategies, hidden tips, and pro-level insights that we don't share publicly.
Ultimate Guide Strategy Guide + Weekly Pro Tips
Floating platform puzzle and insect utility
One of the first route checks that stalls otherwise clean runs is the floating platform section. The required action is at the extreme left: there is a lever there that raises the chain-connected platform and creates the crossing. If you keep searching the central area for a switch or door, you are simply looking in the wrong place. Go left, pull the lever, then return to use the new platform state.
This area also reinforces the value of insects. The early golden bugs, including coinbeetles, are useful beyond resale. They can distract skeletons, open safer stealing windows, and still serve as shop stock if you leave with extras. The efficient Part 1 habit is to keep one distraction item in reserve and sell the surplus. Burning every bug the moment you find one is wasteful; refusing to sell any of them is also inefficient when the mortgage has already taught you how tight the economy is.
Transition to the Cathedral of the Nameless God
Part 1 culminates by pushing through the Spire and opening the way toward the Cathedral of the Nameless God. Treat this as progression, not a full-farm detour. If you reach the Cathedral within the same stretch of play, keep an eye on objective structure rather than trying to clear every enemy path for loot.
Early walkthrough consensus points to a bell-based objective sequence here. The practical note is that ringing bells can alter the room state and attract or reposition danger, so do not activate one while boxed in by patrol routes. Clear your retreat lane first, trigger the bell, then reset your position before committing to the next movement. If an NPC interaction appears on this path, take it; early progression flags in this section are more important than squeezing out one more side theft.
Common Part 1 errors that waste time
- Looting the first corpse at full speed. The trap before the body is there to catch that exact habit.
- Treating skeleton rooms like combat arenas. The intended solution is concealment plus traps, not direct trading.
- Ignoring Observe mode. Patrol knowledge removes most of the randomness from the early dungeon.
- Stealing weapons before safer loot. This raises risk for very little short-term benefit.
- Overspending distraction items. Keep at least one useful bug for a forced stealth break.
- Over-optimizing the shop before paying Lucius. The first mortgage payment matters more than maximizing every transaction.
- Assuming older videos match your exact item flow. Early post-launch coverage suggests some balance variance in drop rates, so use the route, not the exact loot count, as your reference.
What a successful Part 1 looks like
A clean Part 1 in Goblin Vyke: The Thief Tycoon leaves you with the mortgage paid, the shop loop understood, the Spire’s early trap-and-key route mapped, and the Cathedral path unlocked. That is the correct benchmark for the opening walkthrough. If any section still feels unstable, the usual fix is not more aggression. It is slower room reading, cleaner use of Observe, and better conversion of dungeon utility items into either safe progress or immediate gold.