
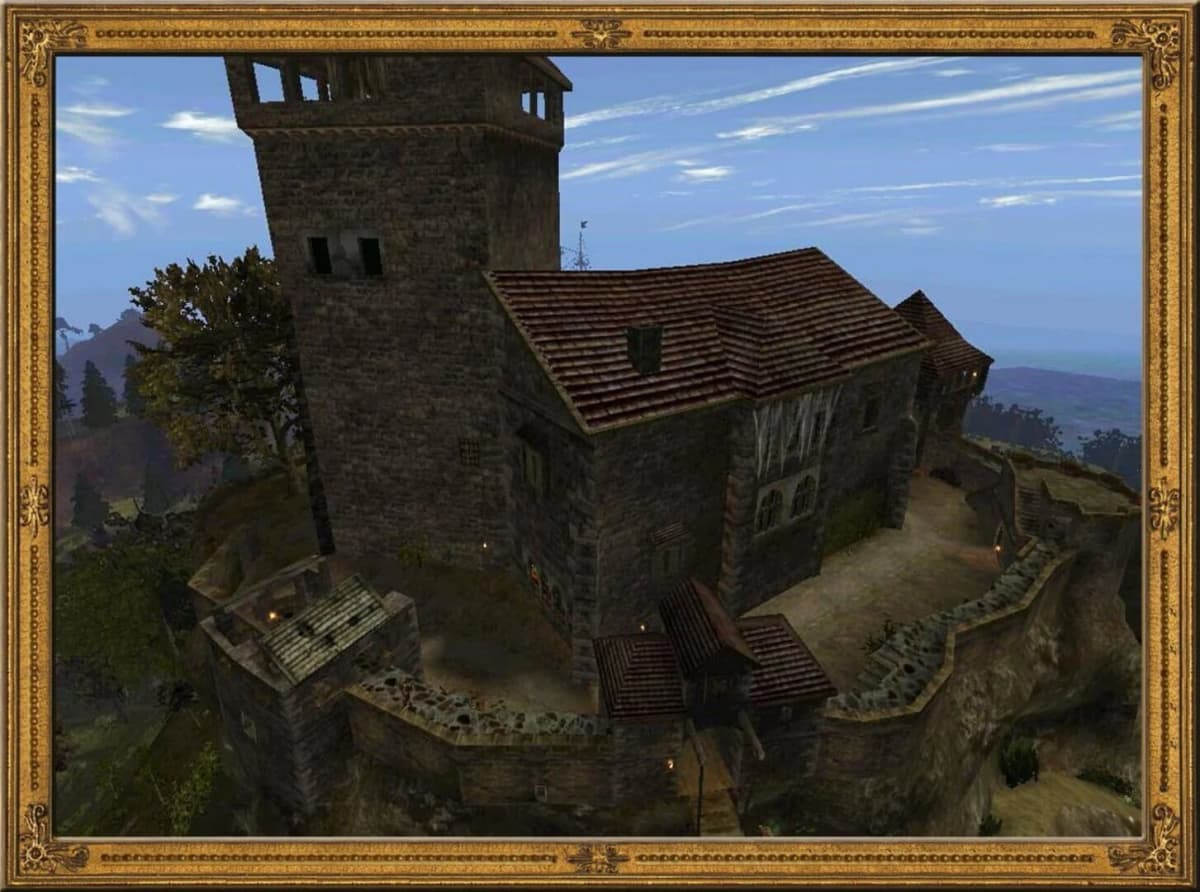
The correct 2026 install order for Gothic II with the Gold Remaster is: clean Gothic II Gold (Night of the Raven) → SystemPack or Union → the GD3D11 renderer → optional NormalMaps pack → the Gold Remaster installer. Then launch through GothicStarter.exe and pick the Remaster entry. That is it. The Remaster ships as a proper installer, not a loose archive you drop in a folder.
One correction worth leading with, because a lot of guides (including our earlier version of this one) get it wrong: you do not need to apply a separate 4GB / large-address-aware patch. World of Gothic’s official download page states that Reportversion 2.6.0, PlayerKit 2.6f and the 4GB patch are already integrated into the Remaster setup. Installing a standalone 4GB patch on top is at best redundant and at worst the source of the mixed-install crashes people then blame on the mod.
Table of Contents (27)
First: make sure you want this one
As of mid-2026 there are three separate projects people call a “Gothic II remaster,” and they are not interchangeable. Installing the wrong one is the most expensive mistake on this page, so check this table before you download anything.
| Project | What it is | Status, July 2026 |
|---|---|---|
| Gothic 2 Gold Remaster (this guide) | Graphics mod for the original 2002 ZenGin engine. Same game, far better looking. | Released and mature. Version 2.7. |
| Gothic 2 Remaster on Unreal Engine 5 | Fan port of Gothic II to UE5 by Dmitri Kaluzhnyj, permitted by THQ Nordic. Free. Ships as a Steam beta branch on Gothic II: Gold Edition, so you still need to own the game. | Public alpha since around 1 May 2026, still updating. Playable, not finished. |
| Gothic 2 Anniversary Edition | A different fan project — a content overhaul on the original engine that restores alpha material and reworks combat and AI. Placed third in THQ Nordic’s Gothic Fan Project Contest at Gamescom 2025. | Not released. Missed a March 2026 target; currently aimed at late summer or early autumn 2026. |
Which one you want:
- You want Gothic II as you remember it, running well and looking sharp on a modern display. That is the Gold Remaster, and that is the rest of this guide.
- You want to see the game rebuilt in a modern engine and you accept alpha rough edges. That is the UE5 project. It carries the original voice acting across and has subtitles in English, German, Polish and Russian. It is enabled through the Steam beta branch of Gothic II Gold rather than installed as a mod, so none of the install steps below apply to it.
- You want reworked content and new quests. That is the Anniversary Edition, and you will have to wait.
One more disambiguation, because it comes up constantly: the official Alkimia Interactive project is the Gothic 1 Remake, which launched 5 June 2026 on PC, PS5 and Xbox Series X|S. There is no official Gothic II remake announced. Every Gothic II project named on this page is fan-made.
Current versions, July 2026
| Component | Version | Where to get it |
|---|---|---|
| Gothic 2 Gold Remaster | 2.7 (updated 2 March 2026) | World of Gothic download page, ModDB, or the Steam Workshop item |
| GD3D11 renderer | v17.8-dev27 (release dated 5 August 2025) | GitHub: kirides/GD3D11, latest release Assets, GD3D11-<version>-ci.zip |
| NormalMaps for Gold Remaster | Bundled with 2.7 on Workshop; separate download on ModDB | ModDB / Myrtana.net. Requires GD3D11. |
| Base game | Gothic II Gold / Night of the Raven | Steam app 39510 or the GOG edition (GOG bundles Night of the Raven) |
The Workshop version’s author has confirmed the update to 2.7 with working normal maps. If you are looking at an installer named G2_Remaster_v2.6_Multilanguage.exe, that is the older naming — check the World of Gothic page for the current file before you commit.
What the Gold Remaster actually is
Gold Remaster is a graphics-heavy “vanilla plus” pass over Gothic II Gold. It keeps the story, quest design and world layout intact and spends all its effort on world detail: buildings, foliage, clutter, higher-detail surfaces, and modern rendering options through DX11 and normal maps. It is explicitly built to preserve the original’s look and feel rather than restyle it — the German description calls it the most graphically complex version of the game to date while retaining the original in story, look and gameplay.
What it is not: a gameplay overhaul, a bug-fix compilation, or a multi-mod stack. If you want changed balance or new content, that is a different project entirely, and it belongs on a different install.
One constraint before you start: this is PC-only. Gothic II modding depends on access to install folders and community tools, so there is no console route here at all.
Before you install anything
Treat this as a fresh build, not a set of files thrown into a years-old Gothic folder. Most crashes, missing textures and black screens come from mixed installs rather than from the mods themselves.
- Install a clean copy of Gothic II Gold with Night of the Raven. No other mods, no leftovers from a previous experiment.
- Back up saves and duplicate the whole game folder before you touch anything, so a rollback is a copy-paste instead of a reinstall.
- Find your directories. On Steam the game lives at
Steam\steamapps\common\Gothic II. The renderer goes insystem\;.vdfarchives go inData\;.modfiles go inData\ModVDF\. Getting these three straight prevents the most common install failure. - Decide now whether this install is graphics-only or a gameplay-mod setup. That decision determines everything downstream.
- Remove any older GD3D11 version first. The project’s guidance is clean replacement, not layering renderer builds on top of each other.
- Be careful with old compatibility tweaks. A fix that solved a Windows 10 problem years ago frequently creates a new one once a renderer and post-processing sit on top.
The manual install, step by step
Step 1 — Boot the base game once
Launch vanilla Gothic II Gold before modding. You are confirming the install works and that the game has generated its basic files. If it does not boot cleanly now, a graphics overhaul will only mask the real problem for a few minutes.
Step 2 — Install SystemPack (or Union)
This is the compatibility layer the whole modern Gothic II stack sits on, and it goes in before the renderer. Pick one route: SystemPack is the standard choice; Union is the alternative if you want plugin support later. Do not install both.
Step 3 — Install the GD3D11 renderer
GD3D11 is what frees the old D3D7 engine to run properly at 1440p or 4K with real-time shadows. Download GD3D11-<version>-ci.zip from the Assets section of the latest release on the kirides/GD3D11 GitHub repository, unpack it, and copy the contents into Gothic II\system\.
Then verify: start the game and check the top-left corner — the renderer version should be printed there. If it is not, the files are in the wrong folder. On first launch, press F11 to open the renderer menu and click Apply(*) to save your settings, or nothing you change will persist.
Step 4 — Optional: NormalMaps
The NormalMaps pack for Gold Remaster only works with GD3D11 installed, which is why it comes after the renderer. On the Workshop version of 2.7 it is bundled; for the manual route, grab it from ModDB and follow the pack’s own placement instructions for the renderer’s normalmaps folder.
Step 5 — Run the Gold Remaster installer
Run the Remaster installer, point it at your Gothic II directory, and let it finish. It brings PlayerKit 2.6f, Reportversion 2.6.0 and the 4GB patch with it, which is why those are not separate steps.
Step 6 — Launch through GothicStarter
Start the game via GothicStarter.exe in the System folder and select the Remaster entry. Launching the normal executable will start vanilla and leave you wondering why nothing changed.
The Steam Workshop route (faster, less control)
If you own Gothic II Gold on Steam, there is a Workshop item and it removes most of the file-shuffling:
- In Steam, open the game’s properties and switch to the Workshop beta branch. Workshop mods do not work on the default branch.
- Subscribe to the Gold Remaster item and the D3D11 renderer item.
- Launch Gothic II Gold once the Workshop content has finished downloading.
- Enable Gold Remaster and the renderer through the Workshop/Union menu.
- In game, press F11 to configure the renderer — HDR, view distance, object fading, texture quality.
Union is not strictly required for the Remaster to work through Workshop, but it is recommended if you plan to add plugins later.
Using the Remaster as a pure texture pack
If you want the Remaster’s visuals on top of a different mod or on plain Gothic II, there is a documented path:
- Install Gold Remaster normally.
- Find
Remaster_Graphics.modin...\Gothic II\Data\ModVDF. - Rename it to
Remaster_Graphics.vdf. - Move it into the main
...\Gothic II\Datafolder.
That turns it into a global graphics patch the base game and other mods will load. This — not the standard install — is where the “just drop a .vdf into Data” advice you may have read comes from. It is a specific technique for a specific goal, not the normal install route.
Steam Deck and Linux
This works on Deck, but it needs a specific recipe rather than default Proton:
- Install the game, then switch Steam to the Workshop beta branch.
- Install GE-Proton9-27 with ProtonUp-Qt and force it as the compatibility tool for Gothic II. Older guides suggest Proton 8.0-5; the current Deck guidance is GE-Proton9-27.
- Launch once so the Proton prefix is created.
- Use protontricks to install
directmusicinto the game prefix. - Edit the prefix’s
user.regand set"ddraw"="native,builtin"underSoftware\Wine\DllOverrides. GD3D11 usually will not activate without it. - If
*dsoundis set to native, remove that override — community reports tie it directly to audio delay and crackling. - Put GD3D11 into the game’s
systemfolder as normal. - If you hit out-of-memory crashes, drop DXVK’s 32-bit
dxgi.dllandd3d11.dll(from DXVK 2.6.2) intosystemalongside the renderer. The GD3D11 project itself notes this as a mitigation.
Deck-friendly settings to start from: 1280×800, Texture Quality Low, Shadows 1024. You can climb from there once you know it is stable.
Settings worth changing before a real playthrough
- Set native resolution, but test 1440p before committing to 4K if you are also running ReShade.
- Start shadows one step below maximum. Old engines lose stability and clarity at the top setting for a small visual gain.
- Raise view distance gradually. Gothic II benefits from it, but big jumps make troubleshooting a performance dip much harder.
- Keep sharpening modest. Upscaled textures plus aggressive sharpening make stone and vegetation look noisy rather than detailed.
- Test one daylight area, one rainy scene and one interior before locking a preset. Gothic II’s mood swings hard across those three, and a preset tuned only on a sunny hillside will ruin night-time readability.
On ReShade generally: treat it as seasoning, not the meal. Presets marketed as “RTX” or “ray-traced” can add genuine depth, and they can also make forests unreadable. If an image looks wrong, reduce bloom first, then contrast, then ambient settings — before you start deleting texture mods.
Common mistakes
- Installing a separate 4GB patch. Already integrated into the Remaster setup. Adding another one is how you create a half-overwritten install.
- Putting GD3D11 in Data. The renderer goes in
system. Only.vdfarchives belong inData, and.modfiles inData\ModVDF. - Skipping SystemPack or Union. The stack expects a compatibility layer underneath it.
- Layering two graphics overhauls. Missing or obviously wrong textures almost always mean two mods are replacing the same assets. Pull back to one, confirm it works, then add extras one at a time.
- Blaming the mod for ReShade. An image that is too dark or too glossy is nearly always the preset.
- Not launching through GothicStarter. The Remaster is a launcher entry, not an automatic override.
About Gothic 2 Plus
Our previous version of this guide recommended running the Gothic 2 Plus gameplay overhaul on a separate install. We are pulling that back to an honest position: we could not verify a current version, download page or install-order guidance for a mod under that name on World of Gothic, ModDB, Nexus or the Steam Workshop as of July 2026. Treat any “Gothic 2 Plus” package you find as unvetted.
The general principle still stands regardless of which overhaul you pick: gameplay overhauls belong on their own copy of the game, never stacked on your graphics build. Because the Remaster installer already bakes in PlayerKit, Reportversion and the 4GB patch, any overhaul layered on top would need to state explicitly whether it goes before or after the Remaster and whether it expects SystemPack or Union. If a mod’s documentation does not answer that, do not install it on a build you care about.
FAQ
Do I still need the 4GB patch?
No, not as a separate step. It is integrated into the Gold Remaster setup along with PlayerKit 2.6f and Reportversion 2.6.0.
SystemPack or Union?
Either works. SystemPack is the simpler default; Union is the choice if you want plugin support. Install one, not both.
Do I need GD3D11 for the Remaster to work?
Technically it is optional, practically it is the point. The renderer is what makes the higher-detail surfaces and normal maps render properly, and the NormalMaps pack does not work without it.
Does the Remaster change the story or quests?
No. It is a visual pass. World layout, story and gameplay are unchanged by design.
Is this the Unreal Engine 5 version?
No. The UE5 remaster is a separate free fan project distributed as a Steam beta branch on Gothic II: Gold Edition, not a mod you install into Data. It has been in public alpha since roughly 1 May 2026. If that is what you are after, none of the install steps here apply — you switch branches in Steam instead.
Is there an official Gothic 2 remake?
No. Alkimia Interactive’s official project is the Gothic 1 Remake, released 5 June 2026. No Gothic II remake has been announced. Everything covered on this page is fan-made, and the Gold Remaster is fan-made with no official affiliation.
Is it on Nexus Mods?
Not as a standalone file. It appears there only in roundup pages. Use World of Gothic, ModDB or the Steam Workshop.
Will this run on Steam Deck?
Yes, with the Workshop beta branch, GE-Proton9-27, protontricks directmusic and the ddraw override. See the Deck section above for the full recipe.
The takeaway
Clean Gothic II Gold, SystemPack or Union, GD3D11 into system, optional normal maps, then the Gold Remaster installer, launched through GothicStarter. Keep ReShade light and keep any gameplay overhaul on its own copy. That is the version of Gothic II that makes sense in 2026: it does not erase the game’s age, it just stops age from being the first thing you notice.
If the Gothic itch is broader than a modding project, our coverage of the remake is where to go next — all five Bestiarium book locations in the Minental and how to beat the Minecrawler Queen are the two guides people ask for most. Everything else we have on the original lives on the Gothic II hub.
FinalBoss // Gear
Level up your setup
01Retro consoleson Amazon→028BitDo controllerson Amazon→03Capture cards (Elgato & more)on Amazon→04Discounted game keyson Kinguin→Affiliate links · As an Amazon Associate, FinalBoss earns from qualifying purchases.
Want to Level Up Your Gaming?
Get access to exclusive strategies, hidden tips, and pro-level insights that we don't share publicly.
Ultimate Guide Strategy Guide + Weekly Pro Tips