
Grind Survivors: Best Class Tier List – Solara, Cascade, Vanta, Riven
Why Class Choice Matters in Grind Survivors
Grind Survivors looks chaotic on the surface – just waves of enemies and randomized buffs – but your starting class quietly decides how far your run can realistically go. Once you start aiming for long survival times and endless mode pushes, the differences between Riven, Vanta, Cascade, and Solara become impossible to ignore.
Each class brings a unique active ability and passive mechanics that heavily influence:
- How safely you can clear dense waves
- Which buffs are “must-pick” versus bait
- How forgiving your run is when you make mistakes
- Whether your build scales into endless mode or stalls out around the mid waves
This guide breaks down all four classes, ranks them by overall viability, and explains how to play around their strengths and weaknesses. The focus is practical: what actually works in real runs, not just theoretical DPS numbers.
Overall Class Ranking & Quick Recommendations
Here’s the short version of the Grind Survivors class tier list, based on consistency in full runs and endless mode:
- S Tier – Solara: Best late-game and endless-mode class. Health-scaling Rail Gun and strong crowd control make high-wave hordes manageable.
- A Tier – Cascade: Versatile all-rounder with bouncy bullets. Great for learning the game and still strong into the late game with the right buffs.
- B Tier – Vanta: Excellent crowd control and farming utility, but damage and scaling fall off compared to Solara and Cascade in very long runs.
- C Tier – Riven: Highest potential DPS on paper, but demands near-perfect play. Strong for short, high-skill runs; punishing for most players.
If you just want the strongest and most consistent pick for pushing endless mode, go straight to Solara. If you want a flexible starter who teaches you core mechanics without locking you into a specific style, Cascade is ideal.
Solara – S-Tier Late-Game Queen
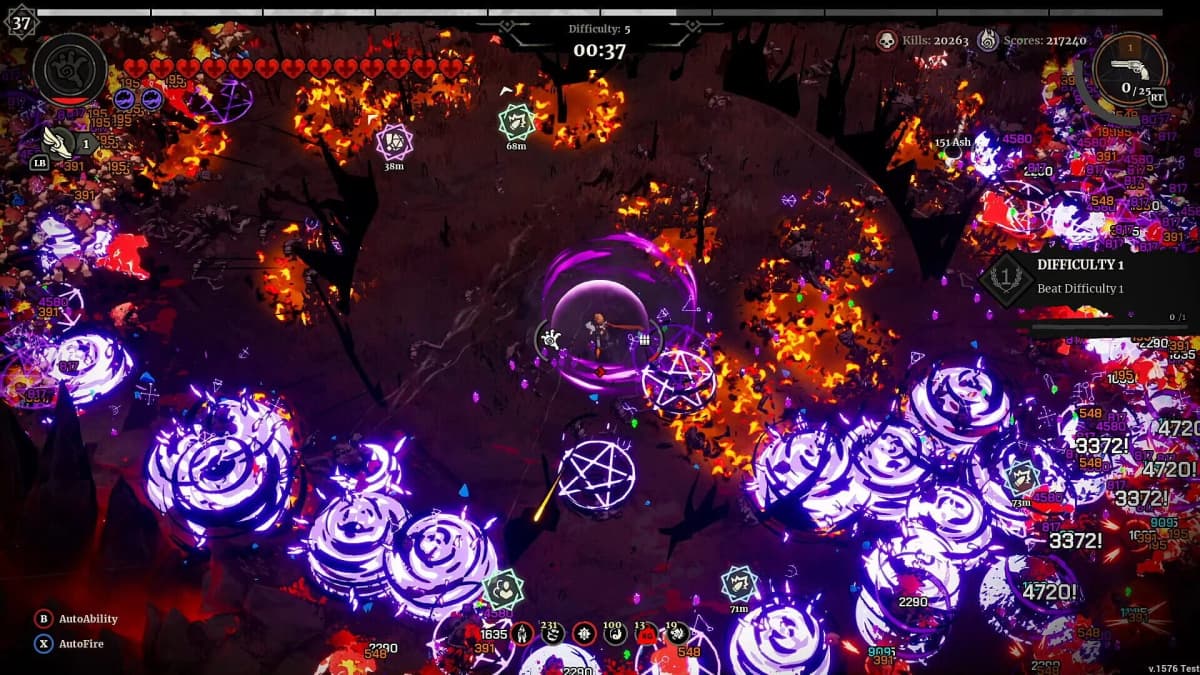
Solara is the class that makes endless mode feel actually achievable instead of a desperate scramble. Her entire kit is built around turning maximum health into damage and using crowd control to keep overwhelming waves under control.
How Solara’s Rail Gun Works (and Why Max HP Is Everything)
Solara’s active ability, Rail Gun, is the core reason she sits at the top of the tier list. It fires a high-damage shot that scales off her maximum health. That changes how you build your character in a really important way:
- Every max HP buff is effectively a damage buff to Rail Gun.
- Defensive health upgrades no longer feel like “lost” DPS – with Solara, they are your DPS.
- Because it scales with max HP, you want to avoid anything that reduces your total health pool, even if the tradeoff looks tempting.
In practice, this means that on Solara you can play tankier without sacrificing your ability to delete tough enemies or chunks of a horde. Just remember: even though you have a lot of health, you do not want to be taking hits, because surviving longer is how you multiply the value of all those health buffs.
Playstyle: Mid-Range Control and Cooldown Cycling
Solara plays best at mid-range, where you can:
- Keep space to react to enemy movements
- Line up Rail Gun through thick parts of the horde
- Let her passive crowd-control tools do work before enemies reach you
To really unlock her power, prioritize buffs that:
- Increase maximum health – the number one priority for damage and survivability.
- Reduce ability cooldown – more Rail Gun casts means more cleared waves and safer resets.
- Improve movement speed – being able to reposition quickly is what keeps you from being cornered between casts.
Once you get a few cooldown upgrades, Rail Gun shifts from a panic button to a near-spammable wave-clear tool. At that point, your job is mostly about positioning: constantly kiting in a loose circle, leading enemies into tight groups, and firing Rail Gun straight through the densest line.
Common Solara Mistakes
- Ignoring max HP upgrades: On other classes, you can justify skipping health for pure damage. On Solara, that’s a big loss of potential Rail Gun power.
- Playing too aggressively up close: Having a big health bar doesn’t mean you’re a melee brawler. Getting cornered deletes your run.
- Neglecting movement speed: You need speed to herd enemies into lines and avoid random hits while Rail Gun is on cooldown.
When played properly, Solara makes the late waves feel surprisingly controlled. Endless mode especially favors her because dense hordes turn Rail Gun into a massive, repeating kill beam rather than just a single-target nuke.
Cascade – A-Tier Versatile Bouncy-Bullet Specialist
Cascade is the most “honest” class in Grind Survivors – no gimmicks tied to low health or risky positioning, just solid ranged damage and a very forgiving kit. She’s the best starting point if you’re still learning enemy patterns, buff priorities, and how to navigate bullet hell chaos.
Why Cascade Feels So Comfortable to Play
Cascade’s passive makes her bullets bounce by default, which is incredibly strong in a game that constantly packs enemies together. Even with basic weapons, those bounces mean:
- Each shot can damage multiple enemies
- You can hit foes that are slightly off-screen or behind the main horde
- Positioning becomes more flexible because you don’t always need a perfect line-up
Her active ability amplifies this by boosting bounce and range for a burst window. It turns tight hallways and screen edges into deadly ricochet zones. With a few attack speed, projectile count, and damage buffs, Cascade’s screen presence snowballs very quickly.
Best Buff Priorities for Cascade
When I’m on Cascade, I treat her as a long-range crowd-clear platform and look for upgrades that multiply the value of her bouncing shots:
- Projectile count / multishot: More bullets means more bounces and more coverage.
- Bullet damage: Important so each hit actually kills instead of just softening enemies.
- Pierce or extra bounce: These stack with her passive very well and let a single volley cut through full packs.
- Range or projectile speed: Extends how far those bounces contribute, especially helpful in more open arenas.
Because Cascade doesn’t depend on a risky condition (like low health), she maintains her power curve cleanly from early to late game. She might not hit Solara’s peak control in endless mode, but she remains reliably strong.
Common Cascade Mistakes
- Undervaluing raw damage: It’s tempting to stack only bounces and projectiles, but without damage your screen is full of bullets that don’t actually kill.
- Saving active for “emergencies” only: Don’t be afraid to use it aggressively to keep waves thin; a dead wave can’t trap you later.
- Overstanding still: The coverage is great, but you still need to reposition constantly so you aren’t surprised by flanking enemies.
Overall, Cascade is my go-to recommendation for players who want one class that works with almost any weapon, any buff pattern, and any arena layout.
🎮 Get This Game at the Best Price
Compare prices instantly and save up to 80% on Steam keys with Kinguin — trusted by 15+ million gamers worldwide.
*Affiliate link — supports our independent coverage at no extra cost to you
FinalBoss // Gear
Level up your setup
01Mobile gaming controllerson Amazon→02Top-rated gaming headsetson Amazon→038BitDo controllerson Amazon→Affiliate links · As an Amazon Associate, FinalBoss earns from qualifying purchases.
Want to Level Up Your Gaming?
Get access to exclusive strategies, hidden tips, and pro-level insights that we don't share publicly.
Ultimate Guide Strategy Guide + Weekly Pro Tips
Vanta – B-Tier Crowd Control and Farming Utility
Vanta looks extremely strong at first because of her crowd control tools and utility. She’s great at stabilizing messy situations and is particularly useful when you’re focusing on farming resources rather than pushing as deep as possible every run.

Where Vanta Shines
Vanta’s kit revolves around control and collection more than raw damage. In practice, this tends to mean:
- She can get you out of near-death scenarios when hordes close in.
- Her tools make gathering experience and drops easier, which helps with faster early-game snowballing.
- Short-range or area weapons pair nicely with her ability to reposition and manipulate pack behavior.
This makes Vanta a strong pick when your priority is farming Ash and unlocking upgrades, since she keeps runs stable even if your weapon RNG is mediocre. You get enough time and safety to power up, cash out, and repeat.
Why Vanta Falls Behind in Very Long Runs
The flip side is that once enemy health starts scaling hard in later waves and endless mode, Vanta’s damage ceiling just doesn’t quite match Solara’s Rail Gun or Cascade’s fully-juiced bounce builds. The crowd control keeps you alive for a while, but eventually:
- Enemies outscale your ability to thin them out fast enough.
- You spend more time dodging than actually killing.
- Small positioning mistakes turn into run-ending traps because you lack a truly explosive screen-clear.
That doesn’t mean she’s bad – she’s just more of a specialist. I like using Vanta when I’m focusing on progression and resource grind, then swapping to Solara or Cascade once my goal is purely pushing leaderboards or deepest waves.
Key Vanta Tips
- Invest in utility early: Pickup range and movement speed feel amazing on her and help her lean into her strengths.
- Pair with high-hit-count weapons: Anything that benefits from being close but not literally inside enemies works well with her control tools.
- Don’t overestimate her late-game: Have realistic expectations; she’s for stability and farming, not peak endless-mode dominance.
If your runs keep ending before you can properly scale other classes, trying a few Vanta farming sessions can give you the resources and practice needed to transition to more demanding characters.
Riven – C-Tier High-Risk, High-Skill DPS
Riven is the classic “glass cannon” taken to an extreme. Her damage potential is absurd, but the conditions to unlock it are so punishing that she ends up at the bottom of the ranking for most players and most goals.
How Riven’s Kit Works Against You
Riven is designed around close-range combat and an active ability that becomes stronger the lower your health is. On paper, this means that at 1 HP, you’re shredding everything near you. In reality, in a bullet-hell game where random hits can come from anywhere, playing on the edge of death constantly is a recipe for heartbreak.
To get the most out of her, you effectively have to play as if you’re doing a no-hit run while staying in dangerous ranges. That combination of:
- Short engagement distance
- Low effective survivability
- Risk-reward mechanics tied to missing health
makes her incredibly unforgiving. One small misread on enemy movement, or a surprise spawn behind you, and the run is over with no way to recover.
Where Riven Can Still Work
Riven isn’t unusable – she’s just highly niche. She can be fun and effective for:
- Short, high-intensity runs where you’re not aiming for endless but just want fast clears and aggressive play.
- Experienced players who already know every enemy pattern and are comfortable dancing at melee range.
- Challenge runs if you want to test your mechanical skill and positioning discipline.
If your goal is consistent progress, though, Riven adds difficulty without offering enough late-game safety or scaling to justify it compared to the other three classes.
How Class Mechanics Shape Your Run Strategy
One of the most important mindset shifts in Grind Survivors is realizing that your class should dictate your priorities from the very first wave. You don’t pick the same buffs or weapons on Riven that you would on Solara, even if they look generically strong.
- On Solara: Treat health and cooldown as primary stats. Every max HP upgrade empowers Rail Gun, and every cooldown reduction multiplies that impact.
- On Cascade: Think in terms of coverage and bounces. Projectile count, damage, and pierce are worth more than niche conditional bonuses.
- On Vanta: Lean into safety and collection. Utility like pickup range and movement speed can be “correct” choices, especially early.
- On Riven: Only pick her if you’re intentionally opting into a high-risk playstyle and are comfortable hugging enemies without getting tagged.
As waves scale up, the classes that convert universal, safe stats (like health or projectiles) into disproportionate power – mainly Solara and Cascade – naturally rise to the top of the meta. Vanta and Riven can feel great for a while, but they demand much more from you to keep pace later.