
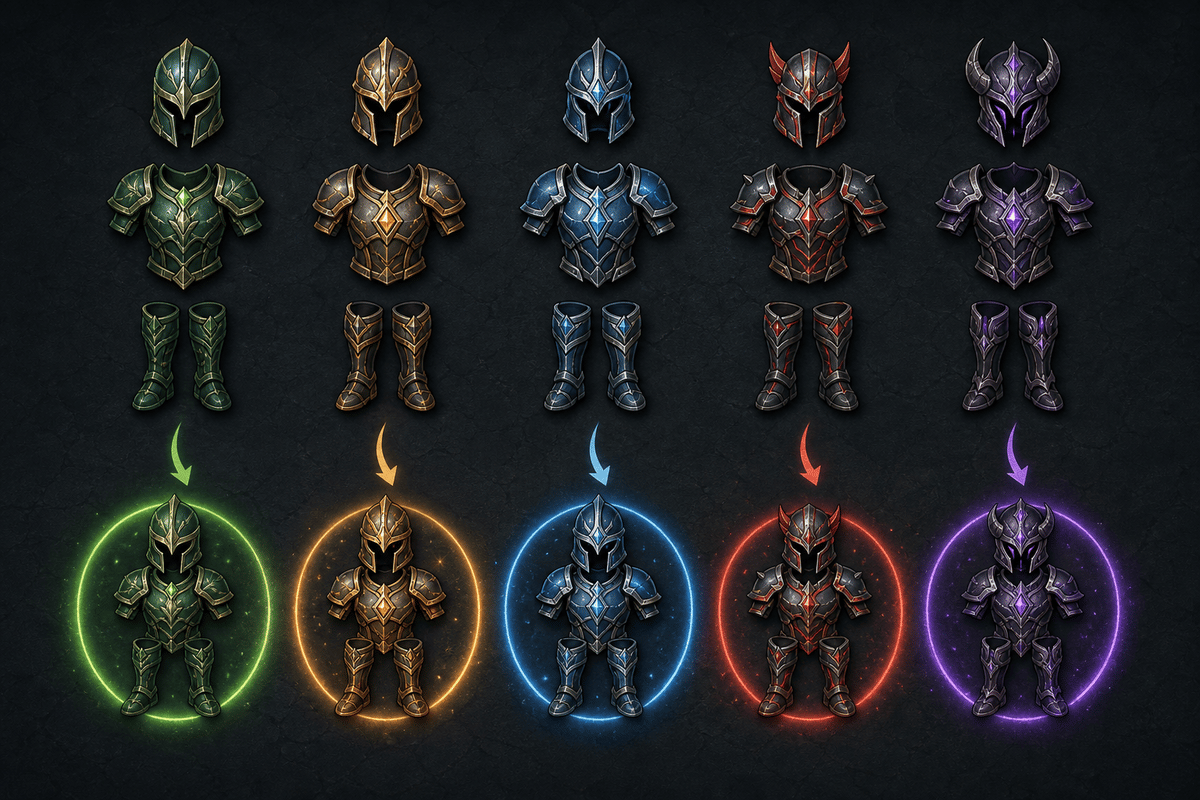
Grounded 2 currently has 14 consistently documented three-piece armor sets. The best way to choose one is by its full-set bonus: Snail Shell rewards perfect defense, Bee improves charged bow shots, Sizzling accelerates staff damage, and Roach Armor helps against dangerous status effects. Craft every set at a Workbench after scanning its key materials at a Resource Analyzer and meeting the required Brainpower level.
Table of Contents (16)
How Armor Crafting Works in Grounded 2
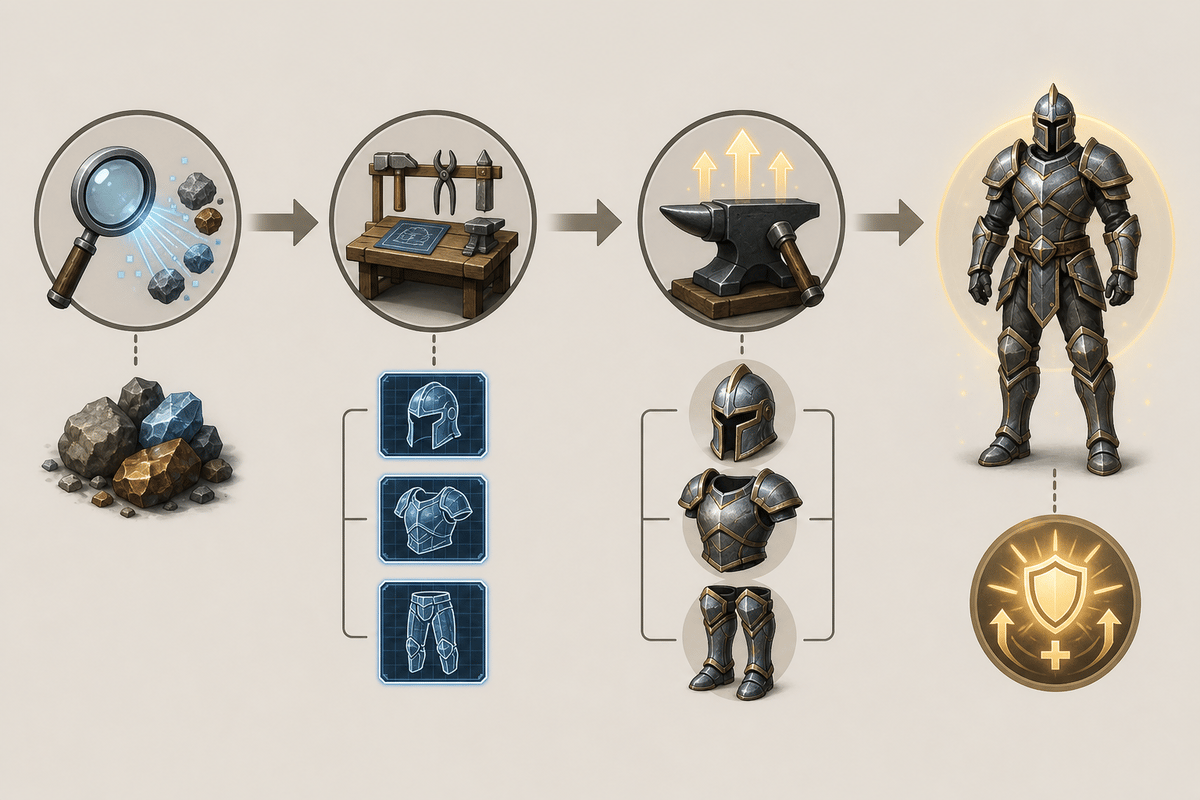
Armor recipes are tied to discovery and progression. Finding a material is only the first step; scan it at a Resource Analyzer to reveal its associated crafting recipes, then use the Workbench to make the head, chest, and leg pieces. A full set is required to activate its defining bonus.
- Find the core resource: Hunt the relevant creature or gather the environmental material associated with the set.
- Analyze it: Use a Resource Analyzer to unlock recipes. Some recipes also require additional Brainpower progression.
- Craft all three pieces: A single piece supplies defense, but the set bonus requires the complete three-piece outfit.
- Upgrade the set: Use a Smithing Station to improve defense and durability as your progression advances.
Acorn Armor is the clearest early example. Analyze an Acorn Shell or Acorn Top, unlock the recipe, then collect the required acorn and early-game plant resources for the Workbench. The same loop applies to the rest of the roster: scan the important enemy drop before spending time farming secondary materials.
Crafting warning: Early Access updates can adjust exact ingredient requirements and unlock conditions. The crafting menu after analysis is the reliable place to check the current material count for each individual piece.
All Grounded 2 Armor Sets and Full-Set Bonuses
The table below focuses on the practical decision: what each completed set does, what type of material unlocks it, and which playstyle gets the most value from wearing all three pieces.
| Armor Set | Full-Set Bonus | Crafting Focus | Best Use |
|---|---|---|---|
| Acorn Armor | Hardy Defense increases damage resistance while blocking. | Acorn Shells, Acorn Tops, and early-game plant materials. | Starter tank and shield-focused melee builds. |
| Bee Armor | Apex Pollinator causes perfectly charged bow shots to release pollen that slows targets. | Bee parts and light crafting materials. | Bow users, kiting, and safer fights against fast enemies. |
| Butterfly Armor | Chilly Dodge lets staff finisher hits empower your body briefly; dodging then releases a chilling gust. | Butterfly materials and frost-oriented resources. | Mobile staff users who weave attacks and dodges together. |
| Clover Armor | Moist gives the set its water-retaining survival utility. | Clover resources and very early gathering materials. | Opening exploration before bug-part sets are available. |
| Fuzzy Armor | Exertion reduces Chill buildup after kills. | Fuzzy materials and cold-resistance components. | Cold-focused exploration and combat routes. |
| Grub Armor | Lone Ranger increases attack damage with bows and spears. | Grub parts and subterranean materials. | Hybrid spear-and-bow loadouts. |
| Ladybug Armor | Scarlet Embrace restores a small amount of health when you block attacks. | Ladybug parts and tougher bug materials. | Solo melee players who block consistently. |
| Northern Armor | Crippling Strike stuns ambushed creatures struck with melee attacks. | Northern-region creature materials. | Stealth openings and melee burst damage. |
| Red Ant Armor | Strength in Numbers raises attack power when allies are nearby, stacking up to three times. | Red Ant parts and basic bug materials. | Co-op frontline and coordinated group damage. |
| Roach Armor | Adaptive Resistance grants resistance to Venom, Chill, or Sizzle, stacking up to five times. | Roach materials and status-resistance resources. | General survival, unknown routes, and status-heavy encounters. |
| Sizzling Armor | Whizzy Wizard increases staff attack speed on staff hits, stacking up to five times. | Sizzle-themed materials and wizard-style resources. | Maximum staff damage during uninterrupted combat. |
| Snail Shell Armor | Retaliation turns blocked hits into stacks that empower your next charged melee attack with a shockwave, up to five stacks. | Snail shells and heavier armor materials. | Blocking specialists and charged-attack melee weapons. |
| Weaver Armor | Web Crawler improves movement on web bridges and avoids spider-web traps; Critical Momentum raises critical chance after successful attacks, up to five stacks. | Spider and web-related materials. | Mobile melee builds, web traversal, and crit-focused damage. |
| Wolf Armor | Deadly Venom gives melee hits a chance to increase venom damage briefly. | Wolf Spider-derived materials. | Poison melee builds that keep pressure on targets. |
Best Armor Sets by Playstyle
Defense values matter, especially after upgrades, but the strongest armor choice is usually the bonus that supports how you already deal damage. These are the current standout sets for the most common builds.
Best Melee Armor: Snail Shell Armor
Snail Shell Armor is the strongest fit for a deliberate melee bruiser. Its Retaliation bonus builds stacks from blocked hits, then converts those stacks into a shockwave on your next charged melee attack. Because it stacks up to five times, the set gets better in longer fights where you can recognize attack strings and block instead of panic-dodging.
Use it with a weapon that has a meaningful charged attack. Spend the early part of a fight blocking safely, avoid releasing the charge into a bad opening, then use the shockwave after the enemy commits to a slow recovery animation. This set loses much of its value if you play aggressively without blocking.
Best Defensive Solo Armor: Ladybug Armor
Ladybug Armor is the more forgiving melee choice. Scarlet Embrace restores a small amount of health when you block, creating reliable sustain over a long encounter. It will not produce Snail Shell’s burst damage, but it gives you more room to survive mistakes while learning enemy attack timing.
Choose Ladybug Armor when consumable healing is becoming expensive, when you are tackling difficult bugs alone, or when you can block individual strikes but do not yet have the confidence to bank stacks for a charged counterattack.
Best Bow Armor: Bee Armor
Bee Armor is the clearest dedicated bow set. A perfectly charged shot applies a pollen slow, giving you space to reload your next shot, reposition around terrain, or create distance from a target that is closing quickly. The slow is also valuable when several enemies are active because controlling one threat makes the rest of the fight easier to manage.
The main trap is firing before the bow is fully charged. Bee Armor rewards patience and accuracy, so use it for deliberate shots rather than rapid panic fire. Grub Armor is the better alternative if your build regularly swaps between bow attacks and spear pressure.
Best Staff Armor: Sizzling Armor or Butterfly Armor
Sizzling Armor is the damage-first staff option. Whizzy Wizard builds attack-speed stacks from staff hits, up to five total. Keep attacking without taking damage to maintain the bonus; getting hit or leaving combat resets the stacks. This makes it strongest when you know an enemy’s safe damage windows and can stay protected while casting.

Butterfly Armor trades sustained speed for movement control. Its Chilly Dodge bonus is better suited to players who use staff finishers, reposition often, and expect to dodge through active threats. Pick Sizzling when you can maintain offense uninterrupted. Pick Butterfly when survival depends on frequent movement and evasive timing.
Best General Survival Armor: Roach Armor
Roach Armor is the safest all-purpose set for areas where Venom, Chill, or Sizzle can ruin an otherwise solid run. Adaptive Resistance stacks up to five times, so the set becomes more valuable as you remain exposed to the status effect it is countering. It is a practical default for exploration because it does not force you into a specific weapon class.
Bring Roach Armor when you are entering an unfamiliar biome, gathering in hazardous territory, or facing a route that mixes environmental danger with combat. Swap into a specialist damage set once you know the area’s main threat and can safely commit to a narrower build.
Other Strong Armor Choices Worth Crafting
Acorn Armor for Early Blocking Practice
Acorn Armor is an efficient first defensive set because its materials are accessible and Hardy Defense directly improves survivability while blocking. It gives new melee players a reason to learn guard timing early, which carries over well into Ladybug and Snail Shell builds later.
Red Ant Armor for Co-op Parties
Red Ant Armor has a straightforward multiplayer role. Strength in Numbers grants more attack power around allies and stacks up to three times, so it gains value as the group stays together. It is much less attractive for solo players, where its central bonus cannot reach its intended strength.
Weaver Armor for Web Routes and Critical Hits
Weaver Armor has two unusually practical benefits. Web Crawler improves movement across web bridges and prevents spider-web traps from interrupting your route, while Critical Momentum increases critical-hit chance through successful attacks. The set is particularly useful when your planned farming path or combat area involves webs, because its traversal benefit remains useful even between fights.
Wolf Armor for Venom Damage
Wolf Armor belongs on aggressive poison-focused melee builds. Deadly Venom can increase venom damage after melee hits, so the set works best when you maintain close-range pressure and can repeatedly connect. It is less consistent than a defensive set for difficult unfamiliar fights, but it is a strong damage choice once you know you can stay on the target.
Northern and Fuzzy Armor for Cold-Focused Content
Northern Armor supports an ambush style: Crippling Strike can stun creatures hit with melee after they have been ambushed. Use it when you can open fights from stealth and capitalize on the first stagger window.
Fuzzy Armor has a narrower purpose but can be valuable in Chill-heavy areas. Exertion reduces Chill buildup after kills, making repeated combat safer when the environment or local enemies are constantly applying cold pressure.
When to Keep, Upgrade, or Replace a Set
- Keep Acorn Armor until you have enough bug parts for a specialized defense set or your preferred weapon build.
- Upgrade Ladybug or Snail Shell Armor if blocking is already central to your combat style; their bonuses remain useful as enemies become tougher.
- Upgrade Bee, Sizzling, Butterfly, Grub, or Wolf Armor when your damage plan is built around the weapon type each set supports.
- Carry Roach Armor as a utility swap for status-heavy exploration, even if it is not your main combat set.
- Do not split a set accidentally unless you are deliberately sacrificing the full bonus for defense or another specific piece effect. Three matching pieces are what activate the major playstyle change.
Armor Planning for the Into the Abyss Update
The Into the Abyss update adds underwater exploration, dangerous new creatures, underwater base building, diving gear, and a new progression layer. That makes flexible equipment planning more important than relying on one permanent armor set. Keep a combat-focused outfit for weapon damage, a Roach set for hazardous status pressure, and enough inventory space to carry the appropriate diving equipment when your route moves below the surface.
For the current armor roster, start with Acorn or Clover Armor, craft a weapon-specialist set as soon as you settle on melee, bows, or staffs, then add Roach Armor and one higher-defense option before pushing into more dangerous regions. That progression covers survival, damage, and status resistance without wasting materials on every set at once.
FinalBoss // Gear
Level up your setup
01Top-rated gaming headsetson Amazon→02High-refresh gaming monitorson Amazon→03Gaming chairson Amazon→04Discounted game keyson Kinguin→
Affiliate links · As an Amazon Associate, FinalBoss earns from qualifying purchases.
Want to Level Up Your Gaming?
Get access to exclusive strategies, hidden tips, and pro-level insights that we don't share publicly.
Ultimate Guide Strategy Guide + Weekly Pro Tips