
Milkweed is one of the first materials in Grounded 2 that turns a simple scavenging trip into a proper gathering run. The game’s streamlined Omni-Tool system removes much of the old tool-swapping friction, but Milkweed Pods still demand the right preparation: bring a bow to drop high pods and a Tier 2 Omni-Axe to crack them open. For the fastest supply of Milkweed Tufts, farm the tall yellow plants south of the Picnic Table, then sweep the rope-fence border toward Snackbar Front.
Table of Contents (7)
Where to Find Milkweed Tufts in Grounded 2
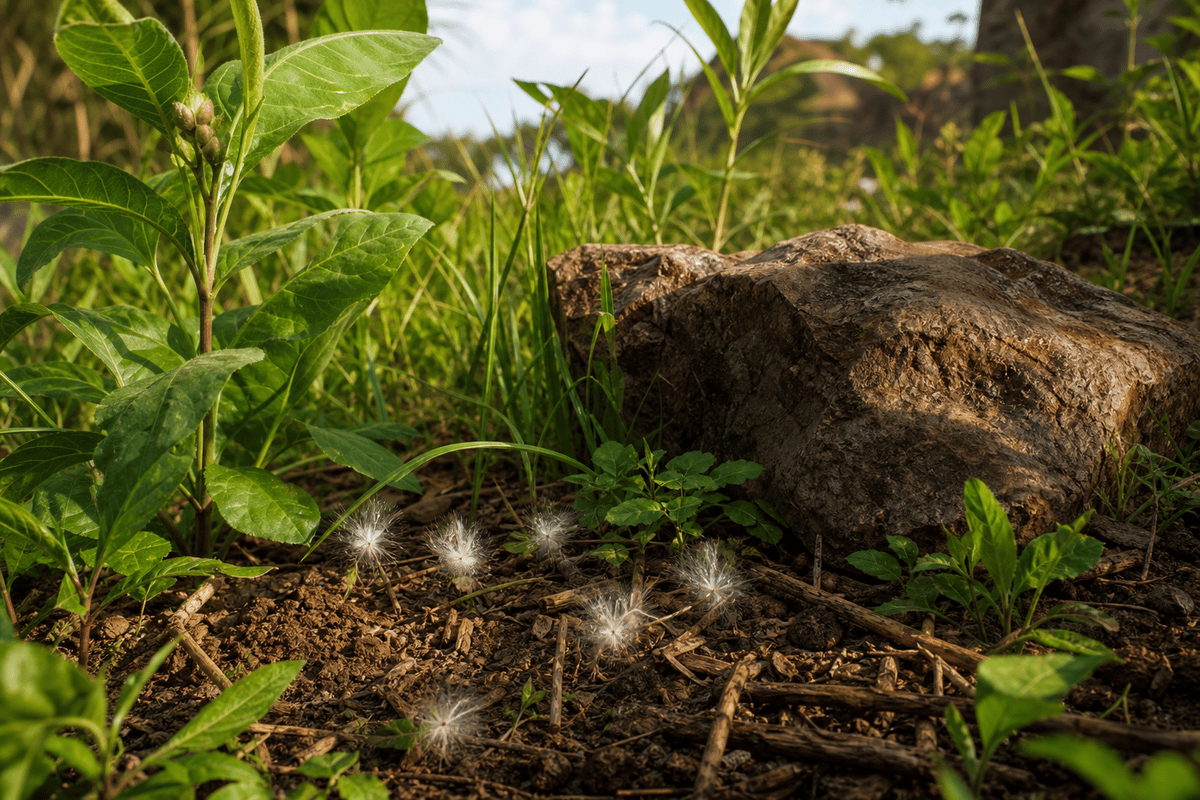
Milkweed Tufts come from Milkweed Pods, not from cutting down the full plant or striking its flowers. Look for tall milkweed plants with yellow stems, broad wavy leaves, and pink or violet flowers near their tops. The pods are usually brown and grow high on the stem, although some may already be lying near the plant’s base.
The south side of the Picnic Table is the best place to begin. It has the most dependable concentration of milkweed plants for a mid-game farming loop, with further plants along the boundary between the Picnic Table and Snackbar Front. If you need more after clearing that line, extend the route toward the Fire Pit side of the area.
| Area | Why Check It | Best Use |
|---|---|---|
| South of the Picnic Table | The most reliable early Milkweed Pod area, with several visible yellow plants. | Start every Tuft and Chunk farming run here. |
| Snackbar Front and Picnic Table border | Milkweed plants can appear along the rope-fence boundary. | Follow this line after checking the Picnic Table’s south edge. |
| Fire Pit direction | Useful secondary area with reported milkweed plants farther from the main route. | Expand here when the core Picnic Table sweep is empty. |
Bring a Bow and a Tier 2 Omni-Axe
The main trap is spotting a Milkweed Pod overhead and trying to harvest the stalk beneath it. Pods that remain attached high on the plant are usually out of melee range. Shoot them with a bow first, wait for them to fall, then use the Tier 2 Omni-Axe on the pod itself.
- Bow: Knocks down Milkweed Pods growing too high to reach.
- Tier 2 Omni-Axe: Breaks open fallen pods and collects their materials.
- Open inventory slots: Each pod can provide both Milkweed Tufts and Milkweed Chunks.
- Food, water, or cold protection: Useful when turning a short harvest into a longer area sweep.
Warning: A basic or lower-tier axe can leave the run stalled even after you have shot down several pods. Upgrade to the Tier 2 Omni-Axe before committing to a full farm circuit, otherwise you will spend time locating resources you cannot efficiently harvest.
Fastest Milkweed Tuft Farming Route
The efficient route is a circuit rather than a single stop. Milkweed plants are tall enough to spot at a distance, while the pods themselves can blend into the upper foliage. Scan for the yellow stems first, then check every plant for attached or fallen pods before moving on.
- Travel to the south edge of the Picnic Table.
- Look across the area for tall yellow milkweed plants with pink or purple flowers.
- Check the ground around each plant before aiming upward; a fallen pod saves ammunition and time.
- Use your bow to shoot down any pod still attached to a stem.
- Walk to the fallen pod and strike it with the Tier 2 Omni-Axe.
- Keep chopping until the pod is fully broken, then collect every Milkweed Tuft and Milkweed Chunk it drops.
- Move east or west along the rope-fence boundary between the Picnic Table and Snackbar Front, checking each visible milkweed cluster.
- Continue toward the Fire Pit-side plants only if your target amount is larger than the main route provides.
Fully breaking each pod matters. A Milkweed Pod is a dual-resource node: it can yield Milkweed Tufts for gear and utility crafting as well as Milkweed Chunks for building. Leaving after the first visible drop reduces the value of every arrow and every trip through the area.
How to Spot the Right Plant and Resource Node
Milkweed can be easy to miss because the plant’s height makes the flower more visible than the pod. Use the flower as your landmark, then inspect the stem and upper branches for the brown pod. A pod on the ground is still worth checking even when you cannot immediately see the parent plant; it may have spawned low or dropped earlier.
- Target: The brown Milkweed Pod.
- Landmark: Tall yellow stems with broad leaves and pink or violet flowers.
- Wrong target: The flower, leaves, and stalk alone do not provide the Tufts.
- Best positioning: Stand on safe, clear ground before shooting upward so you can track where the pod lands.
Using ranged shots from clear ground also helps when the immediate area is unsafe. Grounded 2’s rideable buggies make crossing Brookhollow Park quicker and offer limited protection during travel, but you still want to dismount or position carefully enough to see the pod’s landing point. A pod that falls into dense grass can take longer to recover than the shot took to make.
What Milkweed Tufts Are Used For
Milkweed Tufts are a progression material, with their most useful role tied to warmth-oriented equipment. The notable crafting target is the Fuzzy Parka, which supports cold protection. They also contribute to utility and decorative projects, including the Landing Pad and stuffed or display-style base pieces.
Milkweed Chunks make the same farming trip more valuable. They are used in thatched-roof-style construction and other early building projects, so gathering pods is more efficient than treating Tufts as the only reward. If a base build and cold-ready gear are both on your checklist, clear every pod you find rather than stopping as soon as you have a few Tufts.
Milkweed Tuft Farming Mistakes That Waste Time
- Chopping the whole plant: Focus on the pod. The stalk is only a visual landmark.
- Skipping the bow: High pods often cannot be reached with melee tools.
- Using an underleveled axe: Bring the Tier 2 Omni-Axe before starting the route.
- Looking only overhead: Inspect the base of every milkweed plant for pods already on the ground.
- Leaving a partly broken pod behind: Finish the node to maximize Tufts and Chunks.
- Checking one plant and leaving: Milkweed farming works best as a Picnic Table-to-Snackbar Front circuit.
Best Way to Farm Milkweed Efficiently
For a focused Milkweed Tuft run, start at the Picnic Table’s south edge, trace the rope-fence border toward Snackbar Front, and harvest every pod completely before extending toward the Fire Pit. Keep the bow ready, preserve enough inventory space for both resource types, and use the tall flowered plants as your navigation markers.
The decisive recommendation is simple: do not hunt Milkweed Tufts as loose pickups. Farm Milkweed Pods in full, beginning south of the Picnic Table, because each completed pod gives the best return for cold-gear progression, Landing Pad materials, and base-building supplies in the same run.
FinalBoss // Gear
Level up your setup
01Top-rated gaming headsetson Amazon→02High-refresh gaming monitorson Amazon→03Gaming chairson Amazon→04Discounted game keyson Kinguin→
Affiliate links · As an Amazon Associate, FinalBoss earns from qualifying purchases.
Want to Level Up Your Gaming?
Get access to exclusive strategies, hidden tips, and pro-level insights that we don't share publicly.
Ultimate Guide Strategy Guide + Weekly Pro Tips