
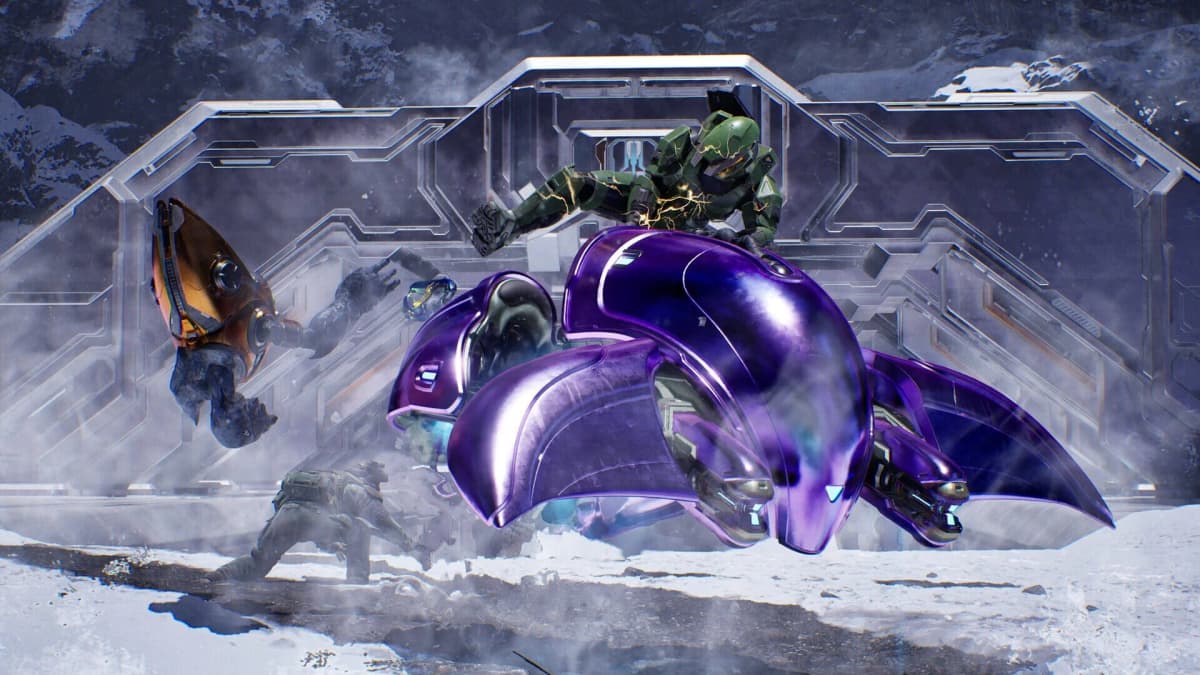
Halo: Combat Evolved launched in 2001 without in-mission lore Terminals. Halo: Campaign Evolved changes that structure with 13 glowing Forerunner- and Covenant-style consoles spread across the main campaign and The Most Dangerous Game bonus missions. The fastest approach is to collect them in campaign order, stop before every obvious mission transition, and treat ledges, empty cells, side rooms, and recently cleared combat spaces as Terminal checks.
Every Terminal is available on every difficulty and with any Skull configuration. Interact with the console once to add its log to Lore / Intel; it remains unlocked permanently, so a successful pickup does not need to be repeated on later runs. A focused collection sweep takes roughly 60-90 minutes when you use Rally Points rather than replaying full missions.
Table of Contents (18)
How Terminals Work in Halo: Campaign Evolved
- Total: 13 Terminals across 10 campaign missions and three bonus-mission entries.
- What to look for: an interactable, glowing lore console placed in the game world rather than a menu collectible.
- Collection rule: activate the Terminal, let the unlock register, then check Lore / Intel before leaving the mission if you are unsure.
- Difficulty: Terminal spawns do not change on Easy, Normal, Heroic, Legendary, or Skull-enabled runs.
- Replay behavior: a collected Terminal cannot be collected twice, but its scene and lore log can be replayed from the Intel menu.
- Big trap: old knowledge from Halo: Combat Evolved Anniversary and Halo 3 does not help here. These are new placements and new lore logs.
All 13 Halo: Campaign Evolved Terminals at a Glance
| Terminal | Mission | Lore Log | Primary Missable Cue |
|---|---|---|---|
| 1 | The Pillar of Autumn | Approach | Small red-lit room immediately off the cryo-bay route |
| 2 | Halo | Forgotten | Drop-down ledge beneath a tunnel-wall opening |
| 3 | Truth and Reconciliation | Inquisitor | Optional brig cell after lowering the forcefields |
| 4 | The Silent Cartographer | Status Update | Security-override building sweep |
| 5 | Assault on the Control Room | Tangent I | Large Forerunner interior |
| 6 | 343 Guilty Spark | Tangent II | Forerunner facility route after the swamp section |
| 7 | The Library | Tangent III | Side space during the linear Flood facility push |
| 8 | Two Betrayals | Alone | Reverse-route side area before advancing the mission objective |
| 9 | Keyes | Consumed | Optional interior space during the Truth and Reconciliation return |
| 10 | The Maw | Arrival | Autumn interior before the final escape is committed |
| 11 | Boarding Action | The Path | Bonus-mission interior route |
| 12 | The Most Dangerous Game – Silicon Cryptographer | Penitent Report | Bonus-mission objective area |
| 13 | The Most Dangerous Game – Heavy Burden | Harmonious Clarity | Bonus-mission late-route sweep |
Terminal 1: Approach — The Pillar of Autumn
Rally-point cue: Begin from the mission start or a checkpoint shortly after the cryo bay. This Terminal is only around five to 10 minutes into the level, so restarting is usually faster than trying to backtrack through later encounters.
- Play through the opening until you reach the cryo bay observation window, the room overlooking the chamber where Master Chief woke up.
- Stand facing the cryo bay, then turn around toward the route that continues the mission.
- Go through the doorway ahead, but immediately make a hard left instead of following the critical path.
- Enter the small red-lit control room.
- Check the back-right corner behind the equipment for the glowing Terminal mounted against the wall.
Why players miss it: Combat and forward momentum pull attention toward the next hallway. The left-hand room does not look like an objective area, so it is easy to sprint past it while returning players follow the original campaign route from memory.
Lore note: Approach establishes the new framing for these collectibles. Rather than presenting an in-the-moment Forerunner transmission in the style of Halo 3, it adds an analytical, post-war perspective around the Autumn’s final moments and ONI’s reconstruction of the campaign.
Terminal 2: Forgotten — Halo
Rally-point cue: Use a checkpoint after rescuing Marines and acquiring the Warthog. The Terminal sits in the early tunnel route, approximately 10–15 minutes from the mission start depending on how quickly you clear the crash-site fights.
- Clear the first crash-site encounter and drive the Warthog toward the Forerunner tunnel complex.
- Enter the tunnel and continue past the first gradual bend.
- Watch for the second turn and small ramp.
- As soon as you reach the ramp, stop the Warthog and look to the right-hand wall.
- Find the opening or window in the tunnel wall, leave the vehicle, and jump through it.
- Drop carefully onto the ledge directly below the opening. Do not fall all the way down.
- Turn back toward the tunnel wall. The Terminal is under the overhang on the ledge behind and below the window.
Why players miss it: The gap is visible only briefly at driving speed, and the ledge is below the route rather than beside it. If the drop goes wrong, reload the nearest checkpoint instead of trying to recover from a lower position.
Lore note: Forgotten expands on the reconstruction of Alpha Halo’s early losses and contact events. That material did not exist in the original 2001 mission.
Terminal 3: Inquisitor — Truth and Reconciliation
Rally-point cue: Start from the checkpoint inside the Covenant ship nearest the brig or holding cells. Reaching the Terminal takes roughly 15–25 minutes from the mission start, with the biggest time difference coming from how aggressively you clear the boarding fights.
- Board the Covenant ship and progress until you reach the brig, identified by several energy-shielded holding cells around the room.
- Use the central console to lower the forcefields and release the captured Marines.
- Stand at the console and face the opened cells.
- Do not enter Captain Keyes’ cell. Instead, move to the open cell almost opposite the central console.
- Walk into the cell and inspect the rear area for the Inquisitor Terminal.
- Activate it before following the rescued Marines and Keyes toward the next ship section.
Why players miss it: The game treats the brig as a rescue objective. Once the shields drop, the natural instinct is to run straight to Keyes and leave with the group. The Terminal is in another cell, making the room’s most obvious destination the wrong one for collectible hunting.
Terminal 4: Status Update — The Silent Cartographer
Rally-point cue: Load the checkpoint nearest the security override building. Expect a 10–20 minute approach from the mission start if you are still working through the island normally.

- Reach the security override building as part of the main Cartographer objective.
- Clear the immediate defenders before interacting with anything that sends you back outside or advances the island sequence.
- Make a full room sweep of the building, checking the back wall sections and equipment-lined corners rather than leaving as soon as the override objective is complete.
- Interact with the glowing Terminal to unlock Status Update.
Why players miss it: This is a post-fight check. Once the building is secured, the mission strongly redirects attention to the next outdoor objective, so the Terminal is lost when players treat the security structure as a one-purpose room.
Terminal 5: Tangent I — Assault on the Control Room
Rally-point cue: Use a checkpoint inside the large Forerunner interior. Reaching the relevant portion of the mission can take 20–30 minutes from the start, particularly on higher difficulties or when you skip vehicle shortcuts.
- Advance through the exterior approach until the mission moves into the large Forerunner structure.
- Once inside, stay alert through the major interior transition instead of treating every corridor as a pure combat tunnel.
- Before committing to the next obvious lift, bridge, or exit route, inspect the side space around the interior room you have just cleared.
- Find and activate the Terminal for Tangent I.
Collection advice: This level is built around repeated Forerunner architecture, which makes it harder to notice a side route from memory. Pause after each objective marker changes; that is the safest time to check the cleared room before a one-way movement section locks your attention onto the next encounter.
Terminal 6: Tangent II — 343 Guilty Spark
Route cue: The Tangent II Terminal belongs to the facility route after the mission’s swamp opening. Continue the primary objective until you enter the Forerunner structure, then search the interior before pressing deeper into the containment sequence.
- Move through the swamp and follow the mission route to the Forerunner facility entrance.
- Enter the interior and clear the immediate threat before pushing through the next obvious door.
- Check the accessible side space in the first cleared facility section.
- Activate the Tangent II Terminal before continuing into the Flood-focused portion of the level.
Why players miss it: The mood shift in this mission makes players rush toward the next story beat. The Terminal is easier to secure when you stop after the first interior fight rather than trying to search while being pressured by enemies.
Terminal 7: Tangent III — The Library
Route cue: The Library is intentionally repetitive, so use the Terminal’s lore-log name as your tracking confirmation. The target is a side-space pickup during the facility push, not a reward for finishing the mission.
- Progress through the Library until you clear one of its larger combat rooms.
- Before following the next light-guided route, inspect the open side areas and equipment spaces around the room perimeter.
- Look for the glowing console rather than relying on a distinctive room shape; the Library’s repeated architecture is the main source of confusion.
- Activate Tangent III, then continue the mission as normal.
Important: Avoid saving Terminal cleanup for a later blind replay of the Library. Its loops and identical-looking corridors make a dedicated return trip slower than pausing for a perimeter check whenever a combat room goes quiet.
Terminal 8: Alone — Two Betrayals
Route cue: Two Betrayals reuses and reverses familiar Forerunner spaces from Assault on the Control Room, which is precisely why old route memory causes misses. Search the optional side area before advancing the mission’s next critical objective.
- Follow the main objective through the reused Forerunner route.
- When the mission opens a route toward the next major destination, delay the forward push briefly.
- Turn back through the newly cleared space and check the available side path or room perimeter.
- Activate the Alone Terminal before moving into the next extended combat sequence.
Why players miss it: The level encourages urgency and makes familiar rooms feel solved already. Terminal hunting requires the opposite habit: treat every reversed encounter space as new, even if the architecture looks lifted from an earlier mission.
Terminal 9: Consumed — Keyes
Route cue: The Consumed Terminal is on the mission’s interior return route. Search the optional space during the push through the ship rather than waiting until the extraction sequence begins.

- Advance into the mission’s interior objective route.
- After clearing the local encounter, check accessible side areas before moving through the next required door or transition.
- Prioritize spaces that are separate from the obvious route to Captain Keyes and the mission-critical path.
- Interact with the Terminal to add Consumed to Lore / Intel.
Collection advice: The mission’s pacing becomes more urgent as it progresses. Grab the Terminal at the first clear opportunity and do not assume you will have safe backtracking time after the next story objective.
Terminal 10: Arrival — The Maw
Route cue: The final campaign Terminal is inside the Autumn during The Maw. Find it before fully committing to the final escape route; this is a poor mission to replay solely for one missed collectible.
- Enter the Autumn interior and follow the mission objective through the returning ship sections.
- After clearing an interior combat space, check its side areas before taking the next exit that pushes the escape sequence forward.
- Locate and activate Arrival.
- Confirm the unlock in Lore / Intel before continuing toward the final escape.
Why players miss it: Familiarity works against completionists here. The final mission has a strong forward-driving pace, and players who know the original escape route tend to prioritize movement over room checks.
Terminal 11: The Path — Boarding Action
Route cue: Boarding Action is the first bonus-mission Terminal stop. Load the mission, progress into its interior route, and clear the initial encounter before making a deliberate sweep of the accessible side space.
- Start Boarding Action from the bonus-mission menu.
- Follow the opening objective into the mission’s interior section.
- Once the first combat area is secure, inspect the room edges and any route that does not immediately advance the objective.
- Interact with the Terminal to unlock The Path.
Planning tip: Do the bonus missions after finishing The Maw. Their three Terminals form a clean final block and are faster to track when the campaign’s 10 main-mission entries are already complete.
Terminal 12: Penitent Report — Silicon Cryptographer
Route cue: In The Most Dangerous Game – Silicon Cryptographer, search the objective area before taking the route that advances the mission beyond its central encounter.
- Load Silicon Cryptographer from The Most Dangerous Game mission list.
- Push through the opening objective without spending time clearing every optional enemy.
- When you reach the main objective space, secure the immediate area and sweep the accessible perimeter.
- Activate the glowing Terminal for Penitent Report before leaving the objective zone.
Efficiency note: The three bonus-mission Terminals can be collected in roughly 15–20 minutes total on a dedicated run when you use the closest available Rally Points and avoid full encounter clears.
Terminal 13: Harmonious Clarity — Heavy Burden
Route cue: Heavy Burden contains the final Terminal, Harmonious Clarity. Search the late-route combat space before taking the mission’s final forward transition.
- Start The Most Dangerous Game – Heavy Burden.
- Follow the main objective until the mission reaches its later interior route.
- Clear enough of the encounter to move safely, then inspect the room perimeter and side space before using the next required exit.
- Interact with Harmonious Clarity.
- Open Lore / Intel after the pickup to verify all 13 logs are present.
Fastest 13-Terminal Collection Route
- Play the main campaign in order from The Pillar of Autumn through The Maw, taking each Terminal as its mission comes up.
- Use a fresh start for Approach, then use the nearest Rally Point for every later miss.
- Stop the Warthog immediately after the small ramp in the Halo tunnel for Forgotten; do not try to spot the wall opening at full speed.
- In Truth and Reconciliation, search the brig cells immediately after lowering the forcefields. Captain Keyes’ cell is not the Terminal cell.
- Before every lift, drop, long bridge, vehicle transition, or final escape sequence, turn around and sweep the cleared room.
- Finish with Boarding Action, Silicon Cryptographer, and Heavy Burden for the three bonus-mission logs.
Terminal Hunting Mistakes That Cost the Most Time
- Using old Halo locations: These Terminals are specific to Halo: Campaign Evolved. Original Combat Evolved did not have in-engine lore Terminals, and Anniversary knowledge does not map cleanly to these placements.
- Following the objective marker too closely: Most misses happen in rooms the mission has already asked you to leave. Clear the immediate threat, then search before moving on.
- Skipping ledges: Forgotten is the clearest example. A visible wall opening can lead to a lower platform rather than another hallway.
- Ignoring opened doors and cells: The brig in Truth and Reconciliation becomes collectible space only after the central console lowers the forcefields.
- Restarting entire missions: Once you know the relevant phase, load the closest Rally Point instead. Full mission replays are only efficient for the early Autumn Terminal.
- Leaving before the unlock registers: Interact with the console and check that its named lore log appears in Lore / Intel.
Why These Terminals Matter to Halo Lore
The 13 logs add narrative material around ONI, Covenant activity, Forerunner history, campaign reconstruction, and post-war politics. Their perspective differs from the original game’s purely environmental storytelling and from Halo 3’s heavily Forerunner-focused Terminal presentation. The result is a second narrative layer running alongside the familiar Alpha Halo campaign: the player still experiences the events as Master Chief, while the Terminals add records and analysis of what those events meant beyond the immediate firefight.
Once Harmonious Clarity is in Lore / Intel, the collection is complete: 10 campaign Terminals and three entries from The Most Dangerous Game.
FinalBoss // Gear
Level up your setup
01Best-selling Xbox Series X|S gameson Amazon→02Xbox controllerson Amazon→03Top-rated gaming headsetson Amazon→04Discounted game keyson Kinguin→
Affiliate links · As an Amazon Associate, FinalBoss earns from qualifying purchases.
Want to Level Up Your Gaming?
Get access to exclusive strategies, hidden tips, and pro-level insights that we don't share publicly.
Ultimate Guide Strategy Guide + Weekly Pro Tips