
Mewgenics Act 1 Guide: Zones, Bosses & Team Builds
Game intel
Mewgenics
From the creator of The Binding of Isaac, Super Meat Boy and The End is Nigh comes... Mewgenics! A game where you hoard, breed, train and set cats out on epic…
Why Act 1 Feels So Brutal (And How This Guide Helps)
After my first dozen runs in Mewgenics, Act 1 (the Alley) felt like a wall. I kept dying to random trash mobs, misplaying tile hazards, or getting blindsided by bosses I didn’t understand. The breakthrough came when I stopped treating it like a random gauntlet and started approaching it as a structured tutorial: five zones, a hidden capstone, and a clear plan for which classes carry you through.
This guide breaks down that plan. We’ll walk through each Act 1 zone, highlight what actually kills your runs (enemies, bosses, and hazards), and pair it with practical team compositions using the eight Act 1 Class Collars. We’ll also cover the three Guillotina fights at your House and how they tie into the secret Throbbing Domain.
Estimated time to internalize this route: 3-5 runs if you follow the recommendations and don’t mind a few early wipes.
- Difficulty: Medium – you’ll still need to play carefully, but you won’t be guessing.
- Focus: Reliable clears of Act 1, smart use of class synergies, and clear Guillotina prep.
Act 1 Structure at a Glance
Act 1 is called the Alley and is split into five zones plus a secret area:
- Zone 1: The Alley (starting area)
- Zone 2A: Sewers
- Zone 3A: Caves (Sewers route finisher)
- Zone 2B: Junkyard (unlocked later via Hard Path)
- Zone 3B: Boneyard (Junkyard route finisher)
- Secret Area: Throbbing Domain (tied to Guillotina quest items)
Each main zone has:
- A pool of regular enemies
- A mid-zone boss
- An end-of-zone boss
- An optional Hard Path with an extra battle and better rewards
Step → Action → Result
Step → Think of zones as a progression ladder rather than a single run. → Result → You stop expecting to clear everything on run one and instead unlock zones and collars methodically.
Prerequisites & Early-Run Mindset
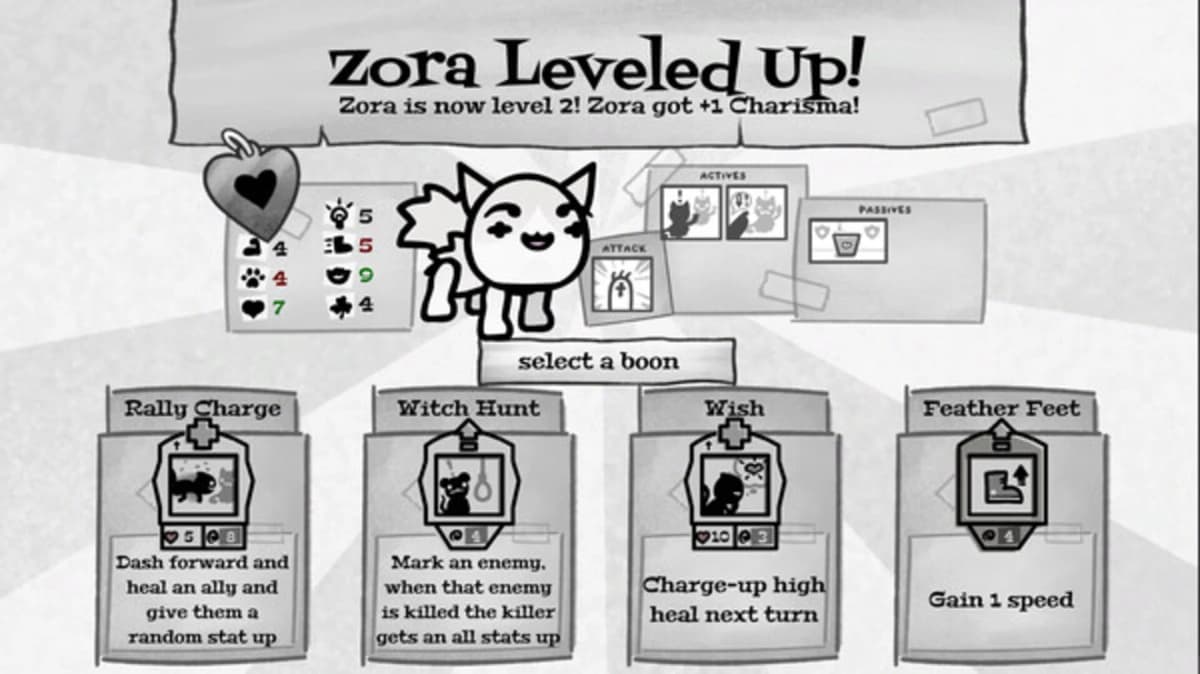
- Act 1 Class Collars available: four starter collars (your initial damage and utility core) plus four more unlocked as you clear zones, including Cleric and Necromancer.
- Recommended squad size: 4 cats (frontline “Tank” + 2 ranged DPS + 1 support).
- Priority stats:
- Luck: for crit-focused classes like Thief and Hunter.
- Constitution: on any cat you expect to soak damage (“Tank”, Necromancer, Cleric).
- Speed: matters more than it looks; acting first lets you control board state.
- Playstyle mindset: treat every turn like a puzzle. Positioning and tile usage will win more fights than raw stats.
Step → Action → Result
Step → Lock in one or two “core” builds and upgrade around them. → Result → Your runs feel progressively stronger instead of random each time.
Zone 1 – The Alley: Enemies, Bosses & Hard Path
The Alley is deceptively gentle. Enemies are low-health and low-damage, which makes it the perfect place to farm XP and test builds. I strongly recommend taking the Hard Path here every time once you’re even slightly stable.
The Alley Enemy Breakdown
Here’s what you’re actually dealing with in The Alley, and how I handle each:
- Maggot – Melee attacker, 1 HP.
Use: Free kills and great for charge/kill-trigger abilities. Let your weakest cat clean these up for safe XP. - Fly – Melee, Flying, 1 HP.
Threat: Not much; flying means it ignores some terrain, but the low HP keeps them trivial. - Flea – Melee that <strongdamages attacking<="" itself="" strong="" when="">, 2 HP.
Tip: Sometimes the best move is to let it hit your Tank once and die from recoil. - Pinky – Melee, moves randomly, 1 HP.
Threat: Chaos positioning. Don’t base your whole turn around where it currently stands. - Pooter – Ranged, Flying, 6 HP.
Priority: Focus fire. Pooters live long enough to chip your backline if ignored. - Lil’ Rat – Dashes in a straight line to attack, 5 HP.
Counter: Stand off-axis so its dash doesn’t line up with fragile cats. Blocks and summons are great here. - Leaper – Leap attack damages all adjacent tiles on landing, 9 HP.
Rule: Never park multiple cats where it wants to land. Use knockback or slows. - Kitten – Moves away when damaged, 5 HP.
Use: Great for baiting certain mid-boss mechanics (especially vs. Maisie). - Cat Caller – Ranged “call” that slows, counterattacks melee, Cowardly, 7 HP.
Counter: Hit from range and avoid trading melee blows. The slow can wreck your turn order. - Mangy – Spawns a Maggot if it survives while damaged; lobbed attack with Poison chance; cannot target adjacent tiles, 7 HP.
Exploit: Stand adjacent so it can’t target you, or kill it in one burst to avoid Maggots. - Tom Tom – Slow but has a wide melee arc, 15 HP.
Counter: Chip it down from range; don’t let multiple cats sit in its swing zone.
Step → Action → Result
Step → Always remove ranged and AoE threats (Pooter, Leaper, Cat Caller, Tom Tom) first. → Result → Remaining enemies can’t meaningfully pressure your squishy damage dealers.
The Alley Mid-Zone Bosses
You’ll face one of four possible mid-zone bosses. Treat this as a stress test for your positioning and single-target damage.
- Maisie – The Protective Matriarch (98 HP)
- Starts with several Kittens on the board.
- Whenever you target a Kitten, Maisie swaps places and takes the hit instead.
- Constantly buffs Kittens’ damage.
Plan: Just pretend the Kittens are armor. Target them only to move Maisie into bad spots or closer to your DPS. Pour all real damage into Maisie – the fight ends when she drops.
- Fenrir – Trap-Setter in Tall Grass (75 HP)
- Tosses invisible bear traps that Immobilize and damage when triggered.
- Affinity for Tall Grass – uses it for cover and mobility.
- Knocks back melee attackers.
Plan: If you have any fire spells, this fight becomes trivial: burn Tall Grass tiles to shrink her safe zones. Advance slowly to avoid overcommitting cats into hidden traps.
- Lucy – Slow-Charging Mage (75 HP)
- Uses AoE spells that show danger markers on affected tiles.
- Spells charge over time – you usually have a turn to reposition.
Plan: Always move off marked tiles before her spells resolve. Bring at least one ranged attacker so you don’t waste turns walking while she charges.
- Magnus – Spinner and Dasher (75 HP)
- Has a chain dash and a spin attack hitting all adjacent tiles multiple times.
Plan: This fight punishes all-melee squads and clumping. Stay at diagonal ranges or use knockback to control where he lands his spin.
Common mistake: bunching your entire squad around Magnus or Fenrir “for buffs.” Spread out. One bad AoE or spin can undo an entire run here.
The Alley End-of-Zone Bosses
- Radical Rat – Bomb Specialist (67 HP)
- Acts each time you end a cat’s turn, tossing a bomb.
- At the end of the round, uses Turtle and all bombs explode in perpendicular lines.
- Bombs can be dismantled with a single hit from any non-fire attack.
Plan:
- Always keep bombs under control. Hitting them once “defuses” them.
- If you have a low-damage or utility attack, use it to clear bombs safely.
- Try to finish your turn with cats positioned off the cardinal lines of bombs.
Result: Once the bomb pressure is gone, Radical Rat himself is fragile and easy to burst.
- Queen Hippo – Slow Heart, Deadly Fists (80 HP)
- Jab attack with Chain Knockback.
- Uppercuts adjacent units at the start of her turn.
- Starts with +4 Brace and 1 Speed.
- At the end of each round, Brace decreases and Speed increases by 1.
- Automatically dies on the fourth round due to “heart problems.”
Plan:
- With ranged attackers, simply kite her until round four – you don’t need to kill her.
- Melee squads should be extremely careful; her chained knockbacks can send cats into hazards or new hits.
- Use slows and terrain to keep distance once her Speed ramps up.
Result: Survive four rounds and the fight ends in your favor, even if she’s still healthy.
Step → Action → Result
Step → Learn both Radical Rat’s bomb patterns and Queen Hippo’s timer. → Result → You remove the biggest early-run RNG spikes from Act 1.
FinalBoss // Gear
Level up your setup
01Top-rated gaming headsetson Amazon→02High-refresh gaming monitorson Amazon→03Gaming chairson Amazon→04Discounted game keyson Kinguin→Affiliate links · As an Amazon Associate, FinalBoss earns from qualifying purchases.
Zones 2–3 (Route A) – Sewers & Caves
Sewers – Water Tiles and Melee Pain
The Sewers unlock after you clear the Alley once. This zone is defined by Water Tiles, which reduce movement and can make melee squads feel like they’re fighting through glue.
- Main hazard: Water that slows or limits movement.
- Biggest risk: Your melee cats get stuck or stranded in bad positions while ranged enemies chip away.
- Reward for first clear: Unlocks the Caves and grants the Necromancer Class Collar (according to the provided info).
Play tips from repeated wipes:
- Lean harder on ranged damage and teleport/mobility skills if you have them.
- Keep your “Tank” mostly on dry land; don’t waste turns slogging through water for minor attacks.
- Consider saving high-impact abilities for when enemies bunch up near choke points formed by water.
Caves – Web Tiles and Final Route-A Boss
The Caves are the final zone on the Sewer route. They introduce Spider Web tiles that trap units. Getting stuck here at the wrong time will absolutely end runs.
- Main hazard: Web tiles that immobilize you until you use a basic attack to break free.
- Risk: Burn an entire cat’s turn just escaping, then eat a boss combo.
- First-clear rewards:
- Unlocks the Hard Path for all zones.
- Improved rewards on Hard Paths (but tougher fights).
Caves survival rules I wish I knew earlier:
- Don’t park your main healer or DPS on a web tile unless you have to.
- Try to clear webs near key choke points early in the battle.
- Save mobility skills (dashes, blinks) for when getting stuck would be lethal.
Step → Action → Result
Step → Treat water and web tiles as “tax zones” that cost you actions. → Result → You naturally reposition around them instead of constantly paying that tax mid-fight.
Want to Level Up Your Gaming?
Get access to exclusive strategies, hidden tips, and pro-level insights that we don't share publicly.
Ultimate Guide Strategy Guide + Weekly Pro Tips
Zones 2–3 (Route B) – Junkyard & Boneyard
How to Unlock the Junkyard
The Junkyard is also a “second zone,” but you can’t go there immediately after the Alley. You must first clear the Caves once.
- After completing the Caves:
- Rerun the Alley.
- Take the Hard Path in the Alley.
- Finish your adventure and return home.
- On subsequent runs, the Junkyard becomes available as a route.
Junkyard – Creep & Shards Instead of Water
The Junkyard is actually easier to manage than the Sewers in terms of raw difficulty, even though the tiles are dangerous. Instead of water, you’ll see:
- Creep tiles – Damage units that stand on them.
- Glass Shard tiles – Also damage standing units.
Why it feels easier: These tiles hurt, but they’re predictable. Unlike water, they don’t tax your movement; they just punish bad positioning.
- Use your Tank or high-Con cats to briefly stand on harmful tiles if it sets up a strong play.
- Force enemies onto Shards and Creep with knockback or pulls for “free” damage.
- Ranged-heavy squads shine here because they can safely pick enemies off unsafe ground.
Clearing the Junkyard for the first time unlocks the Boneyard and another Act 1 Class Collar (the original text notes a collar reward here; exact name may depend on your version).
Boneyard – The Hardest Non-Secret Zone
The Boneyard is the final zone of Act 1 if you ignore the secret area. It’s a straight-up difficulty spike and will punish sloppy resource management from earlier zones.
- Main challenge: High-pressure fights where you cannot afford to waste mana or turns.
- Recommendation: Bring a mix of low-mana-cost abilities for chip damage, movement, and control.
- Mindset: Don’t hold every “big” spell for a hypothetical future boss; use them to prevent snowballing encounters now.
Step → Action → Result
Step → Enter Boneyard only with a well-rounded squad and some cheap, spammable abilities. → Result → You stay functional across multiple drawn-out battles instead of going dry after one big fight.
Best Act 1 Team Compositions (8 Class Collar Pool)
By the end of Act 1, you’ll have access to eight Class Collars, including your four starters plus unlocks like Cleric and Necromancer. Here are three Act 1-focused squads I’ve found consistent across many runs, using only those collars.
1. Balanced Core – Tank, Thief, Hunter, Cleric
- Roles:
- Tank: Frontliner with high Constitution and defensive skills.
- Thief: High single-target DPS with strong crit scaling.
- Hunter: Ranged physical damage and solid utility.
- Cleric: Heals, buffs, and sustain.
- Stat priorities:
- Tank: Constitution > Armor > Speed.
- Thief/Hunter: Luck > Attack > Speed.
- Cleric: Constitution > Mana > Speed.
Why it works: This setup handles almost everything Act 1 throws at you. The Tank screens melee enemies, Thief and Hunter delete priority targets, and Cleric keeps everyone upright while buffing your crit monsters.
Where it shines: Junkyard and Boneyard, where attrition fights would otherwise chew through squads without sustain.
2. Aggressive Necro Core – Tank, Thief, Hunter, Necromancer
- Roles:
- Tank: Same as above – your anchor.
- Thief/Hunter: Primary DPS from range and backstabs.
- Necromancer: Damage amplification, reanimation, and sustain via life-steal/Leech-like skills.
- Trade-off: You lose Cleric’s pure healing but gain massive offensive pressure.
Necromancer’s Reanimation and Leech-style abilities help you turn small enemies into resources and keep fights snowballing in your favor. In early zones like the Alley and Sewers, this build can feel downright unfair once it’s rolling.
Warning: You’re more fragile in drawn-out Boneyard fights. Play cleaner with positioning and avoid chip damage whenever possible.
3. Double-Frontline Control – Cleric, Necromancer, Mage, Thief
- Roles:
- Cleric: Sustain and buffs, effectively a pseudo-tank with high Constitution.
- Necromancer: Second pseudo-tank plus damage engine.
- Mage: Ranged AoE, utility, and mana support.
- Thief: Main single-target executioner.
- Key idea: No pure Tank collar, but two high-Constitution supports make your front surprisingly durable.
Why I like this team in Act 1: You get redundancy in sustain (Cleric + Necro), strong crowd control and damage from Mage, and a dedicated assassin in Thief. It’s a bit slower to start but scales safely into late Act 1.
Step → Action → Result
Step → Choose one composition and stick to it for several runs. → Result → You learn exactly how that squad handles each boss and hazard instead of constantly relearning new lineups.
Guillotina – House Boss & Throbbing Domain Setup
Once you’ve cleared all five main zones of Act 1 and end a day at your House, you’ll trigger a cutscene introducing Guillotina, the first House Boss. This sequence is crucial both for your long-term progression and for accessing the secret Throbbing Domain.
House Attacks & Retired Squads
After Guillotina appears:
- You’ll see a countdown tooltip at the top of the House screen showing when she’ll next attack.
- House Boss fights use Retired Cats only – you can bring 4, just like normal adventures.
- You must fight and defeat Guillotina three separate times. Each victory awards a quest item.
Practical takeaway: Start planning a strong Retired Squad early. Don’t retire nothing but junk; you’ll want a functional mini-roster ready by the time her countdown runs out.
Guillotina Fight 1 – Single Body Bruiser (400 HP)
- HP: 400
- Moves:
- Toss: Grabs an adjacent unit and throws it to a random tile.
- Leap: Jumps to a tile, damaging and knocking back units there.
- Spit: Takes a unit into her mouth; on her next turn she spits it onto another unit, damaging both.
- Swipe: Swipes two adjacent tiles, damaging and knocking back units.
- Also deals Trample damage by walking over units.
- At low HP, she becomes Enraged, gaining bonus health and Attack.
Strategy: Use your Retired high-damage classes to kite her around the arena. Punish her after Leap and Swipe animations when her position is predictable, and avoid ending turns directly adjacent to her unless you can take the hit.
Reward: The Throbbing Gristle quest item.
Guillotina Fight 2 – Split Head & Body (250 HP Each)
- Structure: Two separate bosses:
- Head: Main damage dealer, 250 HP.
- Body: 250 HP, retains Trample and Leap-style attacks.
- Head moves:
- Tongue: Shoots tongue in a straight 5-tile line, damaging everything in its path.
- Gasp: Inhales in a 3-tile-wide lane, dragging units to the center and toward her.
- Toss: Throws a nearby unit to the body, damaging both body and unit.
Strategy:
- Focus the head first. It’s responsible for most of the incoming damage and only has 250 HP.
- Stay as far from the body as possible while you nuke the head.
- Watch your formation to avoid lining up for Tongue and getting dragged by Gasp into bad positions.
Once the head dies, the body becomes Enraged, gains +100 HP, and adds a new move:
- Tantrum: Fills the arena with scraps (environmental clutter).
Even enraged, the body is much easier to manage solo. Take your time and avoid being pinned.
Reward: The Putrid Leech quest item.
Guillotina Fight 3 – Reuniting Head & Body, Plus Mama Maggot
- HP: Body 400 HP, Head 250 HP.
- Key mechanic: Any time you damage the head, the body moves 2 tiles toward it. If it gets close enough, the body picks the head up.
- Moves to track:
- Shake (Body): Spawns Maggots around the body.
- Shriek (Together): After the body successfully reunites with the head and one turn passes, unleashes a Shriek that inflicts 1 Hex and 1 Poison on all units.
- Prison (Head): Traps a unit in Thorns that deal contact damage.
- Toss (Body): Throws the head at a unit, damaging both.
Once you deal enough damage to the body, a Mama Maggot joins, adding more adds and chip damage to manage.
Strategy:
- Be deliberate about when you hit the head, since that pulls the body closer.
- Try to stagger damage so they don’t reunite at the worst possible time (e.g., when your team is low).
- Clear Maggots efficiently, especially if you rely on fragile ranged attackers.
Defeating Guillotina a third time completes this House Boss arc and rewards you with the final Guillotina-related quest item (the original text truncates here; in-game, check the item description for up-to-date details).
Unlocking the Throbbing Domain (Secret Area)
The Throbbing Domain is Act 1’s secret zone and is closely tied to the three Guillotina quest items you earn from her House encounters, including Throbbing Gristle and Putrid Leech.
Because the exact interaction steps and altar mechanics can change between versions, the most reliable approach is:
- Ensure you have all three Guillotina quest items collected from her House fights.
- Pay attention to quest log entries and item descriptions – they point you toward the specific interaction needed to access the Throbbing Domain.
- Expect it to involve carrying those items into a run and using them at a special event or altar-style interaction in Act 1.
Step → Action → Result
Step → Focus first on reliably beating all three Guillotina fights and collecting the quest items. → Result → You’ll meet the key prerequisites; the in-game prompts then guide you the last step into the Throbbing Domain.
TL;DR – Reliable Act 1 Clear & Secret Prep
- Learn The Alley first. Abuse its low-HP enemies, always consider the Hard Path, and master bosses like Radical Rat (bomb defusal) and Queen Hippo (stall to round four).
- Route A: Sewers → Caves
- Sewers: Respect Water Tiles and lean on ranged damage.
- Caves: Avoid getting stuck on Web tiles with key units; unlocks Hard Paths globally.
- Route B: Junkyard → Boneyard
- Junkyard: Manipulate Creep and Glass Shards to hurt enemies more than you.
- Boneyard: Bring low-mana abilities and play tight; this is the hardest non-secret zone.
- Team comps:
- Balanced: Tank + Thief + Hunter + Cleric for safe clears.
- Aggro: Tank + Thief + Hunter + Necromancer for high damage, low safety.
- Control: Cleric + Necromancer + Mage + Thief for flexible, durable play.
- Guillotina: Build a strong Retired Squad, beat her three times, and collect her quest items (Throbbing Gristle, Putrid Leech, plus a final reward).
- Throbbing Domain: Once you have all Guillotina quest items, follow their in-game hints to trigger the secret Act 1 area.
If you treat Act 1 as a structured ladder instead of a single brutal wall, your runs stop feeling random and start feeling winnable. Once you’re farming Act 1 comfortably with a favorite squad, you’ll be in a perfect position to experiment with Hard Paths, optimize breeding, and fully explore what the Throbbing Domain has to offer.