
Boss Rush unlocks immediately after your first clear of Moloch the Collector in Moonlighter 2: The Endless Vault. It is a short, boss-only combat mode: choose perks at a gate, enter a boss arena, receive a full heal after the fight, then repeat until the route ends. Use it to drill boss patterns, earn gold and cosmetics, and pursue the Collector’s Eye trinket.
Critical limitation: Boss Rush contains perk rooms and boss fights only. It does not contain normal biome floors, relic pickups, or materials for shop stock. Enter it for combat practice and its dedicated rewards; return to standard dungeon routes when you need relics to sell, craft with, or improve your merchant loop.
Table of Contents (15)
Boss Rush Unlock, Structure, and Version Scope
Boss Rush was added in the Blob-Life Balance update on 20 May 2026 and remains part of version 1.0, which launched on 2 September 2026. The mode is available after defeating Moloch the Collector once. There is no separate level requirement or initial currency fee attached to that unlock.
- Unlock condition: Defeat Moloch the Collector for the first time.
- Access point: Select Boss Rush from the main dungeon selection after the unlock.
- Run format: Perk pedestals, a gate, then a boss arena.
- Recovery: You receive a full heal between boss fights in the standard four-region chain.
- Run evaluation: Clear conditions, continues used, hits taken, and total clear time determine your grade.
- Purpose: Boss practice, score attempts, gold farming, cosmetics, weapon crates, and the Collector’s Eye trinket.
The short format changes how preparation works. A normal dungeon can provide relics, combat rooms, and longer stretches to recover resources. Boss Rush concentrates the danger into successive arenas. Bring upgraded equipment, a reliable healing plan, and familiarity with the region’s movement hazards before opening the first gate.
How the Gate-to-Boss Loop Works
Every Boss Rush run uses the same basic loop. The decision point is the perk room before each arena. Perk pedestals provide run-specific buffs or modifiers, then the next gate leads directly into a boss fight. There are no ordinary enemy floors between the two.
- Choose a Boss Rush track that matches the boss mechanics you are practicing.
- Review your weapon, armor, abilities, and healing items before entering; you cannot count on relic-route rewards to patch a weak setup during the run.
- Select a perk at the pedestal that supports the next region’s threat pattern.
- Fight the boss with the current score condition in mind: safe clears for Bronze and Silver, clean avoidance for Gold, or fast execution for Platinum.
- Take the full heal between fights, then repeat the perk-and-gate sequence.
Do not treat every pedestal as a damage-only decision. A movement or defensive perk can be more valuable when the next arena emphasizes wind knockback, floor currents, security hazards, or long projectile coverage. Boss Rush rewards consistency across the full chain, and a preventable hit can end a Gold-tier attempt immediately.
All Four Boss Rush Tracks
Boss Rush has four tracks. Three focus on a single region and its mechanical identity. Interdimensional mixes encounters from every dimension and functions as the high-difficulty route once the individual tracks are stable.
| Boss Rush track | Primary mechanics to prepare for | Key bosses and route focus | Best use |
|---|---|---|---|
| Kalina | Desert hazards, Spike Flower patterns, telegraphed attacks, burst damage windows | Herald and Thalaam | Learn shield breaks, hazard recognition, and disciplined punish windows |
| Prison / The Gallery | Museum security, floor currents, ranged pressure, movement control | Curator and Tyke | Practice positioning against environmental hazards and ranged threats |
| Aeolia | Wind effects, platform navigation, knockback mitigation, safe zoning | Senda and Monte | Develop positional control before attempting mixed-route runs |
| Interdimensional | Combined desert, prison/gallery, and wind-platform mechanics | Bosses drawn from all three dimensions | High-difficulty score runs and complete boss-pattern testing |
The exact boss order inside each individual dimension track is not fully listed. The named bosses and regional mechanics are the reliable preparation points. Build familiarity through the single-region tracks first, then move into Interdimensional once you can recognize each region’s pressure pattern without needing exploratory rooms to reset your pace.
Pre-Run Checklist for Every Boss Rush Attempt
- Confirm the Moloch clear: Boss Rush remains locked until Moloch the Collector has been defeated once.
- Set your equipment before entering: Boss Rush does not provide a normal relic route to compensate for neglected weapon or armor upgrades.
- Carry a real intra-fight healing plan: Full heals arrive between bosses, not during a dangerous phase.
- Learn one track at a time: Kalina, Prison / The Gallery, and Aeolia isolate their region-specific hazards more cleanly than Interdimensional.
- Read the next arena’s problem: Choose perks for mobility, stability, defense, or damage according to the region rather than selecting the same type every time.
- Separate practice runs from score runs: Use early clears to learn safe openings. Save hitless or sub-15-minute attempts for routes where your responses are already automatic.
Bronze can be earned by clearing all four region bosses with default gear, but that should be treated as the completion baseline rather than the equipment target for every grade. Silver requires a clear with no continues. Gold requires a no-hit clear. Platinum requires a full clear in under 15 minutes, which puts direct pressure on perk decisions, menu speed, and damage output.
Boss Rush Reward Tiers Explained
| Tier | Requirement | Reward | What to prioritize |
|---|---|---|---|
| Bronze | Clear all four region bosses with default gear | 5,000 gold and a Rush-linked Trophy achievement | Survival and route familiarity |
| Silver | Clear with no continues | 10,000 gold and an Epic Weapon Crate | Reliable healing and low-risk damage windows |
| Gold | Clear with no hits taken | 25,000 gold and Collector’s Eye | Pattern discipline and avoiding all chip damage |
| Platinum | Clear in under 15 minutes | Cosmetic armor set | Fast boss execution and immediate perk decisions |
Collector’s Eye is the major long-term reward. It permanently increases shop sell prices by 10%, affecting every sale afterward. That makes a Gold-tier Boss Rush clear valuable beyond combat progression: it improves Will’s merchant income for the rest of the game.
Gold-tier warning: the no-hit condition is strict. Minor environmental contact, stray projectiles, and other chip damage void the grade. Treat Gold attempts as avoidance runs first and damage races second. Platinum has the opposite pressure: defensive, low-damage approaches can survive but still miss the 15-minute clear requirement.
Kalina Boss Rush: Herald Preparation and Desert Rules
Kalina is the most useful starting track because it teaches the cycle Boss Rush repeatedly demands: identify a telegraphed hazard, preserve space, break the boss’s defensive state, then commit damage during a short opening. The important preparation targets are Spike Flower pattern recognition, desert hazard awareness, Herald shield breaks, and Thalaam burst windows.
- Prioritize perks that improve survival through recurring hazards or help capitalize on clear stun windows.
- Keep enough space to read projectile markers before committing to a combo.
- Use early Kalina attempts to memorize repeating sequences rather than forcing maximum damage.
- Save aggressive strings for moments when the boss is stunned or recovery-locked.
The Herald Bringer of Tekno: Core Fight Rules
The Herald has three phases, a standard HP bar, and purple shield segments above that HP bar. The shield is the priority. Use the backpack attack, Rapture, by aiming it at the boss to remove a shield segment. When the purple shield is depleted, The Herald is stunned. That is the main damage window, so land as many safe hits as possible before the boss recovers.
Rupture remains relevant outside the boss’s shield system. Enemies enter the glowing-purple Rupture state when their HP falls below 50%, allowing Will to use the backpack attack against them. The backpack can also knock stunned enemies out of the level. Keep that interaction in mind during Herald’s later add waves so they do not consume the arena while you wait for another shield-break opportunity.
Herald Phase 1
- Watch the two speakers on The Herald’s side. Their projectiles show red landing circles before impact.
- Move before the projectile lands; do not finish a slow attack string inside a marked circle.
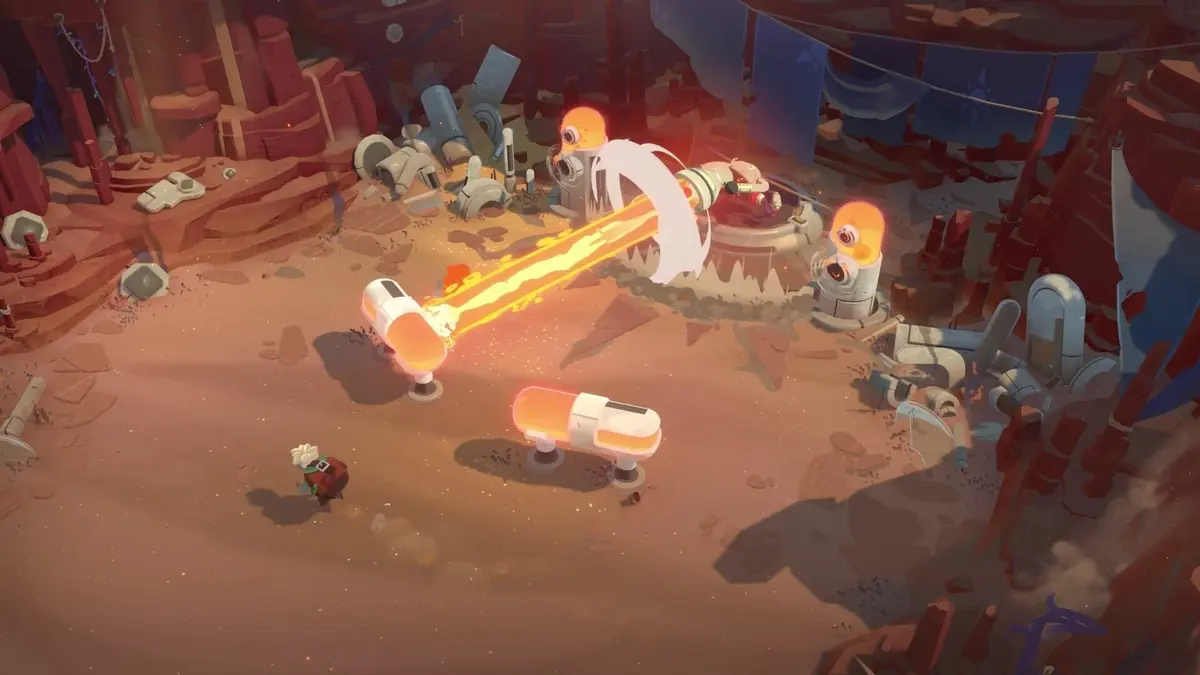
- Use either of the two arena covers when The Herald uses the fire laser beam.
- Stand behind the purple object when setting up Rapture, then aim the backpack attack at The Herald to remove shield progress.
- Once the shield breaks, use the stun to deal damage rather than continuing to reposition for a nonexistent second opening.
The Phase 1 trap is overcommitting after a red circle appears. The markers give enough information to preserve your position, but a greedy combo can leave Will in the landing zone. Build the phase around shield removal and stuns instead of trying to force constant HP damage through active threats.
Herald Phase 2
After approximately one-third of The Herald’s HP is depleted, the boss regenerates its shield and destroys one of the two arena covers. The remaining cover becomes more important because the fire laser can now travel from right to left and return. Do not leave cover early after the first sweep; the return beam can catch a dodge that was timed only for the initial pass.
Phase 2 resets the shield-break process. Rebuild your approach around Rapture, stun The Herald again, and take the damage window only when projectiles and laser positioning allow it. A partial combo followed by a clean escape is better than losing control of the only remaining cover.
Herald Phase 3
Phase 3 uses the same major attack types more frequently and more aggressively. The Herald also calls a new wave of enemies. Remove those enemies quickly before returning to the boss. Leaving them active turns projectile markers, laser coverage, and close-range pressure into overlapping threats that are difficult to read.
- Clear the summoned wave as soon as it arrives.
- Maintain enough open floor to react to red landing circles.
- Respect the returning fire laser beam.
- Break the regenerated shield with Rapture whenever the setup is safe.
- Use every stun window for controlled damage, then reset position before the next sequence.
Defeating The Herald awards two chests containing high-quality relics in the standard encounter. In Boss Rush, the lasting value is the pattern knowledge: shield priority, cover discipline, marked-projectile movement, and add control carry directly into clean-score attempts.
Prison and Gallery Boss Rush: Curator and Tyke Preparation
Prison / The Gallery emphasizes environmental control. Prepare for museum security, floor currents, and ranged threats before fighting Curator and Tyke. The route’s practical demand is movement stability: attacks that force long commitments are risky when the floor can alter your position or when security hazards narrow your safe lanes.
- Choose mobility or defensive perks when the next gate points toward floor-current and security pressure.
- Preserve an escape lane instead of fighting from the edge of the arena.
- Respond to ranged threats before committing to close-range damage.
- Use weapon choices that let you maintain pressure without standing inside environmental hazards for extended periods.
Tyke is associated with a gun-specific route in the main progression. That route context makes ranged-pressure awareness especially important. Do not enter the Prison / Gallery track expecting a pure damage test; the arena’s hazard layer is part of the fight’s workload.
Aeolia Boss Rush: Senda and Monte Preparation
Aeolia concentrates on wind mechanics, platform navigation, and positional control. Senda and Monte are the headline bosses for this track. The relevant preparation is maintaining stable spacing when wind effects threaten to move Will into a bad lane or off a safe platform.
- Select perks that support movement control, recovery, or platform stability when available.
- Keep attacks short enough to cancel movement and correct your position.
- Fight from reliable space rather than chasing damage into a poor platforming angle.
- Practice safe zoning first; speed attempts belong after the wind and platform routes are consistent.
Aeolia punishes damage tunnel vision more sharply than the grounded routes. Positional control determines whether a boss attack is manageable. Establish your footing, identify the wind effect, then take the opening.
When to Attempt Interdimensional Boss Rush
Interdimensional combines bosses and mechanics from Kalina, Prison / The Gallery, and Aeolia. It is the capstone track because it removes the comfort of a single regional ruleset. A player who has learned only one boss pattern can still be caught by desert hazards, floor currents, security pressure, or wind-platform movement in the same chain.
- Clear the region-focused tracks before using Interdimensional for a serious grade attempt.
- Know the Herald shield-and-stun loop well enough to execute it while protecting a no-hit run.
- Be comfortable with both ranged-pressure management and wind-based repositioning.
- Use early Interdimensional attempts to identify perk choices that remain useful across multiple region types.
- Reserve Platinum attempts for a route where perk selection and transition decisions are immediate.
Main Progression Order for Building Boss Rush Familiarity
The main progression provides a practical boss-learning path before Boss Rush becomes a score challenge. Begin with Herald in Kalina Day, move to Curator in the Gallery Exhibition, then face Thalaam in Kalina Night. Tyke follows on the gun path, while Senda in Zephyr and Monte in Harrowing establish the Aeolia-style wind and platform demands.
This order matters because it teaches the regional clusters used by Boss Rush. Kalina builds telegraph recognition and burst timing. Prison / The Gallery introduces environmental interference and ranged pressure. Zephyr and Harrowing build the positional discipline required for wind and platform encounters. Interdimensional expects all three skill sets at once.
What Boss Rush Does Not Replace
Boss Rush is a combat ladder, not a replacement for ordinary dungeon exploration. It does not add relics to Will’s shop inventory or provide the standard materials and relic stock that support shop sales, crafting, and broader upgrades. Use standard dungeon routes for merchant progression and resource collection; use Boss Rush for boss mastery, grades, gold, cosmetics, weapon crates, achievements, and the permanent 10% shop-price increase from Collector’s Eye.
FinalBoss // Gear
Level up your setup
01Top-rated gaming headsetson Amazon→02High-refresh gaming monitorson Amazon→03Gaming chairson Amazon→04Discounted game keyson Kinguin→
Affiliate links · As an Amazon Associate, FinalBoss earns from qualifying purchases.
Want to Level Up Your Gaming?
Get access to exclusive strategies, hidden tips, and pro-level insights that we don't share publicly.
Ultimate Guide Strategy Guide + Weekly Pro Tips