Morbid Metal: How Healing Works – All Health Sources & Tips
My first proper Morbid Metal run ended in the dumbest way possible: I cleared a brutal arena at 5% HP, sighed in relief, and instinctively kited around waiting for my health to tick back up. Nothing happened. I pushed into the next room anyway, got clipped by a basic grunt, and died in two seconds. That’s when it really clicked – this game does not care about your comfort. There is no passive health regeneration. If you don’t understand how healing actually works, every mistake is a slow death sentence.
After a few hours of trial, error, and too many wasted credits, I stopped treating healing as a panic button and started treating it as a resource system. This guide breaks down every single way you can restore or protect HP in Morbid Metal, how they interact, and how to manage your economy so you stop bleeding out halfway through a run.
The Core Rule: No Auto-Regeneration, Ever
Morbid Metal is built around a harsh rule: your health does not automatically come back between fights, between rooms, or even between floors. Once you’ve taken damage, that loss is permanent until you actively trigger a healing source.
There are two immediate consequences:
- You can’t “play it safe” and wait for health to rebuild. Stalling just wastes time.
- Every chip of damage matters. A couple of sloppy hits in early rooms will absolutely kill your endgame boss attempt.
The breakthrough for me came when I stopped thinking of healing as “fixing mistakes later” and started thinking of it as part of my moment-to-moment combat plan. That shift really starts with the most important mechanic in the game: regainable health.
Regainable Health – Your Primary, Skill-Based Healing
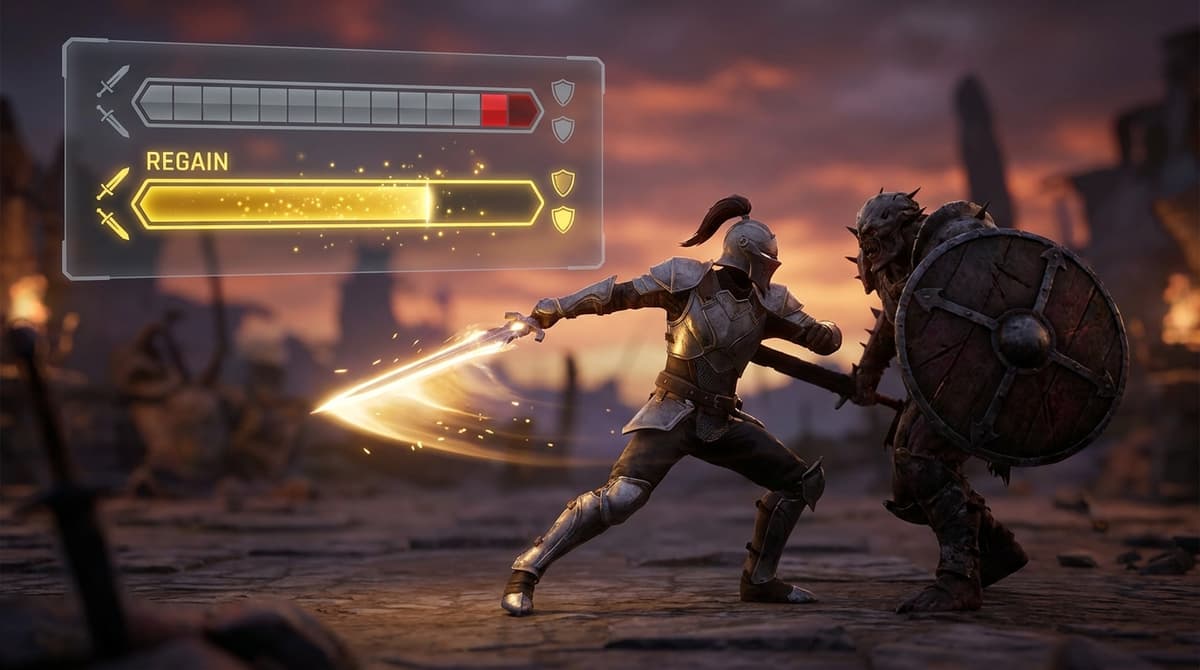
Whenever you take a hit in Morbid Metal, part of the damage converts into a regainable portion of your HP bar. It usually shows up as a yellow (or differently tinted) chunk on the bar where you just lost health.
You can restore this regainable health by hitting enemies before it decays. Think of it as a built-in lifesteal that only appears after you’ve been hurt, and only lasts for a short window.
How Regainable Health Works in Practice
- You take a hit → a part of that damage becomes a yellow “regainable” segment.
- For a few seconds, every hit you land on enemies pulls that yellow segment back into solid HP.
- If you back off or stall, the yellow part slowly shrinks and disappears. Once it’s gone, that HP is permanently lost unless you use another healing source.
This system rewards controlled aggression. After getting tagged, your best move is often to counter-attack quickly during safe openings instead of panic-rolling away for ten seconds.
Common Mistakes with Regainable Health
- Full retreat after every hit – I used to backpedal across the arena any time I got clipped. By the time I felt “safe,” the yellow chunk had decayed, and I’d effectively thrown away free healing.
- Over-committing to regain – On the flip side, I’ve died plenty of times diving into a boss’s most dangerous pattern just to squeeze out a bit of yellow HP. If a follow-up combo will delete you, it’s better to let some regainable health go than to faceplant.
- Not knowing when to cash out – The best times to reclaim are after you’ve forced a stagger, broken a shield, or baited a big whiffed attack. Treat those moments as “healing windows,” not just “damage windows.”
If you master regainable health, you’ll be amazed how far you can get without spending a single item or credit. But it’s not enough by itself. Let’s walk through all the other health sources and where they fit into your survival plan.
Every Health Source in Morbid Metal, Ranked by Reliability
This is how I personally rank healing sources after many runs, from “you should rely on this constantly” to “nice emergency button if you can afford it.”
1. Regainable Health (Aggression On Hit)
Discussed above – this is your baseline. It costs nothing, scales naturally with your damage and skill, and is available in every fight.
Why it’s top-tier: It doesn’t consume items, doesn’t use credits, and works on every enemy. It’s the one healing mechanic you’ll use in every single run regardless of your setup.
2. Healing Protocols & Routine Synergies
Morbid Metal lets you equip various Routines (think passive protocols) that alter how your character survives. Some of the best sustain in the game comes from stacking these with regainable health.
- Shield routines: Temporary barriers that soak a chunk of damage before your actual HP is touched. These don’t “heal,” but every point blocked is a point you never have to restore.
- On-hit or on-kill healing: Routines that restore a small sliver of HP when you land hits, perform finishers, or kill enemies. Combined with regainable health, each safe combo can erase a mistake completely.
- Damage reduction / mitigation: Protocols that slightly lower incoming damage. Less damage per hit means more of your bar is covered by regainable health, and you spend fewer resources later.
What finally clicked for me was treating these like healing multipliers. A shield routine might not look like “healing,” but if it lets you take a risky swing to recharge regainable health without actually losing real HP, it’s effectively a huge heal.
To avoid drifting into a full build guide: focus on one or two routines that directly reduce health loss (shields/mitigation) and, if possible, one that directly restores health on some trigger. Don’t stack five different damage buffs and then wonder why you’re dying with pockets full of credits.
3. Emporium Heals
Between sections, you’ll hit the Emporium, where you can spend run currency to buy various things: upgrades, items, and crucially, direct heals (often a partial or full refill).
These heals are extremely reliable – fixed effect, clear cost – but the economy trade-off is brutal. Every heal you buy is an upgrade or item you don’t get.
What worked for me was adopting a simple rule:
- If my HP is high enough that I can reasonably clear the next zone without playing like a coward, I skip the Emporium heal and buy permanent power instead.
- If I’m at “two stray hits from death” territory and I don’t have strong healing protocols online, I bite the bullet and buy the heal.
Early in a run, I try to save my currency for things that make my damage or survivability permanently better. Later, when my build is mostly online, I’m more willing to drop credits on Emporium heals to protect a promising run.

4. Vitality Fabricators & Healing Nodes
Scattered through runs are Vitality Fabricators and similar healing nodes — interactable devices or events that restore health without charging you credits at the Emporium rates.
- Vitality Fabricators: Dedicated machines that heal a chunk of HP (and sometimes interact with your max health). You can increase their spawn chance with certain unlocks, which is absolutely worth doing early on.
- Healing events / rooms: Random nodes that might give you HP in exchange for a drawback (like losing some currency or taking on a mild debuff).
My approach is to route my runs mentally around these whenever possible. If I know I’ve seen a Fabricator just after a tough arena, I’ll play slightly more aggressively in that arena, trusting that I can patch myself up right after.
For trade-off events, I usually ask myself: “Will this HP now make me strong enough to secure way more credits later?” If I’m limping, the answer is almost always yes.
5. Healing Items & Consumables
Consumables like Corpora Herbal Tea are your classic “press button, get HP” tools. You’ll find them as drops, in chests, and for sale in the Emporium.
- Some heal a flat amount, others a percentage of your max health.
- They’re instant or near-instant, with a short use animation you have to protect.
- You can only carry a limited number (in practice, I rarely walk around with more than a small handful).
My biggest early mistake was hoarding these “for when I really need them” — and then dying with two or three still in my inventory. Now I operate under a different rule: if I’m one combo away from death and I’m not in the middle of a clear punish window, I chug the item.
Think of healing consumables as the glue between your other systems. You shouldn’t rely on them as your main sustain, but they’re priceless for stabilizing after a disaster or topping off before a boss.
6. Lifesteal, Runes, and the Healing Stat
Later into the game you’ll start seeing runes, infusions, or stat lines that give you lifesteal or boost healing. These usually fall into two buckets:
- Lifesteal effects: A percentage of your damage dealt is returned as HP on hit. Great in long fights and when paired with fast weapons.
- Healing stat scaling: A general “Healing” or similar stat that increases how much health you get from lifesteal, consumables, and certain protocols.
Once I started investing into these, my runs became much more forgiving. A modest lifesteal rune plus aggressive regainable health play can effectively erase attrition in regular rooms, letting you save items and credits for bosses.

Economy tip: Early on, I value cheap lifesteal more than marginal damage upgrades. More damage is nice, but if you can turn every hit into a bit of healing, you’ll live long enough to make that damage matter.
FinalBoss // Gear
Level up your setup
01Top-rated gaming headsetson Amazon→02High-refresh gaming monitorson Amazon→03Gaming chairson Amazon→04Discounted game keyson Kinguin→Affiliate links · As an Amazon Associate, FinalBoss earns from qualifying purchases.
Want to Level Up Your Gaming?
Get access to exclusive strategies, hidden tips, and pro-level insights that we don't share publicly.
Ultimate Guide Strategy Guide + Weekly Pro Tips
Healing Economy: When to Spend, When to Endure
Morbid Metal’s real cruelty isn’t just that healing is limited — it’s that your healing options are tied up with your progression economy. Credits spent patching yourself up are credits not spent on power.
Priority Order for Surviving Long Runs
- First line of defense: Regainable health + good positioning.
- Second line: Shield/mitigation protocols and any on-hit/kill healing routines.
- Third line: Free or low-cost healing from Fabricators and events.
- Fourth line: Your own consumables.
- Last resort: Buying raw heals at the Emporium.
If you flip this order — spamming Emporium heals, ignoring routines, and barely using regainable health — you’ll constantly feel starved for both HP and power.
Practical Credit Management Rules
- Prioritize permanent or run-defining upgrades over heals whenever your HP is “playable.” Unlocks that buff all future runs, new routines, and key damage/survival boosts are almost always a better long-term investment.
- Only buy Emporium heals when a run is worth saving. If your build is a mess and you’re limping along with bad protocols, it’s sometimes better to let the run die and start fresh instead of sinking credits into a doomed attempt.
- Use consumables before credits. If you’re about to buy a heal, double-check your inventory. Drinking a stored tea is cheaper than spending hard-earned currency.
- Don’t leave Fabricators unused. If you pass one at >90% HP and there’s no chance you’ll backtrack, consider taking a few calculated risks in the next fight first, then coming back if the route allows it.
This mindset shift — treating healing as a layered system instead of “press button to fix bar” — is what finally got me consistent late-game clears.
Survival Strategy with No Auto-Regeneration
Once you understand the tools, the last step is tightening your overall play so that those tools are enough.
- Fight for your regain. After taking a hit, consciously look for the next safe opening to cash out that yellow health. Don’t tunnel vision on big combos; a couple of fast, safe hits are often better.
- Anchor fights around your protocols. If your shield routine is active, you can afford to risk a swing to fuel regainable health. If it’s on cooldown, play more evasive until it’s back.
- Enter bosses stocked and stable. I try to hit boss doors with: at least one consumable, a functional shield or mitigation routine, and no glaring chip damage I could have fixed cheaply before.
- Accept small losses to avoid big ones. Let some regainable health decay if recapturing it would require diving into clearly unsafe patterns. Dead players don’t benefit from efficient healing.
The game is tuned so that careless players slowly bleed out over a run, while disciplined players can feel almost unkillable without ever touching “auto-regen.” If you lean on regainable health, build sensible protocol synergies, and treat your economy with respect, healing stops being your bottleneck and becomes just another lever you pull to push a good run into a great one.
In short: learn to play around your yellow bar first, then layer in routines, Fabricators, items, and finally Emporium heals as backup. Once that order feels natural, Morbid Metal’s no-auto-regen world suddenly feels a lot less hostile.