Nova Roma: How to Start Your City – Outpost, Roads, Temples Guide
Nova Roma Early Game Checklist (What You Actually Need First)
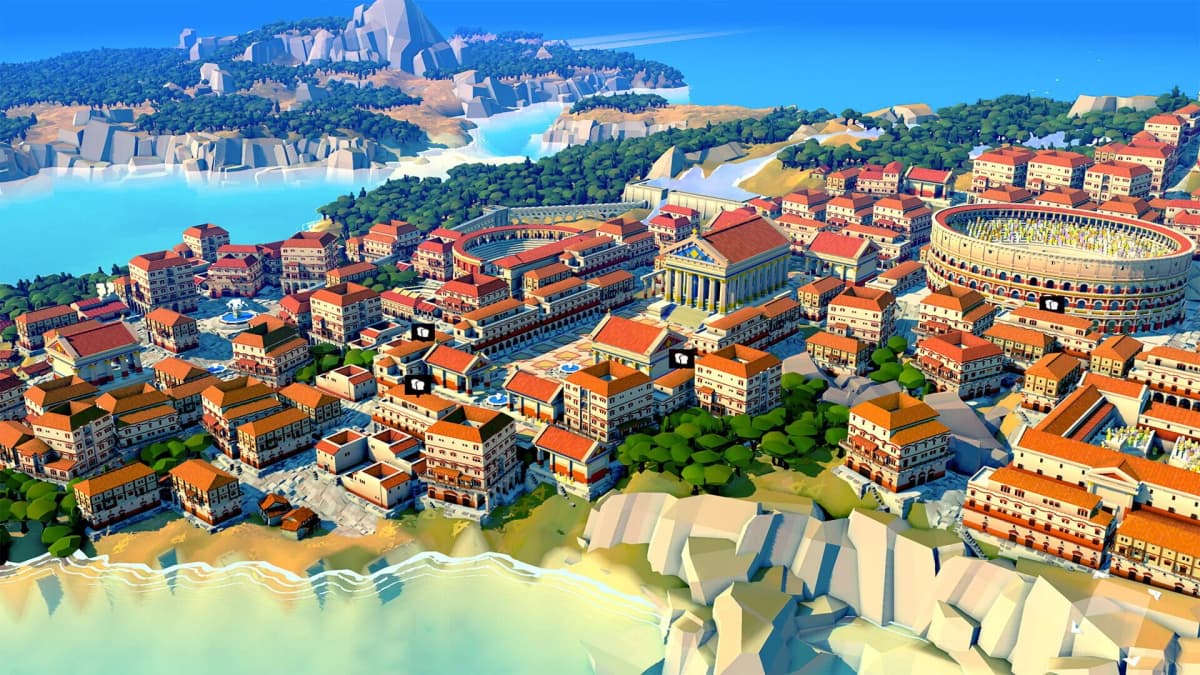
After a few failed starts in Nova Roma where my people either starved, froze, or got zapped by angry gods, I boiled the early game down to a simple order of priorities. If you set these up in the first couple of in-game years, your city stabilizes fast instead of constantly firefighting (sometimes literally).
- Place your outpost on flat, central land with access to trees, stone, and fertile soil.
- Use
Clear Landto grab just enough wood and stone to get started. - Lay roads from the outpost to production buildings and homes immediately.
- Build a Forester and Stone Quarry in good spots, then connect them.
- Set up basic housing, wells, warmth, and repairs (Hovels, Well, Charcoal Maker, Masonry).
- Drop at least one temple, pick a god, and start earning Favor Stars early.
- Secure food with a mix of fertile crop fields and Fishing Huts.
The rest of this guide walks through each step with the small details that make the difference between a smooth start and a slow collapse.
Step 1 – Place a Strong Outpost (Your Entire City Hinges on This)
I underestimated outpost placement in my first run and spent the next hour fighting long walking distances and ugly road layouts. The outpost is your core logistics hub, so its position decides how efficient your whole city will be.
When you start a new map and can move the outpost ghost around, look for:
- Flat, buildable land around it for roads, early homes, and utility buildings.
- Trees nearby (within a short road) so early wood cutting is quick.
- Visible stone deposits within reasonable distance for your first Quarry.
- Fertile ground (often near rivers) within a short walk for your first fields.
What I avoid now:
- Right on a riverbank. Land there is fertile, but you want a little buffer so you have room for roads and buildings, and you’re safer if floods or water systems change in future patches.
- Far out on a peninsula. It looks cool but makes every future expansion a long walk.
Think of the outpost as the “center of the wheel.” Most of your early roads should radiate out from here, so give yourself enough space to branch in several directions.
Step 2 – Clear Land and Grab Starter Wood & Stone
The breakthrough for me was realizing I didn’t need to spam buildings instantly. Your first bottleneck is always basic materials, so put idle citizens to work before placing too much.
At the bottom of the screen, on the right side, hit the Clear Land option. Then:
- Click and drag over nearby trees and small stone clusters to mark them.
- Don’t clear every tree; leave larger patches for a future Forester.
- Let your citizens chop/mine and carry resources back to the outpost.
During this phase, I usually just run the game on normal speed and watch how far people walk. If they’re trekking halfway across the island for a single tree, you selected too wide an area-focus on dense spots close to the outpost.
Step 3 – Connect Early Buildings with Roads Right Away
Don’t make my early mistake of delaying roads “until later.” In Nova Roma, roads are not just cosmetic-they are the backbone of how your workers move and how buildings link to the outpost.
Key things I learned fast:
- Most buildings must be near a road that ultimately traces back to the outpost.
- Citizens prefer roads and will follow them back home instead of wandering through woods.
- Short, straight roads save a surprising amount of time over a full year.
As soon as you place anything important (Forester, Quarry, homes, wells), drop a simple road from the outpost to the front of that building. You can tidy up the network later; early on, function beats aesthetics.
Step 4 – Properly Place Your First Forester and Stone Quarry
Once you have a little starting wood and stone from manual clearing, it’s time to stop relying on ad-hoc cutting and move into steady production.
Forester
The Forester is your early-game lifeline for wood. My first few games, I dropped it in a half-cleared area and wondered why output felt terrible.
- Place the Forester in a dense, mostly untouched forest.
- Avoid putting it in an area you’ve heavily used the
Clear Landtool on. - Connect it back to the outpost with a road so workers can commute easily.
- Make sure there’s either the outpost or a stockpile accessible nearby for deliveries.
The Forester both produces wood and regrows trees, so think of the whole area around it as a permanent “wood zone” you won’t pave over any time soon.
Stone Quarry
The Quarry has stricter placement rules: it must be built adjacent to a stone deposit. This means your early outpost spot should be reasonably close to at least one of these.
- Rotate the building until its “working side” lines up with the stone deposit.
- Drop a road from the Quarry back to the outpost or a nearby stockpile.
- Try not to place it so far away that workers spend most of their day walking.
Both Forester and Quarry can technically function without roads, but in practice, connecting them early keeps your city compact and minimizes idle walking time.
FinalBoss // Gear
Level up your setup
01Top-rated gaming headsetson Amazon→02High-refresh gaming monitorson Amazon→03Gaming chairson Amazon→04Discounted game keyson Kinguin→Affiliate links · As an Amazon Associate, FinalBoss earns from qualifying purchases.
Step 5 – Housing, Water, Warmth, and Repairs
Once wood and stone are coming in steadily, you can afford to focus on people’s basic needs. I rushed housing too early in my first run and ended up with more mouths than I could feed or heat. Now I follow a more controlled sequence.
Hovels and Early Neighborhood Layout
Start with a small cluster of Hovels near the outpost and your first well:
- Place a few Hovels, not a huge suburb-aim to fill your current jobs plus a tiny buffer.
- Connect them with roads to the outpost and nearby workplaces.
- Leave space between housing blocks for Wells, Charcoal Makers, and future upgrades.
Wells and Water
Residential buildings need access to water. Build Wells close to your Hovels so citizens don’t walk far just to drink. As you expand housing, drop more Wells rather than relying on one central one.
Charcoal Maker and Winter Warmth
When winter hits, your people need warmth. A Charcoal Maker turns wood into fuel. What I learned:
Charcoal Maker and Winter Warmth
When winter hits, your people need warmth. A Charcoal Maker turns wood into fuel. What I learned:
🎮 Get This Game at the Best Price
Compare prices instantly and save up to 80% on Steam keys with Kinguin — trusted by 15+ million gamers worldwide.
*Affiliate link — supports our independent coverage at no extra cost to you
- Place the Charcoal Maker near wood production, but not wedged tightly into housing (in case of fire).
- Keep it connected by road so finished charcoal can reach homes quickly.
- Plan your wood supply so you’re not starving your construction for the sake of warmth.
Masonry and Building Maintenance
Buildings in Nova Roma degrade and can catch fire. I lost half a district once because I delayed building a Masonry too long.
Get a Masonry up relatively early, within reach of your core buildings. Workers here automatically repair damaged structures, which keeps your early city from spiraling into collapse after one bad event.
Want to Level Up Your Gaming?
Get access to exclusive strategies, hidden tips, and pro-level insights that we don't share publicly.
Ultimate Guide Strategy Guide + Weekly Pro Tips
Step 6 – Immigrants and Controlled Growth
Once you have houses, spare beds, and a basic economy going, ships will periodically arrive with immigrants. Whether they stay depends heavily on how happy your current citizens are.
- More free beds = more room for new citizens.
- But each new person needs food, water, warmth, and work.
- If your existing population is miserable, immigrants may decide not to settle.
I’ve found it safer to:
- Ensure there is a job waiting (Forester, Quarry, future farms/fishing) before expanding housing a lot.
- Keep an eye on happiness indicators for your residential buildings before big population jumps.
Nova Roma rewards steady, planned growth, not explosive expansion you can’t support.
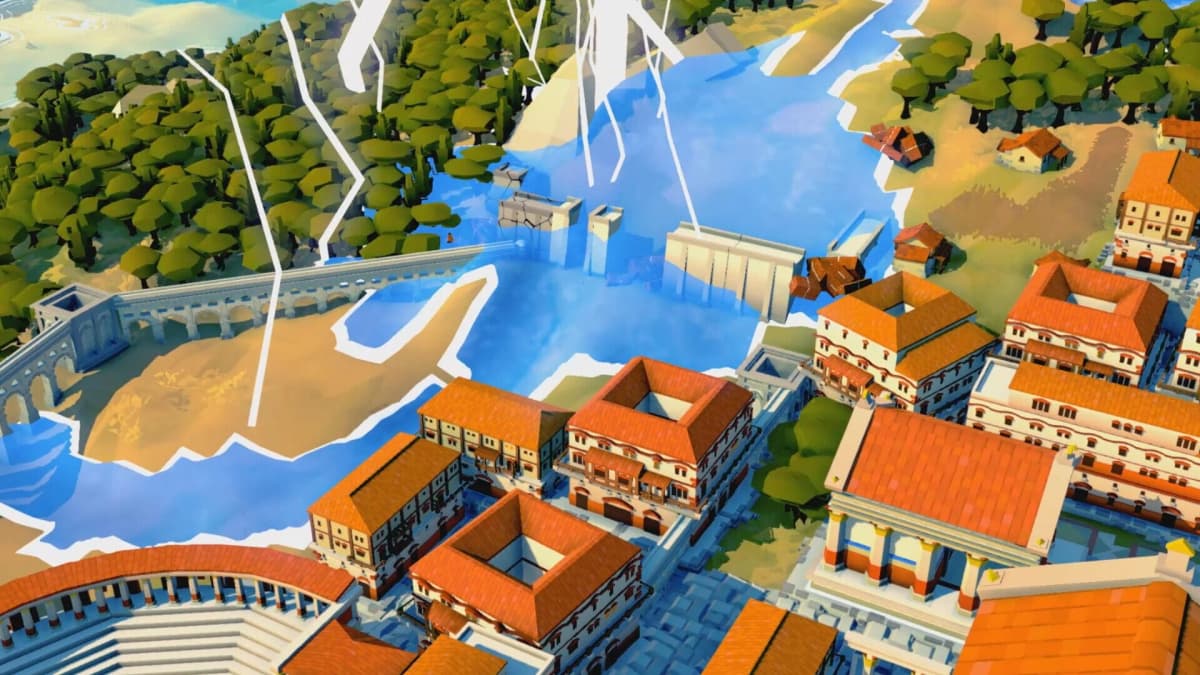
Step 7 – Temples, Gods, and Favor Stars (Don’t Ignore the Pantheon)
This is the system I misunderstood the most at first. I tried to play like a pure economic city-builder and ignored religion. The gods responded with floods and lightning, and that run was over.
Here’s how it works in practice:
- Build a Temple once your basic housing and food are roughly stable.
- Dedicate that temple to one of the available mythical deities.
- The chosen deity will then give you tasks or quests (build structures, offer resources, etc.).
- Completing these earns you Favor Stars.
You can spend Favor Stars in two main ways:
- Unlock advanced buildings and tech-like upgrades in the tree.
- Upgrade the temple itself to gain god-specific bonuses.
You can build multiple temples to different gods and run several sets of tasks at once. Early on, I’ve had better luck focusing on one or two gods whose tasks align with what I’m already doing (like building farms or expanding housing) instead of spreading myself too thin across the whole pantheon.
Important: ignoring the gods entirely has consequences. If you never build temples or neglect their tasks for too long, you’re more likely to get hammered by disasters like floods, lightning, or droughts. In an Early Access game where balance may still change, it’s safer to integrate temples into your early build rather than treating them as late-game flavor.
Step 8 – Secure Food: Crops and Fishing
Every failed city I had in Nova Roma had the same root cause: food falling behind population. The game gives you two main early systems—crops and fishing—that work best together.

Crops and Fertility
First, unlock the crop types you want from the build tree (like wheat or grapes), then place fields on fertile land.
- Check fertility when placing crops; the game shows fertility levels for the selected tile.
- Land near rivers is usually highly fertile and yields more.
- Over time, repeated use of the same plot reduces fertility.
When fertility drops too far, do what I learned to do:
- Destroy the current crops on that patch.
- Let the land rest for a few in-game years until fertility recovers.
- Either replant later or shift that field to a newer fertile zone.
Your outpost can store some food, but as your harvests grow you will need at least one Granary so you’re not wasting surplus or running into storage bottlenecks.
Fishing Huts and Coastal Supply
Fishing is a great stabilizer, especially if your early farms are small or fertility is uneven.
- Build Fishing Huts near designated Fishing Spots along the coast.
- When placing a hut, rotate and move it until the game confirms a suitable location.
- Connect huts to the outpost or granary with roads so fish actually reach your people.
Fishing doesn’t replace farming, but it smooths out bad harvests and supports a slightly higher population while your agricultural network grows.
Putting It Together – A Sample First Two Years
To make this concrete, here’s the rough sequence that finally gave me a stable, growing city without constant crises:
- Year 1, Early
- Place outpost on flat, central-ish land with trees, stone, and nearby fertile soil.
- Use
Clear Landfor close trees and small stone, just enough to get started. - Lay simple roads outwards in two or three directions.
- Build a Forester in a dense forest, connect by road.
- Build a Stone Quarry on the nearest reasonable stone deposit, connect by road.
- Year 1, Mid
- Place a small cluster of Hovels near the outpost and workplaces.
- Build a Well in the housing area and connect it with roads.
- Add a Charcoal Maker near wood production but not in the middle of housing.
- Get a Masonry up near your core buildings for automatic repairs.
- Year 1, Late
- Start your first crop fields on fertile land close to town.
- Place at least one Fishing Hut if you have a good coastal spot.
- Monitor food balance and adjust workforce accordingly.
- Year 2
- Build your first Temple and dedicate it to a god with tasks that match your plans.
- Complete early deity tasks to collect Favor Stars and unlock useful buildings.
- Expand housing cautiously as ships bring immigrants and jobs open up.
- Add a Granary once food production ramps up.
- Start planning second-tier production or more advanced housing as tech unlocks.
By the end of this period, you should have a compact, road-linked city with steady wood and stone, reliable food, happy citizens, and gods that are at least not actively trying to destroy you.
Key Takeaways for a Stable Nova Roma Start
Nova Roma’s Early Access build is tuned so that your first 30–60 minutes have an outsized impact on the rest of the run. The biggest difference between my failed and successful attempts came down to:
- Outpost placement that keeps resources, fertile land, and expansion options in reach.
- Roads from day one so workers and goods don’t waste time bushwhacking.
- Sustainable resource loops via Forester and Quarry, not just manual clearing.
- Meeting basic needs early (water, warmth, repairs) so happiness stays high.
- Respecting the gods with a few well-used temples and steady Favor gain.
- Diversified food from both crops and fishing, plus sensible population growth.
If you treat those as your non-negotiables every time you found a new Rome, the rest of the game opens up naturally: you can start experimenting with more complex layouts, multiple deities, and longer-term infrastructure instead of constantly scrambling to keep people alive.