SAND: Raiders of Sophie: How to Extract – Tower & Cable Timings
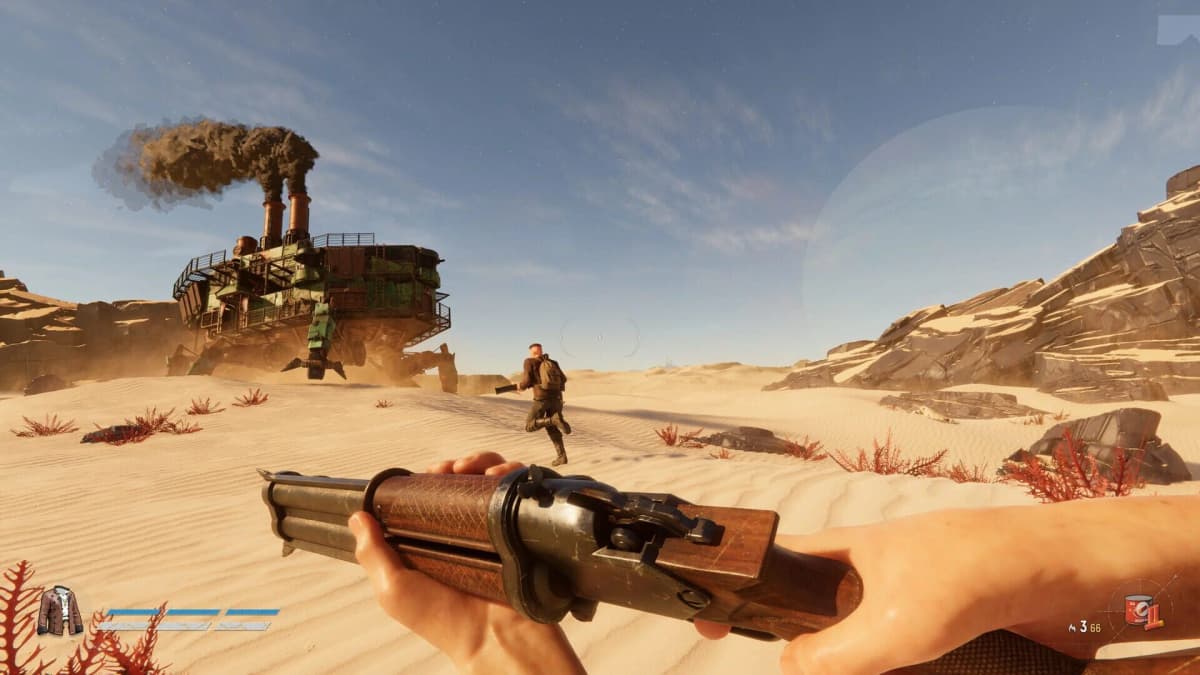
SAND: Raiders of Sophie entered Steam Early Access on June 22, 2026, following multiple delays and infrastructure stress tests conducted under the Server Slam banner. Positioned within the Summer Game Fest window and priced at $19.74 USD, £15.74, or 15,74€ after a 21% launch discount, the title enters an established extraction-shooter market with a mechanical premise that reorients player priorities around a single persistent asset: the Trampler. This customizable walking mech functions simultaneously as transport, mobile base, weapons platform, and inventory vault. Its destruction carries consequences that exceed the temporary setback of an operator death, forcing a design philosophy where extraction is not merely about personal survival but about preserving a base that represents the sum of a run’s investment. The radio tower evacuation sequence is the rigid mechanical terminus of this philosophy, converting the Trampler from a mobile loot hauler into a stationary defense objective governed by hard timers.
The extraction sequence distills into an immutable chain. Operators locate a radio tower, ascend to its summit, interact with the radio console to trigger an evacuation call, survive approximately 90 seconds while the dropship approaches, then secure a cable that remains deployed for roughly 60 seconds. Within this framework lies considerable tactical depth. The Trampler’s behavior changes the moment the radio activates, generating a plume of green smoke that serves as both the dropship’s anchor point and a map-wide PvP beacon. Additionally, the mode in which you are operating-Voyage or Storm Dive-alters tower availability, environmental pressure, and the likelihood of interception. The following analysis examines each phase of the extraction loop in detail, from the appearance of the white door icon through the final zipline ascent, with specific attention to the timing windows, mode-specific risk profiles, and coordination requirements that separate successful evacuations from catastrophic losses.
How Radio Towers Appear and Where to Find Them
Radio towers remain hidden until you close to within a specific proximity range, at which point they materialize on your map and HUD as white door icons. This reveal mechanic fundamentally shapes the early and mid-game pacing. Unlike extraction shooters that broadcast evac points from the match’s outset, SAND forces active reconnaissance. You may know from experience that a tower exists in a particular quadrant, but you cannot set a precise waypoint or plan a direct approach until the icon resolves. This creates a natural tension between looting efficiency and positional awareness. Squads that push too far from suspected tower locations risk finding themselves deep inside hostile territory when the icon finally appears, forcing a desperate cross-map sprint. Solo operators face an even sharper dilemma, as leaving the Trampler unattended to scout invites theft or sabotage, while driving the mech toward the icon prematurely exposes the full inventory to ambush.
In Voyage mode, the white door icon behaves as a relatively predictable utility. Towers are distributed according to a logic that supports extended looting cycles, and their availability does not appear to be artificially gated behind late-match timers. This permissiveness makes Voyage the essential training ground for extraction mastery. Operators can afford to ignore the icon for significant portions of the match, accumulating materials with the knowledge that extraction infrastructure will remain accessible. The 90-second dropship wait and 60-second cable window are mechanically demanding enough without adding scarcity on top. For teams of up to six players, Voyage allows role specialization: scouts can trigger the icon while heavy gunners and Trampler pilots maintain a defensive position near the loot concentration areas.
Storm Dive rewrites this spatial economy entirely. Tower availability is delayed and functions as a scarce or single-use resource, meaning the white door icon may not appear until the match has entered its final stages. By design, Storm Dive forces a commitment to looting under increasing danger, with a shrinking safe zone that escalates environmental damage and compresses the remaining player population into an ever-smaller kill box. When the tower icon finally resolves, it often does so inside or near the collapsing boundary, transforming extraction from a planned exit into a bottleneck. Because the mode offers higher-tier loot deeper inside the storm, the operators who need extraction most desperately are precisely the ones facing the shortest timelines and the most contested towers. By the time extraction is possible, the server population has been winnowed to experienced, heavily armed survivors who understand that intercepting another squad’s 90-second window is often more profitable than completing their own scavenging route.
The distinction between modes also reshapes how you read the map. In Voyage, the appearance of the white door icon is a logistical convenience. In Storm Dive, it is a strategic flashpoint. Squads must decide whether to race toward the icon immediately, accepting an early extraction with modest loot, or to gamble on reaching it later with a fuller cargo hold. Solo operators in Storm Dive face the harshest version of this decision tree, as they lack the division of labor that allows a six-person team to simultaneously loot and monitor tower status. The icon’s proximity-gated reveal adds a layer of uncertainty. You cannot simply camp a known coordinate; you must enter the radius to confirm availability, and in doing so, you may discover that a rival squad has already triggered the green smoke and is entrenched for the siege.
Climbing the Tower and Triggering Evacuation
Reaching the tower’s base does not initiate extraction. You must ascend to the summit and manually interact with the radio console. This climb is a distinct vulnerability phase. You are dismounted from your Trampler, stripped of its armor and mounted weaponry, and committed to a vertical path that offers minimal horizontal escape. Opponents who understand the loop recognize a climber as a target of opportunity. Engaging an operator during the ascent yields high returns: they are likely carrying valuable loot, they are temporarily separated from their mobile base, and their exit route is constrained by the tower’s geometry. Smart ambushers will allow a climber to reach the upper levels before opening fire, knowing that a fall inflicts damage and that the panic of being trapped upstairs often leads to fatal positioning errors.
Squad coordination during the climb is so mandatory. Before the climber commits, the team should clear the tower’s immediate footprint and establish overwatch on common approach vectors. In a full six-person squad, two operators can hold elevated flanking positions, two can secure ground-level ingress, and one can remain with the Trampler as a mobile reserve. Solo players lack this luxury and must rely on concealment, speed, or the gamble that the area is uncontested. The radio trigger sits exclusively at the apex; there is no partial activation or remote triggering. You must reach the top, interact with the console, and commit to the sequence.
The act of triggering the radio is the point of no return. Once the evacuation call is transmitted, your Trampler immediately begins emitting a dense column of green smoke. This emission serves a dual mechanical purpose that new operators often misunderstand. First, it acts as the physical anchor for the dropship’s cable deployment, ensuring the zipline connects to your exact position. Second, and more consequentially, it broadcasts your location to every remaining player on the server. The green smoke is visible at extreme distances, penetrates moderate weather, and persists for the entire 90-second approach window. You cannot disable it, disguise it, or relocate it. Your Trampler has become a luminous objective marker.
This design choice inverts the typical extraction-shooter dynamic. In most genre entries, the evac point is either neutral territory or a moving target. SAND makes the evac point personal and stationary. You do not drive to extraction; extraction comes to you, and it announces its destination with a smoke signal. The green smoke transforms defensive strategy. Operators can no longer rely on stealth during the final minutes. They must treat the Trampler as a fortress under siege. The climb to the radio summit is therefore not merely traversal; it is the ceremonial act of declaring war on every nearby squad and inviting them to test your defenses.
Surviving the 90-Second Dropship Approach
After the radio call, the dropship requires approximately 90 seconds to arrive. This interval is the longest sustained vulnerability in the extraction loop, and it demands a complete recalibration of tactical priorities. For the majority of a match, survival in SAND is governed by avoidance: skirt PvE patrols, bypass player contact, and optimize routes between resource nodes. During the 90-second wait, survival becomes positional warfare centered on an immobile objective. The green smoke eliminates ambiguity about your location, so the only remaining questions are whether your defensive setup can survive the attention it generates, and whether your ammunition and repair supplies will outlast the timer.
The first strategic decision is whether to defend from inside the Trampler or from external positions. The Trampler’s chassis provides substantial hard cover, and its mounted weapons offer suppression capabilities that infantry weapons cannot match. A heavily armored Trampler with a gunner can discourage small squads from committing to an assault. However, a stationary mech is a predictable target. Explosive munitions and concentrated fire all benefit from a target that refuses to dodge. Teams that cluster entirely inside risk catastrophic multi-kills from a single rocket barrage. The superior posture is typically a hybrid: one or two operators manning the Trampler’s weapons while the remainder hold angles in nearby ruins or vegetation, creating interlocking fields of fire that punish anyone fixated on the green smoke.
Solo operators face a trilemma with no clean solution. Remaining mounted maximizes outgoing firepower but eliminates flanking capability. Stepping away to hold a defensive angle risks a fast-moving interceptor destroying the unguarded Trampler. Concealing yourself inside the cargo bay offers protection from small-arms fire but turns the vehicle into a coffin if it is destroyed. The most viable compromise is to maintain immediate adjacency to the Trampler-close enough to mount and repair under pressure, but behind separate hard cover that breaks line of sight from obvious push routes. If an engagement turns unfavorable, the solo operator’s priority must shift instantly from killing the attacker to surviving the remaining seconds until the cable drops.
In Storm Dive, the 90-second window overlaps catastrophically with the storm’s collapse phase. If the tower sits near the shrinking boundary, you may be forced to defend inside damaging weather that drains health or degrades equipment. Even if the tower sits safely within the circle, the storm’s compression ensures that the green smoke draws a higher concentration of desperate, endgame-geared operators than in Voyage. The delayed tower availability means that by the time you trigger extraction, the server has eliminated the unprepared. The survivors who converge on your position are those who have won their own mid-game engagements and are carrying the highest-tier loot. They have nothing to lose by contesting your 90-second window. The defense becomes a final exam in resource management.
Ammunition and repair discipline during the approach is non-negotiable. Operators who enter the 90-second window with depleted magazines or a damaged Trampler discover that the timer is too long to bluff and too short to outlast a sustained assault. Disabled locomotion prevents emergency repositioning if the storm shifts. Stripped armor increases the likelihood that concentrated fire will penetrate to the crew compartment. The 90 seconds is sufficient time to reload, patch armor, and reposition once, but only if those supplies were deliberately reserved during the looting phase. A common failure pattern is to spend all repair resources on mid-game skirmishes, leaving the Trampler vulnerable during the approach when the real threat arrives.
FinalBoss // Gear
Level up your setup
01Top-rated gaming headsetson Amazon→02High-refresh gaming monitorson Amazon→03Gaming chairson Amazon→04Discounted game keyson Kinguin→
Affiliate links · As an Amazon Associate, FinalBoss earns from qualifying purchases.
Want to Level Up Your Gaming?
Get access to exclusive strategies, hidden tips, and pro-level insights that we don't share publicly.
Ultimate Guide Strategy Guide + Weekly Pro Tips
Boarding the 60-Second Cable Window
When the dropship arrives, it deploys a cable that generates a zipline between the vessel and the green-smoking Trampler. This cable remains active for approximately 60 seconds before despawning. That one-minute interval represents the final gate between a successful raid and total loss. The interaction is mechanically straightforward—you latch onto the cable, ascend the zipline, and board the ship—but the surrounding tactics are dense. The cable connects exclusively to the Trampler’s position, meaning you must board from its immediate vicinity. Attempting to reach the extraction point from a distant security position consumes seconds that the 60-second window does not forgive.
The Trampler’s relationship to the cable is the most commonly misunderstood element of the sequence. The green smoke that marked your position serves as the anchor for the zipline, and the Trampler is extracted as part of the boarding process. You do not need to manually load cargo or abandon it behind you. Provided the Trampler survives the full chain—from the radio trigger through the 90-second approach and into the 60-second deployment—it leaves with you. Conversely, if the Trampler is destroyed during the cable window, the extraction aborts. The cable either despawns immediately or becomes non-functional, and you are left standing over the wreckage as the dropship departs empty.
Miss the 60-second window, and the consequences are absolute. The ship departs on schedule, the cable retracts, and you remain in the sand with your exposed Trampler. Every squad that was waiting for your ship to leave now knows you are stranded, likely low on ammunition, and carrying the loot that justified the attempt. There is no overtime or secondary cable. This absolutism is why positioning before the cable appears matters more than reaction speed once it drops. Operators should be mounted on or adjacent to the Trampler before the dropship arrives, not sprinting back from a forward defensive position.
Squad boarding order deserves pre-arranged protocol. The first operator should latch immediately to confirm the extraction channel is active and to reduce the risk of a total wipe if the team is hit by area damage during a cluster. Remaining teammates should provide covering fire from the Trampler or nearby hardpoints. Because ascending players follow a predictable vertical path, they are vulnerable to precision fire. A staggered boarding, where one player holds ground until the final ten to fifteen seconds, sacrifices individual safety for squad security. There is no universally correct order; the optimal choice depends on whether the extraction is occurring under harassment or in a rare moment of uncontested calm.
Contested cables transform the final minute into a king-of-the-hill scenario. Enemy squads that arrive late can use your cable to extract themselves after eliminating your team, making the 60-second window a shared resource that defense teams must deny. The Trampler’s bulk can physically block direct cable access if positioned precisely, though the zipline origin sits above ground level. Advanced squads in Voyage mode may occasionally allow the first cable to expire intentionally, using the ship as bait to draw in attackers before triggering a second radio call. This is a high-risk gambit viable only when tower reuse is permitted and the squad possesses the defensive discipline to survive two consecutive sieges.

Voyage vs. Storm Dive: How Mode Choice Reshapes Extraction
The choice between Voyage and Storm Dive is ultimately a choice between extraction reliability and loot concentration. Voyage mode presents the radio tower loop in its most legible form. Towers are available earlier, the safe zone remains stable, and the 90-second wait occurs in an environment where disengagement is still possible. For operators learning the white-door-icon reveal mechanic, the climbing sequence, and the cable cadence, Voyage is the necessary classroom. The mode permits mistakes. A poorly positioned defense can recover because the storm is not actively draining health. An early extraction can be abandoned in favor of more looting because the tower will still be there later.
Storm Dive exists to stress-test every assumption learned in Voyage. The delayed tower availability removes the early-exit option entirely. You are forced to loot under increasing pressure, and by the time the white door icon appears, you have likely been pushed inward by the storm, depleted consumables in mid-game fights, and accumulated enough high-tier material that death feels catastrophic. The Trampler build that succeeds in Voyage—heavy armor, turreted suppression weapons, expanded cargo racks—often proves too slow to outpace Storm Dive’s final collapse. The mode rewards mobility, quick-repair modules, and leaner profiles that can relocate to the tower through damaging weather.
The risk-reward profile inverts sharply. In Voyage, danger during the 90-second wait comes predominantly from player aggression. In Storm Dive, it comes from player aggression compounded by environmental damage and the desperation of operators who know the tower is their only remaining exit. A Storm Dive extraction frequently resembles a final-stand scenario where multiple squads converge on the same green smoke from different vectors, all carrying endgame loot and willing to expend every remaining resource to secure the cable. The 60-second window in this context is less about orderly boarding and more about outlasting every other shooter in the zip code. The squad that controls the Trampler when the cable drops usually wins not because they executed a flawless defense, but because they preserved enough ammunition and armor integrity to survive the attrition.
These differences have direct implications for Trampler configuration. A Voyage build can prioritize armor thickness and weapon range, accepting slower movement in exchange for the ability to survive a protracted defense. A Storm Dive build should prioritize engine output, repair speed, and lighter weaponry that does not compromise traverse speed. The extraction sequence itself—climb, trigger, green smoke, 90 seconds, cable, 60 seconds—remains mechanically identical across modes. What changes are the conditions under which you execute it. Operators who enter Storm Dive with a Voyage configuration often discover that they cannot reach the tower before the storm overtakes them, or that their Trampler lacks the responsiveness to reposition during the approach window.
Squad Communication and Early Access Realities
Mechanical mastery of the extraction loop is necessary but not sufficient. SAND operates at squad scales of up to six players, and coordination during the 90-second siege often matters more than individual aim. The game provides a flare system accessed through the R menu and scroll wheel, producing colored smoke signals that remain visible for approximately 45 seconds. During extraction, this system transcends its general utility and becomes a critical command layer. Standardized colors can designate incoming enemy bearings, confirm that the tower climb has begun, signal low ammunition, or mark the cable as safe for boarding. In the chaos of a contested evacuation, where voice communications overlap and the green smoke dominates visual attention, a single colored flare transmits information faster than a verbal callout.
The green smoke itself functions as the game’s primary communication channel to the server and to every remaining player. It is unambiguous, persistent, and impossible to ignore. Experienced squads leverage this inevitability rather than fearing it. By triggering extraction from a tower with favorable defensive geometry—clear sight lines, natural choke points, hard cover for dismounted operators—they turn the smoke from a liability into a lure. Attackers drawn to the visible signal are channeled into prepared kill zones. Less experienced operators waste resources trying to hide or obscure the smoke, which is mechanically impossible. Acceptance of the smoke as a fixed variable is the first step toward extraction mastery. You are not hiding. You are holding.
The Early Access reality introduces variables that mechanical skill cannot fully control. SAND: Raiders of Sophie launched on June 22, 2026, with reported server instability, intermittent matchmaking failures, and instances of items deleting before extraction. Temporarily unavailable servers, connection drops, and anti-cheat concerns have surfaced during the initial window, contributing to a mixed reception. These are documented behaviors of the current build. The development team iterated on infrastructure through pre-launch stress testing, yet the live environment has continued to exhibit backend volatility. Operators should approach high-stakes extractions with the awareness that a flawless 90-second defense and a timely cable boarding do not guarantee inventory retention if the server desyncs during the lobby transition.
This technical context should inform risk management without discouraging engagement. The $19.74 USD entry price reflects the Early Access proposition: the core extraction loop is present and functional, but the surrounding architecture is still settling. Do not load your Trampler with irreplaceable crafted components for a run unless you are prepared to lose them to a backend issue rather than an enemy barrage. The distinction between a mechanical failure and a technical failure is important. Dying during the 60-second cable window because an enemy squad outplayed your defense is part of the design. Losing the loot after a successful boarding because of an inventory sync error is a temporary artifact of the launch period. Understanding this distinction allows operators to engage with the extraction loop as intended while maintaining appropriate expectations for the build’s current stability.
The radio tower extraction in SAND: Raiders of Sophie resolves to an unforgiving timing chain that rewards preparation and punishes hesitation. Locate the white door icon through proximity, climb to the radio summit, trigger the green smoke, survive 90 seconds of dropship approach while defending your Trampler as the server’s most visible objective, then secure the 60-second cable before it despawns. Voyage mode offers the spatial and temporal room to learn these rhythms. Storm Dive compresses them into a final examination where the storm, the tower scarcity, and the surviving population all converge on your position. Master the sequence, configure your Trampler to match the mode’s specific pressures, and treat extraction not as an escape route but as the last, most consequential combat encounter of every run.