SealChain: I Stopped Getting Swarmed After Fixing My Item Links and MP (7 Key Tips)
Game intel
SealChain: Call of Blood
The "Sealchain" is a roguelite game where items can be connected to each other to create chain reactions. In this crumbling world, you will play as a medium, u…
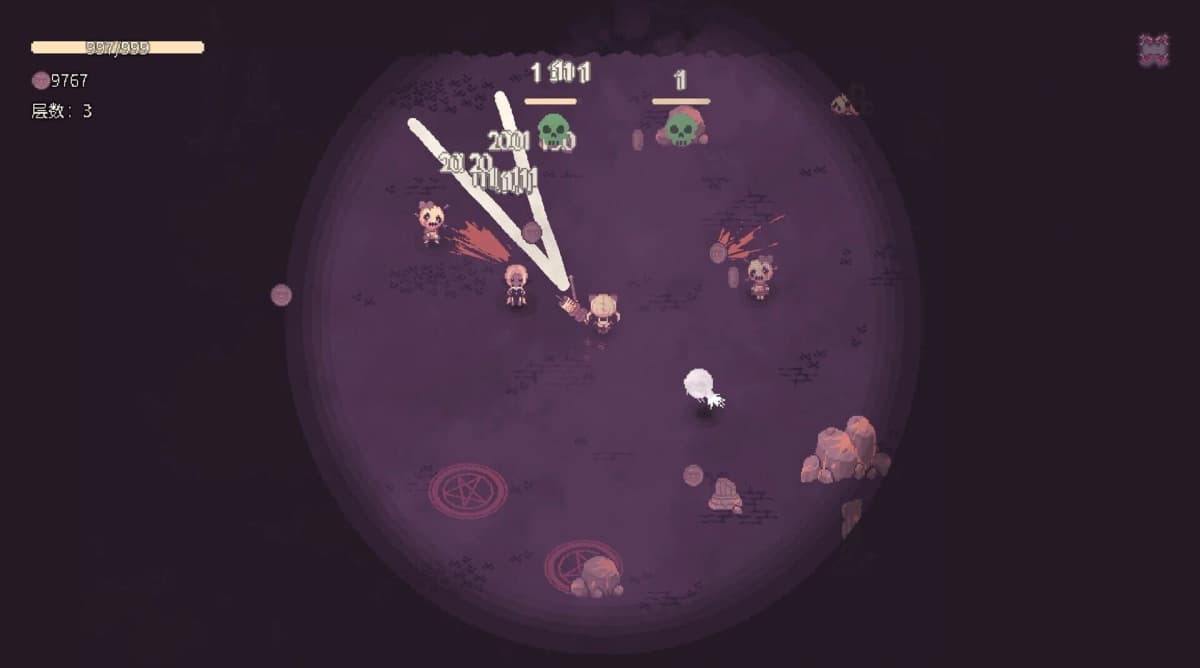
Why Early SealChain Runs Feel So Chaotic
After spending my first 8-10 hours in SealChain: Call of Blood, every run felt the same: I’d start strong, mow down the first waves, then suddenly my MP bar was empty, my HP was shredded, and my “good” build just collapsed under the mob. It honestly felt like I was doing something fundamentally wrong.
The breakthrough came when I stopped treating SealChain like a simple horde shooter and started respecting two things:
- The Item Link System (inventory chaining and sockets)
- Strict MP and HP management instead of pure damage stacking
Once those clicked, my runs went from “die at the first spike in difficulty” to “reach late stages consistently.” Below are seven beginner tips based directly on that experience, aimed at stabilizing your early, chaotic runs as fast as possible.
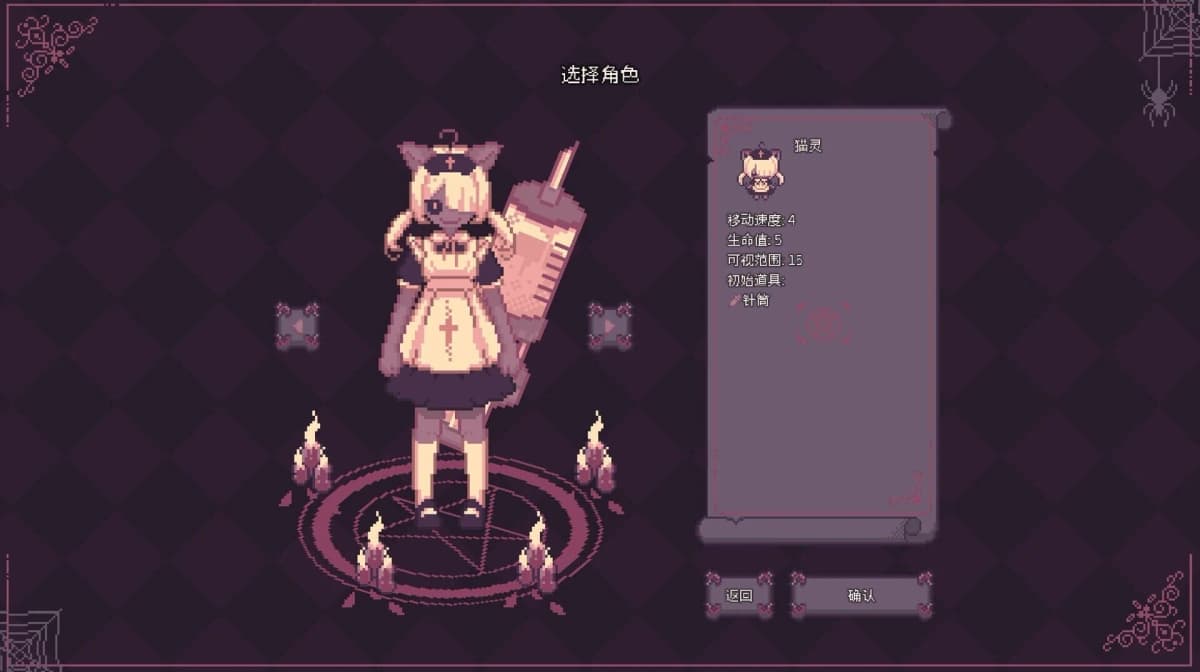
Tip 1 – Build Around Your Character, Not a Generic DPS Plan
My first big mistake was trying to run the same “universal” build on every character. SealChain punishes that mindset hard.
The starter, Huntmoon, is a great example. She can swap between a spread-style bow and a more shotgun-like piercing mode with upgrades. On her, effects like Pierce and Attack Speed feel incredible, because more projectiles hitting more enemies is exactly what her kit wants.
But when I tried to copy that same high-speed, pierce-heavy item setup onto a later-unlocked character that leaned more into chunky hits, it felt awful. My MP vanished, my damage didn’t scale the same way, and runs crumbled.
Early on, do this instead:
- Stick with Huntmoon for your first few hours. She’s forgiving and scales well with basic stats.
- On Huntmoon, prioritize:
- Attack Damage until trash mobs die in 1-2 hits
- A moderate amount of Attack Speed (don’t go crazy yet)
- Pierce or multi-projectile effects to clear big packs
- When you unlock new characters, read their talent descriptions and starting seals. If they highlight HP, armor, or special effects instead of raw speed, build into those strengths rather than forcing your favorite Huntmoon setup.
The core idea: each character scales differently. Match your item choices to how their weapon and talents naturally want to play, and the game immediately feels less unfair.
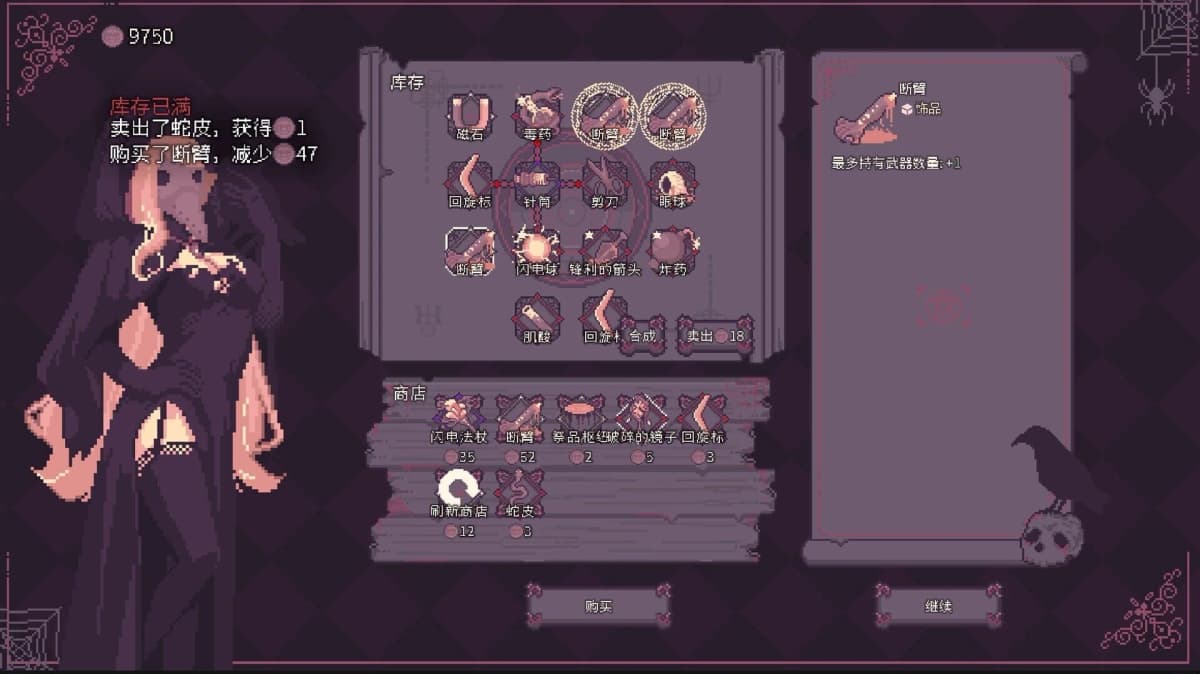
Tip 2 – Learn the Item Link System Early (Press V)
The Item Link System is the heart of SealChain. For my first few runs, I dropped items in the inventory wherever they fit and wondered why my damage felt weak. The moment I created my first proper chain, my build power basically doubled.
Here’s the core loop I use every single run:
- Every item has sockets / seals that can connect to others.
- When seals are linked, they form chains that activate bonuses:
- Extra critical chance or crit damage
- Additional random drops or resources
- MP-related boosts or special effects
- Open your inventory and press
Vto switch into link-edit mode. - Drag items so their sockets line up and form continuous paths instead of isolated pieces.
What finally worked for me was treating one item as my “core” (usually my highest damage or best effect), then building my chain outward from that. I’d rearrange the whole inventory around keeping that main path intact, even if it meant selling or discarding decent but awkwardly shaped items.
If you only remember one thing from this tip: unlinked items are massively underperforming. Raw stats matter, but properly linked seals often give you more power than a flat +5 damage ever will.
Tip 3 – Treat Inventory Chaining Like a Puzzle, Not a Backpack
Once I stopped just “linking whatever touched” and started planning my inventory chaining, things snowballed in a good way.
Items have different shapes and socket positions. The clever play is to arrange them like Tetris pieces so your main chain can snake through as many seals as possible while still leaving flexibility for new gear.
Some habits that helped me a ton:
- Reserve a corridor in your inventory for your main chain. I usually keep a central “highway” of linked items and park junk or situational items off to the sides.
- Think ahead before buying: a slightly weaker item with a perfect shape or socket position can be better than a strong one that breaks your chain.
- Use filler items as bridges in the link path. A tiny piece with one or two seals can connect two powerful items and unlock chain bonuses you’d otherwise miss.
- Regularly press
Vand refine your layout after big pickups or shop visits. I do a quick re-org after every major event.
Many of the game’s strongest effects, including some MP-chain synergies and extra drop procs, only really shine when you give them long, well-planned link paths. Treat your inventory like a living puzzle you’re solving throughout the run, not just a storage space.
FinalBoss // Gear
Level up your setup
01Top-rated gaming headsetson Amazon→02High-refresh gaming monitorson Amazon→03Gaming chairson Amazon→04Discounted game keyson Kinguin→Affiliate links · As an Amazon Associate, FinalBoss earns from qualifying purchases.
Tip 4 – Build Your Damage Around MP Management, Not the Other Way Around
MP is the quiet run-killer in SealChain. Every attack spends MP, and you can see your current and max MP in the top-left of the screen. When that bar hits zero, your weapons effectively go on strike until it regenerates.
Early on, I’d stack Attack Speed, feel like a god for 10 seconds, then suddenly sit there helpless while my MP crawled back up. Elite waves or bosses would wipe me as soon as my burst window ended.
What finally stabilized my runs:
- Grab at least one or two MP upgrades early:
- +Max MP
- +MP regeneration
- On-hit or on-kill MP recovery (if available)
- Don’t overstack Attack Speed until your MP can support it. A slightly slower, sustainable fire rate is better than burning out mid-fight.
- Prioritize MP-related seals in your Item Link chains. If an item says it affects MP, make sure it’s plugged into your main path, not sitting unlinked in a corner.
- Fire in controlled bursts during dense waves. I got into the habit of weaving movement and dodges between short volleys instead of holding the trigger constantly.
Think of MP as your ammo and your gas tank combined. You’re not just managing how much damage you deal-you’re managing how long you can keep dealing damage before everything falls apart.
Want to Level Up Your Gaming?
Get access to exclusive strategies, hidden tips, and pro-level insights that we don't share publicly.
Ultimate Guide Strategy Guide + Weekly Pro Tips
Tip 5 – Treat HP and Armor as Your Real Progress Currency
SealChain doesn’t fully refund your HP between nodes. Whatever damage you take carries forward, and that’s what quietly ruins long runs. I lost so many attempts not to bosses, but to one bad fight two stages earlier that left me limping.
Here’s how I started treating HP correctly:
- Grab defensive stats early if offered:
- Max HP for a larger buffer
- Armor to reduce every hit
- Pay attention to Heart of Mercy nodes on the route map. These are your lifelines. If I’m below roughly half HP, I’ll reroute for them even if it means skipping some damage scaling.
- Respect chip damage. Fast trash mobs that land tiny hits will shred you over time if you ignore them because you “feel strong.”
- Avoid greedy plays at low HP. If an elite node is coming up and you’re already bleeding, it’s often better to detour, stabilize, then tackle harder content later.
I started thinking of HP more like a meta-currency: every point I lost now made the next few fights more expensive and risky. Once I played with that mindset, my consistency shot up.
Tip 6 – Use Talents with Prida to Patch Your Weak Points
Between runs, make a habit of talking to Prida and spending your Talents. Even failed runs give you some, and they’re crucial for smoothing the rough edges of early gameplay.
Talents are split into different categories (offense, defense, utility/economy style trees). I wasted a lot of time spreading points thinly across flashy damage nodes while my core survivability stayed terrible.
What worked much better for me was this rough priority:
- First: Basic economy and progression talents
- More Talents or currency gained per run
- Better shop value or starting resources
- Second: Core MP and HP/armor boosts
- Permanent MP capacity and regen increases
- Baseline HP or damage reduction
- Third: Offense and crit-focused talents
- Attack damage, Attack Speed, crit rate/damage
- Character-specific boost nodes once you know your favorite
The idea is simple: make sure every new run starts a bit sturdier and with smoother resource flow, then stack damage once you’re not constantly dying to basic mistakes. A few well-placed Talents in MP and HP made more difference for me than an entire page of minor attack boosts.
Tip 7 – Let Game Modes and Routes Shape Your Playstyle
SealChain has multiple game modes with different win conditions-things like surviving for a duration, killing a set number of enemies, or pushing into tougher Inferno variants such as late-game Slaughter or Hatred. Each subtly changes what a “good” build looks like.
From my runs, this is how I adjust:
- Killcount / time-pressure modes
- Prioritize AoE, Pierce, and consistent DPS.
- Route toward damage nodes, Attack Speed, and offensive events.
- HP still matters, but failing the timer because your build is too slow is just as bad as dying.
- Attrition / survival-focused modes
- Emphasize Max HP, armor, and sustain effects.
- Take more Heart of Mercy nodes and safer fights.
- Long-term scaling items and defensive chains shine here.
On top of that, your route selection inside a run is huge. I used to autopilot to whatever node was closest; now I pause and plan two or three steps ahead:
- Look at the next few nodes and decide:
- “Do I need HP?” → prioritize Hearts of Mercy and safer encounters.
- “Am I underpowered?” → chase item nodes, shops, or elites only if you can handle them.
- “Is my build strong but fragile?” → grab defensive boosts even if damage options look tempting.
- Don’t be afraid to skip elites when your HP or MP sustain isn’t ready. Living to fight another stage with more Talents earned is still progress.
- In easier modes, experiment with greedy routes to learn enemy patterns without caring as much about finishing the run.
Once I started letting mode goals and route choices dictate how aggressive or defensive I played, I stopped feeling like the game was randomly spiking in difficulty. Most of my deaths were suddenly traceable to a greedy route decision I’d made three nodes earlier-which is good, because that’s something you can learn from and fix.
Wrapping Up – Stabilize First, Optimize Later
When I finally focused on proper Item Links and disciplined MP/HP management, SealChain: Call of Blood shifted from overwhelming chaos to a satisfying, learnable roguelike. The enemies didn’t get weaker—I just stopped sabotaging my own runs.
- Build around each character’s strengths, especially Huntmoon early on.
- Use Item Link chains and smart inventory chaining to squeeze value from every seal.
- Support your damage with solid MP sustain and protect your HP and armor like long-term resources.
- Invest Talents with Prida to fix fundamental weaknesses before chasing big DPS numbers.
- Let modes and route choices guide how greedy or safe you play.
If I can go from getting flattened in the first few minutes to consistently reaching late stages just by applying these seven tips, you absolutely can as well. Once your runs feel stable, that’s when the real fun starts—experimenting with wild chains, pushing Inferno, and chasing those tougher achievements.