

Name, ID number, photo, clearance level, and time window are the five fields that control the first fourteen days of Security 51. Check them in that order, read the daily bulletin before the shift clock begins, and deny access when a field cannot be verified. Level 3 uses the same discipline, but Days 25-30 add branching instructions, research, and field-operation state that must be recorded between shifts.
The division matters because Level 1 errors usually come from skipping a basic check, while Level 3 errors come from applying a valid rule to the wrong condition or losing track of an earlier branch. Visitors are randomized, so a fixed visitor-by-visitor script will not transfer reliably between runs. A fixed decision procedure will.
Table of Contents (16)
How the Level 1 and Level 3 Windows Differ
| Days | Primary task | Reliable decision basis | Frequent failure point |
|---|---|---|---|
| Level 1, Days 1-3 | Learn document verification | Name, IDs, photo, clearance, and time window | Approving after finding only one matching detail |
| Level 1, Days 4-7 | Add anomaly checks | Documents first, then body, behavior, and bulletin-specific cues | Ignoring an anomaly because the documents look normal |
| Level 1, Days 8–14 | Use scanner and Polaroid/photo verification | Tool results as confirmation after document checks | Using a tool to replace the inspection loop |
| Level 3, Days 25–30 | Manage branching outcomes | Daily baseline rule, exact override clause, test result, persistent state | Treating each visitor as an isolated puzzle |
Level 1 Days 1–14: Build One Inspection Loop
Level 1 is designed to make a fixed routine automatic. The queue becomes harder when tools, anomaly flags, and elevator management begin to overlap, so the safest approach is to preserve the same order even when a visitor appears obviously legitimate.
Start every shift with the bulletin and manual
Read the daily bulletin before starting the clock. Extract the day’s admission restrictions, exceptional conditions, and any instruction that changes how a specific type of visitor must be handled. Keep the manual available for clearance levels and permitted time windows. The bulletin is the active ruleset for that shift; an otherwise valid document does not override it.
- Read the bulletin completely before accepting the first visitor.
- Identify the day’s standard admission rule.
- Mark any condition that requires denial, a tool check, a medical-certificate request, or a Call Security response.
- Use the manual to confirm clearance levels and valid entry times.
Days 1–3: Verify every document field
Use the same five-step order for every visitor. Compare the name across the passport and facility pass, then match all ID numbers. Compare the live subject with the photo, verify their clearance level, and finally check that the listed time window is valid. A mismatch in any of these fields is sufficient reason to deny access during the opening days.
- Match the visitor’s name on every supplied document.
- Match every ID number across the document stack.
- Compare the photo with the person standing at the checkpoint.
- Check the clearance level against the manual.
- Check the entry time window against the manual and bulletin.
- Deny access if a field conflicts or cannot be confirmed.
Do not approve a visitor because their name and photo match while their ID number differs. The game expects cross-document consistency. Treat the documents as the primary record and the visitor as the claimant: when the claimant conflicts with the paperwork, the paperwork controls unless a later tool or bulletin instruction specifically resolves the conflict.
Days 4–7: Add anomaly checks after documents
Anomaly inspection belongs after the document pass. First establish whether the visitor’s identity and access rights are internally consistent. Then inspect physical presentation, behavior, and any detail that conflicts with the bulletin. This order prevents a common error: focusing on a suspicious visual cue and missing a simple clearance or time-window violation.
- Complete the five document checks before escalating.
- Look for body, behavior, or presentation details that do not fit the day’s rules.
- Re-read the relevant bulletin line when a visitor seems normal but one detail feels inconsistent.
- Deny access when the available evidence remains incomplete.
Early shifts penalize optimism. A vague suspicion alone may not identify the exact problem, but an unverified claim should not become an approval. Reserve approval for cases where the documents, the visitor, and the day’s instructions agree.
Days 8–10: Use the X-Ray Scanner as confirmation
The X-Ray Scanner and later verification tools expand what can be checked, but they do not replace the bulletin or document comparison. Finish the basic inspection first. Then use the scanner when the current shift requires proof that documents cannot provide, or when a contradiction needs a physical confirmation.
- Read the bulletin and complete the document loop.
- Use the scanner only when the case requires an additional physical check.
- Compare the scanner result with the identity claim and the day’s restrictions.
- Reject the visitor if the scan contradicts their identity or physical claim.
- Deny when the result is missing, unclear, or unsupported by the bulletin.
A scanner should not be used to rescue a failed basic check. On Level 1, a clear document mismatch is usually a denial unless the day’s instructions explicitly require a further test. Scanning every visitor also slows the shift and makes it easier to lose track of the document fields that caused the original suspicion.

Days 11–14: Treat Polaroid and photo checks as identity gates
By the second half of Level 1, the photo comparison must be handled as a full identity check. Compare the live subject with the supplied image before committing to any tool-based decision. If the image is ambiguous, repeat the name and ID comparison rather than treating the photograph as a standalone answer.
- Compare the live subject with the photo or Polaroid result.
- Reconfirm name and ID numbers when the image is unclear or partly obscured.
- Check the bulletin before accepting a stricter or unusual identity explanation.
- Use a medical-certificate request only when the day’s rule calls for medical evidence.
- Deny access if the claimed explanation has no support in the bulletin or documents.
When a tool result, photo, and document stack point in different directions, stop and identify which instruction governs that case. A claimed exception is insufficient by itself. The daily bulletin must support the exception before it can override the normal identity match.
Keep elevator headcount separate from identity approval
Elevator headcount creates a second layer of failure. A visitor can pass the document check and still create a problem if the elevator state conflicts with the shift’s restrictions. Recheck headcount before advancing the line, especially after an unusual approval or a sequence of rapid admissions. Do not pre-clear several visitors because their IDs look valid; each admission can change the current state.
Save consumables for dense shifts
Consumables such as Sandwiches support extended shifts by helping you recover and sustain concentration. Save them for days where the queue is long, the bulletin adds multiple document layers, or you have already had a demanding inspection streak. A simple case with a clear denial does not justify burning supplies.
- Use recovery items after sustained, high-attention screening rather than at the first sign of pressure.
- Pause briefly between visitors to reset your document order if you catch yourself skipping fields.
- Read new medical-certificate rules carefully; certificates can be part of the inspection, not automatic proof of safety.
For a careful first pass through Days 1–14, allow roughly 30–60 minutes of real time per in-game day. The early value comes from accuracy rather than speed. Once the five-field loop becomes automatic, scanning and photo verification take far less attention.
Level 3 Days 25–30: Use Rules and State, Not Visitor Scripts
Level 3 begins on Day 25 with a promotion, new tools, and a broader branching structure. The visitor pool is randomized, so earnings, consumable purchases, and exact visitor order can differ from another run. Record the rule that produced an outcome rather than trying to reproduce a specific sequence of people.
The core Level 3 procedure is consistent: identify the day’s baseline instruction, isolate any clause that says to ignore previous instructions, perform the required test, take the exact required action, then record research and field-operation progress before the next shift.
Day 25: Rorschach Test and the red-color security trigger
Day 25 introduces the Rorschach Test during the BSODeaD crisis. Check for mismatched ID details and administer the test as directed. The critical trigger is a red color mentioned in the test: that result requires Call Security, even if an earlier instruction would normally send the visitor through. Keep Call Security distinct from denial; the two actions are not interchangeable.
- Verify ID details before relying on the test outcome.
- Administer the Rorschach Test when required.
- Call Security when the red-color trigger appears.
- Track the Field Operation for collecting data on the BSODeaD hacker group.
- Track the DUCC Project Display research line.
A documented zero-mistake route for Day 25 earned $402 and purchased a Bento plus Printing Speed. Use that as a route reference only. It does not establish a mandatory earnings target because the visitors checked during a shift can vary.
Day 26: Preserve the literal override wording
Day 26 extends the Rorschach-and-ID logic while adding a condition that instructs the player to let a visitor through while ignoring all other instructions. Treat that wording as a specific override attached to its exact trigger. Do not apply it to visitors who merely appear similar, and do not convert it into a general approval rule for the entire shift.
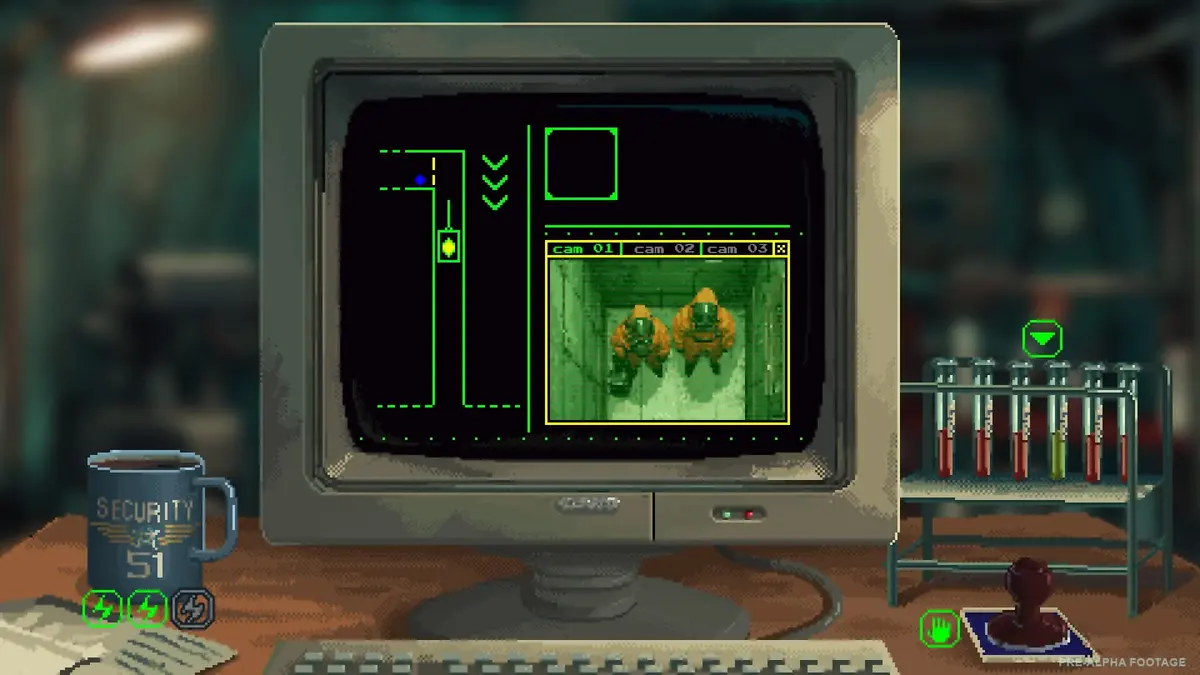
- Start with the baseline admission rule listed in the daily instructions.
- Check ID details and use the Rorschach Test where required.
- Apply a Call Security clause only when its stated condition occurs.
- Apply the “let through, ignoring all instructions” clause only when its own stated condition occurs.
- Continue the probability-mapping Field Operation and Energy Sphere Experiment research.
- Complete the required Isolation Ward research before ending the shift.
One recorded Day 26 route earned $494 with zero mistakes and used a Bento and Coffee. The useful part is the state progression, not the purchase list: research success and field operations can shape what is available later, while consumables and earnings can vary with the run.
Day 27: Route ID mismatches into the correct tool check
Day 27 is a clean example of conditional escalation. When an ID mismatch appears, use UV Light to check for Runic Symbols or use the Thermal Scanner to look for Hypothermic Areas. If neither marker is present, deny access. The point is to resolve a mismatch through the assigned tools rather than assuming every discrepancy produces the same response.
- Check the visitor’s ID for mismatched details.
- Use UV Light to inspect for Runic Symbols when the case calls for it.
- Use the Thermal Scanner to inspect for Hypothermic Areas when the case calls for it.
- Deny access if neither required marker is present.
- Continue the probability-mapping operation and the Prolonged Inhalation of Lilac 8 research line.
A new Field Operation becomes available for Day 28. Record that unlock immediately. Late-game branches are easier to control when the research and operation state is written down before the next day introduces another exception rule.
Days 28–30: Consolidate the branch before chasing perfect outcomes
The last three days in this window test whether earlier decisions were treated as connected state. Use the strongest verification tools on branches that materially affect the end-state: explicit override clauses, named Field Operations, active research lines, and decisions that change access or security handling. Routine cases should still receive the ordinary document check, but they do not require every available tool.
For each Day 28–30 shift, write down the baseline rule before the queue begins. Then copy the exact conditions that alter it. The important distinction is between a default instruction such as “always let through except” and a condition that explicitly tells you to deny, Call Security, or let someone through while ignoring earlier rules. The action belongs to the trigger that names it.
The routing logic for these shifts reduces to a short set of rules:
- Valid documents plus no special trigger: follow the normal allow instruction.
- Document inconsistency: deny unless the bulletin tells you to test for a defined exception.
- Defined tool result: follow the day’s stated Call Security, allow, isolation, or research instruction.
- Explicit override: let the override control the case, even when the normal rule would give another outcome.
- Isolation or quarantine condition: consider containment when the day’s instructions frame it as the intended route.
A Repeatable Branching Timeline for Replays
Use a short record after each Level 3 day. It converts a variable visitor order into a stable timeline of decisions and persistent state. The record should describe rules and outcomes, not the personality or appearance of a particular randomized visitor.
| Record field | What to write | Why it matters |
|---|---|---|
| Baseline rule | The default approval, denial, or exception rule for the day | Stops an override from becoming your assumed default |
| Override condition | The exact trigger and its required action | Preserves “Call Security” and “ignore all instructions” clauses correctly |
| Verification proof | ID mismatch, Rorschach response, UV symbol, thermal result, or other required evidence | Explains why the action was taken |
| Persistent state | Research completed, Field Operation selected or unlocked, and relevant purchases | Tracks dependencies that can affect later branches |
| End-of-day result | Mistakes, earnings, and any unexpected branch change | Separates decision errors from visitor-order variance |
This method also makes replay testing practical. If a later branch changes, compare the saved baseline rule, override condition, proof used, and research or Field Operation state. A different outcome often reflects carried-over state or a different randomized visitor condition rather than a broken decision rule.
Failure Points That Cost the Most Runs
- Starting the clock before reading the bulletin: the day’s active exception can invalidate an otherwise correct document decision.
- Approving on a partial match: a valid name or photo does not repair an incorrect ID number, clearance level, or time window.
- Scanning before checking documents: the scanner confirms a case; it does not replace the basic verification loop.
- Ignoring photo and Polaroid conflicts: identity evidence must agree with the bulletin-supported claim before approval.
- Turning Call Security into a denial: Level 3 branches distinguish the required action, so use the one explicitly stated by the condition.
- Applying an override too broadly: “ignore all instructions” applies only to the trigger attached to that rule.
- Forgetting research and Field Operation state: late branches depend on more than the current visitor, particularly after Day 25.
- Using another run’s earnings as a correctness test: randomized visitors can change the shift’s result even when the decision procedure is sound.
Level 1 becomes reliable once the five-field check is automatic. Level 3 becomes reliable once every exception is recorded as a condition, an action, and a persistent-state change. That record is the part of the route that remains stable when the visitor order does not.
FinalBoss // Gear
Level up your setup
01Top-rated gaming headsetson Amazon→02High-refresh gaming monitorson Amazon→03Gaming chairson Amazon→04Discounted game keyson Kinguin→
Affiliate links · As an Amazon Associate, FinalBoss earns from qualifying purchases.
Want to Level Up Your Gaming?
Get access to exclusive strategies, hidden tips, and pro-level insights that we don't share publicly.
Ultimate Guide Strategy Guide + Weekly Pro Tips