
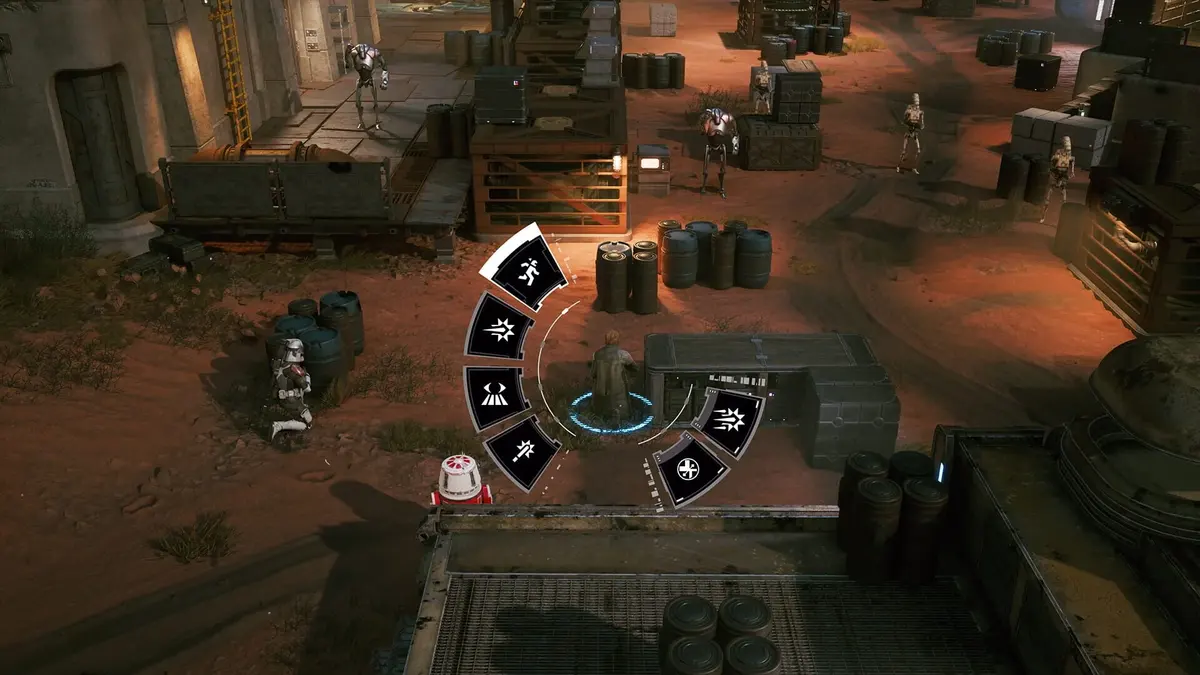
Bit Reactor’s STAR WARS Zero Company is set in the twilight of the Clone Wars, but its early tactical problems are grounded in a much smaller concern: every Operator begins a turn with only 3 Action Points. The strongest early approach is to protect those AP for cover, attacks, and Overwatch; turn every free Backup opportunity into Bond progress; and spend the shared Advantage bar before it reaches its 10-point cap.
The game gives your four-Operator squad a full player phase before the enemy acts, so positioning and target order matter more than rushing the closest battle droid. A clean turn can break enemy cover with an Advantage ability, use Call for Backup on the newly exposed priority target, and still leave one or more Operators with AP for Overwatch. That combination is the foundation of a reliable early campaign.
Table of Contents (8)
Understand the Four Resources That Decide Early Missions
Early mistakes usually come from treating AP, Advantage, Backup, and Overwatch as interchangeable tools. They overlap in combat, but each has a different budget and a different job. Keep that separation in mind before committing to a long move or a low-value shot.
| System | Limit or Cost | Best Early Use | Common Waste |
|---|---|---|---|
| Action Points | 3 AP per Operator each turn | Cover, attacks, positioning, utilities, and Overwatch | Spending 2-3 AP on movement and ending exposed without a shot |
| Advantage | Shared squad pool, capped at 10 | High-impact specialization abilities, cover breaking, and control | Hoarding until the bar caps or spending it on a weak target |
| Call for Backup | Free, once during the squad turn | Extra damage on a priority target and +10 Bond Points for the pair | Calling it against an enemy the first shot will already destroy |
| Overwatch | Uses remaining AP | Covering enemy movement after key attacks are complete | Using it after an Operator has already spent all AP moving |
Movement costs from 1 to 3 AP depending on distance, and the movement markers show the price before you commit. Use them. A position that costs three AP may look aggressive, but it frequently leaves that Operator in an orange exposed silhouette with no shot, no utility, and no reaction fire. Blue cover silhouettes should be your default finish point whenever the mission does not demand an immediate push.
Warning: even basic B1 battle droids can punish exposed Operators. A marginally better firing angle rarely justifies ending a turn in orange cover status, especially when the squad has a full enemy phase still to survive.
The cleanest early sequencing is simple. Spend as little AP as possible to get shared line of sight, use a free Backup call on the target that matters, resolve your main attack, then ask which Operators can still bank 1 AP for Overwatch. If you move first and think later, you burn the same tiny pool that should be paying for your damage and your safety net.
Make Call for Backup Your Main Bond XP Engine
Call for Backup is the best early habit to build because it solves two problems at once. It costs no AP, adds a follow-up shot from an assisting teammate, and awards +10 Bond Points to the two Operators involved. Backup Bond gain is limited to 20 Bond Points per relationship per mission, so use it consistently without trying to force every attack through the same pair after that cap is reached.
- Keep core Operators deployed together across missions and operations so their relationships progress naturally.
- Use Call for Backup against enemies that will survive the opening shot, such as elite targets, armored threats, or enemies still protected by cover.
- Pair Backup with a high-damage weapon user after the target has been exposed or stripped of cover.
- Build Bonds through support actions too: using a medic combat stim or healing an ally increases the Bond between those two squadmates.
- Use Hawks’ Pico-5 ability when appropriate for an additional +4 Bond Points per use, up to 20 Bond Points per character per mission from Pico-5.
The trap is targeting a weak enemy simply because it has the highest hit chance. Your primary attack can destroy that target before the Backup assist triggers, wasting the extra shot. Instead, look for a target with enough health to absorb both hits or one whose removal changes the fight: a heavy weapon user, a support unit, or an enemy holding a dangerous firing lane.
If you want a concrete early Bond target, the practical documented ceiling is strong enough to plan around. Two Backup activations between the same pair can give +20 Bond. Minor teamwork actions such as healing, Combat Stim, or AP-support abilities can add another +20. Finishing the mission together adds +30. You are not going to hit that number every fight, but it shows why Bonds rise fastest when you stop treating support actions as filler.
That also means a dull-looking support turn can be secretly excellent. If one Operator heals, another feeds AP support, Hawks uses Pico-5, and your core pair lands a Backup attack, you are progressing relationships while still stabilizing the board. Early Zero Company rewards that kind of double-dipping.
Before you fire, make sure Backup can actually happen
Backup has two common failure modes, and both are annoying because the button itself is free. First, the assisting Operator must have line of sight and range on the same target. Second, Backup can be wasted if the first shot kills the enemy before the assist fires.
- Confirm the assist indicator before committing the attack.
- Create shared line of sight first; do not assume the helper can see through the same gap as the main shooter.
- Avoid spending Backup on a near-dead target unless you only care about the Bond gain.
- If the fight gives you a high-health elite, boss-style enemy, or a unit in strong cover, that is usually the better Backup sink.
There is also a nasty timing lesson here. Because Call for Backup does not compete with AP, you should usually use it before the caller spends their attack. Queue the free assist, fire into a target that can survive the first hit, and only then decide whether the squad’s remaining AP is better spent on a second attack, a reposition, or Overwatch.
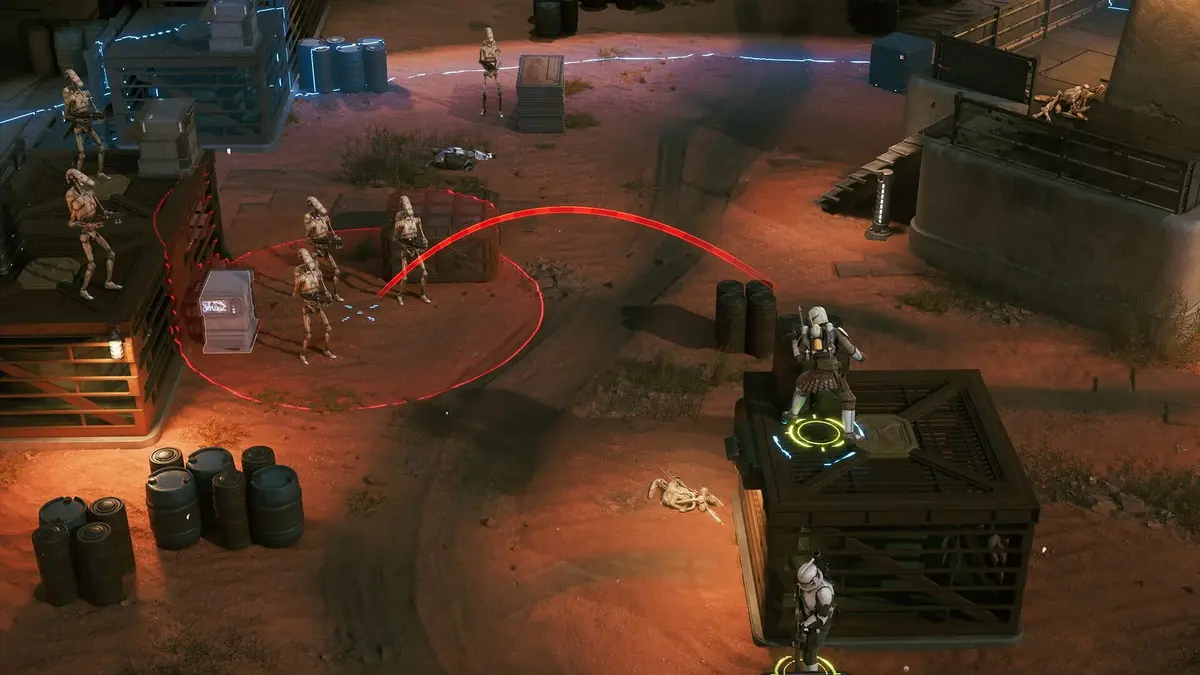
On especially durable enemies, this gets even nastier in a good way. If you can set up a Scoundrel’s Identify Weakness first, pairing it with Call for Backup turns both the primary shot and the assist into guaranteed critical hits against high-health targets, elites, and bosses. That is the kind of early combo that saves entire turns.
Spend Advantage as a Separate Combat Budget
Advantage is shared by the entire squad, does not refresh separately for each Operator, and caps at 10. Every successful hit generates 1 Advantage per enemy hit. A grenade or other area attack that damages three targets therefore creates three Advantage, making multi-target damage valuable even when it does not immediately finish an enemy.
The important distinction is that Advantage-powered specialization abilities can be used without consuming AP. That makes them tempo tools rather than replacements for standard attacks. An Operator can spend AP moving into cover or firing a blaster, then use an Advantage ability to break cover or force a dangerous target out of position.
- At the start of the squad phase, check the current Advantage total before spending AP.
- When the bar is approaching 10, use Advantage on a meaningful control or damage action instead of wasting future generation.
- Use high-impact abilities against elites, boss-style targets, clustered enemies, or enemies protected by strong cover.
- Use ordinary AP attacks to capitalize on the exposed targets created by the Advantage action.
- Call for Backup on the priority target once the battlefield has been opened up.
Trick’s rocket launcher and a Jedi Padawan’s lightsaber throw are valuable because they can alter the battlefield without taking away the AP needed for follow-up attacks. The ideal use is rarely a random damage burst. Use the resource to create a target that the rest of Zero Company can finish safely.
Advantage should not be dumped into disposable enemies, but keeping a full bar is also inefficient. Entering a difficult engagement with some Advantage saved is sensible; finishing repeated fights at the cap wastes every hit that would have generated more.
A good early turn often looks like this: damage one or two enemies to build Advantage, spend that Advantage to open a better angle or disrupt the enemy’s cover, call Backup on the now-vulnerable priority target, then leave 1 AP on a long blaster sniper or repeater user for Overwatch. You are not choosing between aggression and safety there. You are buying both with different currencies.
Choose Crisis Disruptions That Protect Your Control Game
Crisis choices are easy to read the wrong way early on. These are not little player rewards to stack blindly. Crisis missions can present two enemy perk options for a unit type, and you choose which upgrade to disrupt so the enemy does not gain it. In practice, that means you should remove the option that most directly attacks your plan.
The clearest verified example is a ranged enemy choice between an evasion upgrade and a defense-bypass shot. If your squad survives by leaning hard on cover and blue silhouettes, the defense-bypass option is often the scarier one to let through. If your plan depends on reliable Backup assists, Overwatch tags, and clean focus fire, evasion becomes the bigger headache because it turns good sequencing into misses.
- Disrupt defense-bypass upgrades when your squad’s survival depends on cover discipline.
- Disrupt evasion upgrades when your damage plan relies on consistent hit chains, especially Backup and Overwatch follow-ups.
- Disrupt other combat-tech evolutions that make enemy trades cleaner or your control turns messier.
Once that enemy-side choice is handled, build your own combat around displacement and battlefield control. This is where Zero Company gets mean in the fun way.
- Concussion grenades provide a large area effect that can shove multiple enemies near a map edge.
- Force push and pull can send targets near ledges off the stage, instantly defeating them regardless of how tanky they are.
- Kabb’s Uppercut is particularly efficient because it refunds the AP spent executing the move, including its movement cost.
- Push and pull damage affects health directly through droideka shields, making displacement a strong answer to shielded targets.
- Cover destruction sets up cleaner Backup shots and improves the hit chances of Operators who would otherwise be firing through defensive terrain.
Map edges are a win condition, not background decoration. When an elite or boss-style enemy is close to a drop, calculate the shove before committing to ordinary damage. A single Force push, pull, uppercut, or concussion blast can end a target that would otherwise consume several turns of concentrated fire.
So the practical rule is this: disrupt enemy upgrades that undermine your core loop, then use your own tools to make positioning lethal. That keeps the section about crisis choices honest without losing sight of what actually wins the fight.
Save One AP for Overwatch When the Lane Matters
Overwatch is where careful AP management pays off. Overwatch is reaction fire set during your turn, and the number of reaction shots depends on how much AP an Operator has left when entering it. Even 1 AP can still produce useful reaction fire, which is particularly valuable for long blaster snipers and repeaters that would normally require multiple AP for a conventional shot.
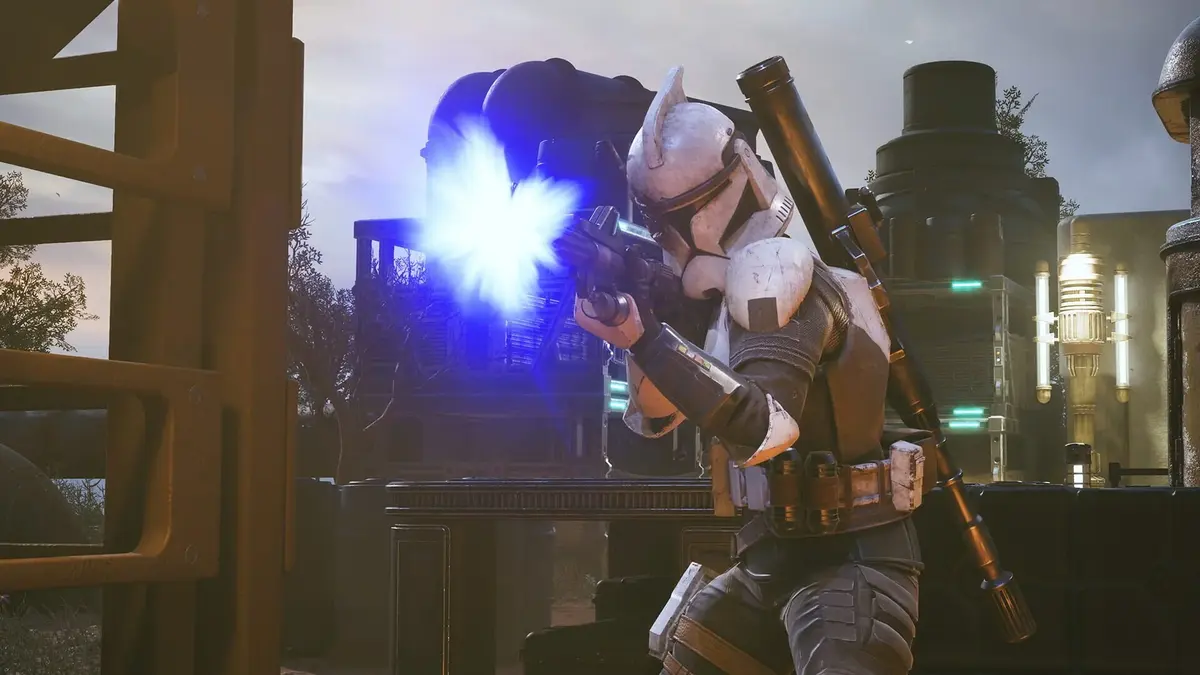
Each Overwatch shot must target a different enemy, so set the cone across a route where several enemies may move rather than aiming at one isolated target. Use Overwatch after your key Backup attack and Advantage action have resolved. It is a defensive finish to a good turn, not a reason to hold back an attack that removes the immediate threat.
Enemy positions are visible from the start of missions, with no fog of war hiding their initial placements. Use that information to identify likely movement lanes, protect the squad’s exposed flank, and decide which Operator can afford to end on reaction fire. A blue-cover sniper watching a narrow approach is worth more than a sniper who spent all three AP sprinting for a slightly better angle.
The sequencing piece matters here too. A lot of early turns feel bad because a player spends 2 AP moving, 1 AP shooting, and then wonders why the enemy phase feels uncontrolled. If the lane matters, reverse the logic: move only as far as needed, take the valuable shot, and preserve that last point for Overwatch. One reaction shot from safety is often worth more than a flashy full sprint that leaves an Operator stranded.
Manage Intel, Operations, and Influence Before Advancing a Cycle
Combat is only half of Zero Company’s early strategy. Operations are text-only map events started with Intel, offering immediate decisions and rewards such as credits, gear, and Influence. Their timers run in cycles, and a new cycle only passes after you complete a combat mission. This gives you room to resolve urgent operations before advancing the campaign clock.
- Prioritize operations closest to expiration so their rewards do not disappear unused.
- Invest in Intel when you need more operations available between combat missions.
- Use Influence deliberately because every sector has three Influence tiers to progress through.
- Spend Contacts to grant an immediate 7 Influence in the sector that needs it most.
- Use the Den map for instant travel between stations and check companion speech bubbles for available conversations.
The campaign layer rewards timing rather than rushing every available combat mission. Clearing an operation does not advance the cycle by itself; combat does. That means you can spend Intel to surface more operations, resolve the ones about to expire, spend Contacts to finish an important Influence tier, and only then take the mission that pushes the clock forward.
That is the early strategic rhythm a lot of players miss. If two operations are about to time out and one sector is close to its next Influence tier, the right move is often to tidy that up before you lock yourself into the next battle. Zero Company is generous about that timing window. Use it.
Use Flexible Recruits to Cover Your Squad’s Weaknesses
Recruited Operators can swap talents freely, which makes them the best place to correct an early roster problem. Hawks and story characters have fixed unique talents, while droids also occupy their own specialty. When a mission exposes a weakness, adjust the recruit who can fill the gap rather than trying to force every character into the same job.
Astromechs are especially useful for a squad that needs smoother action economy: they can generate AP for the rest of the team, apply defense penalties to enemies, and use Scan to grant hit bonuses to allies. On higher difficulties, carrying at least one Heavy is also a practical safety measure because taunts give the squad a way to control enemy attention when cover alone is not enough.
Check the permadeath setting before taking risks with injured Operators. With permadeath enabled, characters can be lost permanently if a fight goes bad. Trick has a valuable safety net through his passive that lets him get back up once per combat, and that trait can be upgraded to prevent an injury after he goes down. It is a useful buffer, but it should not replace disciplined cover and target control.
FinalBoss // Gear
Level up your setup
01Top-rated gaming headsetson Amazon→02High-refresh gaming monitorson Amazon→03Gaming chairson Amazon→04Discounted game keyson Kinguin→Affiliate links · As an Amazon Associate, FinalBoss earns from qualifying purchases.
Want to Level Up Your Gaming?
Get access to exclusive strategies, hidden tips, and pro-level insights that we don't share publicly.
Ultimate Guide Strategy Guide + Weekly Pro Tips