Starfield PS5: 15 Things to Do First to Skip the Early Grind
Starfield PS5 Beginner Guide – 15 Smart Moves to Skip the Grind
Starfield is built like a classic Bethesda RPG: massive freedom, very little hand-holding. That’s great long-term, but on a fresh save it’s easy to wander, get broke, and feel stuck running fetch quests for pocket change. The good news is that the early game doesn’t have to be a slog if you front-load a few smart decisions.
This guide is written from extensive PC/Xbox experience with Starfield and translated directly to a PS5 mindset. Button labels may differ slightly, but the systems are identical. The focus here is practical: 15 concrete things to do in your first few hours so you’re earning real credits, moving fast, and not drowning in loot and loading screens.
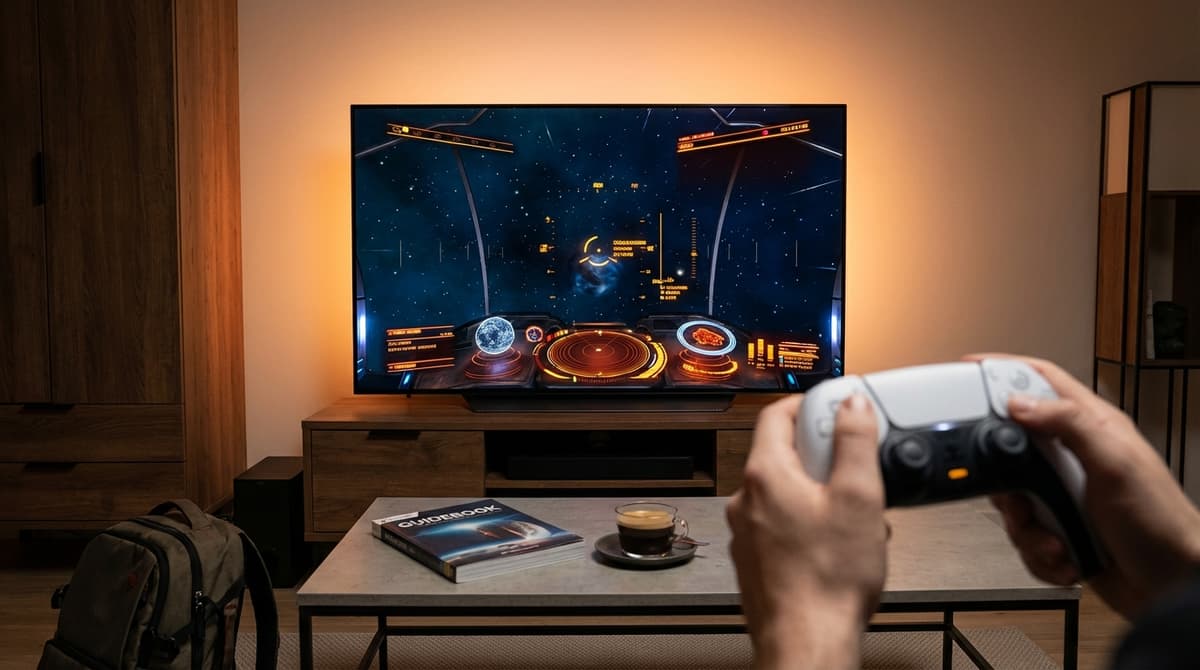
1. Tweak PS5 Settings First (Especially DualSense)
Before you start hoovering up space junk, spend five minutes in the options menu. Comfort and clarity here will pay off for dozens of hours.
On PS5, go into Start → Options and immediately:
- Dial in look sensitivity and dead zone so aiming feels smooth, not floaty.
- Enable or adjust aim assist to match your comfort with thumbsticks.
- Turn on clear HUD elements like enemy health bars and damage numbers.
- Lower motion blur and film grain if visuals feel smeared in firefights.
For DualSense specifically (assuming standard haptic/trigger support):
- In
Options → Controls / Controller, tune adaptive trigger strength – medium is usually the sweet spot so firing and boosting feel punchy without fatigue. - Keep haptics on, but not maxed. Subtle vibrations for gunfire, ship engines, and your boost pack make it easier to “feel” what’s happening without staring at UI elements.
- If you’re sensitive to rumble, lower or disable it for piloting only – long grav jumps plus combat can otherwise be a lot.
The goal is simple: you want your DualSense telling you what’s happening (recoil, impacts, boost pack ignition) without becoming noise. Nail this early and your combat and traversal will feel much more natural.
2. Pick a Background That Actually Helps (Best Starting Backgrounds)
Backgrounds in Starfield aren’t just flavor text; they give you three starting skills that massively shape the early hours. There’s no single “right” choice, but some are much friendlier for a first run that wants to avoid grind.
For a smooth PS5 beginner experience, these stand out:
- Bounty Hunter – Gives you Piloting, Targeting Control Systems, and Boost Pack Training. Great mix of ship combat and mobility, with less need to grind early skills.
- Soldier – Strong for straight combat: weapon skills plus Fitness for better oxygen management while encumbered or in firefights.
- Explorer – Mobility- and utility-focused, suits players who want to scan, loot, and move quickly without fighting everything.
If you want the most hassle-free start, Bounty Hunter is an excellent “best background” pick. Getting Boost Pack Training for free (more on that next) is huge, and the ship skills save you from grinding skill points just to make space combat tolerable.
3. Prioritize the Boost Pack Training Skill Immediately
The Boost Pack Training skill in the Tech tree is the single biggest quality-of-life boost in early Starfield. If your background doesn’t start with it, make it one of your first skill purchases when you level up.
Why it’s essential:
- Lets you actually use your boost pack instead of it just sitting on your back.
- Makes platforming and climbing ledges far quicker, cutting down on awkward pathfinding.
- In combat, lets you dodge sideways, hop over cover, and break line of sight instead of face-tanking.
- Pairs nicely with DualSense haptics – the brief rumble on ignition makes it easy to time your bursts.
On controller, get into the habit of tapping your jump/boost button rhythmically instead of holding it. Short, controlled bursts give you more distance and use less fuel, which matters when you’re trying to clear canyons or kite enemies.
4. Bee-Line the Main Quest to New Atlantis and the Lodge
A lot of players get lost because they start hoovering every side activity the moment they hit space. Resist that urge until you’ve reached New Atlantis on Jemison and joined Constellation at the Lodge.
Follow the main quest markers from the opening mine sequence through to the point where you:
- Reach New Atlantis for the first time.
- Visit the Constellation Lodge.
- Get access to your room and the Lodge’s basement area.
Once those are unlocked, the whole game opens up: you gain a central hub, proper storage, more reliable vendors, and better-paying quests. Doing this early saves you from shuttling back and forth from random outposts with no infrastructure.
5. Use the Lodge Basement for Unlimited Storage
Encumbrance is where a lot of grind comes from: constantly deciding what to drop, jogging slowly back to your ship, micro-managing inventory. The Lodge basement storage solves most of that.
Once you’re part of Constellation:
- Land near the Lodge in New Atlantis.
- Offload heavy loot from your ship into your personal inventory if needed.
- Head downstairs in the Lodge to the basement area – you’ll find containers, crates, and storage spots that effectively function as unlimited storage.
- Dump all crafting materials, spare weapons, suits, and quest-related items you don’t need right now.
The key habit: treat the Lodge as your true home base. Whenever you’re passing through New Atlantis, make a quick storage run. It’s far less grindy than building outposts early and frees you to loot aggressively without worrying about where it all goes.
6. Learn the Fast Travel System (Including the Encumbered Trick)
Starfield’s map can be confusing at first: there’s a system map, a planet map, and local area maps. Walking everywhere is a recipe for burnout; smart fast travel is how you keep momentum.
The basics:
- Open your starmap from anywhere (usually via the pause/menu button, then selecting the map tab).
- From system view, you can jump to any previously visited planet or orbiting location.
- From planet view, you can fast travel directly to discovered landing zones, cities, and POIs.
Now, the important part for avoiding grind: the fast travel while encumbered trick.
Normally, if you’re over your carry weight, the game blocks certain fast travels. But you can often bypass this by:
- Opening the
Missionmenu instead of the map. - Selecting an active mission that’s on another planet or system.
- Choosing “Set Course” or equivalent – this can initiate a grav jump even while you’re overweight.
It’s borderline exploit-y, but it saves you from tedious slow-walking back to your ship just because you picked up one rifle too many. Use it to keep your sessions focused on actual gameplay instead of inventory purgatory.
7. Milk New Atlantis for Early Credits (SSNN, GalBank, and More)
New Atlantis isn’t just pretty; it’s your best early-game credit farm if you know where to look.
- SSNN (Settled Systems News Network) – You can report certain activities and earn credits while unlocking repeatable assignments. It’s an easy, low-risk pipeline of missions that fit naturally alongside the main story.
- GalBank – Offers debt collection and financial odd-jobs. Take the simpler ones first; some can escalate into heavy combat, which is rough at low levels.
- Mission boards – Inside various buildings and starports. Prioritize delivery, cargo, and survey tasks over hardcore combat until your gear and skills catch up.
Circling these hubs between story beats keeps a steady income flowing without forcing you into grindy planet-hopping just to scrape together credits.
8. Hit Sidonia’s Mission Board for Safe, Steady Work
Mars, and specifically the mining settlement of Sidonia, is another underrated early-game moneymaker.
When you arrive:
- Head inside the main facility.
- Look to the right of the entrance for a mission board.
- Pick up non-combat gigs: ferrying settlers, cargo runs, basic exploration.
These jobs pay reliably, scale gently, and let you learn spaceflight, landing, and navigation on PS5 without dumping you into brutal gunfights. Great way to level while you’re still tuning your DualSense sensitivity and getting used to the UI.
9. Practice Ship Combat in the UC Simulator
Ship combat can feel clumsy on a controller until you internalize power management and drifting. Instead of learning the hard way in live firefights, use the UC ship simulator in New Atlantis.
- Head to the United Colonies facility in New Atlantis.
- Look for the training/simulation area.
- Run a few scenarios to get a feel for turning, boosting, and diverting power between engines, shields, and weapons.
There’s no XP risk, no credit loss, just pure practice. Use this time to get comfortable with whatever control layout the PS5 version uses for reallocating power and locking targets. Once this clicks, real encounters feel much less chaotic and grindy.
10. Choose Traits Wisely (Especially “Wanted”)
Traits can make or break your early hours. One in particular, Wanted, is more useful than it looks if you’re okay with occasional ambushes.
With the Wanted trait:
- You’ll periodically be hunted, which means extra combat encounters (and loot) baked into normal play.
- You gain access to Sir Livingston’s pistol, a strong early-game sidearm that outclasses most starter weapons.
- Later on, there are additional benefits, including ship-related perks, if you keep interacting with the relevant NPCs and sending home a bit of cash now and then.
It does add some danger, but in return you’re skipping the “poke low-level pirates for a worse gun” grind and jumping straight to higher-quality gear.
11. Build a Simple Early Skill Plan (No Min-Maxing Required)
You don’t need a spreadsheet, but having a loose skill roadmap keeps you from wasting points and then grinding activities just to fix mistakes.
After Boost Pack Training, consider prioritizing:
- Weight Lifting – Raises carry capacity, directly reducing how often encumbrance slows you down.
- Commerce – Better buying/selling prices means more credits per haul.
- Persuasion – Opens up non-violent solutions and bonus rewards, cutting down on ammo-spongy fights.
- Security – Lockpicking saves you from backtracking later for chests and doors you couldn’t open.
Think in terms of “what will save me time?” rather than raw damage. You’ll find plenty of strong guns; saving minutes every mission is what really kills grind.
12. Treat Miscellaneous Quests as Your Main Side Income
Instead of diving straight into massive faction arcs, start by hoovering up miscellaneous quests. They’re shorter, more varied, and slot neatly between main story beats.
- Read books and notes you find – many add quest markers.
- Check computers and terminals in offices and starports.
- Talk to NPCs with unique names or overhear conversations in cities.
These tasks often pay surprisingly well for the time invested and rarely lock you into long quest chains, so you avoid that “I just wanted a quick mission and now I’m three hours deep” feeling.
13. Join Factions, But Don’t Overcommit Yet
Starfield lets you join multiple factions, and there isn’t a strict “correct” order. On a fresh PS5 run, though, it’s smarter to sample them rather than binge one storyline immediately.
- Do the early quests for UC Vanguard, Freestar Rangers, or others to unlock their gear and perks.
- Stop after a couple of missions if the difficulty spikes; come back later when your loadout is better.
- Avoid fully committing to outlaw paths too early until you understand how bounties and scanned contraband work.
This keeps your options open and prevents you from getting stuck in high-level mission chains that feel tuned for much later in the game.
14. Be Ruthless With Inventory (Ship Cargo + Lodge Storage)
The fastest way to turn Starfield into a chore is trying to carry everything. Early on, adopt a strict inventory philosophy:
- Prioritize high value-per-weight items (guns, armor, certain crafting materials) over random junk.
- Use your ship’s cargo hold for medium-term storage when you’re in the field.
- Regularly shuttle anything you want to keep long-term to the Lodge basement storage.
- Sell excess weapons and armor often; don’t hoard ten nearly identical rifles “just in case.”
Combine this with Weight Lifting and the encumbered fast travel trick and you’ll spend dramatically less time staring at inventory screens on your PS5.
15. Scan and Mine, But Don’t Turn It Into a Job
Scanning planets and mining resources are core systems, but they’re also an easy trap. Fully surveying worlds and mining every vein you see in the first few hours is pure grind.
Instead:
- Scan flora/fauna and minerals you happen to walk past; don’t go out of your way unless a mission demands it.
- Mine resources that are directly useful for upgrades you want now (weapon mods, suit mods), not everything in sight.
- Ignore building outposts until you have a financial cushion and a clear reason – the Lodge covers your storage needs early on.
This way you still engage with exploration, but it supplements your progress instead of replacing it with repetitive loops.
FinalBoss // Gear
Level up your setup
01Best-selling Xbox Series X|S gameson Amazon→02Xbox controllerson Amazon→03Top-rated gaming headsetson Amazon→04Discounted game keyson Kinguin→Affiliate links · As an Amazon Associate, FinalBoss earns from qualifying purchases.