
Stuck After Chapter 3 in Norse: Oath of Blood? Here’s How I Built My Camp and Beat Little Magpie
Game intel
Norse: Oath of Blood
Norse is a turn-based tactics and combat game for PC and console. Set against the rich backdrop of the Viking Age, join Gunnar, a young warrior, on a relentles…
Where This Guide Kicks In (and Why It’s Confusing)
After finishing chapter 3 in Norse: Oath of Blood, the game suddenly dumps the world map, a half-built camp, and a stack of projects and missions on you. My first run, I wasted several in-game turns and resources on the wrong buildings and walked into Little Magpie under-geared and half-prepared.
This guide covers exactly what I wish I’d done instead:
- How to efficiently finish the Makeshift Camp and unlock key abilities
- Which early projects to prioritize when resources are tight
- Step-by-step tactics for Little Magpie (wolf ambush + trader defense)
- How to push settlement progress into Western Reach, Dock, and Fishing Hut
- A practical walkthrough for Ullr’s Arrow, including the brutal boar side fight
I played on Normal with patch 1.01, which has the smarter enemy AI, so if you’re on the same version your battles should feel similar.
Step 1 – Finishing Makeshift Camp Without Wasting Turns
Right after the chapter 3 mission “Settling In”, you get the Makeshift Camp project. The game explains very little, and I initially clicked random resources and wondered why nothing finished. Here’s the clean way through it.
From the top menu, go to Projects → Makeshift Camp. Your immediate goal is to build four tents/shelters, which completes the camp’s basic framework.
You should have enough starting materials from the Jarl’s parting gift. For the tents, use:
- Wood
- Leather
- Wadmal (cloth)
- Oil if prompted for finishing details
Select the required resources in the project screen, then confirm the turn. The key step I missed at first: you must then go to Home → Advance Turn to actually progress construction. Once you advance, the framework finishes and the Makeshift Camp project resolves.
After that, the game quietly opens up a lot of systems, so don’t rush straight to the map yet.
Early Ability Picks – What I Chose and Why
Next, go to Hirdmen. This is where you unlock the first real power spike for your party. My choices, which felt very strong for the next two missions:
- Gunnar – Leader: Extra control and buffs on your frontline tank; great for the trader defense in Little Magpie.
- Sigrid – Sharp-Eyed / Mighty Shot: This is huge. It gives you better ranged burst and lets her cripple key targets like the Alpha Wolf.
- Arn – Veteran / Iron Will: Keeps him standing longer when enemies focus him, which they love to do.
- Asmarr – Warrior / Ram (or Shield Bash-equivalent): A shove/stun tool for setting up combos and protecting squishier units.
- Buldi – Wolf Fang: Great mobility and damage, especially useful for chasing archers and finishing off runners.
I tried more defensive or “cute” options first run, and fights dragged on. The setup above gives you enough damage and control to finish encounters before attrition kills you.
Don’t Skip the Seamstress
Before you leave this menu, go to the Seamstress tab. Craft upgraded clothes for anyone still in basic gear. Even small boosts to armor or movement matter, especially for Sigrid and your flanks. I ignored this the first time and really felt it in the Ullr’s Arrow boar fight.
Step 2 – Early Projects and Efficient Build Order
After Makeshift Camp, you’ll see a pile of new projects: things like Western Reach, Master Loomhall, Large Room, Drop Spindles, and soon after, settlement expansions like Dock and Fishing Hut. You won’t have the resources to blitz all of them, so the trick is sequencing.
Here’s the order that worked best for me:
- Start Drop Spindles first – it’s usually affordable with your current stock and supports clothes/cloth later.
- Put some resources into Large Room with whatever you have (usually Wood and basic cloth). When you later gain 5x Fiber, add those to progress it.
- Queue Western Reach with Wood + Bog Iron even if you’re missing Oil/Fiber. It still pushes the timeline forward.
Now advance the turn from Home. After a bit of progression, you’ll trigger the “Struggling Stranger” event and a cutscene with Sigrid. This is your signal that the longhouse-related progress is on track and that the next story beat (Little Magpie) is about to open up.
Pro tip: as new buildings like the Smithy and Healing Hut appear in later turns, prioritize them over decorative or comfort upgrades. Smithy weapon tiers and faster warband recovery have a bigger impact on these early hard fights than rushing prestige structures.
FinalBoss // Gear
Level up your setup
01Top-rated gaming headsetson Amazon→02High-refresh gaming monitorson Amazon→03Gaming chairson Amazon→04Discounted game keyson Kinguin→Affiliate links · As an Amazon Associate, FinalBoss earns from qualifying purchases.
Step 3 – Preparing for Little Magpie
Once the Sigrid training scene ends, you’ll see Little Magpie on the world map as a story mission. Don’t slam “Depart” immediately; the prep screen matters.
Party & Gear Setup
On the mission screen, hit Prepare first. Here’s what I do every time now:
- Party: Keep Gunnar, Arn, Sigrid, Asmarr, and Buldi. If you’re tempted to swap someone out, don’t drop your only archer (Sigrid) or your main tank (Gunnar).
- Weapons: Equip the best damage you have on Arn and Buldi – they’ll be deleting priority targets.
- Items: Make sure you have a couple of bandages spread across the party. The trader defense can go south quickly if you can’t patch her up.
Once everyone looks good, hit Depart.
Exploration Route & Early Loot
The mission opens with a simple objective: Investigate the trail. Walk forward, but don’t rush the main path too fast. Off to the sides you’ll find:
- Berries: free healing. If everyone’s full HP, leave them for post-fight heals.
- Open chests: the third one you run into gives you 5 Hacksilver.
- Provisions: grab everything – they matter more in longer missions.
After the third chest, look left for a runestone and a nearby skeleton. Check the skeleton first to get the Golden Eagle Feather, then interact with the runestone to gain the Blessing of Loki. This immediately triggers the wolf ambush.
Wolf Ambush – How to Delete the Alpha Safely
This fight looks scarier than it is. Regular wolves only have around 3 HP; the real threat is the Alpha Wolf with its much bigger health pool and damage.
- Opening turns: Use basic attacks to one-shot or two-shot the closest regular wolves. Don’t overextend; keep your line tight.
- Use Alert/Guard abilities: If Gunnar or Arn can spare an action, put up any “Alert” or overwatch-style stance so they auto-hit approaching wolves.
- Sigrid’s job: Take the risky shot at the Alpha with Mighty Shot or her crippling ability. Yes, it can miss, but a hit makes the whole fight safer.
- Focus fire: Once chaff wolves are down, pile Arn and Buldi into the Alpha. With Leader buffs and decent positioning, it drops fast.
When the fight ends, backtrack to any untouched berries to top off HP before progressing further down the trail.
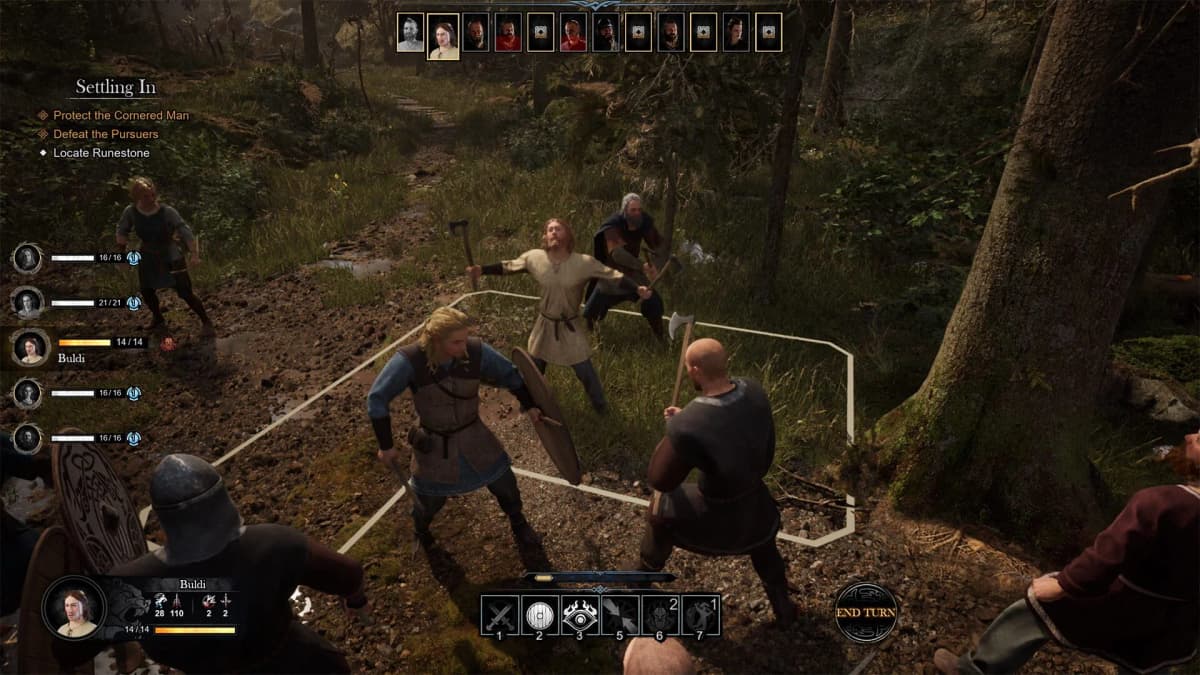
Protecting the Trader – High Ground or Bust
Next you’ll find the source of the commotion: a trader about to be torn apart by a group of outcasts. This is the first fight that actually wiped me a few times. The dangers:
- Multiple melee enemies threatening the trader immediately
- Two enemy archers on high ground, chunking your party if ignored
- Reinforcements arriving from the left mid-fight
Here’s the positioning that finally gave me a consistent clear:
- Right flank: Put Gunnar and Arn up front on the right, directly facing two enemies. Sigrid starts behind them.
- Left side: Keep Buldi and Asmarr toward the left to intercept adds and any stray melee aiming for the trader.
On turn one, move Sigrid toward the right high ground. If you can kill or push off the enemy standing there early, you control that vantage point for the rest of the fight.
🎮 Get This Game at the Best Price
Compare prices instantly and save up to 80% on Steam keys with Kinguin — trusted by 15+ million gamers worldwide.
*Affiliate link — supports our independent coverage at no extra cost to you
For the frontline:
- Target the enemy leader first. He has low HP but decent armor (around 3), so it takes a couple of good hits.
- Start with Gunnar’s attack, then follow up with Arn’s basic strike.
- Use Asmarr’s shove/Shield Bash/Ram to set up combos or push threats away from the trader.
- Send Buldi left to clean up adds and protect that side of the trader.
On the next player round, continue focusing the biggest brute near the trader:
- Hit him again with Gunnar, then chain into Sigrid’s Mighty Shot from high ground for big combo damage.
- If another brute closes in on the trader, use Asmarr’s control ability (Ram/Shield Bash) to knock them away or stun them.
- Use bandages on the trader if she’s taken hits – keeping her alive is the win condition.
Once the main brutes fall, the fight becomes cleanup. Use Buldi’s Leap (or equivalent mobility) to chase down the archer who retreats north, then mop up remaining enemies. When the last outcast drops, a cutscene ends the mission.
Before you exit, walk the whole battlefield:
- Loot any chests, bags, and provisions
- Use leftover berries to heal wounded characters for free
Only then leave the mission and cash in your rewards.
Want to Level Up Your Gaming?
Get access to exclusive strategies, hidden tips, and pro-level insights that we don't share publicly.
Ultimate Guide Strategy Guide + Weekly Pro Tips
Step 4 – Pushing Western Reach, Dock, and Fishing Hut
Back at camp, you should now continue Western Reach. Go to Trade → Village Market and assign tasks:
- Clear the Land – assign Holti
- Stands – also Holti
- Invitations – handled by Geirlaug
This stuff runs over turns, so while it’s cooking, keep talking to your people. From Home, you’ll see characters with conversation icons:
- Talk to Arn to unlock the Dock project.
- Talk to Torsten to trigger another cutscene and more settlement context.
- Later, speak to Holti to unlock the Fishing Hut project.
In between, I like to hop back into the Seamstress and craft better clothes as new materials trickle in. It’s easy to forget, but those small stat bumps really smooth later fights.
Advance turns on the map until the story pushes you into the next main mission: Ullr’s Arrow.
Step 5 – Ullr’s Arrow Mission Walkthrough
Ullr’s Arrow is mandatory – the game gates your settlement progress behind it, so you can’t ignore it. When you start the mission, your main goal is simple: Hunt the Elk. A sub-objective tells you to look for signs of it.
Follow the main path, looting as you go. Early on, make sure you open the barrel you pass; it has extra supplies you’ll be glad to have if you tackle the side fight.
Eventually you’ll reach another runestone. Interact with it to gain the Blessing of Ullr, which is themed around hunting. From here, move east/right following the path until you see old tracks. Keep tracking forward, hoovering up any loot on the way.
Optional Boar Fight – High Risk, Worth It If You’re Ready
At a fork, the path splits left and right. The left path leads to another runestone and a nasty boar encounter. I strongly recommend doing this, but only if you’re comfortable with tough fights.
Why it’s rough:
- Lots of smaller boars = tons of enemy turns
- A big boar with a Trample-style push attack
- Your party will be under constant chip damage
What finally worked for me:
- Always keep at least one empty tile behind any character in the big boar’s charge lane. If it Tramples you into a wall or obstacle, you take extra hurt and get locked in bad spots.
- Use your tankiest characters (Gunnar/Arn) to body-block the boar while Sigrid and Buldi focus on thinning smaller boars.
- Don’t hoard heals – use berries and bandages as soon as a character risks getting focused down next enemy phase.
- Abuse terrain: high ground and choke points make all those boar turns less punishing.
Clearing this fight feels great and sets you up with more resources and another blessing, which helps later.
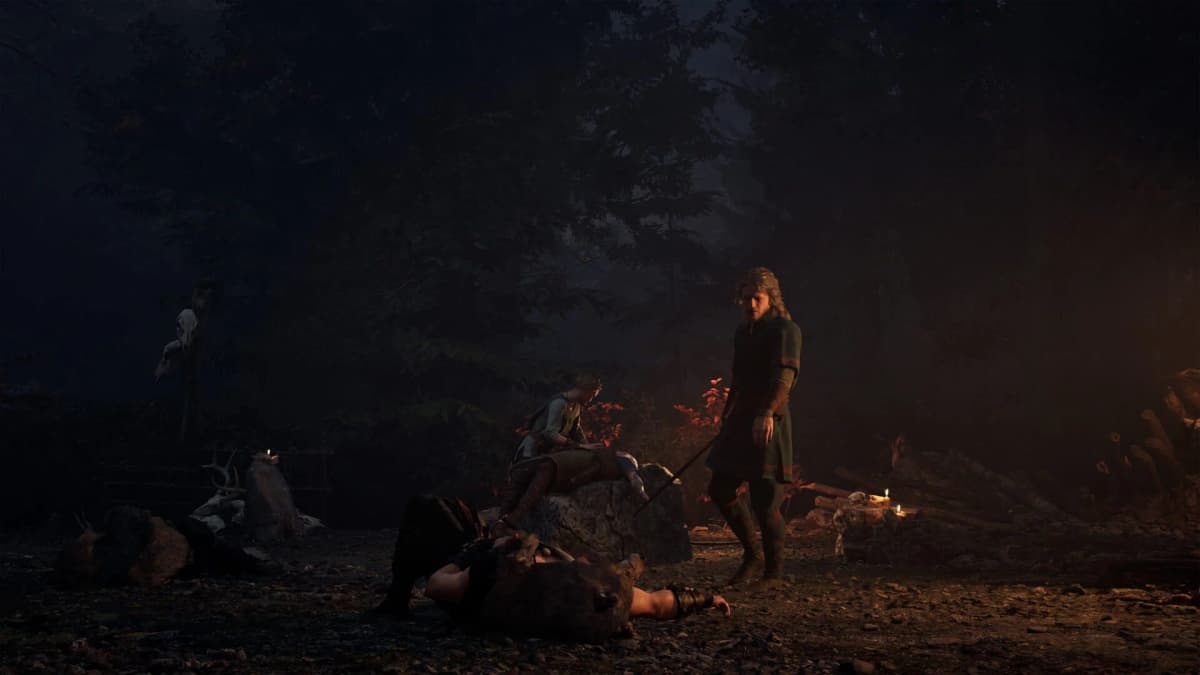
Continue the main trail and you’ll hit a cutscene where Gunnar shoots the Elk, but it escapes. Your objective switches to Chase the Elk. Push forward a bit more and another scene plays, introducing a new party member.
From this point, you’re committed – you won’t be heading back to the village until the mission is done. The objective updates to searching for signs of the Sons of the Wolf.
Move straight ahead, grab the provisions on the path, and watch for a wolf darting off to the side – it’s just flavor, but it tells you you’re on the right track. Keep following the trail until a cutscene triggers and your objective updates to Find the Sons of the Wolf.
From here, it’s basically a straight shot: follow the path until you see their ritual camp in the distance. Step close enough and the final cutscene before the big fight begins.
Final Fight vs. Sons of the Wolf – General Tactics
The Sons of the Wolf encounter can vary a bit, but the pattern is consistent: a mix of melee fanatics (often backed by beasts) with a dangerous frontline. On my runs they loved to focus vulnerable characters and dogpile anyone who overextended.
- Formation: Keep Gunnar and Arn in the center, shoulder-to-shoulder. Sigrid and your new recruit play just behind, with Buldi/Asmarr flexing to whichever flank gets pressured.
- First target: Identify the highest-damage melee or any beast that can reach your back line in one turn. Delete that first with combined focus.
- Control tools: Use Ram/Shield Bash and any knockback to break up enemy lines and prevent multi-hit combos on the same character.
- Sigrid’s role: Pick off low-HP targets to reduce incoming actions. Don’t get greedy trying to chip tanks when you can remove a whole attacker.
- Finish quickly: As of patch 1.01, enemies are good at focus-firing weakened units. If someone drops low, either pull them back or end the fight fast.
Once the last enemy falls, you’ll get another story scene and the mission wraps, kicking you back to the settlement with solid momentum and a stronger roster.
What Comes Next
After completing Little Magpie and Ullr’s Arrow, your camp starts to feel like a real settlement. From here, I recommend:
- Pushing Western Reach and trade to unlock better gear sources
- Building the Smithy and Healing Hut as soon as they become available
- Regularly checking Seamstress and Hirdmen after each mission for new outfits and abilities
If you follow this order, you’ll hit the mid-game with a stable resource flow, upgraded weapons, and a party that can handle the tougher tactical encounters the game throws at you. I stumbled through this sequence my first time; running it this way on a second save was dramatically smoother. If I can drag this ragtag warband into shape, so can you.