

Released on 3 September 2026, The Blood of Dawnwalker builds much of its progression around a segmented day, optional exploration, and combat that rewards directional defense. The Arbiter route brings those systems together: collect four quest components for Nareh, spend three Time Segments on the final ritual, survive the Ravenous Bear, then use the bear’s aftermath to begin Into the Den and collect the Rebel’s Falchion.
The efficient order is to unlock A Bulwark Against Darkness, gather the Relic of a Saint, Bundle of Silk Threads, Flask of Quicksilver, and Moult of a Large Lizard in one regional loop, return each item to Nareh at the Uriashi Hermitage shrine, and only begin the ritual when no urgent timed quest is about to expire. The Enhanced Arbiter Set is a strong early-to-midgame defensive payoff because it supports both Coen’s human and vampiric health pools while also improving stamina, restoration, weapon damage, and magical damage reduction.
Table of Contents (14)
Unlock A Bulwark Against Darkness Before Hunting Materials
The Arbiter armor is tied to A Bulwark Against Darkness. The practical story gate is reaching the point where St. Mihai’s Silver Sword can be reforged with the Uriashi blacksmith, Nareh. A smuggler can also approach Coen in Svatau City with two letters: one introduces the mystery, while the other lists the four armor components and directs you toward Nareh in the northwestern hinterlands.
Nareh is found at the Uriashi Hermitage shrine in northwest Briar Sloughs. Access to Briar Sloughs and the surrounding field regions is the meaningful progression requirement; there is no stated numerical Infamy threshold to chase before planning the route.
- Have A Bulwark Against Darkness active.
- Reach the Silver Sword reforge stage and meet Nareh.
- Unlock access to Briar Sloughs and the Uriashi Hermitage shrine.
- Leave room for the ritual’s three Time Segments.
- Clear or stabilize any time-sensitive objective before committing to the armor loop.
Protect your Time Segments first
The daily time bar is divided into eight segments. Hourglass-marked activities show how many segments they will consume, and filling the bar turns day into night with no way to reverse that transition. That makes the Arbiter ritual expensive even before considering detours, tower combat, marsh exploration, or the later Into the Den cache.
Timing warning: leave the Arbiter route alone if you are in the middle of a prologue deadline. During Withering Away, failing to deliver the medicine to the mother before mass carries severe consequences. Finish that thread first, including Anca’s recipe: three spoonfuls of herbs in hot water, never boiling water.
The Four Arbiter Components and the Cleanest Route
The component loop works best when treated as a regional sweep rather than four separate errands. Start with the saint relic objective, handle silk threads while passing through the relevant settlement, take on Aurelius’ Tower while prepared for a real combat gate, then finish with the marsh cave near Vera before returning north to Nareh.
| Component | Best acquisition route | Planning note |
|---|---|---|
| Relic of a Saint | Complete Echoes of Silenced Bells and obtain St. Tibia. | The relic from St. Tibia qualifies for the Arbiter requirement. |
| Bundle of Silk Threads | Buy it from Sanzhana, or collect it during Come Hither. | Come Hither provides the free route; Sanzhana is faster when you have the currency. |
| Flask of Quicksilver | Reach the top of Aurelius’ Tower through Home Sweet Home progression. | The climb includes a boss fight, so arrive with healing and a weapon you trust. |
| Moult of a Large Lizard | Search the cave in the swampy area near Vera, west of Maragir Wealds. | Clear hostile enemies around the cave before going in, especially when arriving low on resources. |
Begin with the Relic of a Saint
Echoes of Silenced Bells provides the most defined relic route. St. Tibia drops a saint relic that fills the Relic of a Saint slot for A Bulwark Against Darkness. Secure it early in the loop so the remaining materials become straightforward travel and combat objectives rather than a search for an unknown shrine reward.
Choose between a paid and free Silk Threads pickup
Sanzhana sells the Bundle of Silk Threads, making it the practical choice when you are already carrying enough Daenerius and want to finish the set immediately. Players following Come Hither can collect the threads for free instead. The free route is better when conserving currency; the merchant route is better when the rest of the Arbiter components are already ready and you want to avoid delaying the return to Nareh.
Treat Aurelius’ Tower as the route’s combat checkpoint
The Flask of Quicksilver waits at the top of Aurelius’ Tower. The tower requires a climb and culminates in a boss fight, so this is the point where an underprepared route can stall. Handle nearby upgrades, replenish healing, and enter with enough time remaining that a failed first push does not force you to abandon a more urgent quest chain.
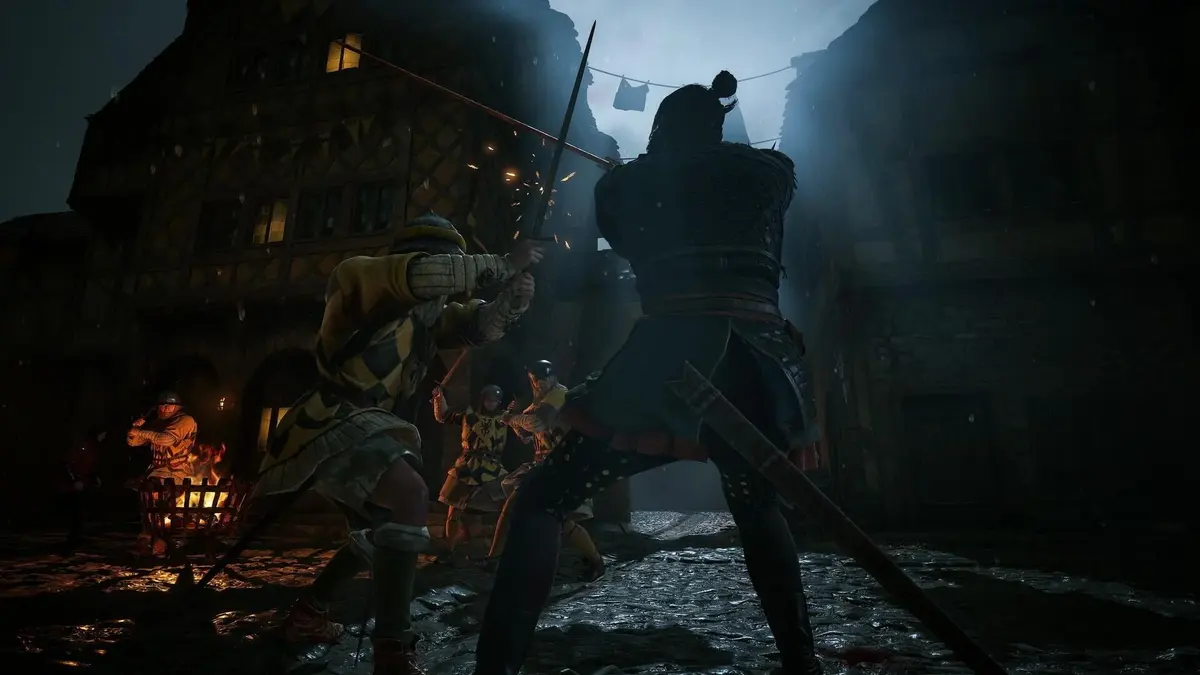
Directional sword combat matters here and later against the bear. Coen’s attack direction follows left-stick or mouse movement, and defense depends on matching the incoming line with a block or parry. A reliable guard and a deliberate counter are more valuable than repeatedly forcing long attack strings into an enemy’s defense.
Finish at the Vera swamp cave
The Moult of a Large Lizard is in a cave in the swampy region near Vera, west of Maragir Wealds. This is the most exploration-heavy material. Remove enemies around the entrance before entering the cave, particularly if you used healing or blood restoration during the tower segment. The moult is a creature shed, not a standard merchant purchase, so this detour remains mandatory even when Silk Threads came from Sanzhana.
Return to Nareh and Plan Around the Three-Segment Ritual
Bring the four components back to Nareh at the Uriashi Hermitage shrine. Hand them in individually. Each turn-in grants a base piece of the Arbiter set, building toward the full four-piece armor before the enhancement ritual begins.
The ritual consumes three Time Segments and sends wolves first, followed by the Ravenous Bear. Winning finalizes the legendary Enhanced Arbiter Set. Start it with a clean schedule. A nearby hourglass objective, a family deadline, or an unfinished time-sensitive side quest can turn an otherwise valuable armor upgrade into a costly story tradeoff.
- First wave: a pack of wolves. Thin the group methodically and avoid spending all stamina on attacks.
- Final wave: the Ravenous Bear. Save healing and blood-restoration resources for this phase.
- Reward: the completed Arbiter set at legendary rarity.
Why the Enhanced Arbiter Set Is Worth the Detour
The Arbiter set is heavy armor built for a mixed-form playstyle. Its value comes from covering the two resource pools that define Coen’s day-and-night combat: human survivability during daytime exploration and vampiric survivability when blood powers come online at night.
- Enhanced Bracers of the Arbiter: increase maximum vampiric health, vampiric health-segment regeneration, blood-drinking restoration, and weapon damage.
- Enhanced Boots of the Arbiter: improve maximum human health, human health restoration, maximum stamina, and magical damage reduction.
- Chest and leg pieces: complete the four-piece heavy set and benefit from the ritual’s legendary enhancement.
The boots are especially useful for the Ravenous Bear because extra stamina gives you more room to raise guard, reposition, and attempt a parry without immediately exhausting Coen. The bracers make longer recovery periods more forgiving by improving vampiric restoration and the payoff from drinking blood.
The Sangoran Wayfarer’s Armor is a separate promotional or bonus outfit. It does not replace the Arbiter route, which is the quest-locked legendary heavy set tied to Nareh, the component hunt, and the ritual encounter.
Ravenous Bear Tactics: Stay Lateral and Parry the Big Commitments
The Ravenous Bear is the route’s early-to-midgame wall. The fight is dangerous because its damage is high, the arena gives limited cover, and panic rolling creates distance without creating a useful counterattack window. The winning rhythm is to stay just beyond lunge range, circle laterally, and turn the bear’s biggest telegraphed attacks into parry opportunities.
Keep the bear at the edge of its lunge range
Hold a distance where the bear can commit to a charge or long swipe, then move sideways rather than retreating in a straight line. A lateral sidestep keeps Coen close enough to punish the end of the animation. Back-rolling repeatedly pushes you out of counter range and can leave you reacting to the next approach with depleted stamina.

Parry priorities for a safer fight
- First priority: lunges. Raise guard as the bear commits, then parry at the point of impact. The lunge carries high damage and leaves the bear open when stopped cleanly.
- Second priority: heavy front-paw swipes. Their slower wind-up makes them a practical parry target while learning the encounter.
- Lowest priority: fast close-range swipes. Use short sidesteps and micro-positioning instead of gambling on every small hit.
After a successful parry, take a controlled punish rather than extending into a full greedy combo. The bear’s recovery is your damage window, but its next heavy attack is the real threat. Directional defense is the fight’s core skill check: use guard to survive a mistimed read, then reset spacing and wait for the next large commitment.
Use stamina as a defensive resource
Guarding, dodging, and attacking all compete for stamina. Avoid spending it all while the bear is still neutral. Keep enough available to raise guard for a lunge, sidestep a heavy swipe, or disengage after attacking. Wearing the Enhanced Arbiter boots makes this plan more stable thanks to their maximum-stamina bonus, while the set’s health and restoration bonuses reduce the punishment from an occasional blocked hit.
When the bear finishes a long recovery animation, use the opening for a brief heal or vampiric restoration if damage is already under control. Trying to recover during close-range pressure usually hands the bear its strongest chance to finish the fight.
Into the Den: Claim the Stash After the Bear
The Ravenous Bear also opens the Into the Den side quest. After the kill, inspect the mangled corpse behind the encounter area. The corpse holds a Tattered Letter, and reading it marks a northwestern search zone for a secret stash hidden at a flat stone marked with an X.
Use the nearby shrine and road as your navigation anchors. Head west along the road until a ramshackle hut appears on the left side. It is the only clearly identifiable structure with a door in that part of the search area, and its location narrows the hunt for the marked stone.
- Defeat the Ravenous Bear.
- Inspect the mangled corpse behind it.
- Read the Tattered Letter to reveal the northwestern search area.
- Use the shrine, western road, and ramshackle hut as landmarks.
- Search for the flat stone marked with an X and claim the cache.
The cache interaction consumes one time cycle, so avoid treating it as a free cleanup objective when another deadline is active. The reward is substantial: the Artisan’s Tunic, the Rebel’s Falchion shortsword, and a note explaining where silver can be sold later. Silver is prohibited by the vampiric authorities, making that final note useful for future economic planning.
The Rebel’s Falchion is the immediate prize for aggressive melee players. Its fast shortsword profile fits the same measured parry-and-punish approach used against the bear: defend against the large telegraph, take your opening, then return to lateral positioning before the next attack cycle starts.
FinalBoss // Gear
Level up your setup
01Top-rated gaming headsetson Amazon→02High-refresh gaming monitorson Amazon→03Gaming chairson Amazon→04Discounted game keyson Kinguin→
Affiliate links · As an Amazon Associate, FinalBoss earns from qualifying purchases.
Want to Level Up Your Gaming?
Get access to exclusive strategies, hidden tips, and pro-level insights that we don't share publicly.
Ultimate Guide Strategy Guide + Weekly Pro Tips