
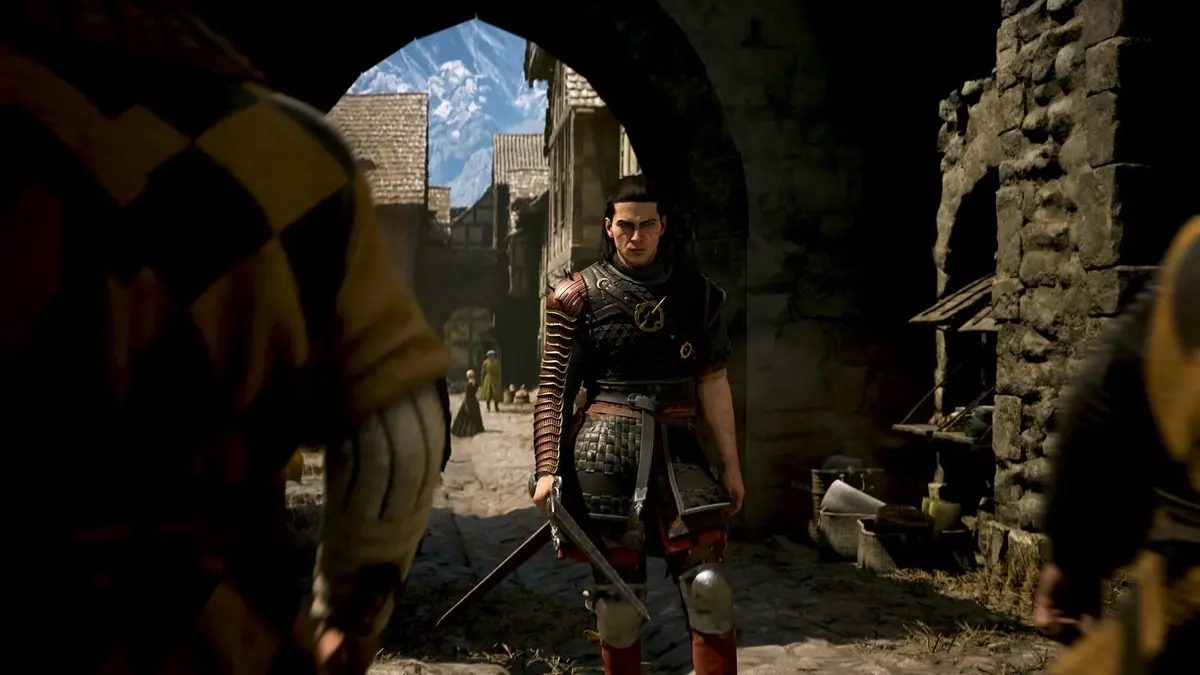
The trap is equipping a tougher-looking Medium or Heavy piece, seeing the defense jump, then wondering why Coen suddenly feels sluggish in every sword exchange. Armor is never hard-locked in The Blood of Dawnwalker, but Medium and Heavy pieces apply their listed stamina and stat penalties until you unlock the matching Swordmastery proficiency perk. Light armor is the only class Coen wears proficiently from the start.[1][2][3]
For Medium armor, unlock and fully rank Second Skin I. For Heavy armor, progress farther down the same Swordmastery branch and fully rank Second Skin II. Both perks reduce the relevant armor penalty by 33% at Rank 1, 66% at Rank 2, and 100% at Rank 3. The final rank is the point where the extra penalties disappear.[2][3][5]
This guide covers the released PC and console version’s armor-proficiency route as documented in September 2026. If you still need the early story steps that open Coen’s progression systems, use the FinalBoss Dawnwalker prologue guide first rather than detouring through every optional activity.
Table of Contents (6)
Armor Proficiency Explained: What You Gain and What You Do Not
Armor proficiency removes the additional penalties printed on Medium and Heavy armor descriptions. It does not convert every armor class into Light armor. Weight still matters because each class has its own stamina-regeneration baseline.
| Armor class | Proficiency requirement | Base stamina regeneration | Best use before full proficiency |
|---|---|---|---|
| Light | None; Coen is proficient automatically | 100% | Fast sword builds, evasive play, and early progression |
| Medium | Second Skin I Rank 3 | 80% | Use selectively after Rank 1 or 2; becomes a strong all-round choice at Rank 3 |
| Heavy | Second Skin II Rank 3 | 60% | Save for defensive situations until the proficiency path is complete |
The key distinction is easy to miss: a fully proficient Heavy set still has Heavy armor’s lower stamina baseline, but it no longer carries the separate non-proficiency punishment. That is why full Heavy proficiency makes defensive sets viable without making them ideal for every aggressive sword build.[2][8]
Armor occupies four slots — Chestpiece, Bracer, Trousers, and Boots — and each piece belongs to Light, Medium, or Heavy weight. Read every item tooltip before mixing pieces. One unproficient Heavy item can undermine a loadout built around stamina recovery, sprinting, dodging, and sustained blocks.[6][8]
How to Unlock Medium Armor Proficiency
Medium armor is the sensible first investment for most Swordmastery-focused characters. It gives Coen a meaningful step up in defense and posture without locking him into Heavy armor’s 60% base stamina-regeneration profile.

- Spend 1 Skill Point on Vigor. Vigor is the prerequisite node that opens the route to Second Skin I.
- Buy Second Skin I Rank 1. This costs 1 Skill Point and 1 Time Segment, reducing Medium armor penalties by 33%.
- Buy Second Skin I Rank 2. Spend another 1 Skill Point and 1 Time Segment to reach a 66% reduction.
- Obtain one Second Skin I Manual. The Manual unlocks access to Rank 3. Armorers and blacksmiths can stock these Manuals, and they may also come from chest loot.
- Buy Second Skin I Rank 3. Spend 2 Skill Points and 1 Time Segment. This removes Medium armor penalties completely.
The full Medium route therefore requires 5 Skill Points total when Vigor is included: 1 for Vigor and 4 across Second Skin I’s three ranks. The Second Skin I ranks themselves consume 3 Time Segments. Once Rank 3 is active, inspect a Medium armor tooltip again; its non-proficiency penalty should be gone.[2][5]
Practical recommendation: do not wait for the final rank before trying Medium gear. Rank 2 already cuts two-thirds of the penalty and can make a useful piece workable. Still, switch fully into Medium only when your stamina bar and recovery feel reliable for your preferred attack strings. A sturdier chestpiece is poor value if it leaves you unable to dodge after a blocked hit.
How to Unlock Heavy Armor Proficiency
Heavy armor takes longer because Second Skin II sits deeper in the Swordmastery branch and demands more Manuals. Finish the Medium route first; Vigor and Second Skin I are part of the route leading to Second Skin II.[2][3][5]
- Progress through Vigor and Second Skin I. Second Skin II remains unavailable until you have opened the earlier Swordmastery path.
- Collect three Second Skin II Manuals. You need the full set to complete Heavy armor proficiency.
- Invest in Second Skin II Rank 1. Heavy armor penalties fall by 33%.
- Invest in Rank 2. Heavy armor penalties fall by 66%.
- Invest in Rank 3. Heavy armor penalties are removed at 100% reduction.
Two Heavy armor Manuals have reliable merchant stops. The Armorer in Svartrau City, on the city’s northwestern side, sells Second Skin Manuals. A second Armorer in Tantari Village, in southeastern Vale Sangora, also sells Medium and Heavy Manuals. These are the efficient purchases to make before you start opening camps purely for a Manual drop.[3]
The third Second Skin II Manual comes from chest loot and is RNG-dependent. For the best farming targets, work through high-level soldier camps and outposts in southern Vale Sangora, particularly Rockfalls, The Silts, Boar’s Back, and Tantari Woods. These locations can yield Epic Swordmastery Manuals, including Second Skin II, but there is no guaranteed third-chest location or published drop rate.[3]
Budget carefully before committing. Second Skin II’s three ranks are listed at 4 Skill Points and 3 Time Segments in the detailed rank costs, while another route total places the full Heavy investment at 6 Skill Points. Expect to need at least 4 Skill Points for the perk ranks and keep extra points available for its preceding Swordmastery requirements; the exact total shown can depend on which prerequisite nodes you have already bought.[2][3]

⚠️ Spoilers: What the Heavy Armor Manual Route Can Change
Svartrau City and Tantari Village are story-progressed areas, so pursuing the Heavy armor route can push you into quests and regions beyond the early-game loop. Reaching Tantari Village usually means working through at least one multi-segment southern Vale Sangora questline. Clearing the high-level soldier camps around Rockfalls, The Silts, Boar’s Back, and Tantari Woods can also alter nearby patrol activity, outpost control, and later dynamic events.
If you are preserving specific early quest states, collect the merchant Manuals when you naturally reach their hubs and leave RNG farming until you are ready to commit to those camp clears. The FinalBoss early-build guide is the better place to settle your Swordmastery priorities before spending scarce Time Segments on Heavy armor.
When Medium and Heavy Armor Are Worth the Investment
Prioritize Second Skin I when you want a flexible Day or Night set that can take more punishment without strangling your stamina economy. Medium gear is particularly effective for hybrid builds and players who still rely on frequent dodges. Nightweaver Garb, for example, supports mobility with its dodge-distance bonus while offering Medium-tier protection.[8][10]
Prioritize Second Skin II when posture, blocking, and surviving committed exchanges matter more than constant movement. Eclipse Plate’s posture bonus and Brencis Guard’s block efficiency suit players who plan to stand their ground, especially in difficult melee encounters. Heavy armor before Rank 3 carries too much stamina risk for that playstyle to feel consistent; full proficiency is the threshold that makes the investment pay off.[8][10]
Three Mistakes That Waste Skill Points and Time Segments
- Expecting proficiency to unlock from character level. It never does. Manuals, Skill Points, and Time Segments unlock the Second Skin ranks.
- Reading defense but skipping the penalty line. Medium and Heavy items remain equippable before proficiency, so the game lets you make a weak loadout without stopping you.
- Farming the third Heavy Manual too early. Southern Vale Sangora soldier camps are dangerous. Reach them with a solid weapon and at least a dependable Medium setup rather than forcing an underpowered Heavy build.
Also remember that Day Set and Night Set equipment are configured separately. After buying a Second Skin rank, check both loadouts before leaving a shrine or beginning a multi-segment quest. Unlocking proficiency does nothing for a set you forgot to re-equip.[14]
FinalBoss // Gear
Level up your setup
01Top-rated gaming headsetson Amazon→02High-refresh gaming monitorson Amazon→03Gaming chairson Amazon→04Discounted game keyson Kinguin→
Affiliate links · As an Amazon Associate, FinalBoss earns from qualifying purchases.
Want to Level Up Your Gaming?
Get access to exclusive strategies, hidden tips, and pro-level insights that we don't share publicly.
Ultimate Guide Strategy Guide + Weekly Pro Tips