
The Liar Princess And The Blind Prince: Chapter 3 Witch’s Garden Guide
Game intel
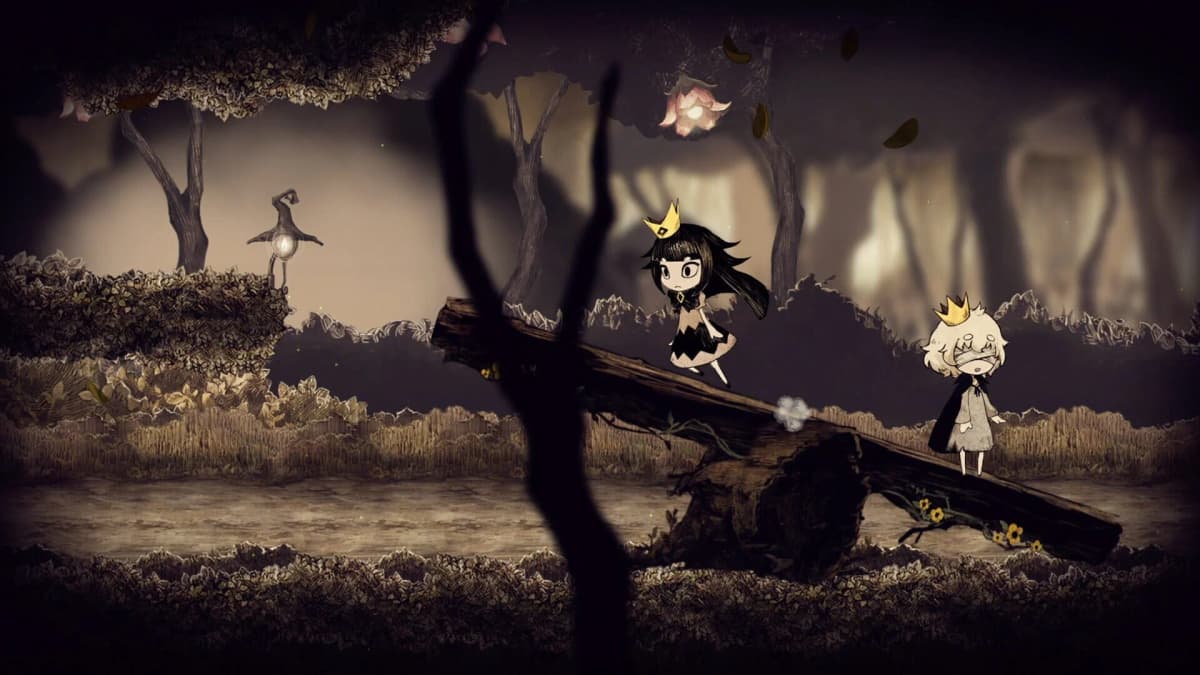
The Liar Princess And The Blind Prince
The Liar Princess and the Blind Prince follows the tale of two lonely hearts brought together through a mutal misunderstanding. In it, you control the wolf, di…
Why the Witch’s Garden Is So Confusing (And How This Guide Helps)
After spending well over an hour getting turned around by portals and overthinking the riddle stones in Chapter 3, I finally pieced together a clean route through the Witch’s Garden. The big hurdles here are the teleporters, the numeric riddles, and understanding how lanterns, lifts, and pressure plates all link together. This guide walks through the chapter exactly how I now clear it in one smooth run, including the precise codes you need (like 2-6-3 and 5-9-1-5) and how to safely grab the optional flower without losing the prince or getting mobbed by monsters.
Everything below assumes standard PC controls, but the logic is the same on any platform: switch between wolf and princess, guide the prince by the hand, and use portals, lanterns, and pressure plates in the right sequence.
Stage 1: Portals, Flying Enemies, and the First Riddle (Code 2-6-3)
This first part looks simple, but the portals and flying enemies can easily make you panic if the prince falls. I restarted here more times than I’d like to admit before I slowed down and used the mechanics properly.
From the stage start:
- Walk right as the princess, holding the prince’s hand.
- Enter the first portal. Each portal in this opening section just pushes you forward; keep going right through every new portal you see.
- When you see gaps with floating, cloud-like monsters nearby, switch to wolf and look directly at the flying enemy. If you stare at them, they transform into a solid ledge.
- Once the enemy becomes a ledge, jump onto it, then lead the prince over safely. Repeat this for each gap.
Eventually you reach a lift you can’t move yet. The lever is up on a higher ledge.
- Switch to wolf and jump up to the higher platform with the lever.
- Operate the lever to move the lift so the prince can ride it up with you.
- Bring him to the upper area, then continue right to the first riddle stone.
The first stone mentions “crossing some numbers together” and there are three number mechanisms below it. This sounds more cryptic than it actually is.
Solution: Set the three mechanisms to 2, 6, and 3 (in any order where the devices correspond to the three slots). Once all three digits match, the locked path opens and you can move to the next stage.
Common mistake: I wasted time trying to interpret the riddle literally instead of just trying the code. If the path doesn’t open, double-check that each dial is fully set to the correct digit and that you’ve actually confirmed the input if your platform requires a confirm button.
Stage 2: Bird Riddle, Lantern Monsters, and Gem Count (Codes 4-8 and 5-9-3)
This stage mixes background clues, a numeric bird riddle, and your first serious lantern segment with monsters that fear light. The key here is to move carefully while carrying the lantern so the prince never gets cornered.
As soon as you enter:
- Notice the colored lanterns in the background as you walk through portals. They hint at the coming riddles, but you don’t need to write them down if you already know the solutions.
- Keep going portal to portal until you reach a riddle stone with two dials – one on the left, one on the right.
The stone mentions large birds with numbered wings, but a part of the number can’t be read. It’s setting up a left-right number relationship.
Solution:
- Set the right mechanism to
4. - Set the left mechanism to
8.
Once both are correct, the path opens. Head right and you’ll immediately see a lantern.
Here’s where the monsters and lantern mechanic kick in:
- Pick up the lantern as the princess.
- Walk to the nearby fire pedestal and press the interaction button to light it.
- Enter the next portal; you’ll appear in an area full of monsters that line the path.
Monsters will not approach you or the prince as long as the lantern is lit. This is your safe zone and your best weapon here.
What finally worked for me: I kept the prince close, stayed in princess form while carrying the lantern, then switched to wolf form only when I had a clear opening to attack. The monsters stay away from the light, so you can use the lit lantern to create a “bubble” of safety, then quickly switch to wolf, step out of the light’s edge, and claw enemies down one by one.
Once you’ve cleared the monsters and guided the prince through, you’ll reach another riddle stone. This one mentions counting red, yellow, and blue gems, and there are three mechanisms below it.
Solution: Set the three mechanisms to 5, 9, and 3. The sequence unlocks the path to the next stage.
Tip: If you lose the lantern light (for example by dropping it or taking too long near enemies), retreat, relight it at the last fire pedestal, and re-approach slowly. Trying to brute-force your way through the monsters without the lantern usually ends with the prince getting eaten.
FinalBoss // Gear
Level up your setup
01Top-rated gaming headsetson Amazon→02High-refresh gaming monitorson Amazon→03Gaming chairson Amazon→04Discounted game keyson Kinguin→Affiliate links · As an Amazon Associate, FinalBoss earns from qualifying purchases.
Stage 3 (Hollow Tree Hill): Optional Flower and the Four-Story Riddle (Code 5-9-1-5)
This is the most complex part of Chapter 3 and where I got stuck the longest. There’s only one flower in the Witch’s Garden, and it’s hidden behind a multi-step riddle that sends you to four different “stories.” If you want 100% completion for this chapter, you need to do this section.
Reaching the Flower Riddle
From the Hollow Tree Hill entrance:
- Walk right and you’ll see a collapsing platform.
- Step onto it with the prince to break it and fall down into a portal.
- Follow the path to reach the main riddle stone that talks about “four stories” and has four number mechanisms beneath it.
Standing here, think of this as your hub: left story, right story, and then deeper branches within each. You need to collect four hints, then return to this stone to enter the final code.
🎮 Get This Game at the Best Price
Compare prices instantly and save up to 80% on Steam keys with Kinguin — trusted by 15+ million gamers worldwide.
*Affiliate link — supports our independent coverage at no extra cost to you
Left-Side Stories: Vine Platforms, Monster Ledge, and First Hints
Start on the left portal from the main riddle stone.
- Enter the left portal; you’ll find vine platforms and another flying monster.
- As wolf, look at the flying enemy to turn it into a solid ledge, then jump up to the higher platform.
- Leave the prince safely on this monster-ledge (he won’t move while you’re away).
- Move forward alone as the princess to reach a secondary riddle stone – this gives your first story hint.
- Below this area is another portal; take the lower portal down to the next section.
In the lower section:
- Find the lantern and a fire pedestal.
- Have the prince pick up the lantern (guide him carefully), then light it at the fire to the right.
- Use the lit lantern to activate the glowing spot on the left – this powers a lift.
- Ride the lift up to another hint stone – that’s your second story hint.
Once you’ve read the hint, return through the portals to get back to the main four-story riddle stone. Make sure the prince is still carrying the lantern; you’ll need it on the right side.
Right-Side Stories: Pressure Plates, Lifts, and Lantern Routes
Back at the main riddle stone, enter the right portal this time.
- You’ll land in a room with three pressure plates.
- Put the lantern down on one plate.
- Have the princess stand on a second plate and the prince on the third.
- When all three plates are pressed, a lift activates.
- Pick the lantern back up and ride the lift to another hint stone – this is your third story hint.
- Use the nearby portal to move to the next area.
In the next lantern section:
- Go right to find a lift that doesn’t work yet and a fireplace.
- Light the lantern at the fireplace.
- Return to the lift with the lever on the left and ride it up while keeping the lantern lit. The light keeps enemies from approaching you as you ascend.
- At the top, light another fire pedestal to power the lower lift.
- Ride back down and use the now-active lift in the lower area to reach the final hint stone.
With all four story hints collected, return once again to the main four-story riddle stone.
Entering the Final Flower Code (5-9-1-5)
Now that you’ve seen all four hints, you can enter the solution.
Solution: Set the four mechanisms beneath the main stone to 5, 9, 1, and 5 in order.
Once all four digits are correct, a portal opens directly in front of the stone. Enter it to reach a flower field.
Walk up to the flower and interact to have the princess give it to the prince. After the short scene, you’re returned to the stage entrance and can walk straight ahead to continue the chapter.
Tip: Don’t make the mistake I did of wandering around the side stories after entering 5-9-1-5. Once the code is in, the portal appears right there; no extra triggers are needed.

Want to Level Up Your Gaming?
Get access to exclusive strategies, hidden tips, and pro-level insights that we don't share publicly.
Ultimate Guide Strategy Guide + Weekly Pro Tips
Final Section: Remote Commands, Lantern Bridges, and Collapsing Platforms
The last big stretch teaches you how to command the prince from a distance, then throws a multi-portal lantern puzzle at you. This part looks intimidating, but once you know the route it flows quickly.
Unlocking Remote Commands and First Lift
As you enter the next stage after the flower:
- Walk onto another collapsing platform; break it with the prince to fall into a portal.
- You’ll face a large gap. Switch to wolf and jump across.
- Stand on the pressure plate on the far side – this is where you gain the ability to instruct the prince from a distance (e.g., asking him to walk or interact without directly holding his hand).
- Use the new command to tell the prince to walk towards you across the now-extended path.
- Take the next portal together.
In the following section:
- You’ll see a fire pedestal and an empty lantern nearby. Have the prince pick up the lantern.
- Go left to find a fire source and light the lantern.
- Return to the area near the lift and use the lit lantern on the glowing spot to activate the lift.
- Ride up to a pressure plate. Place the lantern on the plate so it stays pressed while you move right.
- Break the collapsing platform to drop into the next section.
The Big Lantern–Portal Loop
This is the most maze-like part. There are two sides (right and left), each with two portals, and you need to retrieve and light the lantern while fighting enemies.
From the new lower area with two pressure plates and no lantern yet:
- First, fall down to the right side.
- You’ll see two portals; take the right portal first.
- In this area is a large collapsing platform with the lantern on the far side. As the princess, jump up to the high ledge above the collapsing floor.
- Use your new remote command to ask the prince to walk across the collapsing platform to pick up the lantern.
- Once he has the lantern, guide him back and return through the same portal you used to enter.
- Now take the left portal on this right side. This leads to an enemy-filled area.
- Clear all enemies (switching to wolf when it’s safe) and a portal back up to the top area will appear.
Back at the top again, drop down on the left side this time.
- There are again two portals. Take the right portal first to reach a fire pedestal where you can light the lantern.
- After lighting it, run back through the portal and then take the left portal.
- Follow the path; you’ll loop back up to the main platform, now with a lit lantern in hand.
Opening the Final Portal and Reaching the Exit
On the main platform with two pressure plates and fire spots on both left and right sides:
- Have the princess stand on one pressure plate.
- Use remote commands to direct the prince, carrying the lantern, over to the big fire spots on each side and light them one by one.
- Once both large spots are lit, a new portal appears in the center of the platform.
- Enter this central portal to reach the final collapsing-platform area.
In this last room:
- Break the collapsing platforms carefully, watching for enemies below.
- Drop down in controlled steps and defeat any monsters that appear before moving on.
- Keep heading right; once the enemies are cleared, the exit is just ahead.
Reach the exit to finish Chapter 3. You’ll get a cutscene where the princess gives the prince another flower, and then you move on to the next chapter.
Wrap-Up: What You’ve Learned for Later Chapters
Once I understood how the Witch’s Garden fits together, later chapters felt much less overwhelming. This single chapter teaches almost all of the game’s trickiest mechanics in one place: reading riddle stones for numeric codes like 2-6-3, 5-9-3, and 5-9-1-5, using lanterns to both repel enemies and activate lifts, and coordinating pressure plates with the prince and dropped items.
If you follow the route above, you can clear Chapter 3 in a single, clean run and grab the optional flower along the way. The more you practice switching forms, commanding the prince from a distance, and treating portals as deliberate shortcuts instead of random teleporters, the smoother the rest of the game will feel.