

Soulslike openings usually teach players to turn repeated enemy kills into levels, then use those levels to force their way through the first major wall. The Relic: First Guardian shifts that familiar rhythm. Your character does not gain Strength, HP, or traditional stat points by grinding; early power comes from the weapons, armor, Relics, skill-tree unlocks, and route choices you make before challenging a Brutal again.
The most reliable early-game plan is to reach the first Tibelle’s Blessing, complete one Event Trail for a Sealing Stone, clear its connected dungeon, and only then begin testing the first serious boss encounters. Start with Sword and Shield, commit your Ancient Relic Power to one build identity, and treat arena hazards as part of every boss moveset. That progression loop gives you a real combat advantage without wasting time trying to farm levels the game does not have.
Table of Contents (8)
Understand What Actually Makes You Stronger
The first trap is assuming that enemy kills will eventually solve an early boss through raw stat growth. They will not. The Relic: First Guardian has no conventional character-level system, so an underprepared build stays underprepared until you improve its equipment, Relics, or skill access.
Your early progression has four practical parts:
- Relics, also called Runes: fragments that grant passive effects and usable powers.
- Unique weapons and armor: each piece is a meaningful find rather than disposable starter gear.
- Weapon skill trees: unlocks that expand a weapon family’s available moves and combat options.
- Ancient Relic Power and Relic Energy: the progression resources used at altars and Relic-focused interfaces.
That makes early loot evaluation more important than it is in a standard level-driven action RPG. A new sword, shield, armor piece, or Relic can materially change how you approach the next dungeon. Do not dismiss an early weapon because it looks like a starter tool; every unique piece can become the foundation of a build if its moveset and Relic effects match the way you want to fight.
Early priority: build around one weapon family and one combat identity. Scattering upgrades across every Relic and skill branch leaves you with several incomplete tools when the game starts demanding clean boss execution.
Follow the First Hub Loop Before Exploring Every Branch
The early regions are structured around a central camp or hub, Event Trails, Sealing Stones, and dungeon routes. The key is to use that structure as a preparation circuit rather than treating every available path as an immediate boss challenge.
After the opening, push forward until you reach your first Tibelle’s Blessing. This is the early checkpoint and recovery point where you can restore yourself and manage your progression tools. Once you have that anchor, work through the first loop in order:
- Reach the early hub area near the Camp of Faded Mist Forest and activate the first Tibelle’s Blessing.
- Take one Event Trail rather than repeatedly changing routes.
- Secure the Sealing Stone tied to that trail.
- Use the unlock to enter and clear one dungeon.
- Review your weapon, armor, Relics, and skill-tree direction before committing to a major Brutal.
This route matters because Event Trails and dungeons supply the exploration rewards that replace conventional leveling. If you skip directly from the hub to a difficult boss, you may be mechanically capable of learning the fight, but your build will be missing the Relics, gear options, and skill investment that make the fight manageable.
A cautious first trip from the intro to the hub and first Blessing can take roughly 45 to 60 minutes. The first Event Trail and dungeon can add another 60 to 90 minutes, especially while learning hazards and boss patterns. The time is better spent there than repeatedly forcing attempts against a boss with an unfinished setup.
Use Sword and Shield as Your Early Combat Classroom
Sword and Shield is the strongest first commitment for players still learning how The Relic: First Guardian handles defense. The weapon family gives you a balanced close-range moveset, while the shield makes the game’s most important early rule visible: stamina belongs to defense.
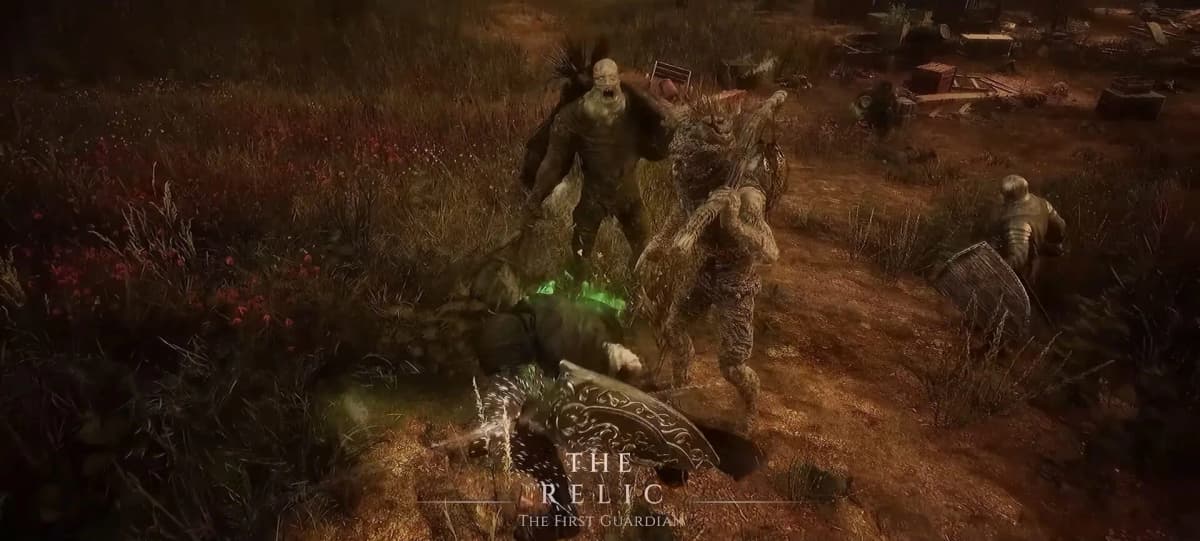
Attacks do not consume stamina. Dodges, blocking, and parries do. That reverses the habit many players bring into the game. You can attack aggressively without worrying that a few sword swings will empty the bar, but every defensive decision still has a cost. If you burn through stamina while blocking, parrying, or panic-rolling, you become Groggy, opening yourself to a punishing stagger and heavy damage.
The correct Sword and Shield rhythm is simple: attack while the boss is giving you a safe opening, then preserve enough stamina to answer the next dangerous read. The weapon’s value is not passive turtling behind a shield. It is giving you a controlled way to learn which attacks can be guarded, which need a dodge, and which are worth attempting to parry.
| Defensive tool | Best early use | Main danger |
|---|---|---|
| Block | Use against readable single hits and incoming projectiles when you need a stable answer. | Holding guard through too much pressure drains stamina and can leave you Groggy. |
| Dodge | Use to escape wide attacks, reposition around arena hazards, and avoid attacks that should not be blocked. | Repeated panic dodges spend the stamina you may need for the next attack. |
| Parry | Use on attacks whose timing you have already identified and can recognize consistently. | Fishing for parries on unfamiliar strings turns a safe defensive plan into unnecessary damage. |
Start a new boss encounter with the shield as an information tool. Guard a telegraphed hit and watch what it costs. Dodge the wider or more dangerous patterns. Add parries only after you know the timing. Once the fight is familiar, Sword and Shield can shift from a learning build into a stagger-focused build that creates safer damage windows.
Spend Ancient Relic Power on One Clear Build Direction
Ancient Relic Power and Relic Energy are the resources that turn exploration into combat readiness. At altars and Relic-related interfaces, they unlock skill-tree options and help awaken latent abilities in the main Relic. Relic Awakening Shards matter for the same reason: bring them back when you find them so the First Guardian’s core abilities can develop instead of sitting dormant in your inventory.
For the first hub loop, a focused build is stronger than a broad one. Pick the identity supported by your current weapon and Relics, then invest enough to make that identity reliable before branching out.
| Build identity | Early-game purpose | When it fits best |
|---|---|---|
| Defensive | Supports safer guard management, measured parries, and consistent learning attempts. | Best for Sword and Shield players still learning Groggy, boss strings, and arena hazards. |
| Aggressive | Prioritizes pressure and damage opportunities during safe boss openings. | Best once you can recognize the point where a boss is vulnerable rather than trading hits blindly. |
| Elemental | Builds around Relic effects and weapon choices that reinforce an elemental direction. | Best when your collected Relics and equipment already point toward the same effect. |
For a first run with Sword and Shield, the defensive route is the sensible starting point. It gives you room to learn how much stamina each defensive response costs, which is more valuable than chasing a small amount of extra damage before you can survive a full boss sequence.
Weapon skills deserve the same focus. They operate on cooldowns rather than MP or a mana-like resource, so there is no reason to preserve them for an imaginary final phase. Use a skill when it lines up with a meaningful opening: after a stagger, during a boss’s recovery, when a hazard cycle is inactive, or against a heavily telegraphed move that gives you time to commit.
Weapon skills can deal their maximum damage when an opponent is staggered. That makes stagger windows the best place to spend a cooldown. Blowing a powerful skill into a boss that is still actively attacking may look aggressive, but it often leaves you without the tool when the fight finally gives you its safest damage opportunity.
Build a Relic Loadout Instead of Equipping Every New Rune
Relics are build pieces, not collectibles to equip at random. Each one adds a passive effect, a power, or a direction for the rest of your setup. The early mistake is to treat every new Rune as an automatic upgrade, creating a loadout that has no clear purpose.
Use each new Relic as a decision point. Ask whether it supports your current weapon family, your intended defensive plan, or your selected skill-tree direction. A Relic that reinforces stable blocking and controlled counterattacks is useful for a Sword and Shield build even if another Relic appears more spectacular in isolation. The best early setup is the one that helps you survive long enough to use its strengths consistently.

- Keep Relics that reinforce your current combat identity.
- Use gear upgrades that make your chosen approach more reliable in boss arenas.
- Save experimental Relics for later rather than dismantling a focused early setup after every pickup.
- Revisit your loadout after clearing an Event Trail or dungeon, when new gear gives you a genuine reason to adjust.
Read Arena Hazards Before Treating a Boss Attempt as Lost
Brutals are rarely only about their direct attacks. Boss arenas use environmental pressure and status effects to force movement, disrupt positioning, and punish players who focus entirely on the enemy model. If you die with a mostly healthy boss still in front of you, the problem may be your hazard response rather than your damage output.
On the first attempt in a new arena, identify where the pressure begins. Projectile hazards can come from towers, floating orbs, or the boss’s own hand animations. Those visual launch points tell you when to move, when to keep the shield ready, and when the arena is about to steal stamina from you before the boss’s main attack arrives.
| Hazard source | What to watch for | Practical response |
|---|---|---|
| Towers | Projectile launch points around the arena. | Track their timing before committing to a long damage sequence. |
| Floating orbs | Positioning pressure that can punish a narrow focus on the boss. | Keep an escape lane open and avoid rolling without a destination. |
| Boss hand animations | A boss-generated projectile or status threat layered into its normal offense. | Prepare to block, dodge, or disengage instead of continuing your combo through the tell. |
Sword and Shield has a practical advantage here: the shield can block projectiles to reduce incoming damage and can sometimes prevent status buildup. That does not mean you should stand still and guard everything. Blocking costs stamina, and an arena that combines projectiles with a direct boss attack can quickly force a Groggy state. Use the shield to stabilize a dangerous moment, then move before your defense bar is spent.
A useful boss-attempt sequence is to spend the first run learning the arena, the second run testing your defensive answers, and later attempts converting those reads into skill windows and stagger damage. This makes deaths productive. You are learning where the safe ground is, which projectile source has priority, and when a cooldown can be committed without being interrupted by status pressure.
Fix the Early Habits That Create Avoidable Deaths
Most early stalls come from habits that made sense in other action RPGs but work poorly here. Correcting them changes the pace of the game immediately.
- Rationing normal attacks: attacks do not consume stamina, so do not give up safe damage because you are trying to preserve a resource they do not use.
- Rolling every time the boss moves: dodge stamina is valuable. Roll to avoid a specific attack or reposition around a hazard, rather than spending the bar on panic movement.
- Blocking entire attack strings: the shield is strong, but it is not infinite. Guard the attacks you understand, then move before the accumulated stamina cost turns into Groggy.
- Equipping every new Relic: build cohesion matters more than having the newest fragment equipped.
- Branching into every route before completing one loop: finish an Event Trail, claim its Sealing Stone, and clear a dungeon before dispersing your attention.
- Ignoring status pressure: watch the arena’s launch points and movement restrictions as carefully as the boss’s weapon or body tells.
Account for Camera and Lock-On Problems
The game’s combat can be at its best when a weapon moveset, a cooldown skill, and a stagger window all line up. It can also be undermined by unreliable camera behavior, lock-on problems, technical roughness, and crowded arenas. Plan around that reality rather than assuming every boss attempt will give you a perfect view.
When the camera obscures the boss or an environmental hazard, stop forcing long commitments. Reset your position, keep enough stamina for a defensive response, and wait for the screen to give you a readable situation again. A missed damage opportunity is recoverable; getting Groggy while the camera hides an incoming hazard is usually the kind of mistake that ends the attempt.
FinalBoss // Gear
Level up your setup
01Top-rated gaming headsetson Amazon→02High-refresh gaming monitorson Amazon→03Gaming chairson Amazon→04Discounted game keyson Kinguin→Affiliate links · As an Amazon Associate, FinalBoss earns from qualifying purchases.
Want to Level Up Your Gaming?
Get access to exclusive strategies, hidden tips, and pro-level insights that we don't share publicly.
Ultimate Guide Strategy Guide + Weekly Pro Tips