
The Seven Deadly Sins: Origin – How to Clear Act 10 Fast
Act 10 “Deep Below Ground” Overview
Act 10 in The Seven Deadly Sins: Origin looks straightforward on paper, but the timed blue braziers, spider swarms, and the final escape sequence are where runs fall apart. Once I treated this act like a tight dungeon with a specific route and timing, it stopped being a slog and turned into a satisfying run that reliably ends with Bug (SR) in my roster.
This guide sticks to what you need to finish Act 10 efficiently:
- How to handle the village errands and Butterfly Grass cleanly
- Both encounters with the man in the black costume (including the stun mechanic)
- The constellation floor puzzle and all timed blue-brazier gates
- Managing webs, spiders, and explosive barrels without backtracking
- The Vernas/Hawk defense fight and the Soldier Spider boss
- Route and timing for the final escape platforming section
Recommended party: bring at least one consistent fire attacker (Tristan works fine) and keep Guila available if you like lighting braziers from a distance.
Step 1 – Oasis Village Errands: Medicine & Vernas
You start in Oasis Village with Guila unwell. Talk to Guila to learn she needs medicine, then follow the marker to Dr. Sennet. Grab the medicine and return it to Guila to finish this short errand and send her off toward Liones.
Head back to Dr. Sennet. This time she’s talking with Sarasik and asks you to deliver medicine to Vernas north of the village. Follow the marker, speak to Vernas, and he immediately sends you out again for Butterfly Grass.
Step 2 – Gathering Butterfly Grass (x3) Without Wandering
The first time I did this, I wandered all around the desert and still missed one plant. The game is pickier than it looks.
From Vernas’s spot north of the village, head west toward the marked area. Look for small, luminous grass tufts with butterflies hovering around them.
- You need three Butterfly Grass
- All three are within the marked radius; do a slow circle around the outer edge so you don’t miss one tucked behind rocks
- Use the minimap: interactive herbs show as small icons when you’re close
Once you have three, return to Vernas’s last known location. He’s gone, leaving a map fragment. Interact with it; your party decides to investigate the marked location, kicking off the real chapter.
Step 3 – First Man in the Black Costume Fight
Follow the marker out into the desert to find the man in the black costume. This first fight is more of a check that you’re awake than a real boss.
- You only need to drop him to about 40% HP
- Play defensively; don’t burn all resources since the fight auto-ends at the HP threshold
- Watch for his stronger telegraphed strikes and dodge sideways, not backwards, to stay in melee range
Once his health hits that threshold, the fight stops. He retreats, tries to attack the villagers, and Sarasik takes the hit in a cutscene. After checking on Sarasik, Vernas appears and sends you on the “Guardian Stone” errand.
Step 4 – The “Guardian Stone” Statue & Return to Village
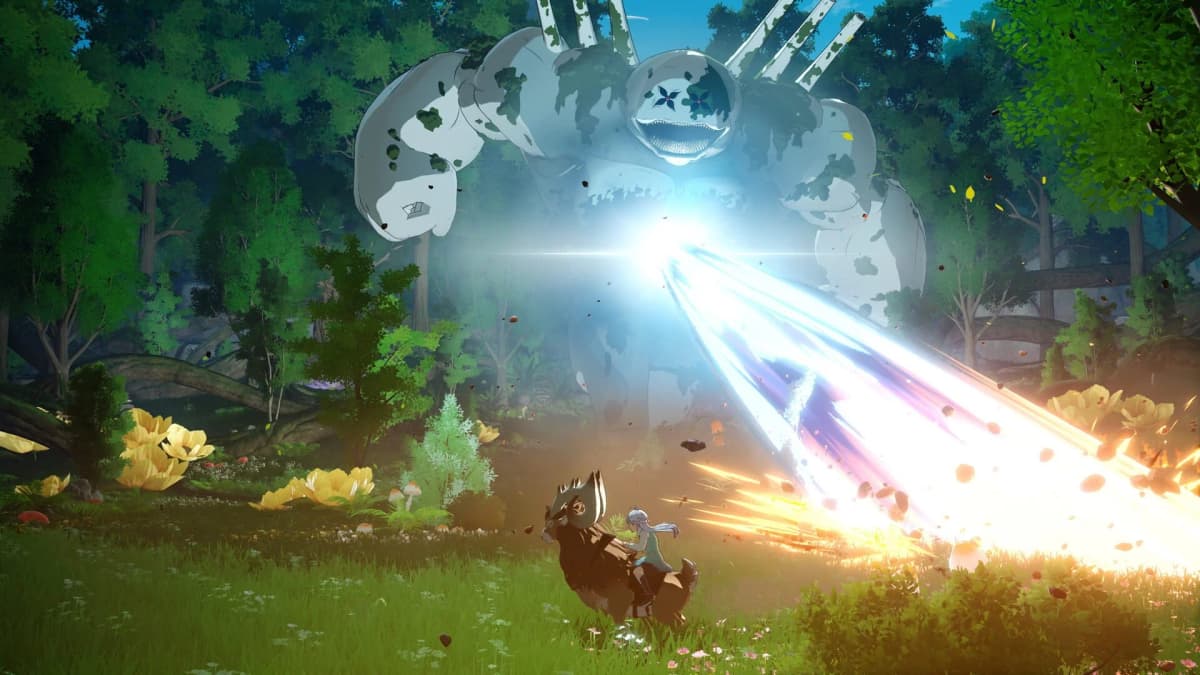
Follow the marker to the huge beast statue. Underneath is a glowing gem. Approach to trigger a cutscene: Tristan removes the stone, the statue collapses, and a powerful creature wakes. You don’t fight it here; the party escapes automatically.
Back in Oasis Village, Vernas has vanished again. Talk to Sarasik. He explains that what you grabbed is actually a sealing stone, and Vernas has taken villagers toward nearby ruins. Agree to let Sarasik join you, then head southeast from the village toward the new marker.
Step 5 – Entering the Ruins & First Brazier + Bandits
At the marker you’ll find a massive hole in the ground. Jump in to enter the ruins proper. This is where fire mechanics become the core of the act.
- Immediately ahead is your first brazier
- Hit it with a fire-element attack (Tristan’s skills, or Guila’s adventure skill from range)
- Lighting it spawns a group of desert bandits (five enemies)
Clear the bandits, then proceed deeper, lighting optional braziers as you go to cut down the darkness. None of these early braziers are timed, so use them to orient yourself and watch for side paths.
Step 6 – Constellation Floor Switch Puzzle (Upside-Down “Y”)
Eventually you reach a locked main gate with nine floor switches arranged in a grid and two movable blocks nearby. The game doesn’t really explain itself here, which is where I got stuck the first time.
Here’s the logic:
- The nine tiles each show one of three constellation patterns, each pattern repeated three times
- Your goal is to activate all three tiles of the same pattern at once
- The correct pattern is the one that looks like an upside-down “Y”
Step on (or park a block on) all three upside-down Y tiles so they are active simultaneously. Once all three are pressed, a side gate to your left opens.
Go through that side gate to find a brazier with a fire mechanism (a device you can interact with instead of using character skills). Activate it to light the brazier with blue flame. This is your first timed brazier:
- Blue braziers temporarily unlock the main gate
- Once lit, run back immediately to the main gate before it relocks
- If you’re late and the flame goes out, just relight it and try again
When the main gate is open, sprint through to the next chamber. Don’t stop to light side braziers until you’re safely past the timed door.
Step 7 – Explosive Barrel Door & Second Blue Brazier
The next large room has several standard braziers, a <strongwooden gate="" on="" right<="" strong="" the=""> with an explosive barrel in front, and a locked gate on the left.
Do this in order:
- Stand at a safe distance from the barrel by the right-hand wooden gate
- Use the nearby fire mechanism to ignite the barrel
- Back away; the explosion destroys the wooden gate and opens a new chamber
Inside that new chamber is a brazier in the center with another fire mechanism. Activate it to light the brazier in blue flame. This flame temporarily unlocks the previously locked left-hand gate in the main room.
The common mistake here is stopping to fight random enemies or lighting extra braziers. As soon as the central brazier turns blue, run straight back and through the left gate before it shuts.
FinalBoss // Gear
Level up your setup
01Top-rated gaming headsetson Amazon→02High-refresh gaming monitorson Amazon→03Gaming chairson Amazon→04Discounted game keyson Kinguin→
Affiliate links · As an Amazon Associate, FinalBoss earns from qualifying purchases.
Step 8 – Trap Corridor, Spider Nest & Webs
Beyond the timed gate is a trap corridor. Time your movement, then about halfway in you’ll find another brazier next to an iron door. Light it with fire to turn the flame blue and open that iron door.
Through the door is a large spider nest area. This room teaches you two key rules:
- Spiders are weak to fire
- They will naturally avoid lit braziers, so fighting near flame keeps you safer
To progress, look to the left side of the room for another wooden door, an explosive barrel, and a fire mechanism. The trick is that the barrel and trigger aren’t in ideal positions.
Use the Book of Stars to move the barrel and the fire mechanism closer to the wooden door:
- Drag the barrel so it sits right next to the wooden door
- Place the fire mechanism where you can safely trigger it while still out of blast range
- Activate the mechanism to ignite the barrel and blow the door open
Deeper in the ruins you’ll start encountering web walls. Use any fire attacks to burn them away quickly. Don’t waste time with normal physical hits; they’re much less effective than fire.
Step 9 – Second Man in Black Fight (Stun Mechanic)
Beyond more webs and spiders you eventually run into the man in the black costume again. Tioreh attacks on sight, forcing a second battle, this time with him wielding a Grimoire.
The important mechanic here is his stun meter:
- Every time he uses a Grimoire attack, a chunk of the stun meter fills
- After around eight Grimoire attacks, he becomes fully stunned
- While stunned, you can unload damage safely; save big skills for this window
Play evasive early: focus on dodging his telegraphed swings and letting him “charge up” his own stun by attacking. Once he drops into stun, switch to full offense and burst him down. When his HP is low enough, a cutscene resolves the conflict peacefully.
Banner arrives, explains what Vernas has really been doing, and you find nearby villagers stuck in webs.
Step 10 – Freeing Villagers While Handling Spider Waves
Interact with each webbed villager to set them free. Every few seconds, new spiders spawn and try to overwhelm you.

- Prioritize clearing spiders in your immediate area before interacting with a villager
- Keep fights near any lit braziers so spiders stay at a slight distance
- Rotate characters if needed to keep HP up; don’t let the fight drag or you’ll get swarmed
Once all villagers are freed, Sarasik leads them out. You push deeper into the ruins to confront Vernas.
Step 11 – Vernas, Protecting Hawk & Soldier Spider Boss
In the next chamber you finally catch up to Vernas. After the cutscene, you find Hawk trapped in webs and immediately enter a defense-style fight.
Two phases here:
- Phase 1 – Protect Hawk: You must defeat waves of spiders while making sure Hawk’s HP (shown under the quest details top-left) doesn’t hit zero. Focus on any spiders that path directly toward Hawk first, then clean up the rest.
- Phase 2 – Soldier Spider: Once Hawk is free and runs off, a much larger Soldier Spider appears. The man in black joins you as an ally.
For the Soldier Spider, fire damage still works very well, but the key is respecting its wide swings and lunges. Try to:
- Circle around its sides rather than staying directly in front
- Use dodge-cancel after heavy attacks to avoid being caught in long animations
- Capitalize whenever your ally draws aggro; that’s your window to unload skills from behind
Once it goes down, a side room opens on the right. Head through and continue the chase after Vernas.
Step 12 – Final Escape Route & Timed Iron Gate
You’ll eventually hit what looks like a dead end. The man in black leaves to check on the upper gate and confirms that lighting another blue brazier will open it for a short time. This whole sequence is where I kept failing on early runs because I lit the brazier before I’d memorized the route.
Here’s the clean way to handle it:
- Before lighting the brazier, walk the route once mentally:
- Note the broken statue hand on your right
- The path across its hands and shoulders
- The pushing blocks corridor
- The web bridge ramps and the rolling boulder spot
- The final iron gate at the top
When you’re ready:
- Light the brazier on the ground; once the blue flame appears, start moving immediately
- Jump onto the statue’s right hand, climb to its shoulder, then drop onto the other hand and across
- Move through the pushing blocks by waiting for their retraction, then sprinting through a full cycle rather than hesitating
- Burn through the web wall on the far side with a quick fire attack
- Climb the web bridges, pausing only to let the boulder roll past before continuing upward
- Keep climbing the remaining web ramps straight to the iron gate and slip through before it closes
If the gate shuts on you, you must drop back down, relight the brazier, and repeat. Once you know the rhythm, you can make it with a bit of stamina to spare; the key is committing to each section instead of second-guessing mid-jump.
Beyond the gate is a final chamber. Open the doors to emerge back into the desert.
Step 13 – Rewards: Bug (SR) & Ending Act 10
Outside, Sarasik runs up and explains he tracked you using a dropped map. Talk to the man in black one last time; he finally shares his real name, BugBug (SR) as a unit reward for completing the act.
Return to Oasis Village and find Dr. Sennet near the southern gate. Speak to her to trigger the final Act 10 cutscene. Once it ends, Act 10 is complete and the next act unlocks, with Bug now available for your team going forward.