
The Seven Deadly Sins Origin: How to Start – Resource & Team Setup
Early Mistakes to Avoid in The Seven Deadly Sins Origin
After my first few hours in The Seven Deadly Sins Origin on mobile, I realized I’d done what I always do in new gachas: leveled the wrong characters, wasted rare materials, and ignored half the systems the game was quietly teaching me. The result was a pretty rough wall in the early chapters that I absolutely didn’t need to hit.
This guide is the “second run” version of those opening hours: how to progress smoothly, keep your resources intact, and set up a team that doesn’t crumble the moment enemies stop dying in two hits. Everything here is based on actual play: what I tested, what I regret burning, and what made the biggest difference once I corrected course.
Step 1 – Push the Main Story First (But With a Plan)
The best thing you can do right after the tutorial is to follow the main quest line. Not because side content is bad, but because the campaign quietly unlocks almost everything that makes the game comfortable to play.
- New regions of Britannia for more chests, materials, and bosses.
- Distortion points (fast travel) placed right next to many story objectives.
- Key characters and mounts that speed up exploration and combat.
- Access to daily missions and more menus in the
MissionandEventtabs.
The practical approach I use now on fresh accounts:
- Follow the main story until most of the basic systems are unlocked (dailies, mastery, shop tabs).
- Whenever the story takes you past a Distortion point, detour a few seconds to activate it.
- Between big story beats, spend 5-10 minutes sweeping any obvious chests, harvestable nodes, or NPCs with blue question marks.
You don’t have to 100% each zone. Just think of the story as your “spine,” and let exploration and side quests hang off it instead of replacing it.
Step 2 – Unlock and Abuse Fast Travel
Origin’s world is big, and running everywhere on foot is the fastest way to burn out. The turning point for me was treating fast travel like a main objective, not a side bonus.
- Distortion points: stone-like structures you can interact with to unlock as teleport beacons.
- Heal statues: marked with a green heart on the map, also serve as refills for your shared HP bar.
- Mount & auto-move: once Hawk is unlocked as a mount, you can use the auto-path feature to ride straight to objectives.
My routine now whenever I enter a new area:
- Open the map and mark any obvious Distortion icons.
- As I follow the main quest, I make tiny detours to tap each one once.
- Whenever I need to backtrack for a quest, I teleport instead of running.
This doesn’t just save time. It also makes farming bosses and materials later much less painful, since you’ve already done the groundwork.
Step 3 – Loot, Side Quests, and Daily Rewards (Without Wasting Time)
Early on, the game throws a lot of prompts at you: side quests, event rewards, login bonuses, daily missions. It’s easy to either ignore them or spend half your session mashing through menus. There’s a middle ground that works much better.
Loot Almost Everything You See
Inventory size at the start is generous, so I pick up:
- Plants, mushrooms, insects, feathers, etc.
- Enemy drops and chest rewards.
- Any crafting materials on the way to an objective.
These feed into cooking, crafting, and side quests. I try not to go off on 5-minute detours for a single shiny, but if it’s within a short jog of my path, I grab it.
Pick Up Side Quests, Don’t Chase Them Immediately
NPCs with a blue question mark over their head will give you side quests. Most are simple “go there” or “bring X items” errands.
What I do now:
- Talk to any NPC with a blue icon when I pass them.
- Accept their quest but don’t change my main objective unless it’s on the way.
- Many of these auto-complete just by continuing the main story and looting normally.
Never Skip Dailies and Free Rewards
Two menu sections matter from day one:
Menu → Missions → Daily: complete any 4 daily tasks from the list for gems and materials. It’s fast and flexible; you’re not locked to specific four.Menu → Eventsand the shop’sGrowthtab: grab login bonuses and the small bag that gives extra boss loot energy.
I make it a habit to clear my dailies as soon as the tab unlocks, even if I don’t plan a long session. Those early gems add up to crucial pulls, and the extra energy bag is surprisingly valuable if you’re farming bosses.
Step 4 – Weapons, Armor, Mastery, and Potential Explained
The most confusing part of Origin at first is the layer cake of progression systems. Here’s how I think about each one, and how I use them early on.
Weapons: Your Real “Build” Button
Each character can equip three weapon types, and their skills, element, and even role can change drastically between them. A support character with one weapon might become a DPS with another, or the reverse.
- Pick one weapon type per character as your main build for now.
- Within that type, equip the best weapon you have (rarity and stats).
- You can change builds later once you’ve unlocked more mastery and weapons.
Armor: Let Auto-Equip Handle It Early On
Every character can equip multiple armor pieces (boots, chest, etc.) or a full set that replaces some slots but offers better bonuses.
For the first 10–15 hours, I don’t micromanage armor. Instead, I:
- Use the Recommended Equipment button so the game auto-fills the best pieces.
- Make sure every character in my active team has armor in every available slot.
- Avoid heavy upgrading of low-rarity armor; save serious investment for later levels.
Mastery: Your Main Stat Progression
There’s no classic character level cap grind here. Instead, you strengthen characters with Mastery, which spends specific materials and gold to push them through stages.
🎮 Get This Game at the Best Price
Compare prices instantly and save up to 80% on Steam keys with Kinguin — trusted by 15+ million gamers worldwide.
*Affiliate link — supports our independent coverage at no extra cost to you
- Each Mastery level gives small stat boosts.
- Later levels unlock weapon specialization and give Potential points.
- Materials get rarer as you climb, and each character demands more of them.
Potential: Long-Term Power Per Character
Potential is a separate tree where you spend points to unlock more impactful bonuses. You earn points by:
- Finishing an entire weapon Mastery branch for that character.
- Pulling duplicates of the character from gacha.
Each character can reach up to Potential 10, but this is a long-term grind, not something you rush in the first few days.
FinalBoss // Gear
Level up your setup
01Top-rated gaming headsetson Amazon→02High-refresh gaming monitorson Amazon→03Gaming chairson Amazon→04Discounted game keyson Kinguin→Affiliate links · As an Amazon Associate, FinalBoss earns from qualifying purchases.
Want to Level Up Your Gaming?
Get access to exclusive strategies, hidden tips, and pro-level insights that we don't share publicly.
Ultimate Guide Strategy Guide + Weekly Pro Tips
Step 5 – Spend Mastery Materials Like They’re Precious (Because They Are)
The single most painful mistake I made was scattering mastery experience items across every shiny new character I pulled “just to try them.” Those materials dry up fast, and the cost ramps hard as you go higher.
- Pick 3–4 core characters you actually like and who fill useful roles.
- Focus your Mastery materials on them only.
- For bench characters you occasionally use, take them to just the first Mastery level for a small, cheap stat bump.
- Do not dump rare materials into characters you don’t plan to field regularly.
If you treat mastery XP like a premium currency instead of a common resource, your account will feel much stronger by the time mid-game rolls around.
Step 6 – Equip Secondary Weapons for Free Stats
One subtle mechanic that the game doesn’t shout about: even if you don’t actively use a weapon type in combat, equipping a weapon in that slot still gives you a portion of its stats (around 30%).
What this means in practice:
- For each character, fill all three weapon slots with the best weapons of each type you own.
- Use your preferred weapon type as the active build.
- Enjoy the “free” attack and stat bumps from the other two passive weapons.
This is one of the easiest power spikes you can get early on without spending extra materials, and it makes even your supports feel less flimsy.
Step 7 – Build a Real Team: Roles, Healing, and Elements
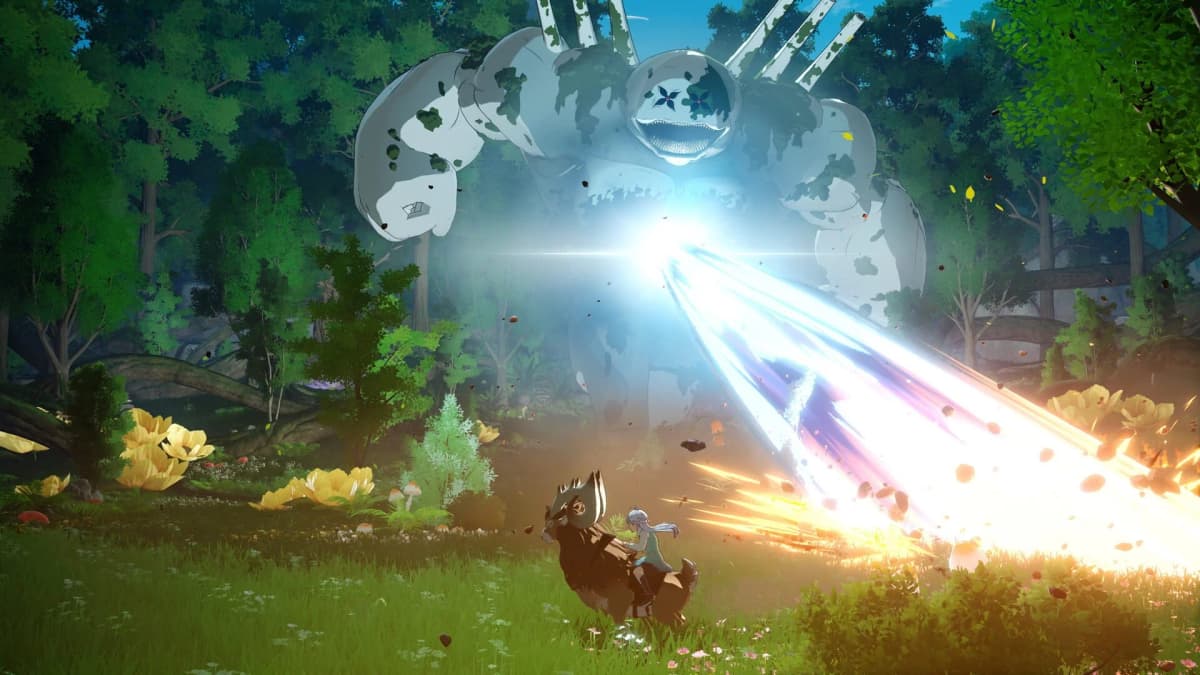
Origin’s combat feels easy for the first couple of hours. Then you notice that your shared HP bar for the whole team isn’t refilling between fights, and bosses start actually hurting. That’s when team structure suddenly matters.
Always Bring a Healer or Strong Support
You can heal with:
- Green-heart heal statues on the map.
- Potions and food items.
- Character skills and ultimates that restore HP or provide shields.
Using items mid-fight is clunky and limited, so I strongly recommend running at least one healer or heavy support in your core team. Characters like Hendrickson built as a long sword support can keep your HP stable without breaking your damage output too much.
Basic Team Template for Early Game
- Main DPS: Your hardest hitter, built with a weapon and element you like.
- Sub-DPS / Off-DPS: Fills downtime, covers different range or element.
- Healer / Support: Provides sustain and possibly buffs or shields.
- Flex: Another support, a breaker, or a second DPS depending on content.
Try not to run four pure DPS units. The shared HP bar system punishes teams with no sustain once you’re in longer fights or boss arenas.

Use Elements and Overpower to Your Advantage
Enemies have weaknesses to specific elements (Fire, Ice, Earth, Lightning, Wind, Physical, Holy, Dark). Hitting those weaknesses doesn’t just do more damage; it also builds your Overpower bar faster.
Once filled, Overpower lets you trigger a boosted phase with big damage potential. Teams that share an element build this bar faster, so there’s value in clustering around one or two core elements as you get more characters and weapons.
Switch Characters Aggressively in Combat
Don’t treat your party like a “main + backups.” Origin rewards frequent switching:
- Switch skills: many characters have on-switch attacks that fire when you tag them in.
- Cycle supports: swap in support characters to drop buffs/debuffs, then back to your main DPS.
- Heal on demand: jump to your healer to pop a heal or shield, then return to offense.
Later, duo skills and character synergies make this even more important. Even early on, getting into the habit of switch-comboing will make bosses feel much less tanky.
Step 8 – Use Convenience Features to Save Real Time
Finally, don’t feel guilty about using all the “lazy” tools the game offers. They exist for a reason:
- Teleport between distortion points instead of running back and forth.
- Use auto-move with Hawk to path to the next objective while you check menus or plan upgrades.
- Skip cinematics for repeat viewing or when replaying content on alts.
- Let Recommended Equipment handle gear while you’re still drowning in low-rarity drops.
The less time you spend jogging across empty fields or sorting 1-star armor, the more time you have for actual fights, bosses, and experimenting with builds.