
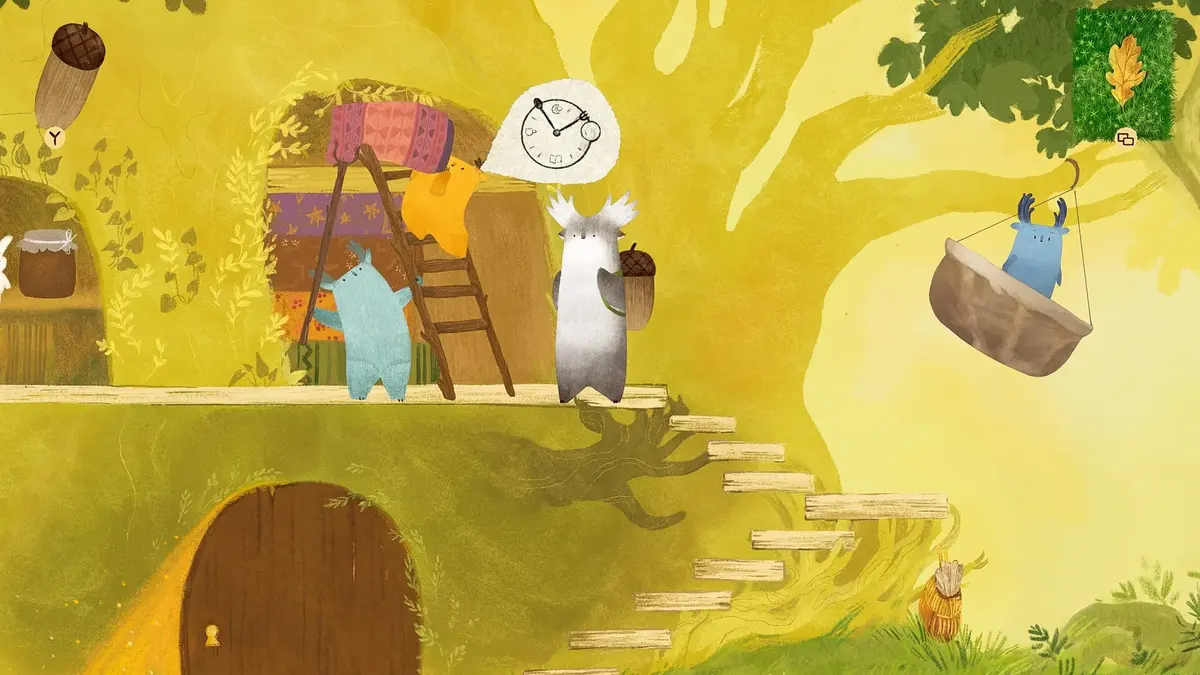
The cleanest way through Tukoni: Forest Keepers is to treat every chapter as a complete search-and-delivery route: inspect each screen, collect every loose item before changing areas, combine inventory objects when their purpose is unclear, then drag the finished item onto the correct character or object. Clicking an inventory item alone frequently does not complete an interaction.
Chapters 1-4 build on that same loop. The game communicates most answers through environmental art, speech bubbles, symbols, and object placement, so a blocked route usually means there is a foreground pickup, a visual clue, or an item combination still waiting on the current map.
Table of Contents (18)
How Tukoni: Forest Keepers Puzzle Interaction Works
Before following the chapter routes, lock in the three habits that prevent most stalls. First, use drag-and-drop inventory interaction. Pick up the item, hold it, and place it directly on the kettle, chest, telephone, NPC, machine, or puzzle slot that needs it. Second, inspect visual details before guessing at a code; leaves, flowers, squirrel imagery, fruit, mushrooms, and other decorations can function as puzzle language. Third, recheck your inventory after every transition because one solved request often produces the tool for the next room.
The safest screen-clear order is to check foreground foliage and bushes, then shelves and tables, then NPC requests, then locked containers or machines, and finally the available exits. Leaves, vines, and decorative objects can partially cover important pickups such as an acorn cap, mushrooms, and small tools.
- Use the Notebook early: it tracks active tasks and records visual information that matters later.
- Combine before delivering: tea ingredients, repair materials, and travel supplies often need to become one usable item first.
- Finish open requests before leaving: a helpful Tukoni commonly gives the next route item in exchange.
- Use image clues literally: symbol locks reward matching the visible sequence instead of trying random inputs.
- Inspect the full device: after inserting items into a phone, cabinet, clock, or similar prop, interact with the object itself to trigger the next step.
Chapter 1 Walkthrough: Pack for the Journey and Prepare Tea
Chapter 1 is the game’s onboarding route, but it already teaches the inventory logic used throughout the later village, portal, and party sections. Open the Notebook after the opening scene, then collect the Herb and Teabag around the hut. Check the chest behind the Traveller as well: it is locked, and its missing button becomes a required pickup during the chapter.
Clear the west side before making tea
Head left from the hut first. Find the Dew hanging from a leaf, but leave the water collection until you have the kettle. Continue along the path to find the Tukoni behind the hazelnut bush. This character wants something that plays music, so keep that request active while exploring the rest of the route.
Continue through the western area to collect the Red Paint with Brush, then climb the slope. Inspect the half-drawn track and the canvas at the top of the hill; the Traveller records the important visual information in the Notebook. Pick up the Coloring Pencils from the table farther left before returning to the hut.
Clear the east side and complete the two NPC trades
From the hut, travel right and collect the Kettle from the table. Continue past the blueberry bush to the sitting area, where the Music Player and Missing Button are available. Keep going right until you reach the Tukoni behind the grapevines. Give this character the Red Paint with Brush to receive the Red Maple Leaf.
Go up the nearby slope and pick up the Thermos. Then return to the Tukoni behind the hazelnut bushes and hand over the Music Player. The reward is the Hazelnut Leaf. These two deliveries matter because they provide the leaf item and travel container needed for the chapter’s tea preparation chain.
Make the Chapter 1 tea correctly
Return to the Dew and drag the Kettle onto it to collect water. Place the filled Kettle on the stove near the hut. In the inventory, combine the Herb with the Teabag, then add that combined tea item to the heated Kettle. Next, combine the Hazelnut Leaf with the Thermos, and use the prepared thermos with the finished kettle.
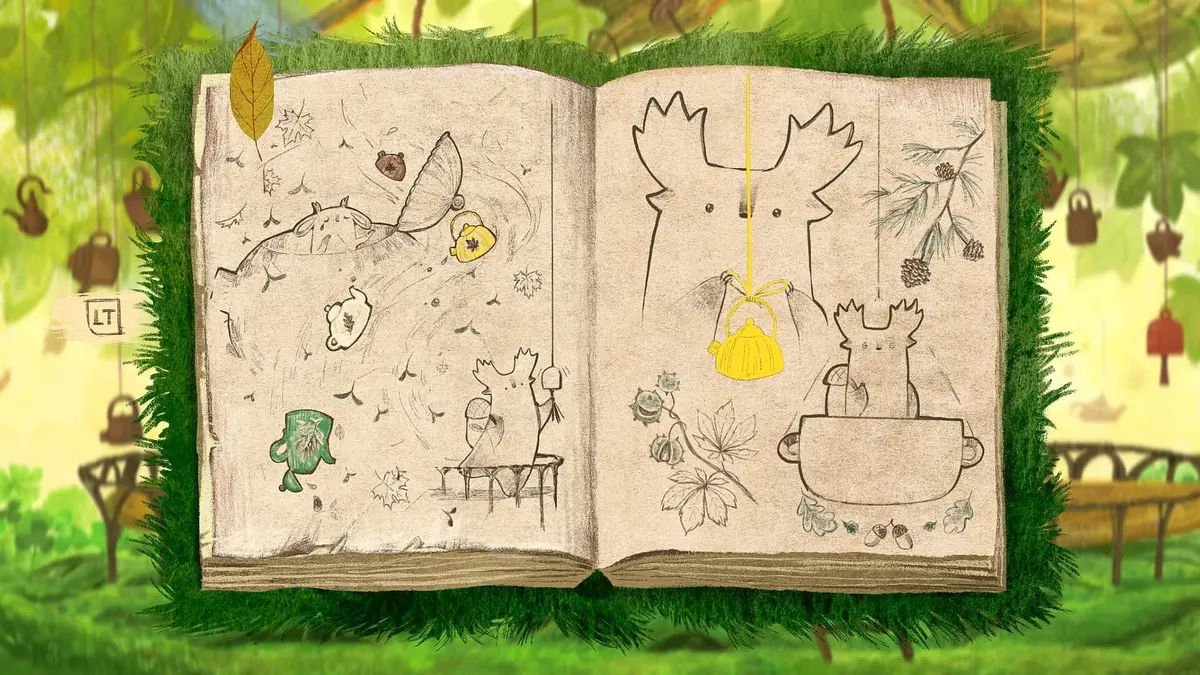
The common Chapter 1 trap is attempting to use the Herb, Teabag, Thermos, or leaves as separate click actions. The recipe advances only when the ingredients are combined and physically placed on the relevant object. If the tea chain appears stalled, check whether the Kettle has water and whether the Herb and Teabag have been merged in the inventory.
Open the chest and leave prepared
Use the Missing Button on the chest near the hut, then apply the chapter’s visual clue information to its combination. The lock is meant to be read through the game’s artwork and Notebook observations, so study the recorded drawing rather than cycling combinations blindly. With the chest solved and the tea supplies prepared, Chapter 1’s travel setup is complete.
Chapter 2 Walkthrough: Tukoni Village, Teapots, and the Cabinet
Chapter 2 moves the route into Tukoni Village and makes the game’s request-and-reward structure more important. Explore every house fully before following the next exit. The chapter revolves around collecting teapots, combining the appropriate items, helping residents, and using the resulting trade items to acquire a Lantern and the Green Teapot.
Start by identifying every loose teapot and every household puzzle in the village. Teapots are progression objects rather than background decoration, so pick them up even if their immediate destination is unclear. When an NPC requests help, check whether a teapot, a trade object, or a repair item has appeared in your inventory after the previous interaction.
Repair the pillow before chasing the cabinet solution
One of the key village tasks is repairing a pillow with the Sewing Kit. Treat this as a direct placement puzzle: select the Sewing Kit and drag it onto the damaged pillow rather than searching for a separate crafting menu. Complete the repair as soon as both pieces are available, because it clears an NPC request and keeps the chapter’s item-trade chain moving.
The cabinet uses a combination lock. Look around the same interior for a visual arrangement, repeated symbols, or a clearly ordered environmental clue before touching the lock. The intended answer comes from what the room shows you. A cabinet code in Tukoni is generally an observation test, so random attempts waste time and can make it harder to remember which symbols you have already checked.
Chapter 2 checklist
- Search each village house for teapots and small trade items.
- Combine teapot-related items when the inventory presents compatible objects.
- Trade the required objects to obtain the Lantern and Green Teapot.
- Use the Sewing Kit directly on the damaged pillow.
- Read the room’s visual clue before entering the cabinet combination.
- Revisit NPCs after every successful delivery for the next item or route trigger.
Chapter 3 Walkthrough: Portal Area, Storybook Pages, and Tea Ingredients
Chapter 3 begins after reaching a new area through the portal. Its structure is broader than the village section: you are helping new characters while gathering Storybook Pages, Tea Herb, and the tools required to move through the location’s environmental puzzles. Do a full pass of the portal area before committing an item to a single request, because several tasks overlap.
Prioritize Storybook Pages whenever you spot them. They are easy to treat as scenery because they fit the illustrated environment, yet they are major quest pickups. Tea Herb and its related tools should be collected on the same first pass, then used only when the relevant brewing or delivery interaction is ready.
Solve the mailbox fruit order from the visible sequence
The mailbox puzzle reinforces the game’s image-first rule. Find the fruit clue, note its displayed order, and enter that order at the mailbox. Keep the sequence in the same direction shown by the art. If the mailbox does not react after input, back out, compare the fruit icons again, and verify that you have interacted with the mailbox itself after setting the selection.
Handle the rope bell and wind puzzle as an object-placement task
For the rope bell and wind-related interactions, collect the necessary parts first and place them onto the visible mechanism. These puzzles become much clearer once the device has all of its physical components. Inspect the resulting animation, direction cue, or icon pattern before making the next move; the environment shows the intended order.
Do not leave the mushroom gate short of its full count
The forest mushroom sequence is a frequent collectible checkpoint. Some mushrooms are hidden behind foreground leaves, and progress requires the complete set rather than an approximate total. Search the edges of the screen and move any leaf that looks unusually layered over an object.
At the mushroom sorting gate, place 3 small mushrooms, 1 medium mushroom, and 2 large mushrooms into the right-side lines, then pull the lever. A misplaced size or one missing hidden mushroom leaves the device inactive. Count each group before pulling the lever instead of swapping pieces repeatedly.
Chapter 4 Walkthrough: She-Bear’s Party, Pie, and Your Own Blend Tea
Chapter 4 is a larger cozy-logistics puzzle built around helping the She-Bear prepare for a party. The chapter combines ingredient gathering, tool repair, pie baking, and special tea brewing. Its main rule is simple: collect every visible party-related object before starting the cooking steps, because the required tools are spread across the area and several are easy to overlook.
Your key Chapter 4 pickups include the Yo-Yo, Strainer, Grinder parts, Bat, and Key. Each belongs to the larger preparation chain. If an interaction point appears unusable, check whether one of these objects needs to be delivered, assembled, or used to open the next container.
Collect tools before baking the pie
Do a full route around the party area and gather the Yo-Yo, Strainer, Grinder parts, Bat, and Key before committing to the pie station. The pie objective is easier once every tool is already available because the chapter can otherwise send you back through completed rooms for one overlooked component. Match each item to the obvious object or character request rather than trying to combine unrelated party supplies in the inventory.
Finish the grinder and tea chain
Assemble the Grinder parts at the grinder before expecting it to process ingredients. Once the tool is functional, follow the visual recipe sequence for the special tea, Your Own Blend. Keep the Strainer available for the tea-preparation stage, and inspect the brewing station after every ingredient placement. The final delivery works as a completed drink interaction, so prepare the tea fully before dragging it to its recipient.
Chapter 4 stall fixes
- If the pie station lacks an action, search for a missing party tool, ingredient, or access item such as the Key.
- If the grinder does not work, confirm that every Grinder part has been installed on the machine.
- If the tea sequence stops, check for the correct prepared ingredient and use the Strainer at the appropriate brewing step.
- If an NPC repeats a request, drag the completed object directly onto that character instead of selecting it with a single click.
- If a route feels empty, inspect foreground props again; small objects can blend into the illustrated scenery.
Best Full-Run Routine for Chapters 1-4
For a smooth run, keep one rule in mind: every chapter is a chain of visible requests, hidden pickups, item combinations, and direct deliveries. Clear a screen before moving on, use the Notebook whenever an image-based lock appears, and drag finished inventory objects onto their targets. That routine carries you from Chapter 1’s travel tea through Chapter 2’s village trades, Chapter 3’s portal puzzles, and Chapter 4’s pie-and-tea party preparation without unnecessary backtracking.
FinalBoss // Gear
Level up your setup
01Top-rated gaming headsetson Amazon→02High-refresh gaming monitorson Amazon→03Gaming chairson Amazon→04Discounted game keyson Kinguin→Affiliate links · As an Amazon Associate, FinalBoss earns from qualifying purchases.
Want to Level Up Your Gaming?
Get access to exclusive strategies, hidden tips, and pro-level insights that we don't share publicly.
Ultimate Guide Strategy Guide + Weekly Pro Tips