
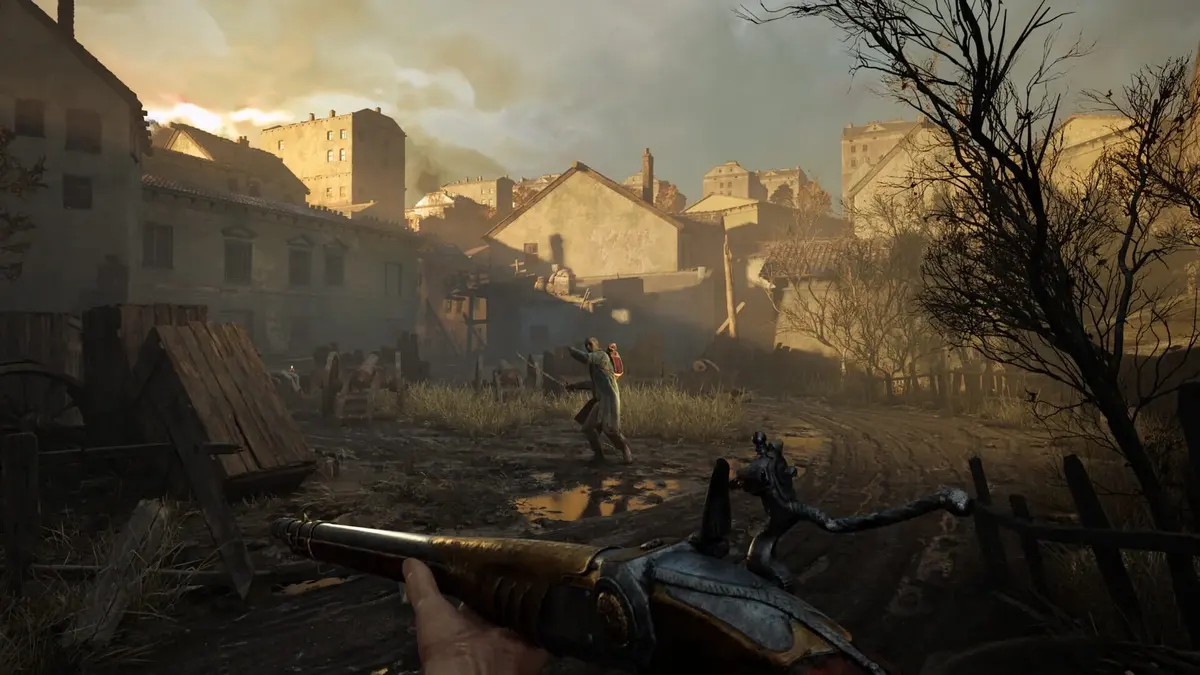
An enemy winds up while your Saber is mid-swing. You cannot cancel that attack into a parry, so an extra hit can leave you committed when you need to defend. Keep your opening exchanges short: block an ordinary attack, counter during the opening, and leave enough Endurance to handle the next swing.
That habit makes the early skill choices much clearer. Build enough Endurance to attack and defend in the same exchange, keep the Saber for its forgiving blocking style, and bring out the Rapier when precision matters. Your first upgrades should support those actions before you chase stronger critical hits.
Table of Contents (6)
Best early skills: Endurance first, then cheaper defensive exchanges
Valor Mortis uses skill purchases when you level up rather than a conventional spread of Soulslike attributes. For an early Saber-focused build, work through these priorities. This is an opening-hours recommendation; you can redistribute points later when another combat style suits you better.
| Priority | Skill investment | What it solves |
|---|---|---|
| First | Maximum Endurance | Gives attacks, blocks, and dodges more room before you exhaust your resources. |
| Next | Blocking and Melee Endurance Cost | Makes repeated Saber exchanges less expensive, helping you defend after attacking. |
| Then | Health | Adds a buffer against unfamiliar attacks once your basic Endurance demands are covered. |
| After the defensive foundation | Nephtoglobin improvements | Supports more frequent use of Transmutation powers. |
| When parries become dependable | Parry efficiency and posture-related upgrades | Strengthens the route from successful defense to stagger and critical attacks. |
Make room for Amber early. The first five Amber slots become available at levels 1, 3, 5, 7, and 9. Unlocking them gives you space to equip the Amber you find, including Surplus Amber for Catalyst farming. Those early milestones deserve attention alongside your core combat skills.
If you settle into Rapier parries rather than Saber blocks, reconsider how much you are investing in Blocking. Skill points can be reset through the level-up options at a Lantern, but respeccing costs Catalysts and becomes more expensive as your level rises. Adjust a build that no longer fits instead of continuing to buy skills for a weapon you have stopped using.
Saber or Rapier: choose around the enemy in front of you
You begin with the Saber and a pistol, then obtain the Rapier very early. The Rapier is excellent for straight-line pokes, weak points, and parrying, but it lacks the Saber’s blocking option. Switching to it changes your defensive rhythm as well as your attacks.
| Weapon | Best early use | Important limitation |
|---|---|---|
| Saber | Learning enemy patterns, blocking ordinary attacks, and counterattacking safely. | Long attack commitments can leave you unable to parry an incoming swing. |
| Rapier | Precise weak-point attacks and encounters where you can reliably parry. | No Saber-style block; you need to commit to parrying or dodging. |
| Pistol | Pulling individual enemies, hitting exposed weak points, and dealing with distant threats. | Uses ammunition that is better saved for shots which change the encounter. |
Keep the Saber as your learning weapon rather than replacing it immediately. Bring out the Rapier when a vulnerable point is awkward to reach with a broad swing. Against a group, use the pistol to draw an enemy into a manageable fight before committing to melee.
Combat habits that preserve health and healing charges
Block ordinary attacks, then counter promptly. An immediate counterattack restores health lost while blocking. That gives the Saber a useful sustain loop, but the recovery is tied to blocked damage: do not assume any hit can be healed back by swinging at the enemy.
Dodge red-glowing attacks. Avoid trying to absorb them with a block. A perfect dodge triggers brief slow motion and creates an opening for a heavy counter hit, giving you an offensive reward for avoiding the attack cleanly.

Practice parries against isolated enemies. There is no strong, flashy visual cue to do the timing for you; read the attack animation. Parries and hits fill an enemy’s posture meter, and filling it staggers the target for a critical attack. Against several enemies, a failed parry can leave another attacker free to hit you, so separate the group before practicing.
Target glowing lambent blisters. These pustules are weak points: shooting them deals extra damage and yields Nephtoglobin, the resource that fuels Transmutations. Melee attacks also replenish it. Purple drops from defeated enemies refill Nephtoglobin, while gold drops refill ammunition, so watch what falls instead of firing through every encounter.
Use Fire Transmutation where enemies bunch up. Burning enemies become vulnerable to finishers, and igniting an explosive carried by an enemy detonates it. Doorways are particularly useful because they concentrate approaching targets instead of allowing them to surround you.
The environment offers more ways to break up a fight. Shoot glowing red-orange nodes to reveal blocked paths or activate traps such as rolling carts and falling boxes. When a ledge gives you access to a plunge attack, use that opening rather than dropping into the middle of a group without attacking.
Spend Catalysts before exploration, not after a successful run
Catalysts serve as both experience and currency. Death drops your carried supply, and dying again before recovering it can erase that stash permanently. Once you have enough for a useful skill or upgrade, return to a Lantern and spend it before testing an unfamiliar route.
Keep Catalyst Clots unconsumed until you are ready to spend their contents. Consuming them adds to your carried Catalysts, exposing that value to the same death-and-recovery risk. There is little benefit in opening them immediately before exploring.
A failed boss attempt has one helpful detail: your dropped Catalysts spawn outside the arena. Recover them and level up before re-entering if the total buys an improvement. You do not have to defeat the boss to retrieve that progress.
Lanterns restore health and Ferrofluid Flask charges, but resting also respawns non-boss enemies. Plan your return around that reset. Consumables already used remain spent after death, so repeated attempts can drain supplies even when you recover your Catalysts.
Leave green poison gas routes alone during the opening hours. They require a later gas-passing ability; additional Health or repeated attempts will not provide the traversal tool you are missing.

Farm Catalysts at the barn with Fire Transmutation
The early barn encounter works well as a farming loop because its doorway lets you funnel enemies into Fire Transmutation. Approach until the enemies begin moving toward you, keep their approach concentrated at the doorway, and burn the cluster. Finish survivors with controlled Saber attacks rather than chasing into the pack.
The melee cleanup helps replenish Nephtoglobin for your Transmutation use. If you are arriving without enough resource to burn the group, replenish it through melee attacks or enemy weak points before committing to the pull.
Find and equip the two copies of Surplus Amber to improve Catalyst earnings per kill. The early Amber-slot unlocks make room for that farming setup. You can then change your equipped Amber when you return to progression or a boss attempt.
Resting at a Lantern replenishes your Flask and respawns the non-boss enemies for another run. Farm toward a specific purchase, then spend the Catalysts. If the doorway pull keeps breaking down and forcing you to use consumables, fix the grouping before repeating it; the value of this route is a controlled fight you can reproduce.
Upgrade your main weapon and fix the right Flask problem
Defeating the first boss, General Loair, unlocks the Abandoned Church hub. James’s Iron Bench handles weapon upgrades, while Louis’s Laboratoire handles Transmutation and Ferrofluid Flask improvements. The church also gives you access to trading and fast travel.
Spend your first weapon materials on the sword you are actually using most. Weapons have ten upgrade levels, and spent upgrade materials cannot be recovered. Keeping both the Saber and Rapier useful does not require splitting every early material evenly between them.
Your Ferrofluid Flask begins with three charges, replenished only at Lanterns. Its two upgrade types address different problems: an Empty Flask increases charges, while a Flask Power Upgrade increases healing potency.
- Prioritize charges when you run out before the next Lantern. More uses give you additional chances to recover from separate mistakes while learning a route.
- Prioritize potency when each use leaves too much health missing. Stronger healing becomes more valuable when you can survive between openings but need each safe drink to restore more health.
Before consuming a charge after a blocked attack, take the immediate counterattack if the opening allows it. Recovering that blocked damage preserves the Flask for hits you cannot reclaim.
FinalBoss // Gear
Level up your setup
01Top-rated gaming headsetson Amazon→02High-refresh gaming monitorson Amazon→03Gaming chairson Amazon→04Discounted game keyson Kinguin→Affiliate links · As an Amazon Associate, FinalBoss earns from qualifying purchases.
Want to Level Up Your Gaming?
Get access to exclusive strategies, hidden tips, and pro-level insights that we don't share publicly.
Ultimate Guide Strategy Guide + Weekly Pro Tips