
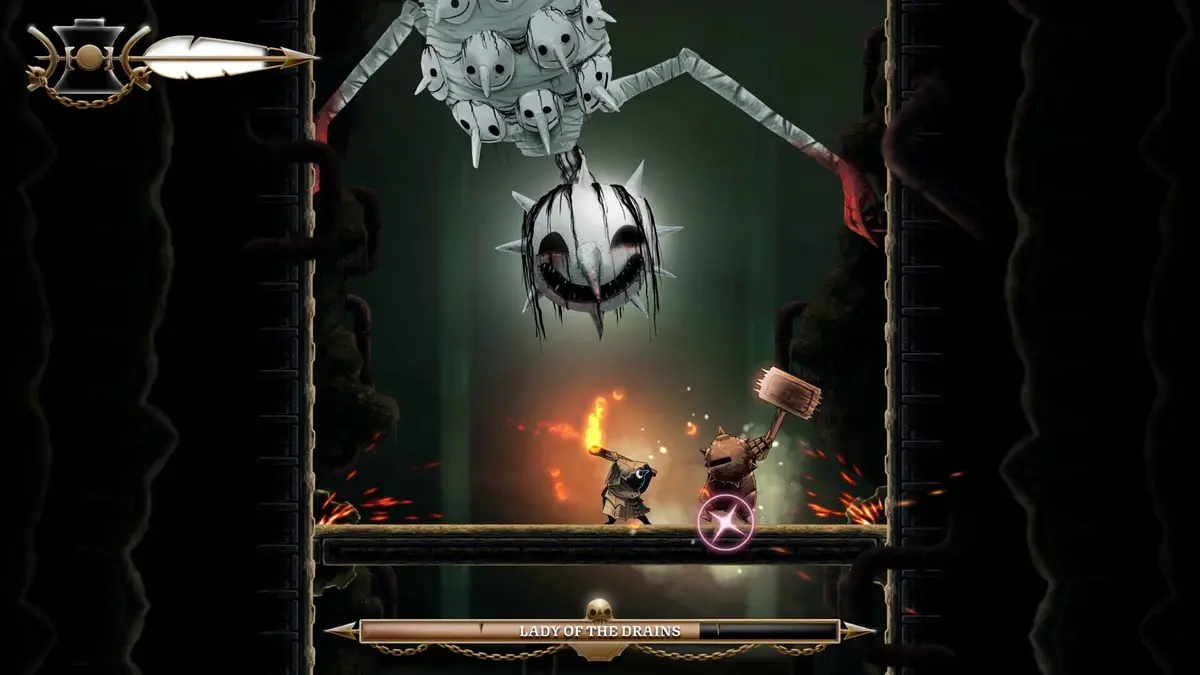
The Drains only fully opens after you get Wind Ride, collect all 3/3 Elevator Parts, and manually repair the Broken Elevator. That lift is the gate to Lady of the Drains, the Golden Feather, and the route onward toward Midnight Drench.
The clean route is simple once you stop treating every dead end like a missed jump: Climb first, Wind Ride second, Elevator Parts third, then the Broken Elevator and Lady of the Drains. If your counter is stuck at 2/3, stop searching the blocked pit after the upper branch. The final part is on the far-left lower route.
Before you descend, bring the Flaming Vessel, save at the Drains Tent, and make sure the elevator itself reads 3/3 Elevator Parts. Collecting the parts does not repair the lift automatically. You must go back and interact with the elevator.
Table of Contents (11)
The Drains Progression Checklist
- Defeat The Swarm and obtain Climb by dropping into the next area.
- Use Tent Travel to return to the Tent near The Bog, then head left to the large hole leading into The Drains.
- Reach the southeastern route and collect Wind Ride.
- Finish the Wind Ride tutorial so you can reliably ride drafts by holding Jump.
- Collect Elevator Part 1 on the western spikes route. The counter should read 1/3.
- Collect Elevator Part 2 in the upper shaft above the Broken Elevator. The counter should read 2/3.
- Backtrack to the far-left lower branch and collect Elevator Part 3. The counter should read 3/3.
- Return to the Broken Elevator in the central Drains area.
- Interact with the elevator after the display shows 3/3.
- Ride down and fight Lady of the Drains.
- Collect the Golden Feather after the fight and continue toward Midnight Drench.
The key trap here is assuming every gap is a pure platforming test. The Drains is built around movement gates. A vertical wall, high exit, spiked opening, or distant ledge usually means the route expects Climb, Wind Ride, or both used together.
Enter The Drains With Climb and Tent Travel Ready
After defeating The Swarm, drop into the next area to unlock Climb. That matters immediately in The Drains because the zone keeps asking you to recover from drops, scale walls after riding an air current, and finish routes that Wind Ride alone cannot complete. Wind Ride gives you lift and lateral control in drafts. Climb is what turns that positioning into progress.
Once Tent Travel is available, open the map, select an activated Tent, and hold the assigned warp button. The useful return point for this section is the Tent unlocked before the Hunter’s Cabin. From there, go left until you reach the big hole in the ground. That descent leads into The Drains.
Activate the Drains Tent as soon as you reach it. That is the practical checkpoint for the whole sequence: collecting missed elevator parts, topping up before the boss, and retrying Lady of the Drains without repeating the full route from elsewhere.
Get Wind Ride Before Hunting Elevator Parts
Wind Ride is in the southeastern section of The Drains. Its input is straightforward but important: stand in a wind draft and hold Jump. Glimmer will ride the current instead of performing a normal jump, which lets you rise through shafts or carry across gaps.
You need Wind Ride for the raised component routes. It is what gets you through spiked openings, across hazard-lined rooms, and into upper branches around the elevator network. When a current carries you toward a wall, do not jump away too early. Let the draft do the work, drift close enough to the wall, then use Climb to convert that approach into height.
This is the point where a lot of wasted time starts. If you try to search every elevator branch before getting Wind Ride, The Drains looks more obscure than it is. Several routes that appear broken are simply movement-gated.
Elevator Part 1: Western Spikes and the Pendulum Route
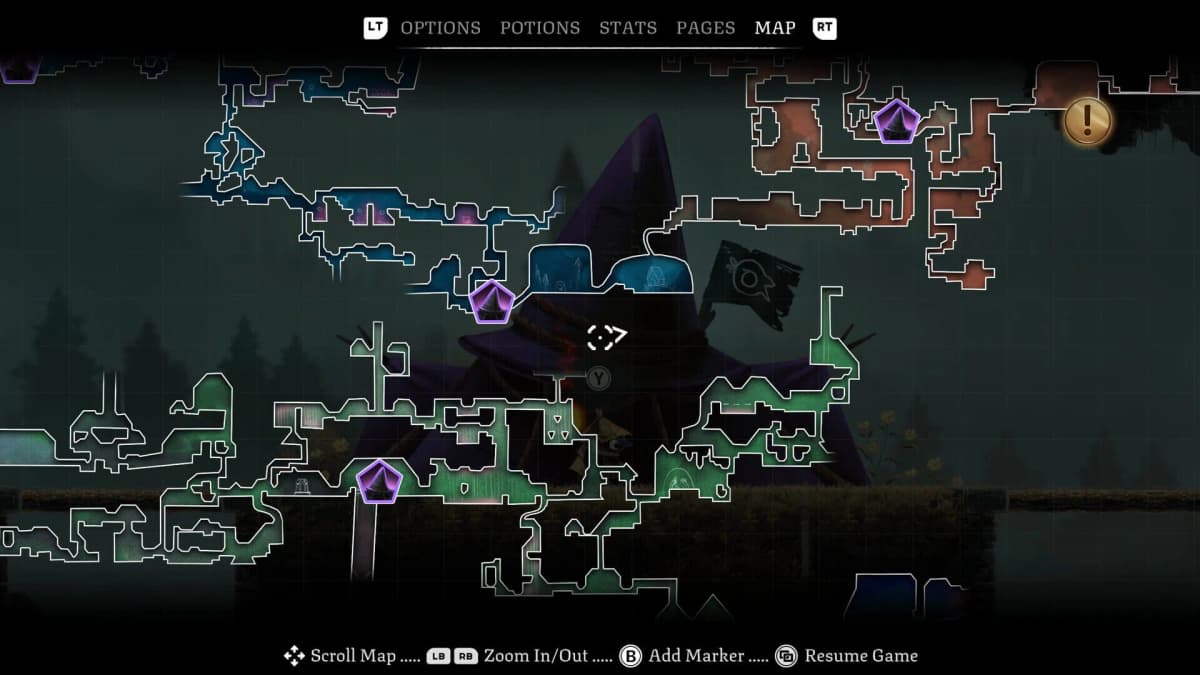
After learning Wind Ride, head back toward the western side of The Drains. The first Elevator Part sits past the elevated spiked section, roughly around 8766, 10758. This route is the cleanest reminder that Wind Ride is about positioning, not panic-jumping.
- Find the western air current that feeds into the opening above the spikes.
- Hold Jump to ride the draft cleanly through that opening.
- Enter the next room and cross the section with the spike pendulum.
- Take the left exit.
- Use the next draft to rise instead of trying to jump up the shaft normally.
- Land on the first ledge on the right.
- Slide through the opening, then use Climb on the wall beyond it.
- Continue to the pickup at the end of the route.
When you grab it, your elevator counter should update to 1/3. If it does not, you are not at the actual pickup yet. Keep following the route until you hit the component itself rather than turning around at the last safe ledge.
The pendulum room is where players often rush and create their own problem. Let the draft place you in the right lane before committing to the next move. This section is much easier when you stop forcing maximum-distance jumps through hazards.
Elevator Part 2: Upper Shaft Above the Broken Elevator
The second component is in the upper section of the room above the Broken Elevator. This is the pickup that should push the display from 1/3 to 2/3, and it is the point where the route starts misleading players toward the wrong follow-up branch.
- Return to the area around the Broken Elevator.
- Use Wind Ride to enter the high shaft above it.
- Stay on the elevated route rather than dropping back to the ground-level platforms.
- Take the small eastern side room off that upper section.
- If you see the moving candied spider egg, follow that route upward.
- Continue toward the area near Eagle’s memorial.
- Pick up the component and confirm the counter now reads 2/3.
The important landmark here is height. If you are still wandering the floor around the elevator, you are below the route you need. Get back into the upper shaft and keep thinking vertically.
This is also where the famous fake lead shows up. After this pickup, you can run into a blocked pit or a branch that looks like it should continue. Do not burn time on it. That path is not how you reach the last part.
Elevator Part 3: The Far-Left Lower Branch That Fixes the 2/3 Problem
The third Elevator Part is the one that strands most players at 2/3. Its location is tied to the far-left lower route, not the blocked pit after Part 2. The pickup is associated with the area around 10762, 10234, but the important part is how you reach it: by backtracking through the normal platform route and dropping into the last unexplored lower branch.
- After collecting Part 2, stop pushing deeper into the blocked pit.
- Return to the main Drains platform route.
- Move back through the explored rooms and go all the way left.
- Look for the last unexplored downward path on that side.
- Drop into that lower branch and follow it through.
- Continue until you reach the final Elevator Part.
- Pick it up and confirm that the display has advanced to 3/3.
This is the checklist item that needs to match your counter. If you already have Part 1 and Part 2, the next successful pickup must take you to 3/3. If it does not, you are still on the wrong route.
There is no extra key hiding this part, and you do not need to clear some separate golden gate first. The route is easy to miss because the previous search pattern trains you to look upward and east. The last part is found by deliberately going back and taking the lower-left detour instead.
Repair the Broken Elevator
The Broken Elevator is in the central portion of The Drains, around 9763, 10652. Once the display reads 3/3 Elevator Parts, go back to the lift itself and interact with it. That interaction is the repair step. The game does not auto-complete it when you collect the final component.
The practical repair sequence is short: check the display, stand at the elevator, interact, and then take the now-functional lift down. There is no separate boss key, no fourth component, and no extra side requirement between 3/3 and the descent.
If the elevator still does not descend, assume one of two things first: either the display is not actually at 3/3, or you have not interacted with the lift after collecting the last part. Those are the real sticking points in this section.
Why the Elevator Will Not Move
- The display says 1/3 or 2/3: one component is still missing. Retrace the western spikes route, the upper shaft above the elevator, and the far-left lower branch.
- You kept searching the blocked pit after Part 2: turn back. That is not the route to the final component.
- You have 3/3 but nothing happened: return to the Broken Elevator and interact with it manually.
- You can reach a draft but not the exit: stay in the current longer, drift toward the wall, then use Climb to finish the ascent.
- You tried this before getting Wind Ride: several of the routes are still movement-locked without it.
Lady of the Drains Boss Preparation and Fight
Lady of the Drains waits directly below the repaired elevator, around 9757, 10737. This is a two-phase fight, and the best prep is simple: save at the nearby Tent, refill what you can, bring the Flaming Vessel, and go in knowing that the fight is more about discipline than greed.
- Save at the Drains Tent before touching the elevator.
- Confirm the lift reads 3/3 and is fully repaired.
- Top up health, ammunition, and other consumables before the one-way descent.
- Keep the Flaming Vessel ready, but do not throw it during panic movement.
- Take clean openings, then reset your position instead of forcing one extra hit.
Phase One: Spike Balls, Spinning Nail, and Vanishing Pressure
In the first phase, prioritize spacing and take damage opportunities only when the arena is clear. Do not overcommit between attacks. Lady also disappears at points, which shifts the threat to spike balls rising from below. The safe mindset here is movement first. Sliding or simply moving away is enough to deal with a lot of the pressure if you stop trying to stand in and trade.
This is the phase where overcommitting starts the collapse. If you land a clean hit window, take it, then be ready to move. When she vanishes, stop attacking and focus on spacing because the rising hazard is what catches players who are still thinking about damage instead of survival.
Phase Two: Jump the Shockwave and Use Flaming Vessel in Stable Windows
Phase two adds the most important tell in the fight: Lady’s face splits, creating a ground shockwave that you need to jump over. That is the moment to respect the pattern instead of chasing damage. See the split, prepare the jump, clear the shockwave, then punish only if the arena is stable afterward.
The Flaming Vessel is strong here, but the timing matters. Use it after Lady finishes an attack or during a calm window where your feet are planted and your next movement is obvious. Do not throw it while you are already correcting a jump, dodging the shockwave, or scrambling away from hazards. That is the most reliable way to lose control of the attempt.
In other words: the Flaming Vessel is for pressure and recovery when the fight briefly settles, not for panic-throwing while the screen is asking you to jump, slide, and reposition at once. If a window looks messy, skip the vessel and keep the phase clean.
Defeating Lady of the Drains awards the Golden Feather and opens the next stretch toward Midnight Drench. From there, progression continues through the nearby route and deeper toward the Western Gate and the path leading to Dessicated Castle. But the real gate here is simpler than the layout first suggests: get Wind Ride, make the counter read 3/3, repair the elevator yourself, and do not let that blocked pit talk you into another half hour of searching.
FinalBoss // Gear
Level up your setup
01Top-rated gaming headsetson Amazon→02High-refresh gaming monitorson Amazon→03Gaming chairson Amazon→04Discounted game keyson Kinguin→Affiliate links · As an Amazon Associate, FinalBoss earns from qualifying purchases.
Want to Level Up Your Gaming?
Get access to exclusive strategies, hidden tips, and pro-level insights that we don't share publicly.
Ultimate Guide Strategy Guide + Weekly Pro Tips