
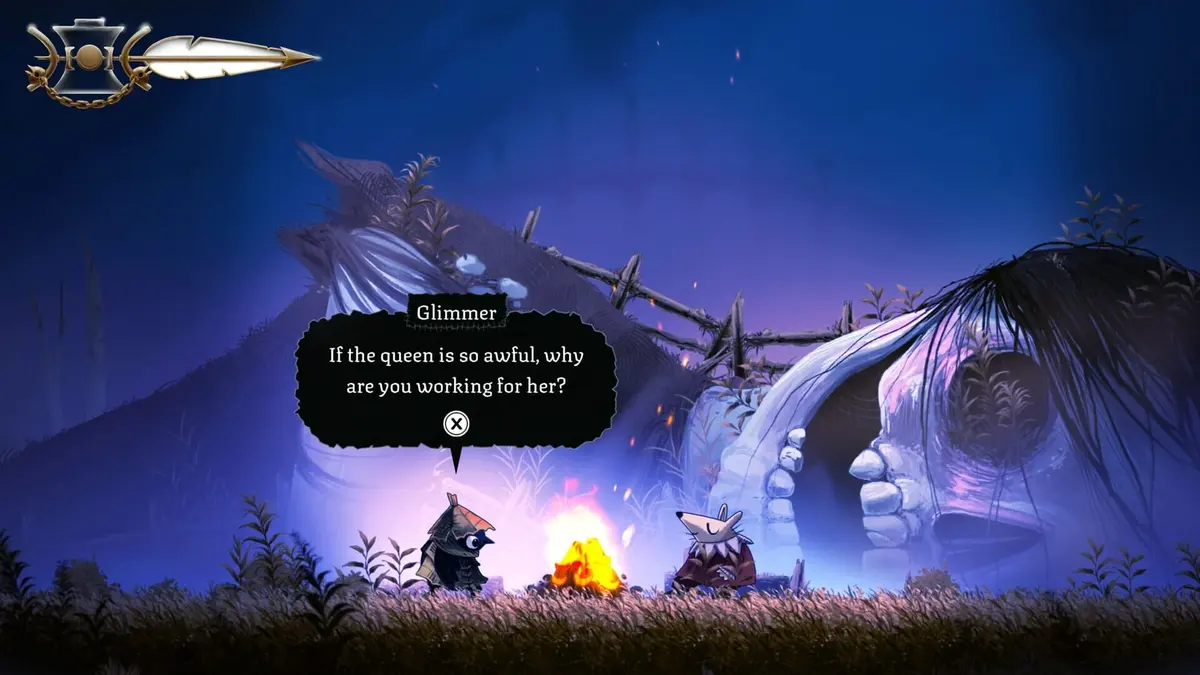
Well Dweller starts with a familiar exploration rhythm: a blocked wall, shaft, or gap signals that the next movement ability is nearby. Parts 2 through 5 make that structure far stricter. The clean continuation runs from The Bog to The Drains, then through Gravenvalley and into Desiccated Castle. The important habit is to clear the new routes unlocked by each ability before committing to the next gate; doing so keeps trinket slots, currency, healing, and map progress close to the main path.
Before heading back into the deeper zones, set up the tools that prevent wasted exploration. Enable the minimap, use every map station you reach, and visit Looter when a tent gives you access. The Glass Eye trinket makes nearby hidden areas translucent, which is especially valuable in rooms that look like simple dead ends. The Weathered Coin increases the currency dropped by defeated enemies, so it pays for itself during any full-zone sweep. Keep the Flaming Vessel ready as well: toss it toward a close enemy, then immediately swing your melee weapon to bat it into the target. That turns an awkward projectile into a dependable short-range ranged hit.
Table of Contents (5)
Part 2: Clear The Bog, Beat The Swarm, and Unlock Climb
After the Night Garden and Hunter’s Cabin stretch, return the berries to Mother and follow the route to The Bog. This is the first area that makes ability-gating impossible to ignore. You can explore its lower and side rooms, but the upper routes and long vertical shafts are deliberately out of reach until you defeat The Swarm and collect Climb.
- Activate Ilda’s map station when you enter The Bog.
- Check accessible side rooms for healing, currency, and trinkets.
- Head west until you reach The Swarm’s arena.
- Defeat The Swarm, leave through the western room, and descend.
- Take the egg and finish its tutorial to unlock Climb.
The Swarm is the point where players commonly lose health trying to force quick melee damage. The encounter is built around crowd control and safe movement, not standing under the main mass and trading hits. Stay on the outer edge of the arena, keep the smaller enemies from boxing you in, and save your strongest ranged or area attack for the moments when the group compresses into a predictable cluster. A missed attack window costs very little; getting surrounded usually costs a heal.
Once The Swarm falls, do not rush out of The Bog. Climb is your first major cleanup key. It lets Glimmer scale straight walls, though the stamina limit still matters. Start with the upper rooms northwest of The Swarm’s arena, then revisit the vertical shafts and side chambers that were visibly blocked on the way in. Use short climbs between ledges and platforms. Starting a long ascent without checking for a resting point is the easiest way to fall back into a hostile room with low health.
Climb is progression equipment first and combat mobility second. Its immediate job is opening The Drains, so completing the Bog’s accessible high routes before leaving keeps the next zone from becoming a premature backtrack.
Part 3: Use Climb and Wind Ride to Restore The Drains Elevator
The Drains expand the vertical design introduced in The Bog. The central rooms are worth mapping early because the area’s major objective — the elevator — cannot be completed until all three Elevator Parts are found. Begin by opening the Climb-accessible branches around the central route. The southeast section contains the next ability chamber, and that ability changes how the entire zone connects.

Grab the egg in the southeast route and complete the tutorial to unlock Wind Ride. This ability carries you through marked wind tunnels, letting you cross gaps and reach isolated rooms that initially look disconnected from the map. Treat every new wind tunnel as part of a loop, not an exit to rush through. Its destination can place you beside an elevator part, a trinket room, or a return route to the central station.
The best elevator route is a single circuit: collect the nearest part reached through Climb, open the branches off the central drains, pick up Wind Ride, then use the wind tunnels to claim the isolated parts. Return to the elevator only after securing the third part. After returning to the Tent, repair the elevator and descend. Repeatedly heading back to the hub after every part adds travel time without producing any advantage.
| Drains objective | What opens it | Why it matters |
|---|---|---|
| Southeast ability chamber | Climb | Unlocks Wind Ride and access to isolated routes. |
| Remote side branches | Wind Ride | Contains the remaining elevator route connections and loot rooms. |
| Deep Drains descent | All three Elevator Parts | Restores the elevator and advances the main route. |
| Lady of the Drains arena | Repaired elevator and zone progression | Tests vertical spacing before the wider kingdom opens. |
Lady of the Drains is a two-phase fight where the arena matters as much as the boss. Keep space both horizontally and vertically, avoid settling directly beneath her, and preserve enough stamina for a Climb escape when the ceiling or floor becomes unsafe. The Flaming Vessel is particularly useful here because it both refills the vessel meter and deals damage. Throw it when the boss’s movement pattern ends, then follow with a safe melee strike if the opening is close enough. Chasing her during repositioning is the risky play; wait for the arena to stabilize, then punish.
Midnight Drench is worth a brief stop after this stretch. Moving forward only a few steps in the area reveals a Golden Feather, making it one of the fastest major progression pickups available once the route is open.
Part 4: Gravenvalley Is the Route-Planning Checkpoint
Gravenvalley changes the pace. The Bog and The Drains have a strong internal route; Gravenvalley starts asking you to connect tents, events, gates, and newly available movement tools. Use Tent Travel aggressively here. Once the western castle gate is opened with its switch, travel to the Hunter’s Cabin rather than retracing the entire valley on foot.
The key progression chain runs through bell-activated platforming and the ticket-gated witch-burning event. Lida provides the plan to infiltrate the event and rescue both her and Egbert, then the route escalates into the fight against Lida the Terrible. This section rewards careful environmental execution more than brute-force combat. Activate bells before attempting their platform sequences, watch which platforms have actually moved, and take the stable route instead of trying to save seconds with blind jumps.
The Docks are a valuable side route during this broader section because they offer a trinket-slot reward without an initial ability requirement. Teleport to the Gravenvalley Tent and take the route toward The Docks. At the approach, use Hover to reach the left wall, then use Climb to enter the next room. This is a good example of Well Dweller’s gate language: a wall that looks decorative often becomes a route once two movement tools are combined.

Keep Slingshot equipped when exploring Gravenvalley. It is useful as a ranged attack, but its wall-bounce utility matters for traversal as well. Later, Endless Climb removes the fatigue problem from long wall sections, while Wall Sling lets you plant the matchstick into a wall and create a temporary platform. Wall Sling comes after defeating the Dollmaker and taking the western ability route from the Dollmaker’s House. Place the platform before stamina reaches its final sliver; waiting until the panic moment leaves too little time to recover height.
Part 5: Open Desiccated Castle, Rescue Egbert, Then Loot Methodically
Part 5 begins by opening the gate to Desiccated Castle and rescuing Egbert. The castle is a better place to slow down than to sprint through. Its rewards are tied to environmental puzzles, enemy clears, and a stealth section, so treat it as a compact loot expedition rather than a straight line to the next story beat.
- Speak with Looter after rescuing Egbert and check the available purchases before spending currency elsewhere.
- Work through the switch-and-pillar rooms one puzzle at a time, confirming each change in the room before moving on.
- Clear the enemies tied to the trinket-slot reward before leaving that branch behind.
- Enter the stealth section with full awareness of your retreat route; alerting enemies in a narrow corridor can turn a clean path into a health drain.
- Use Glass Eye near suspicious castle walls, particularly after a puzzle room or combat reward appears to end abruptly.
Desiccated Castle is where the earlier preparation starts paying off. Extra trinket capacity gives you room to pair a combat tool with an exploration tool, such as a damage-focused option alongside Glass Eye or Weathered Coin. That flexibility is more useful than treating every slot as pure damage, because the castle’s hidden spaces and structured rooms still reward thorough exploration.
Use a Two-Pass Loot Route in Every Major Zone
The fastest way through this section of Well Dweller is to separate progression from cleanup. The first pass exists to beat the gatekeeper, collect the mandatory ability, restore the key mechanism, or open the next gate. The second pass uses that fresh ability to clear visible dead ends, hidden walls, upper rooms, and trinket branches. Mixing both jobs constantly leads to the worst kind of backtracking: revisiting an area three or four times because you left during the exact moment its new routes became available.
| Zone | Progression pass | Cleanup pass |
|---|---|---|
| The Bog | Defeat The Swarm and unlock Climb. | Clear the upper northwest rooms and vertical shafts. |
| The Drains | Unlock Wind Ride and collect three Elevator Parts. | Sweep wind-tunnel branches before restoring the elevator. |
| Gravenvalley | Open the castle gate and complete the event route. | Return with Slingshot, Endless Climb, and Wall Sling for high routes. |
| Desiccated Castle | Rescue Egbert and open the immediate progression route. | Finish switch puzzles, the trinket-slot branch, hidden walls, and stealth rooms. |
Looking farther ahead, the wider castle approach eventually requires all seven Golden Feathers to enter Queen’s Castle. Soar is an endgame ability, useful for reaching previously inaccessible places after the main late-game progression rather than for opening the castle itself. The practical priority before that point is still the same: secure Climb, Wind Ride, Endless Climb, Wall Sling, a reliable ranged tool, and enough trinket capacity to support the way you fight.
FinalBoss // Gear
Level up your setup
01Top-rated gaming headsetson Amazon→02High-refresh gaming monitorson Amazon→03Gaming chairson Amazon→04Discounted game keyson Kinguin→
Affiliate links · As an Amazon Associate, FinalBoss earns from qualifying purchases.
Want to Level Up Your Gaming?
Get access to exclusive strategies, hidden tips, and pro-level insights that we don't share publicly.
Ultimate Guide Strategy Guide + Weekly Pro Tips