
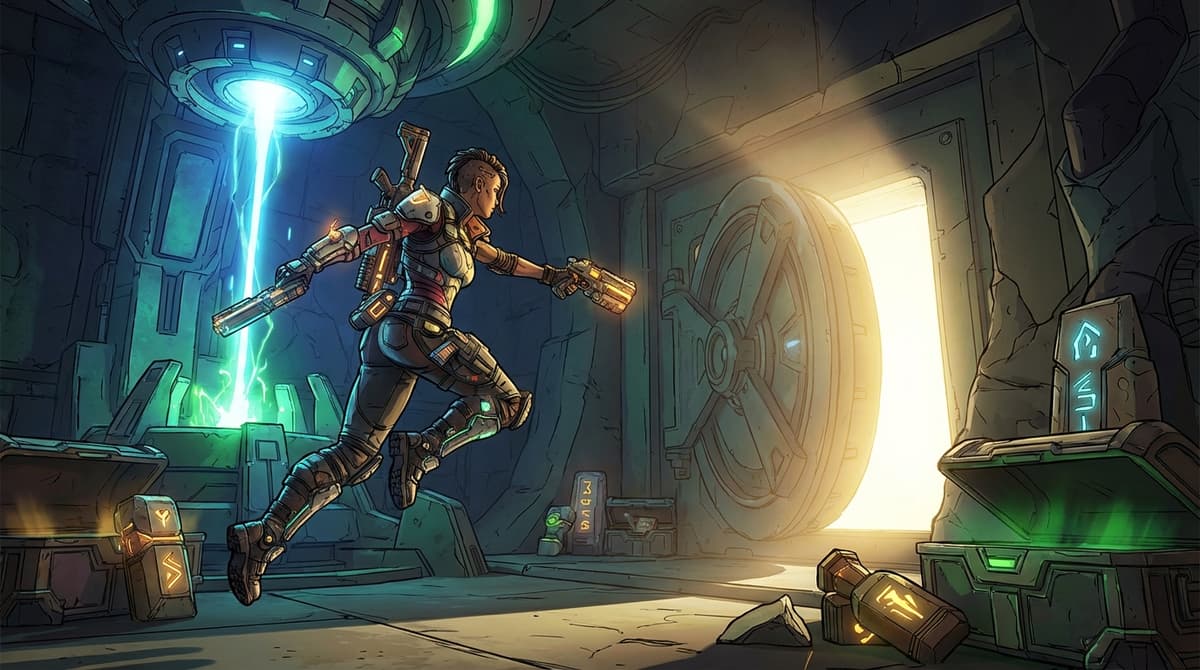
You’re Probably Missing These Borderlands 4 Vaults – Here’s How I Found Every Hidden Entrance
Why These Vaults Matter (And How I Kept Missing Them)
On my first run through Borderlands 4’s endgame, I kept rushing main missions and wondering why traversal still felt sluggish. The breakthrough came when I finally treated the vaults and their key fragments as a proper objective instead of side distractions. Once I unlocked all three primordial vaults, the mobility buffs completely changed how I moved, fought, and farmed.
This is a practical Borderlands 4 all vault locations – hidden vaults and secret areas guide built from that experience, covering:
- All 9 vault key fragment locations across the three major regions
- How to reach each primordial vault (including tricky climbs and grapples)
- Difficulty, gear requirements, and time-saving routes
- How vault symbols and hidden areas tie into your fragment runs
If you follow this route, you can reasonably knock out all three vaults in an evening, unlock both glide pack upgrades, and clean up a good chunk of exploration progress along the way.
How Borderlands 4’s Vault System Works Now
Borderlands 4 drops the old single endgame vault formula. Instead, there are three primordial vaults, one in each major region:
- The Fadefields – Arch of Inceptus vault
- Carcadia Burn – unnamed primordial vault
- Terminus Range – Arch of Origo vault
Each vault needs three vault key fragments, for a total of nine. Fragments are tucked into caves, shipwrecks, silos, and garrisons, and some demand decent platforming or good control of your grappling hook and glide pack.
The key reason these are worth prioritizing is the rewards:
- Arch of Inceptus (Fadefields) – Faster glide pack regeneration
- Arch of Origo (Terminus Range) – 50% glide pack cost reduction
Combined, these two buffs let you chain glides constantly, open up shortcuts the level designers clearly expect you to use, and give you much more vertical freedom during fights. That is why I now always target vault fragments early in a new playthrough.
Fadefields – All Fragments & The Arch of Inceptus Vault
I recommend starting with the Fadefields vault. The fragments teach you most of the core traversal skills you will need later, and the glide pack regen reward makes the other two regions feel smoother.
Prep & Recommended Route
- Safehouses to unlock: The Launchpad, Abandoned Post, The Lowrise
- Required gear: Grappling hook, basic glide pack
- Suggested order: The Howl → Coastal Bonescape / Stillshore → Wreck of the Last Great Hope → Arch of Inceptus
Doing them in this order keeps fast travel hops short and ramps difficulty nicely from simple cave fight to grappling-oriented platforming.
Fadefields Fragment 1 – The Howl (Northeast of The Launchpad)
This was the first fragment I found by accident and later realized it is actually the ideal starting point.
- Fast travel: The Launchpad safehouse
- Direction: Head northeast from the safehouse marker
- Landmark: Obvious cave entrance showing clearly on the map
Push through the cave system, clearing out the enemies as you go. There is no boss; it is just a straightforward interior fight. The fragment rests on a pedestal or raised surface deeper inside the cave.
Difficulty: Moderate. Solid warm-up combat with no tricky jumps.
Personal tip: Do not waste heavy ammo here. Save your big guns for later fragments; standard weapons are more than enough.
Fadefields Fragment 2 – Coastal Bonescape (Stillshore Village)
This fragment is simple once you know which safehouse to use. I initially approached from the wrong side of the map and wasted time fighting through extra packs.
- Fast travel: Abandoned Post safehouse
- Destination: Stillshore point of interest (small coastal village)
From Abandoned Post, move into Stillshore and clear out the ripper enemies. Head behind one of the buildings toward the back of the village and look for a crate with the fragment sitting on top.
Difficulty: Easy to Moderate. Short, open fights and a very obvious fragment once you reach the right building.
Time saver: Grab any visible vault symbols while you sweep the village. Several collectibles tend to cluster around coastal areas like this, so it is efficient to scan rooftops and walls before leaving.
Fadefields Fragment 3 – Wreck of the Last Great Hope (West of The Lowrise)
This is where my run slowed down at first. The game expects you to use the grappling hook in a specific way, and I kept missing the hatch.
- Fast travel: The Lowrise safehouse
- Direction: Head west toward the coastline
- Landmark: A tunnel-like passage formed from the wreck of a ship
Enter the tunnel. On the left side, near a red light, there is a hatch in the floor. Use your grappling hook to yank it open, then drop down into the hidden cave below. The fragment waits on its pedestal inside.
Difficulty: Moderate to Challenging, depending on how comfortable you are with grappling under pressure.
Common mistake: I originally tried to melee or shoot the hatch. It only responds to the grappling hook, so swap to it immediately when you see the red light.
Fadefields Vault – Arch of Inceptus (Cliff to the East)
With all three Fadefields fragments, the Arch of Inceptus vault marker appears on your map on an eastern cliff.
- Head east from the main Fadefields area toward the marked cliff face
- Use your grappling hook to climb up the cliff
- Clear the mangler nest blocking the path at the top
- Follow the trail uphill to the vault entrance
- Interact with the vault to begin and complete the encounter
Reward: Faster glide pack regeneration. This cuts downtime between glides and is noticeable immediately in open zones.
Estimated time: About 10–15 minutes from the cliff base through to completion, depending on how quickly you clear enemies.
Carcadia Burn – All Fragments & The Unnamed Vault
Carcadia Burn’s fragments are more spread out but individually not too bad. The trick is using the right safehouses so you are not driving in circles like I did at first.
Recommended Order in Carcadia Burn
- Start: Lopside (easiest, fast confidence boost)
- Then: Ruined Sumplands
- Finally: Judgment’s Lapse (silo climb)
Carcadia Fragment 1 – Lopside (Fuel Station)
This is one of the fastest fragments in the whole game and a great way to ease into Carcadia Burn.
- Fast travel: Makeshift Chalet safehouse
- Drive straight to the nearby fuel station at Lopside
- Mantle up onto the roof of the station
- The fragment sits on a crate at the top
Difficulty: Easy. Minimal or no combat and very obvious geometry for climbing.
Estimated time: Around 2–3 minutes from the safehouse if you head straight there.
Carcadia Fragment 2 – Ruined Sumplands (Northwest)
Here I wasted time circling the swamp until I learned the visual cue that actually matters: the gold spheres.
- Fast travel: Judgment’s Lapse silo safehouse
- From Hull’s Handbasket point of interest, head northeast
- Look for a rock cluster decorated with gold spheres
- The fragment rests on a stalagmite near those rocks, close to the water’s edge at the hill base
Difficulty: Easy to Moderate. The openness means enemy patrols can flank you, so clear the area before looting.
Tip: If you see the gold spheres, you are in the right place. Use them as your primary landmark instead of relying only on the minimap.
Carcadia Fragment 3 – Judgment’s Lapse (Silo Summit)
This one tripped me up because the platforming path is not obvious from ground level. Take it slow.
- Fast travel: Judgment’s Lapse safehouse
- Work your way up the silo structure using ladders, ledges, and platforms
- Carefully navigate each gap; do not rush jumps
- The fragment waits at the top of the silo
Difficulty: Moderate. Falling means repeating sections, but enemies are manageable.
Estimated time: About 5–10 minutes from the base, depending on how often you miss jumps.
Carcadia Burn Vault – What We Know
Once you collect all three Carcadia Burn fragments, the region also grants access to its own primordial vault. The exact in-world name and precise landmarking are less clearly telegraphed than the other two, and details can vary with patches.
What consistently happens is that a vault marker appears on your map in Carcadia Burn after collecting the third fragment. Follow that marker; it typically sits in a more central or elevated part of the region. At this point, rely on the in-game waypoint rather than vague map descriptions.
Practical advice: As soon as the third fragment is in your inventory, open the map and immediately set a custom waypoint on the new vault icon so you do not accidentally get sidetracked.
FinalBoss // Gear
Level up your setup
01Top-rated gaming headsetson Amazon→02High-refresh gaming monitorson Amazon→03Gaming chairson Amazon→04Discounted game keyson Kinguin→Affiliate links · As an Amazon Associate, FinalBoss earns from qualifying purchases.
Terminus Range – All Fragments & The Arch of Origo
Terminus Range is where your improved mobility pays off. The region leans harder on glide pack use and vertical level design, especially around silos and garrisons.
Terminus Fragment 1 – Covered Charge (Central Silo)
Covered Charge sits roughly in the middle of Terminus Range and plays like a mini traversal test.
- Head to the Covered Charge location marked on your map
- Work your way up and around the silo or interior structure
- Use grapples and mantles as available to reach higher levels
- Loot the fragment once you reach its platform
Difficulty: Moderate. Expect light platforming plus scattered enemies.
Terminus Fragment 2 – The Reoquary (Glide Pack Test)
This fragment forced me to respect my glide pack angle and momentum. It is easy to overshoot or undershoot if you rush.
- Travel to The Reoquary silo area
- Climb to a suitably high point overlooking the fragment location
- Trigger your glide pack and carefully steer onto the target platform
- Collect the fragment once you land
Difficulty: Moderate to Challenging. Your success depends on precise glide control and timing.
Tip: Wait for your glide pack to be fully off cooldown before each attempt. I lost time repeatedly going for a “good enough” charge.
Terminus Fragment 3 – Vestal Garrison (Indoor Command Room)
Vestal Garrison is more about navigation than movement tech, but it is easy to get turned around inside.

- Fast travel: The Nightcap safehouse
- Head southwest to reach Vestal Garrison (or directly east from the Carcadia Burn entrance into Terminus)
- Go up the main stairs and through the large door into the garrison
- Immediately turn left through the next doorway
- Climb the short staircase into a command room
- Check under the large monitor on a crate – the fragment sits there
Difficulty: Easy to Moderate. Enemies guard the building, but the path is short and direct once you know it.
Estimated time: Around 5–8 minutes from The Nightcap, counting the interior fight.
Terminus Vault – Arch of Origo (Low Leys Border)
With all three Terminus fragments collected, your final big vault is the Arch of Origo, sitting on the border between The Low Leys and Cuspid Climb.
- Fast travel: Heritage Opus safehouse
- Follow the main road north
- Cross the bridge into The Low Leys
- Soon after the bridge, look left for a ledge across a ravine
- Jump the ravine to the opposite side
- Enter the cave behind the shrine
- Interact with the vault and complete the encounter
Reward: 50% glide pack cost reduction, which effectively lets you treat gliding as a constant movement option rather than a limited resource.
Estimated time: Roughly 12–18 minutes from Heritage Opus through the full vault sequence, depending on your build and enemy resistance.
Want to Level Up Your Gaming?
Get access to exclusive strategies, hidden tips, and pro-level insights that we don't share publicly.
Ultimate Guide Strategy Guide + Weekly Pro Tips
Vault Symbols & Secret Extras While You Explore
Alongside the nine fragments, Borderlands 4 scatters 46 vault symbol collectibles across its world. Many sit in the same sub-regions you pass through during fragment hunting, especially around places like Coastal Bonescape, Lopside, and the various silos and garrisons.
To stay efficient, always check your region progress before you leave an area:
- Hover over a region on the map
- Press
Squareon PS5,Xon Xbox, orFon PC to see collectible progress - Use map filters with
D-Pad Right(console) orB(PC) to show specific icon types
My rule now is simple: if I am already in a fragment area and the region is missing only one or two symbols, I take a few extra minutes to scan rooftops, cave walls, and tucked-away corners. That habit saves a lot of late-game backtracking.
Advanced Tips For a Smooth One‑Session Vault Run
Once I started planning my vault route instead of winging it, the whole process became far less frustrating. A few things that made the biggest difference:
- Stock up first: Hit a vending hub before committing to a region. Grab ammo, healing, and shield upgrades so you are not forced to fast travel mid-route.
- Bind your traversal tools: Keep grappling hook and glide pack on comfortable inputs you can trigger under pressure. Most of the tricky sections punish hesitation.
- Play patiently on platforming fragments: At Judgment’s Lapse and The Reoquary, it is always faster to line up a jump or glide properly than to rush and repeat the climb.
- Use mobility in combat, not just traversal: Once you have both vault mobility buffs, start incorporating glides and grapples into fights to flank enemies and escape bad angles.
- Cluster goals: Whenever you head to a fragment, quickly check for nearby side missions or undiscovered symbols. Clearing them together keeps your map from turning into a checklist mess later.
- Manage cooldowns consciously: In areas like The Reoquary, wait for full glide pack and skill cooldowns before hard jumps or big pulls. Entering a fight with everything ready is worth the few seconds of patience.
Wrap‑Up: What Changes After All Three Vaults
Once all three primordial vaults are complete and your glide pack is fully upgraded, the entire game world opens up in a new way. Jumps that felt risky become routine, high ledges turn into shortcuts, and revisiting older regions for cleanup takes a fraction of the time.
If you work through the fragments in the order above-Fadefields, then Carcadia Burn, then Terminus Range-you will feel a steady difficulty curve instead of a brick wall. More importantly, you will get the most impactful mobility upgrades early, which makes everything afterward smoother, from farming to chasing down the last few hidden symbols.
If this path turned a frustrating treasure hunt into a satisfying evening of vault runs for me, it can do the same for you. Unlock the vaults, lean into the new movement tech, and the rest of Borderlands 4’s secrets become much easier to claim.