Marathon: How to Complete Introducing Traxus – Dire Marsh Guide
Game intel
Marathon
Marathon Recompiled is an unofficial PC port of the Xbox 360 version of Sonic the Hedgehog (2006) created through the process of static recompilation. The port…
Why Introducing Traxus Is Tricky (and Why This Guide Helps)
After burning four full Dire Marsh runs on this single contract, I finally worked out a reliable way to clear Introducing Traxus without wiping to the UESC Commander or timing out on the scan. This guide walks you through exactly what I do now, run after run, to finish it cleanly and unlock the Traxus rewards – including the Bully SMG – without relying on luck or cracked teammates.
Everything here is based on actual runs on Season Level 3 Dire Marsh, both solo and with a squad. I’ll break it down step-by-step: prep, terminal locations, the Commander fight, the three-minute timer, and what you can safely ignore (like stressing over extraction) once the scan is done.
Prerequisites and What You’re Actually Doing
To complete Introducing Traxus, you must finish all three objectives in a single Dire Marsh run:
- Hack a dark blue UESC terminal at Intersection, Complex, or Bio-Research.
- Defeat the UESC Commander that drops in and pick up the Shipping Manifest.
- Within three minutes, climb and scan the marked stacked shipping container nearby.
Requirements and rewards from my runs:
- Map requirement: Dire Marsh (unlocked at Season Level 3).
- Run requirement: All three steps must be done in one raid, but you don’t need to exfil alive for the contract to count once the scan is complete.
- Rewards: Credits, several attachments, the Bully SMG, and access to Traxus agent Vulcan, the Cutthroat Competition priority contract, and Traxus upgrades/Armory.
Difficulty-wise, I’d rate this as medium-high for newer players: the map is big and hostile, and the Commander is tanky. With a bit of preparation and knowing where to go, it becomes very manageable.
Step 0 – Loadout, Squad Setup, and Raid Mindset
The first few times I failed this contract, it wasn’t because I didn’t know the objectives – it was because I brought the wrong tools and got greedy. Here’s what I now bring specifically for this contract.
Recommended Loadout
- Primary: A reliable mid-range rifle or SMG with good stability. The Commander has a fat shield bar, so sustained DPS matters more than one-shot burst.
- Secondary: Something that uses a different ammo type (for example, pistol or shotgun) to stretch your ammo pool.
- Grenades or explosives: These chunk the Commander’s shield and help clear bots. I regretted not bringing them on my first attempt.
- Healing: At least 2–3 med items. The fight gets messy if other UESC or players show up.
- Shield/armor mods: If you’ve done the NuCaloric/other liaison stuff first, equip any shield mods you’ve unlocked. Extra survivability is huge in Dire Marsh.
Solo vs Squad
I’ve completed this solo, but I don’t recommend it as your first attempt. The Commander is a bullet sponge, and Dire Marsh has enough ambient danger that random third parties can ruin your day mid-fight.
- Duo or trio is ideal: One player can focus on adds, one on the Commander, and one watching for other Runners.
- Assign roles: Before you drop, agree on:
- Who will hack the terminal.
- Who will anchor in cover to beam the Commander.
- Who will grab the manifest and then climb for the scan once the timer starts.
Play with the mindset that the contract is the goal, not your backpack value. If the choice is between detouring for loot or getting to the terminal early, always pick the terminal.
Step 1 – Get to the Right POI and Find the UESC Terminal
Once you load into Dire Marsh, open your map immediately with Tab (PC) or your equivalent map button on console. You’re looking for the nearest of these three POIs:
- Intersection
- Complex
- Bio-Research
After many runs, I now prioritize them in this order for safety:
- Best: Bio-Research – Generally quieter, more cover, fewer players passing through early.
- Okay: Complex – More angles and verticality; manageable if you move carefully.
- Riskiest: Intersection – Central and loud. Most Runners orbit this area, so expect company.
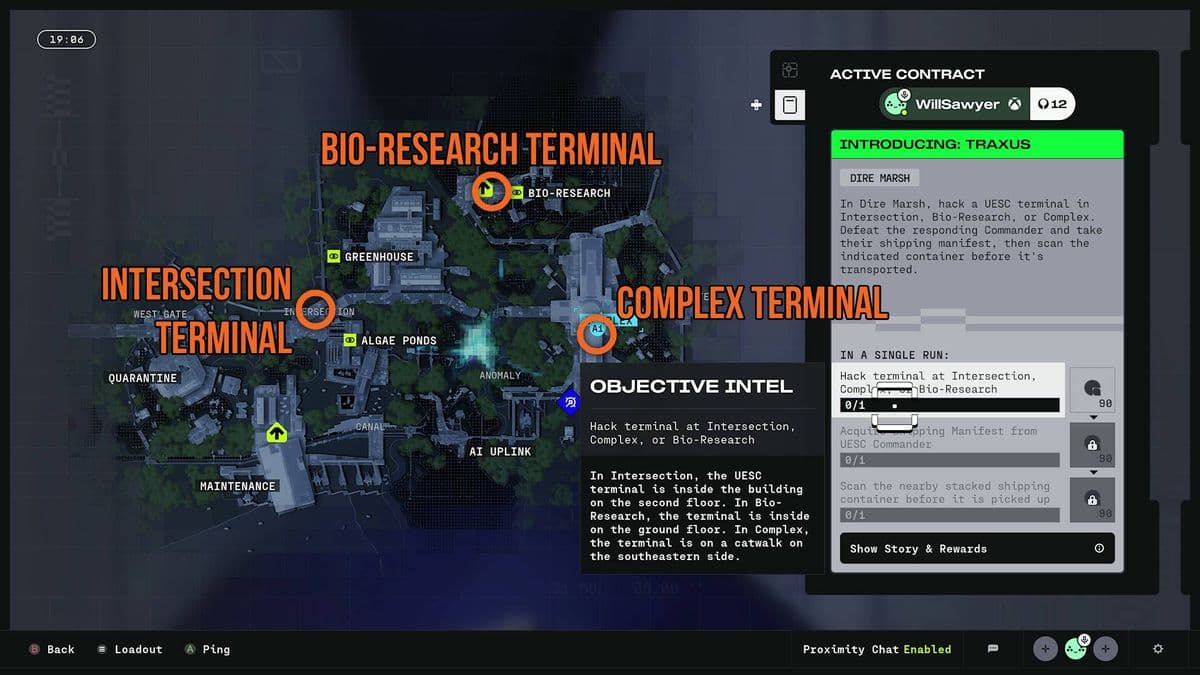
Approximate Terminal Spots by Location
The contract wants a dark blue UESC terminal. It’s not huge, and this is where I lost a full run just wandering around while other squads closed in. Here’s where I consistently find it:

- Intersection: Inside the main building, on an upper interior level near the central walkways. I usually check the stairwell core and follow the balconies until I see the dark blue terminal panel.
- Complex: On the lower exterior catwalks on the southeastern side of the main structure. Climb the ladders on the west, wrap around the outside, and look for a small UESC console along the railings.
- Bio-Research: Ground floor of the western building, relatively close to the entrance. This is the easiest one to hit quickly – which is why Bio-Research is my go-to.
My routine: sprint to the chosen POI, clear immediate AI or players, then full-sprint sweep the likely floor before you touch the terminal. Once you interact with it using E (or your interact button), the fight begins – you don’t want to be mid-loot or split from your team when that happens.
FinalBoss // Gear
Level up your setup
01Top-rated gaming headsetson Amazon→02High-refresh gaming monitorson Amazon→03Gaming chairson Amazon→04Discounted game keyson Kinguin→
Affiliate links · As an Amazon Associate, FinalBoss earns from qualifying purchases.
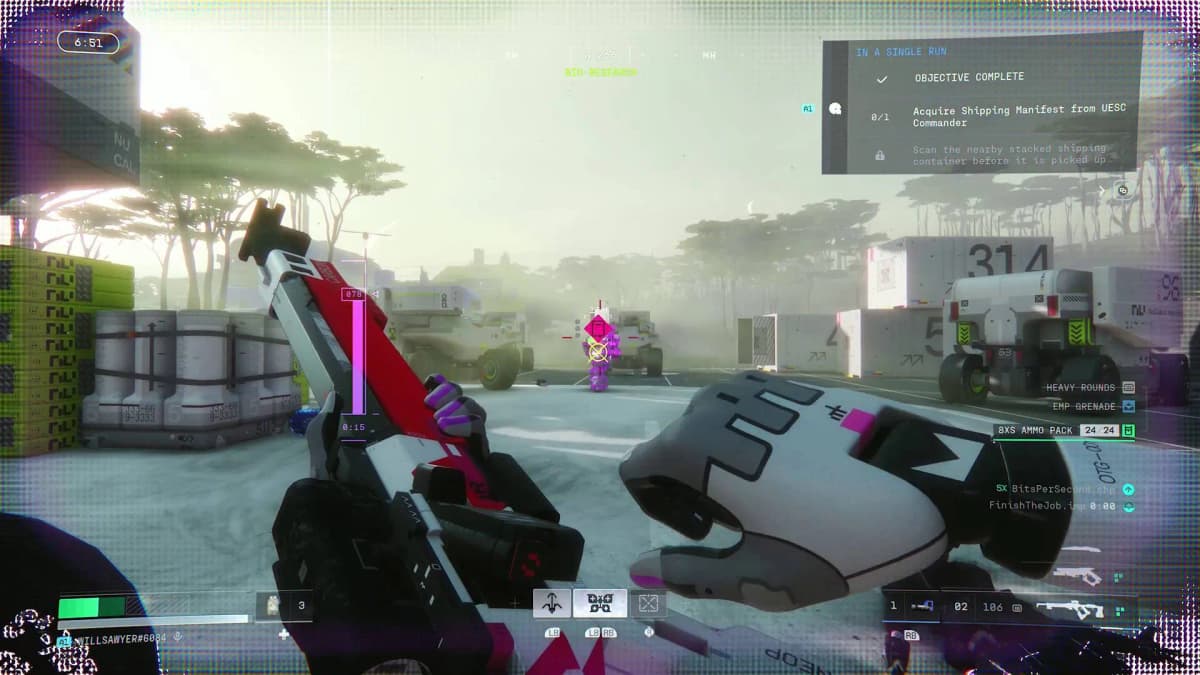
Step 2 – Trigger and Win the UESC Commander Fight
Interacting with the terminal “hacks” it and triggers a UESC dropship. The mistake I made on my first two runs was standing in the open, staring at the sky, waiting to see where it landed. Don’t do that.
Set Up Before You Hack
- Ping a spot of solid cover (containers, corners, interior doorways) that your whole team can fall back to.
- Reload everything and make sure your teammates are nearby.
- Mentally decide: You’ll clear the small fry first, then focus the Commander.
Once ready, have one player start the hack with E, then immediately move back to cover. The dropship will roar in and unload:
- Standard UESC grunts.
- Support robots/drones depending on the roll.
- A heavily shielded UESC Commander (your main target).
How I Handle the Fight
- 1. Delete the adds first. Grunts and bots will chew your health while you’re mag-dumping the Commander. I focus them with quick sprays or a shotgun, using corners to break line of sight.
- 2. Bait the Commander’s nades. He loves lobbing grenades and explosive shots. I peek, tag the shield a bit, then duck. Once he throws, I shift positions and punish the recovery.
- 3. Use grenades and abilities on his shield. Any explosive you have should go into his opening moments to strip shield faster.
- 4. Call out armor breaks. When the shield is gone, push damage hard. If you’re in a squad, have one player continue to hold range while another flanks for a better angle.
Expect this fight to burn a lot of ammo. On my first win, I went through almost all my primary mags and had to finish with my secondary. That’s normal – plan for it.
Once the Commander drops, he’ll leave behind the Shipping Manifest. Do not pick it up until you’re healed and ready to move. Grabbing it starts the next phase’s three-minute timer.
Want to Level Up Your Gaming?
Get access to exclusive strategies, hidden tips, and pro-level insights that we don't share publicly.
Ultimate Guide Strategy Guide + Weekly Pro Tips
Step 3 – Grab the Manifest and Beat the 3-Minute Scan Timer
This is the part where most people panic – I did too at first – but it’s much more forgiving if you know what’s coming.
Starting the Timer
When your team is topped off and you’re not immediately under fire, have the designated player interact with the Shipping Manifest using E. This will:
- Add the manifest to your inventory.
- Start a 3-minute countdown.
- Place a waypoint on the map for the correct shipping container.
From here, you’re no longer searching blind. Just follow the waypoint.
Finding and Climbing the Stacked Container
The target is always a stacked white container – a large white box sitting on top of another, close to your current POI. You’ll know it’s the right one because:
- It’s specifically stacked, not a lone container.
- The front face has a distinctive pattern that looks a bit like a QR code and the tag “CRGO”.
- Your waypoint marker is pinned directly on it.
The climb route will vary slightly depending on the surrounding clutter, but in all my runs, there’s been a fairly obvious path via nearby crates, ladders, or walkways. If I’m low on time, I don’t overthink it – I just bunny-hop up any geometry that gets me onto the lower container, then onto the upper face.
Once you’re in front of the marked panel on the upper container, hold the interact button E to scan it. The scan completes in a couple of seconds.
Very important: As soon as the scan finishes, the contract’s in-raid objectives are done. A UESC dropship will swoop in and visually “collect” the container, but you don’t have to be alive or extract for the contract to progress once this scan completes. Dying afterwards won’t void the liaison, though obviously you’ll lose your gear.
After the Scan – Extraction, Turn-In, and Rewards
If things are calm and you still have resources, I usually rotate toward a safe extraction to keep my loot. But if the zone is hot or you’re running on fumes, it’s perfectly valid to play evasively, burn the clock, or even sacrifice yourself rather than risk feeding another squad more gear.
Once you leave the raid (successfully or in a body bag), head back to your contracts tab in the lobby. You should see Introducing Traxus ready to turn in. On completion, you’ll receive:
- Credits for your wallet.
- A selection of weapon attachments.
- The Bully SMG – which hits well above its weight class and is absolutely worth the effort.
- Access to Traxus agent Vulcan, the Cutthroat Competition priority contract, and Traxus faction upgrades and Armory offerings.
Depending on what you’ve done already, completing this liaison may also chain you into more faction introductions, like Sekiguchi Genetics, giving you even more progression paths.
Common Mistakes I Made (So You Don’t Have To)
- Wasting time looting before the terminal. Dire Marsh is big; if you spend 10–15 minutes looting first, you increase the odds of other squads converging on your POI mid-fight.
- Grabbing the manifest while still under pressure. Don’t start that three-minute timer if you’re still bandaging or if more UESC are pushing in.
- Trying to “hold” the container area like a last stand. You don’t need to fight the world around the container. All that matters is that someone reaches the panel and finishes the scan.
- Forgetting this is a faction contract, not a loot run. If a choice comes down to a safe rotation to the objective versus a juicy fight, pick the objective until the contract is done.
Final Thoughts – Making Introducing Traxus Repeatable
Once I shifted my mindset and followed this structure – rush a safe POI (Bio-Research if possible), stage the Commander fight, only start the timer when ready, then beeline the stacked container and scan – this contract went from a frustrating wall to a repeatable task I could comfortably guide friends through.
If you stick to the steps above, prioritize cover and coordination, and remember that extraction is optional after the scan, you’ll unlock Traxus, secure the Bully SMG, and open up a whole new slice of Marathon’s faction progression without burning half a season banging your head against Dire Marsh.