
Mina the Hollower: First-Hour Guide to Early Loot and Spending
Game intel
Mina the Hollower
Mina the Hollower is a bone-chilling action-adventure game featuring classic gameplay and an 8-bit aesthetic in the style of Game Boy Color, refined for the mo…
Retro action-adventures usually teach confidence first and discipline later. Mina the Hollower flips that order. Its opening hour trains spacing, burrow timing, and resource judgment before it lets you feel powerful. The practical answer up front: treat the start like a controlled scouting run. Sweep the town of Ossex and its nearby paths, grab obvious permanent loot before deep exploration, spend Bones before risky branches, and prioritize survivability over flashy damage unless enemies are already taking too long to kill.
The short version
- Hub: The first hour is anchored in Ossex (Town of Ossex). Strip it for obvious value before you commit to a dungeon path.
- Weapon: Pick your starter for comfort. Your three choices are Whisper & Vesper (fast daggers), the Nightstar (mid-range whip), and the Blaststrike Maul (heavy hammer).
- Currency: Bones are your money and XP in one pool; Joules are separate energy that powers your sidearm. Don’t confuse them.
- Spending: If you’re dying, buy Defense. If fights are dragging, buy Attack. Spend before unknown routes, not after.
- Combat: Live at mid-range, land one or two clean hits, then reset with movement or burrow. Burrow is a defensive tool, not just traversal.
What the first hour is really teaching you
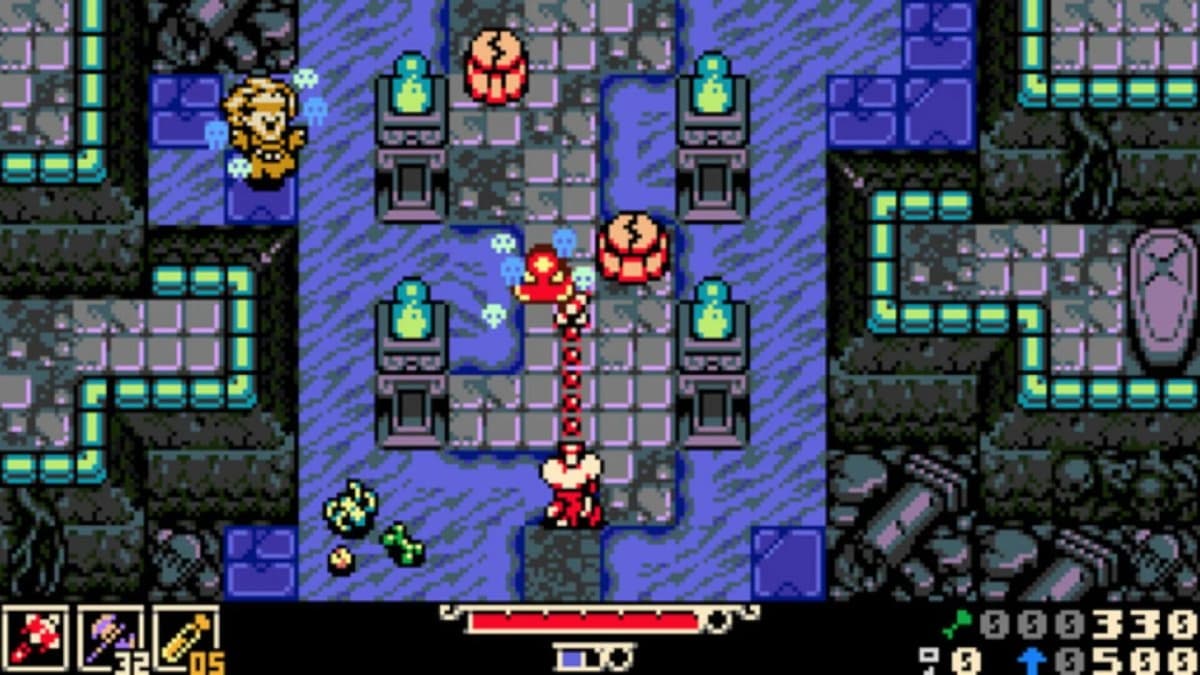
The biggest early trap is bringing the wrong genre habits into combat. Mina looks fast and snappy enough that you might expect to dash in, trade damage, and overpower the first zone. That is not the rhythm the game rewards. The safe early pattern is to approach from mid-range, watch the enemy’s first commitment, then answer with a short punish. Burrow is not just a movement gimmick here; it is part of your defensive reset, and the first hour goes much smoother once you use it that way.
- Enter rooms slowly: stop near the middle distance instead of hugging doorways or charging into melee.
- Read one attack first: let enemies reveal their timing before you swing.
- Limit yourself to one or two hits: especially against unfamiliar targets, because greedy third hits are where early damage spikes happen.
- Reset with movement or burrow: the point is to re-establish spacing, not to stay glued to the enemy.
- Heal your route, not your ego: if a room went badly, back off and stabilize instead of pushing deeper with low resources.
If a fight feels messy, that usually means your spacing was wrong before it means your build was wrong. That distinction matters early, because it keeps you from overspending on damage when the real fix is learning room entry and disengage timing.
Choose your opening weapon for comfort, not “best build” theory
You start by picking one of three weapons, and each teaches a different version of the game:
- Whisper & Vesper (daggers): snappy, close-quarters strikes with low recovery. Flexible and aggressive, but the speed can bait you into overcommitting because “just one more hit” always feels safe when it often is not.
- Nightstar (whip): a balanced, mid-range weapon that emphasizes spacing and positioning. It is usually the calmest way to learn enemy behavior because it lets you stay just outside danger.
- Blaststrike Maul (heavy hammer): high-risk, high-reward. It punishes bad timing but rewards clean reads, and it has charge attacks plus a roll mechanic unique to the weapon.
For a blind first run, the Nightstar’s reach is the most forgiving teacher, but pick whatever matches your instincts. In the first hour, a weapon that lets you disengage cleanly is stronger in practice than one that posts bigger numbers when everything goes perfectly.
Your best early route: sweep Ossex first, then commit to one branch
For the least wasteful first hour, use Ossex as your anchor. Before you push hard into a dungeon path, do a deliberate sweep of the town and the immediate surrounding start-zone routes. Talk to everyone, open every visible chest, check short side passages, and grab the easy permanent pickups you can reach without turning the run into a death march. This matters because Mina’s economy punishes sloppy wandering: the farther you drift into unknown rooms while carrying unspent Bones, the more you risk losing them. Die while holding a Spark and you keep your Bones, but die Sparkless and you lose every Bone you were carrying.
The other reason to sweep early is habit-building. Early chests are easy to leave behind on a blind route, and they are annoying to clean up later once the map has branched in three directions. The rule is blunt: if you can safely open a chest now, do it now. In a game with layered side paths and repeated backtracking, “I’ll grab it later” is how simple loot turns into dead travel time.
Once Ossex is reasonably stripped for obvious value, pick one nearby progression route and stick to it until the game gives you a strong reason to return. Ping-ponging between half-cleared paths is one of the fastest ways to drain healing, forget chest locations, and carry currency through the most dangerous rooms for no payoff.
What to loot first when everything looks useful
The cleanest early priority order is permanent utility first, survivability second, damage third, and niche tech last. Value the items and upgrades that keep paying you back every room over the ones that only matter in an ideal combat sequence.
- Permanent upgrade materials: anything that feeds long-term health, defense, attack, or weapon growth beats a temporary comfort purchase.
- Healing support: the Primed Vial Pouch trinket adds extra healing vials, which turns mistakes into recoverable errors instead of run-ending ones.
- Route unlocks and traversal tools: getting a second Spark (via a Spark Container upgrade) opens a Spark-locked door near the pawn shop in Ossex and unlocks the Iron Steed bike mount. Faster travel pays off every trip.
- Stable utility trinkets: consistency effects like Steady Souls (which lets Mina move normally across rough terrain) are more valuable than situational bonuses during the learning phase.
If you are choosing between a permanent defensive increase and a small offensive edge, the defensive option is usually the smarter blind-run purchase. The exception is when common enemies are already taking too many clean hits to finish; then you are paying a resource tax every room and attack becomes the better value.
FinalBoss // Gear
Level up your setup
01Top-rated gaming headsetson Amazon→02High-refresh gaming monitorson Amazon→03Gaming chairson Amazon→04Discounted game keyson Kinguin→
Affiliate links · As an Amazon Associate, FinalBoss earns from qualifying purchases.
Want to Level Up Your Gaming?
Get access to exclusive strategies, hidden tips, and pro-level insights that we don't share publicly.
Ultimate Guide Strategy Guide + Weekly Pro Tips
Where to spend Bones (and how Joules differ)
First, get the two resources straight, because they are not interchangeable. Bones are money and XP in one bucket: they buy trinkets, sidearms, weapon upgrades, train rides, and minigame entries, and they fund your level-ups. Joules are a separate resource that powers your sidearm. When this guide talks about “spending,” it means Bones. For the full breakdown of how Bones, deaths, and weapon upgrades interact, see our companion guide on managing Bones, respawns, and weapons.
When you level up (a “Bone Up”), you choose one stat to raise: Attack, Defense, or Sidearm Damage. There is also a fourth choice, Bonestone, which banks your Bones safely instead of spending them on a stat, deferring the level-up. That makes the spending rule simple:
If you are dying, buy Defense. If fights are dragging, buy Attack. Defense is the most forgiving first purchase because it turns bad room reads into lessons instead of resets. Attack becomes right when you are already surviving but taking so long to finish encounters that every room becomes another chance to make a mistake. Sidearm Damage is a more specialized pick that pays off once you lean on your sidearm. Build for the problem you are actually having, not the one a future endgame setup might solve.
Avoid hoarding for a speculative “perfect” purchase while wandering deeper into unscouted rooms. The Bonestone option exists precisely so you can lock in progress before a risky push instead of gambling a full stack of Bones on a Sparkless death. Mina rewards frequent, practical investment more than romantic saving.
Shops, trinkets, and the early buys worth respecting
Vendors in Ossex turn the town from a simple hub into a reset point where you convert risky gains into permanent progress. A few early trinkets are worth knowing by name, and which ones are realistic in the first hour:
- Primed Vial Pouch: extra healing vials. A strong, practical early grab.
- Steady Souls: footwear that lets Mina move normally across terrain that would otherwise slow her. Pure consistency value. (Don’t confuse it with the separate Steady Soles trinket.)
- Chain Capacitor: raises your damage on consecutive hits as long as you don’t get hit or miss. It’s the reward for the Ossex chop-shop car-destruction minigame, so it rewards clean play rather than a quick shop visit.
- Bell of Grace: a run-preservation trinket, but it costs 1,000 Bones handed to the NPC Frayd in the Station Underside. That’s a meaningful investment, not a casual first-hour comfort buy. Plan for it; don’t expect it day one.
The broader lesson holds: buy tools that smooth execution before you buy tools that only shine when you are already playing cleanly. Travel and routing upgrades like the Iron Steed do not look glamorous on a stat screen, but they save more real time than a tiny damage bump because they cut backtracking and make failed pushes cheaper to recover from.
First-hour mistakes that waste the most time
- Opening fights at point-blank range: this hides enemy tells and forces panic reactions.
- Chasing three-hit strings on new enemies: the third swing is where early greed usually gets punished.
- Leaving visible chests for later: early routes branch fast, and “later” often means a long cleanup loop.
- Hoarding Bones into unexplored areas: a Sparkless death drops everything you were carrying. Bank with a Bonestone or spend first.
- Confusing Bones with Joules: Joules only power your sidearm; don’t treat them as spending money.
- Buying damage because it sounds exciting: if the real problem is survival, Attack will not fix your route.
- Constant branch-switching: half-cleared paths create confusion, missed loot, and bad risk management.
Practical takeaway
The best way to start Mina the Hollower is not to play bravely; it is to play cleanly. Sweep Ossex and the nearby start-zone paths for obvious permanent value, open chests the moment you safely can, and spend Bones before unknown routes punish your greed, banking with a Bonestone when a push looks risky. Pick the starter weapon that fits your instincts, lean on Defense early and Attack only when fights drag, and prioritize traversal trinkets like the Iron Steed. In combat, live at mid-range, hit briefly, and reset often. Do that and the first hour stops feeling like a scramble and starts working the way the game intends: as a tutorial in spacing, economy, and route discipline.