
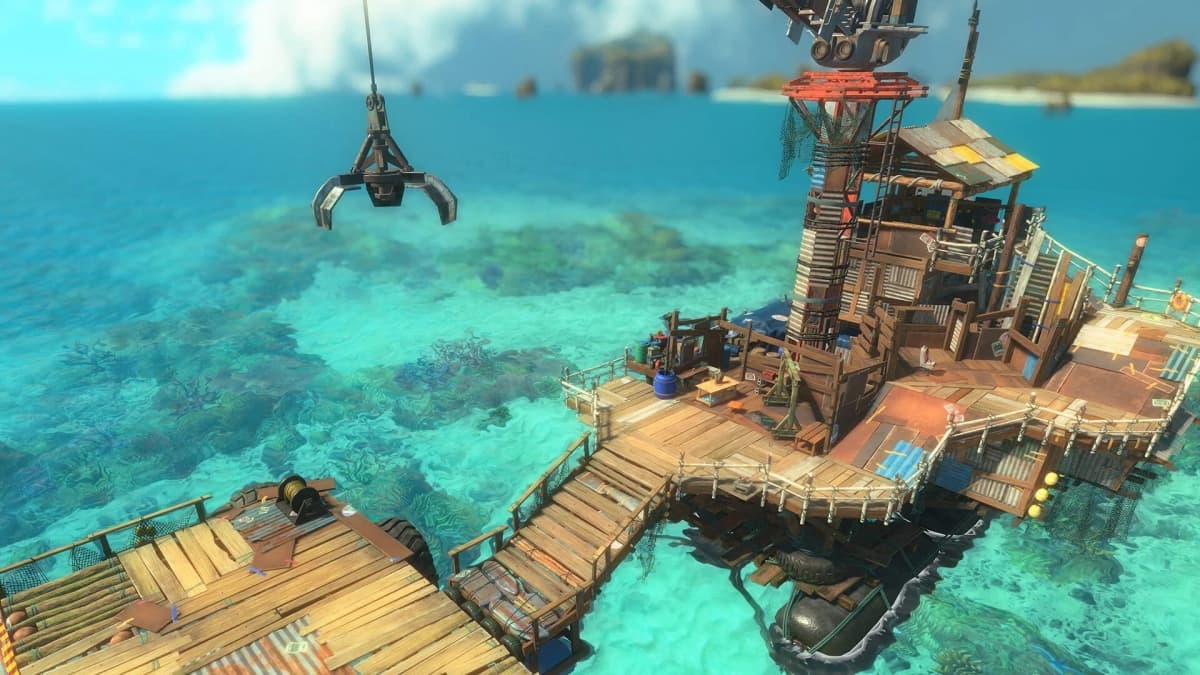
Splatoon Raiders launched on 23 July 2026 for Nintendo Switch 2 ($49.99 digital, $59.99 physical), and after the first week the shape of it is clear: this is a run-based action-RPG built on the Splatoon toolkit, not a Splatoon multiplayer game with a campaign attached. You play a customisable Mechanic — Inkling or Octoling — stranded on the Spirhalite Islands with Deep Cut, running repeatable raids, hauling treasure and salvage back to the Hideout Ship, and spending it on gear that lets you reach the next island. Progression is persistent, not linear. There are no chapters to fail; there are runs that go badly and runs that fund your next upgrade.
The rule that matters most: your ink tank choice defines your playstyle, your gadgets cover its blind spots, and the Exploration Bot is a control tool you spend before the arena closes around you — not a panic button you hold until you are one hit from going down.
Table of Contents (17)
How progression actually works
The loop is short and repeatable. Each island holds multiple raids and dungeons mixing combat, platforming, environmental puzzles and treasure hunting. You clear them, you come back with loot and salvage, and you spend it at the Hideout Ship. Hit the upgrade thresholds and the story advances and a new island opens.
Two consequences worth internalising early:
- Nothing is wasted. Gear and loot carry from raid to raid. A run you abandon halfway still funded something.
- Earlier islands stay useful. Revisiting cleared content at a higher difficulty is a legitimate route to rare drops, not a consolation prize.
The Hideout Ship is the whole meta-game: a weapon forge and a gadget workshop that you upgrade between raids using salvage and Salmonid-dropped parts. If a run is going badly, the correct instinct is usually to bank what you have and go spend it, rather than push one more room.
Tanks and gadgets
Three ink tank classes anchor your build:
- Speed Tank — mobility-first. Good when the arena is large and the danger is getting cornered.
- Power Tank — damage-first. Good when the danger is a wave that must die quickly.
- Tactical Tank — utility-first. Good when the danger is losing control of the floor.
You start with two active gadget slots and progression opens a third. That third slot is where builds get interesting, because it is the point at which you can carry a primary job, a cover answer, and one luxury.
Gadgets are not fixed items. Parts can be added and removed to change a gadget’s power and in some cases add abilities, so a gadget is better thought of as a chassis you tune toward a role.
Difficulty: Tourist, Raider, Survivalist
Three settings, and one important detail: difficulty changes enemy strength, not loot quality. It is a comfort and skill choice, not a reward tier. Nobody is farming Survivalist for better drops, so there is no obligation to play above where you are comfortable. Difficulty also scales automatically with party size in co-op — more on that below.
Exploration Bots: what they are and when to use them
An Exploration Bot is a powered construct piloted by a member of Deep Cut who accompanies you on each raid. It provides AI combat support — it genuinely shoots alongside you in solo play — and it helps detect hidden treasure caches, which makes it a scouting tool as much as a fighting one. In practical terms: you are never actually alone on a run.
The common mistake is treating the Bot’s window as an emergency revive. That timing wastes most of its value. The Bot is strongest when an encounter is becoming unstable: enemies are compressing your movement, your inked routes are shrinking, or a clustered wave is about to push you off the objective.
What the Bot window is for
- Reclaiming movement space. Repaint enough ground to move freely instead of retreating through hostile terrain.
- Breaking enemy momentum. Stop a group collapsing onto one position.
- Setting up a burst phase. Enemies gather around the Bot; that is when your gadgets go in.
- Protecting an objective before a scramble becomes a wipe.
If enemies already surround you and the floor is mostly hostile ink, the Bot still helps — but the window is smaller and far harder to convert into damage. Spend it earlier than feels comfortable.
The enemy roster
Salmonids are the core faction, as the series trains you to expect, and raids revolve around fighting waves of them while scavenging. Above the standard types sit Boss Salmonids, which drop special Salmoned parts used for crafting and upgrades — these are the enemies you actively want to find once your forge is running.
Scrappers are the clearest example of the game’s material logic: break their armour and they drop Scrapper window panes, a crafting material. That is the pattern to look for. Enemies are not just health bars; specific enemies gate specific upgrades, so “which enemy do I need?” becomes a real question once you are chasing a particular piece of gear.
Beyond Salmonids and their boss variants, the roster is still being catalogued by the community — wreckage and salvage across the islands imply more than one hostile category, but names beyond the Salmonid families are not yet nailed down. Treat any exhaustive “full enemy list” you see this early with suspicion.
Enemy priority: control the floor before chasing kills
Encounters play best as combat puzzles. Enemy grouping, ink coverage, arena shape and objective pressure determine what should die first, and the highest-priority target is usually the one removing your ability to move — not the one with the biggest health bar.
- Keep at least one inked route away from the active fight.
- Use crowd-control moments to build a cluster before spending anything big.
- Commit high-impact gadgets when several enemies can be hit, not on scattered stragglers.
- Return to inked ground after a burst instead of lingering to finish minor targets.
- Reassess after every large wave. Safe ground disappears faster than you expect.
Movement is a survival resource here, because inked terrain is where you recover and reposition. Standing still to finish one target is how a clean damage window turns into a collapse.
Co-op: how it works and how to unlock it
Splatoon Raiders is single-player-focused with genuine optional co-op layered on top. Up to four players total, supported both online and over local wireless, and you can progress the story cooperatively rather than being shunted into a separate mode.
Co-op is not available from the start. You unlock it after completing the Scayl Buried Ruins raid on Erpp Island, at which point you interact with the improvised communications station in the Hideout Ship to open or join rooms.
Two design details that make co-op painless:
- Loot is instanced. Every player gets their own drops. There is nothing to compete over and no reason to rush a chest.
- Difficulty scales with party size automatically, behind the scenes. No single player’s difficulty setting overrides the group’s experience.
Give every player a job
A group with four damage builds clears easy content fast and then falls apart the moment enemies take the floor. Before a demanding raid or boss, agree who is creating space, who is converting grouped enemies into damage, and who stabilises when the arena turns hostile. The Bot’s control window is the natural cue for the whole team to commit at once.
- Bring complementary tanks rather than three of the same.
- Make sure someone can reopen movement space when the floor is lost.
- Hold major burst tools for grouped or vulnerable moments.
- Keep inked recovery paths open for the whole team, not just the damage dealer.
- Apply upgrades and gadget parts before the run, so you are testing a finished setup.
Progression errors that slow you down
- Saving the Bot too long. A control tool used as a last-second survival attempt is a wasted control tool.
- Fighting from hostile ground. Reduced mobility and no recovery makes every group more dangerous than it needs to be.
- Building two gadgets for the same job. Redundancy leaves you with no answer when the arena changes shape.
- Spending everything on damage. A higher-damage build that cannot restore movement space loses consistency the moment enemy density rises.
- Chasing marginal upgrades before fixing the build. Tank role and gadget parts decide runs; a slightly better roll does not.
- Pushing difficulty for loot. It does not work. Difficulty changes enemy strength, not drop quality.
FAQ
Is Splatoon Raiders multiplayer or single-player?
Single-player-focused with optional four-player co-op, online or local wireless. It is not a PvP Splatoon game — there is no Turf War here.
When does co-op unlock?
After the Scayl Buried Ruins raid on Erpp Island. Then use the improvised communications station on the Hideout Ship.
Should I play on the hardest difficulty for better loot?
No. Difficulty affects enemy strength only. Pick the setting you enjoy.
Has there been a day-one patch?
Nintendo has not published patch notes or a version update for Splatoon Raiders as of late July 2026. If one lands, it will appear on Nintendo’s official support and news pages first.
How much space does it need?
Enough that microSD Express capacity is a real consideration on Switch 2 — we sized that up in the best Switch 2 microSD Express card for Splatoon Raiders.
The takeaway
Build each tank around one clear job, use gadget parts to patch its weaknesses rather than stacking its strengths, and spend Exploration Bots while there is still arena left to reclaim. Solo, that gives you a dependable recovery loop. In co-op it gives the team a rhythm: create space, group the enemies, commit the burst, get back on inked ground before the next wave. Everything else — the crafting, the island unlocks, the treasure — follows from not losing control of the floor.
New to the game? Start with our release-day guide to story, tanks and gadgets, then browse the Splatoon Raiders hub. For what else landed alongside it, see July 2026’s confirmed Switch 2 releases.
FinalBoss // Gear
Level up your setup
01Best-selling Switch 2 gameson Amazon→02Switch 2 accessorieson Amazon→038BitDo controllerson Amazon→04Discounted game keyson Kinguin→
Affiliate links · As an Amazon Associate, FinalBoss earns from qualifying purchases.
Want to Level Up Your Gaming?
Get access to exclusive strategies, hidden tips, and pro-level insights that we don't share publicly.
Ultimate Guide Strategy Guide + Weekly Pro Tips