MOUSE: P.I. For Hire: Glugging From The Deep Walkthrough
Game intel
Mouse: PI For Hire
Join private investigator Jack Pepper on a guns blazing, jazz-fueled adventure in MOUSE: P.I. For Hire. MOUSE combines the charm of hand-drawn rubber hose anim…
Late in MOUSE: P.I. For Hire, “Glugging From The Deep” stops feeling like a normal chapter and starts acting like a final exam: hub NPCs, side jobs, a crane puzzle, hard underwater gating, and a timed submarine boss against Ze Professor. The level wastes your time if you improvise. The clean clear is three jobs in order — assemble the diving suit, sweep the docks for secrets before boarding, then treat the boss as an objective sequence, not a damage race.
The short version
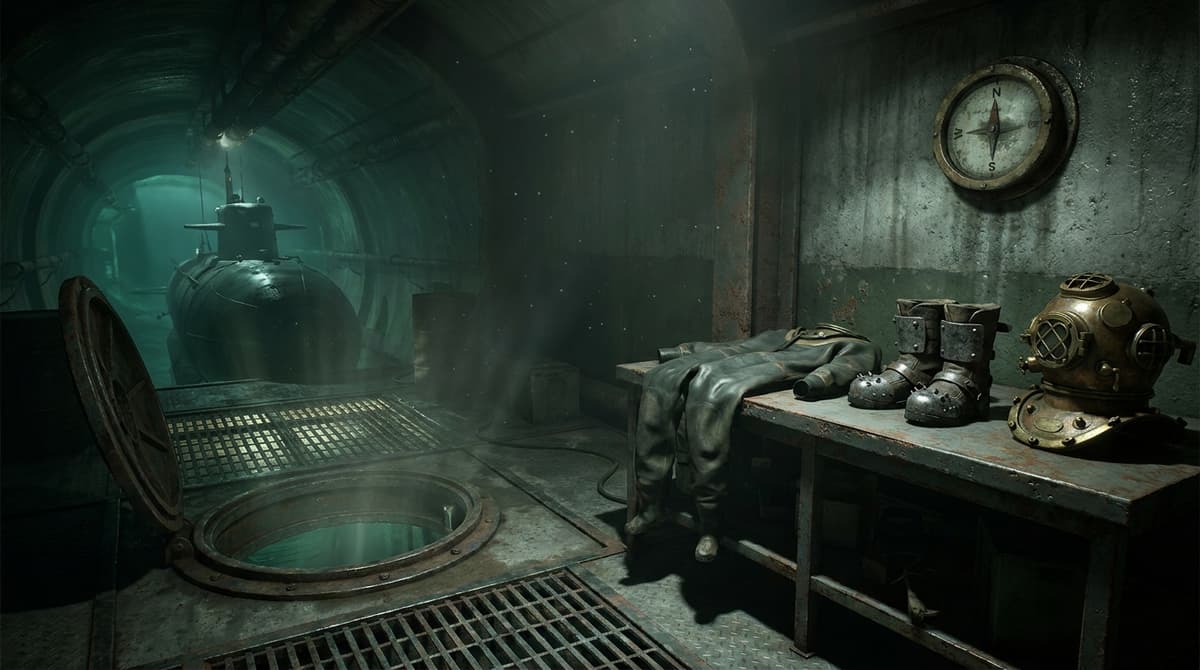
- Underwater progress is hard-gated. Tammy assembles your diving suit from three pieces: the rubber suit, the heavy spiked boots (called “heavy steel boots” in the in-game objective list), and the diving helmet.
- Eddy gives you the heavy spiked boots; Tammy is the information hub for the whole chapter.
- The submarine lead comes from Wanda — not from chasing combat early.
- Boss rule: destroy every turret to drop the tank shields, then destroy the tanks. The final room runs a ~2:40 self-destruct timer.
- Don’t skip the crane switches, the X-marked wall, the tailpicked safe, or the schematic by the dead angler fish at the exit.
Understand the gate before you explore
Underwater progress is locked behind a full gear set. You need the rubber suit, the heavy spiked boots, and the diving helmet before the level opens up. The game dresses this as detective work and side-content cleanup, but it is mandatory progression. If a path feels incomplete, assume you are missing one of those three pieces before you assume you missed a jump or a hidden switch.
- Rubber suit
- Heavy spiked boots (listed in-game as “heavy steel boots”)
- Diving helmet
The big progression rule: talk to the NPCs when the mission points you back toward town or the waterfront. Tammy is the information hub for this chapter, and Eddy is specifically tied to the heavy spiked boots. Dialogue here is the routing layer, not flavor. If your objective feels vague, return to Tammy first and exhaust every lead before you roam. For the chapter that teaches this town-hub rhythm earlier, see the Fair Enough walkthrough.
The efficient order for the diving suit
Once the chapter turns into a hunt for underwater gear, do not scatter. Follow the main leads until the suit is nearly assembled — that cuts backtracking later. Advance the main objective until Tammy points you toward the gear chain, pick up the boots from Eddy when that step opens, then finish the helmet and remaining suit leads in the same sweep before returning to the dock. Treat the first half as pre-raid logistics: assembling the diving gear is the mission, and Wanda is the one who hands you the submarine lead once the suit is ready.
If the objective marker seems stuck, the cause is almost never combat or a missed pickup — it is an unspent conversation step. Re-check Tammy, re-check Eddy, and confirm you actually received the relevant item before heading back to the water.
Do your dockside cleanup before you board
Once the diving suit is complete and the path to Ze Professor’s submarine opens, resist boarding immediately. This is the best window for collectibles and a smoother return route. The chapter’s collectibles fall into four types — a baseball card, a comic, a newspaper, and schematics — and the easiest way to track them is by zone, not by item type: vents, rooftops, shipping containers, the crane and dock machinery, and the submarine approach itself. Vents and container tops are the easiest to “see” without actually collecting, so re-sweep them carefully.
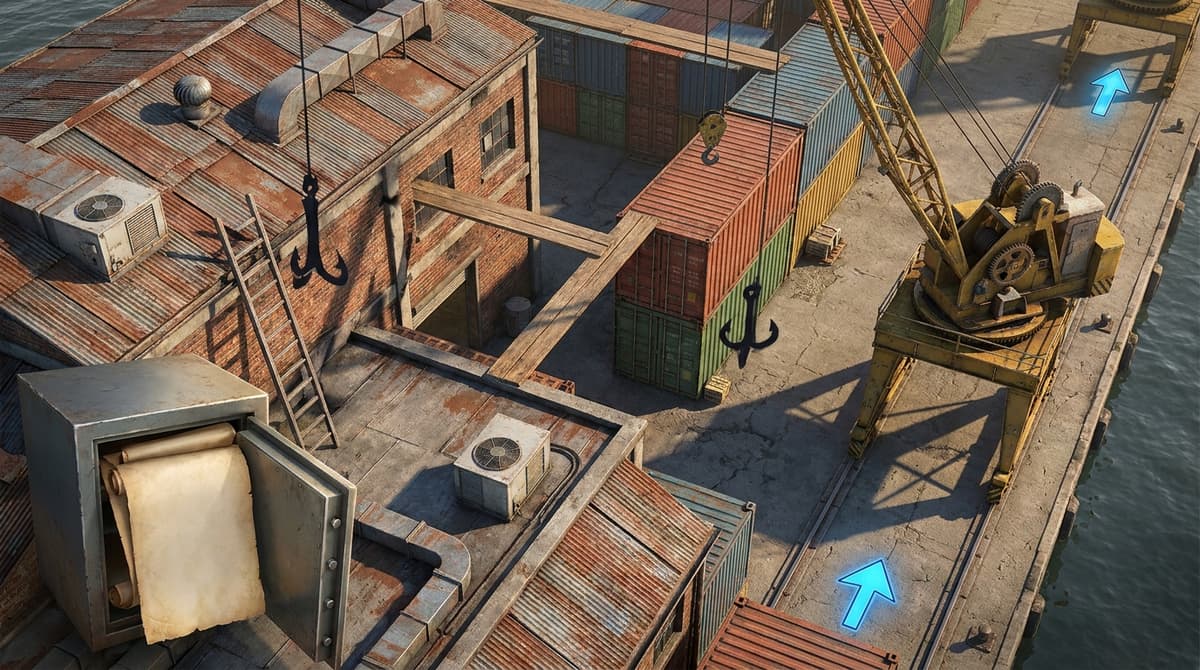
The dock machinery puzzle is worth special attention. Two compass-marked crane switches control it: the south switch opens the rail-depot gate, and the north switch moves the crane to rotate a grappling point toward a secret safe. Hit both before moving on — story-only players skip this because it looks like scenery logic, but it leads to one of the mission’s easiest-to-miss secret routes.
Watch for a cracked wall marked with an X. Break it with dynamite or the cannon to reveal a warp pipe that shortcuts your cleanup and return movement. If a wall looks suspicious and you have an explosive on hand, test it — the X is a genuine hint.
Near the submarine, climb the ladder and tailpick the safe for a schematic. Grab it in a calm pre-fight pass; it is far easier than fishing for it during post-battle tunnel vision. The same compass-switch and tailpicking toolkit shows up across the campaign — the Fatal Repulsion walkthrough breaks down those switch puzzles and bosses in more depth.

FinalBoss // Gear
Level up your setup
01Top-rated gaming headsetson Amazon→02High-refresh gaming monitorson Amazon→03Gaming chairson Amazon→04Discounted game keyson Kinguin→Affiliate links · As an Amazon Associate, FinalBoss earns from qualifying purchases.
Want to Level Up Your Gaming?
Get access to exclusive strategies, hidden tips, and pro-level insights that we don't share publicly.
Ultimate Guide Strategy Guide + Weekly Pro Tips
How to beat Ze Professor’s submarine boss
The submarine is where most failed runs happen, and the reason is simple: it looks like a duel but it is an objective puzzle under pressure. Target priority matters more than aim. Fire at the wrong part and the timer punishes you even with clean movement.
Phase 1: destroy every turret first
Wipe out all the turrets on the submarine before anything else. Do not split attention between turrets and tanks, and do not tunnel on Ze Professor. The turrets are what disable the protective shields around the tanks — while even one turret is live, the shields stay up and you are not progressing. Use your most reliable accurate weapon for fast, clean destruction from safe movement lines. The classic mistake is leaving one awkward turret alive on a far angle, then wondering why nothing opens. If the shields are still up, stop shooting everything else and rescan the arena.
Phase 2: burn the tanks once the shields drop
When the shields disable, switch straight to the tanks. The final room adds a ~2:40 self-destruct timer, so hesitation costs more than imperfect aim. Use your heaviest damage option here and keep your route compact — wide panic loops waste seconds and break line of sight on your real targets. Do not get baited into cleanup: this is not the moment to search for pickups or chase Ze Professor. The tanks are the check, and the timer is telling you exactly what the mission cares about.
Phase 3: finish the fight, then grab the last schematic
Once the tanks are gone, the rest of the encounter opens up and Ze Professor becomes the proper finish. If you handled the order correctly, the hard part is behind you — the level’s real demand is sequencing, not a hidden combat gimmick. There is one completionist trap on the way out: a schematic sits beside a giant dead angler fish near the level exit. The angler fish is a static landmark, not the boss — don’t sprint past it. Take a last look around before you commit to the transition.
Side jobs and post-mission turn-ins
“Glugging From The Deep” ties optional content back into collectible completion. The “Friends in Deep Places” side job is turned in to Bozo, outside the bar, for a baseball card — so a full clear is not just what you grab inside the submarine route, it is also what you turn in afterward. The mental model is not “beat the submarine and you’re done.” It is “finish the dock chapter, clear the submarine, then close the loop in town.” If your collectible totals look one short after this mission, check your turn-ins before assuming you missed something in combat.
Common mistakes
- Can’t progress underwater: one diving-suit piece is missing, or an NPC conversation step never completed. Re-check Tammy and Eddy.
- Tank shields won’t drop: at least one turret is still alive somewhere on the submarine.
- Timing out the boss: you opened fire on tanks before clearing turrets, then ran out of the ~2:40 self-destruct window. Clear turrets first, save burst for the tanks.
- Missing a collectible: re-sweep vents, rooftops, containers, the north/south crane switches, the X-marked wall’s warp pipe, the tailpicked safe by the submarine, and the angler-fish schematic at the exit.
- 100% run still short: return to town and turn in side jobs like “Friends in Deep Places” to Bozo.
Practical takeaway
“Glugging From The Deep” rewards route discipline as much as combat. Don’t brute-force the submarine — respect the structure. Talk to Tammy, get Eddy’s boots, finish the full diving suit, clear the dock secrets (crane switches, X-wall warp pipe, tailpicked safe) before boarding, destroy every turret before the tanks, beat the ~2:40 timer, then sweep for the angler-fish schematic instead of sprinting for the exit. Next portal chapter up is the Steve Bland Portal World walkthrough.