
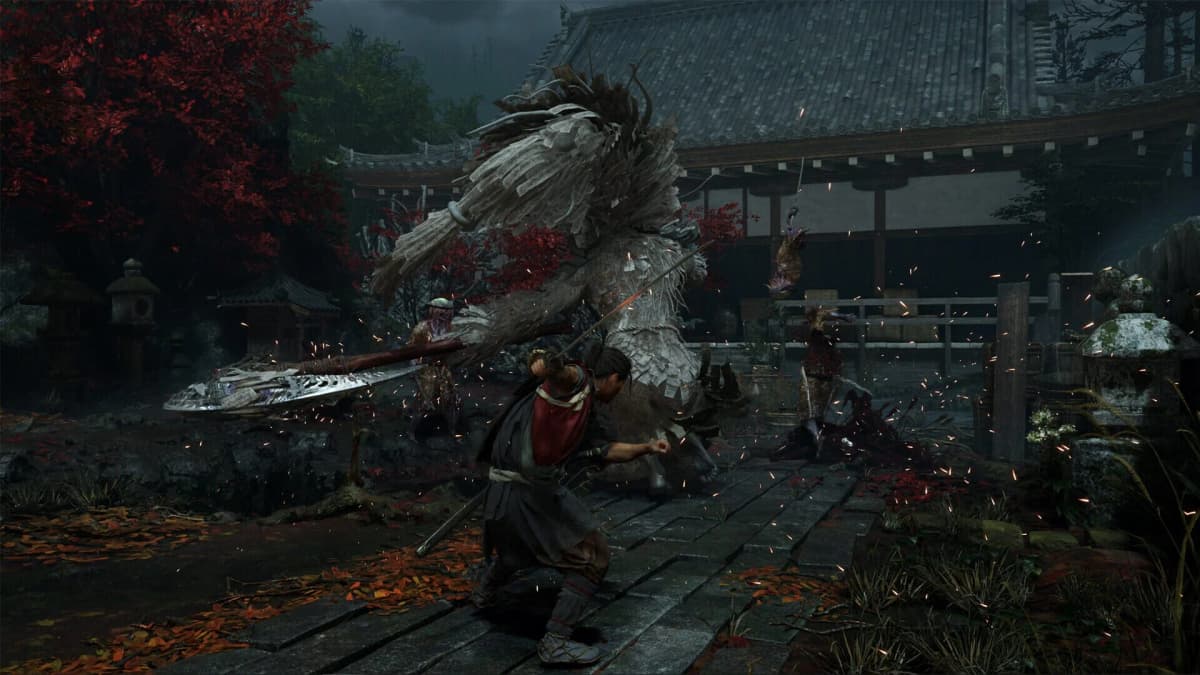
Deflect Byakue’s axe strings instead of trying to parry every hit. Hold Guard and press Attack as an axe blow lands — L1 + X on PS5 or LB + A on Xbox — to drain his red stamina bar quickly, then take the Break Issen prompt when he is staggered. This is the cleanest route through the fight because Byakue’s axe swings give deflect a more forgiving timing window than parry.
The boss name is Byakue. Auto-captions and video subtitles sometimes write “Byaku” or “Byakuyei,” but those refer to the same axe-wielding boss. The key is to treat the encounter as a stamina-break fight: deflect committed axe attacks, dodge body charges, Issen the one reliable slam opening, and use Break Issen twice.
Table of Contents (11)
Use Deflect as Your Main Defensive Tool
Byakue pressures you with heavy axe attacks that look tempting to parry. Resist that instinct for his normal axe strings. A standard parry can still work, but its timing is tighter and it does less to solve the real problem: his stamina gauge.
Deflect converts each successful answer into major stamina damage. Hold Guard, wait until the incoming axe is about to connect, then press Attack. If you press too early or too late, you will only block, which protects you less efficiently and does little to empty the red bar.
- PS5: Hold L1 and press X as the axe lands.
- Xbox: Hold LB and press A as the axe lands.
- PC and other control layouts: use the equivalent Guard + Attack input mapped in your chosen layout.
- Timing rule: react to the impact point of the swing, not the start of Byakue’s wind-up.
Do not immediately swing back after one successful deflect. Byakue follows a deflected hit with more swings, and attacking after the first counter is how players get clipped by the rest of the string. Stay in Guard, keep reading his weapon, and deflect until he has finished committing. Your normal damage comes after the sequence ends; your biggest progress comes from the stamina damage dealt during it.
Read Each Byakue Attack Correctly
Byakue has several attack types, but they do not all deserve the same answer. Deflecting every visible movement is inefficient. Axe swings are your stamina-building opportunity; body attacks are the attacks to evade.
| Byakue attack | Best response | Why it works |
|---|---|---|
| Normal axe swing or axe string | Deflect each swing | Each clean deflect takes a substantial chunk from his red stamina bar. |
| Shoulder bump or running body charge | Dodge or Reflex Dodge | These attacks are dangerous but give poor stamina value when deflected. |
| Shoulder bump into jumping flipped axe slam | Dodge the bump, then Issen the slam | The descending flipped axe slam is the fight’s clearest high-damage Issen opening. |
| Overhead axe slam with an area attack | Dodge away | A missed defensive timing can leave you stunned and exposed to follow-up pressure. |
| Talisman Hair Lash blue attack | Use its specific timed parry or counter response | This is a situational exception; it is not part of the normal axe-string deflect loop. |
Dodge the shoulder, then Issen the flipped axe slam
The most important sequence to recognize starts with Byakue driving his shoulder forward. Dodge that body check rather than trying to deflect it. He then jumps and brings the axe down in a flipping overhead slam. Strike just before the axe hits the ground to trigger Issen.
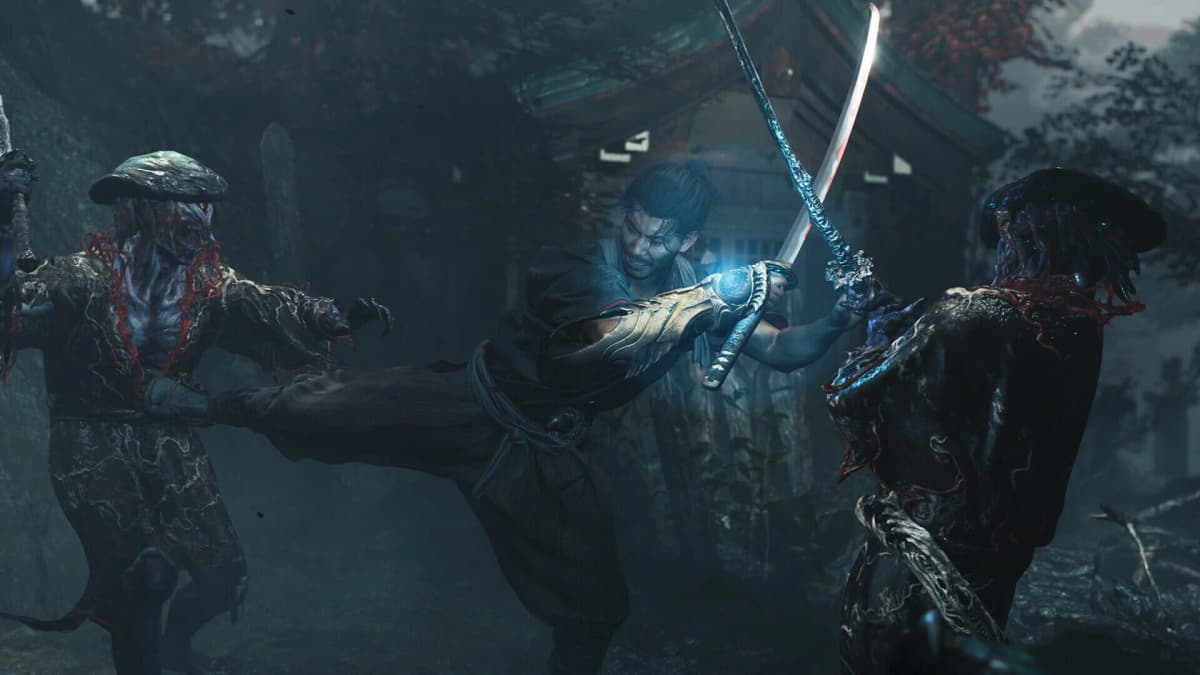
Do not rush the Issen input during the jump. The useful cue is the axe’s descent toward the floor. Waiting for that final impact moment makes the counter far more consistent and prevents an early swing from turning into a trade.
Drain the Red Bar and Take Both Break Issen Prompts
Byakue’s visible red stamina bar matters more than squeezing in extra light attacks. Every long axe string is an invitation to deflect repeatedly and push that bar toward zero. When the bar empties, move in and take the Break Issen prompt immediately. Letting the stagger expire wastes the payoff from all those defensive reads.
With clean deflect chains, a successful Issen on the flipped slam, and Break Issen whenever stamina empties, two stamina breaks are enough to finish Byakue. Do not interpret that as a reason to force damage at the start. The two-break result comes from consistently converting his aggression into stamina loss, not from trying to out-trade a giant axe.
During Break Issen, choose the marked body-part option based on what you need. Red marks prioritize heavier direct damage with fewer orbs, while purple marks sacrifice some immediate damage for more orbs. If Byakue is close to defeat, the red option is the efficient closer. If you need resources for the next danger window, the purple option has more value.
Save The Two Celestials for the Dangerous Half
Do not spend The Two Celestials at the beginning of the fight. The early portion is controlled by deflecting axe strings, and burning your high-impact ability there leaves you without it when Byakue’s pressure becomes harder to manage.
Hold The Two Celestials until after the first stamina break or until a bad position puts you at risk of being trapped by body charges and overhead slams. That is when the ability serves its best purpose: stabilizing the fight when your deflect rhythm breaks down, rather than adding unnecessary burst during the safest part of the encounter.
If you reach the second red-bar cycle with The Two Celestials available, you have a strong safety net. Deflect the axe attacks as usual, dodge the charge attacks, and use the ability when the arena pressure would otherwise force you into a risky defensive guess.
Common Mistakes That Extend the Fight
- Parrying every axe attack: parry is usable, but deflect is more lenient here and drains stamina faster.
- Attacking after the first deflect: Byakue can continue the string. Keep deflecting until his offense ends.
- Blocking body charges: dodge shoulder bumps and sprinting attacks instead of accepting weak stamina damage and dangerous contact.
- Trying to Issen the shoulder bump: the shoulder is the setup; the jumping flipped axe slam is the Issen target.
- Ignoring the Break Issen prompt: the red bar reaching zero is your major damage window. Take it every time.
- Using The Two Celestials immediately: save it for later pressure, when one missed timing can cost the fight.
Byakue Boss Guide FAQ
Parry or deflect Byakue
Deflect Byakue’s standard axe swings. The Guard + Attack input has a more forgiving practical window than parry against these attacks and removes stamina much faster. Save parry-style responses for specific attacks such as Talisman Hair Lash, rather than building your whole strategy around tight parry timing.
How many stamina breaks Byakue takes
Two stamina breaks are enough to finish Byakue when you consistently deflect axe strings, land the flipped-slam Issen, and take Break Issen each time his red bar empties. Missing several deflects or skipping a Break Issen can extend the fight, so focus on the loop rather than trying to force a fixed damage race.
When to use The Two Celestials against Byakue
Use The Two Celestials later in the fight, ideally after the first stamina break or during a dangerous stretch of charges and overhead pressure. The early axe strings are manageable through deflects alone; the ability is more valuable when you need to regain control.
Practical Fight Plan
Start patient: deflect every committed axe swing, dodge shoulder charges, and wait for the shoulder-bump jump sequence to Issen the flipped slam. Keep draining the red bar until Break Issen appears, then repeat the same plan for the second break. Save The Two Celestials for the later danger window, and Byakue becomes a controlled stamina duel instead of a parry test.
More Onimusha: Way of the Sword guides: all bosses in story order · best build and skill tree · parry and Soul tips · Defense, Blaze and Issen explained.
FinalBoss // Gear
Level up your setup
01Top-rated gaming headsetson Amazon→02High-refresh gaming monitorson Amazon→03Gaming chairson Amazon→04Discounted game keyson Kinguin→Affiliate links · As an Amazon Associate, FinalBoss earns from qualifying purchases.
Want to Level Up Your Gaming?
Get access to exclusive strategies, hidden tips, and pro-level insights that we don't share publicly.
Ultimate Guide Strategy Guide + Weekly Pro Tips